Scanning with Checkmarx Fusion
Important
You must have the fusion-manager and scan-fusion roles to use Checkmarx Fusion! See Managing Roles for more information on roles in Access Management.
Checkmarx Fusion requires the AI toggle enabled in the tenant-level! (See below)
For customizing Fusion on the Project and Scan levels, ensure the Allow Override checkbox is marked when enabling Fusion at the tenant and project levels!
Perform the following to enable Checkmarx Fusion:
Tenant-level: Go to
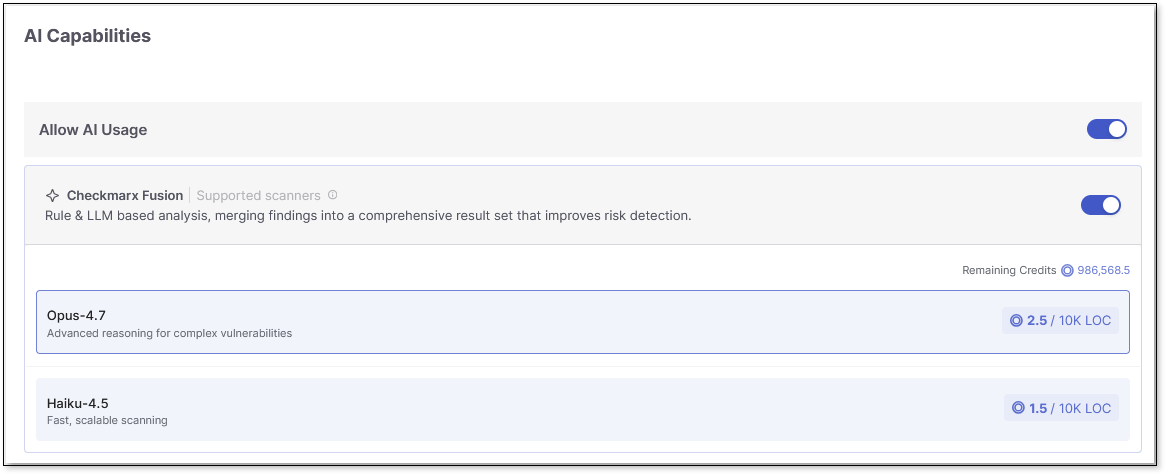
 > Global Settings > AI >, and then under AI Capabilities, ensure Allow AI Usage and Checkmarx Fusion are toggled on, and a model is selected. Click Save when done.
Notice
Each model has their own credit usage per 10,000 lines of code (LOC).
Project-level:
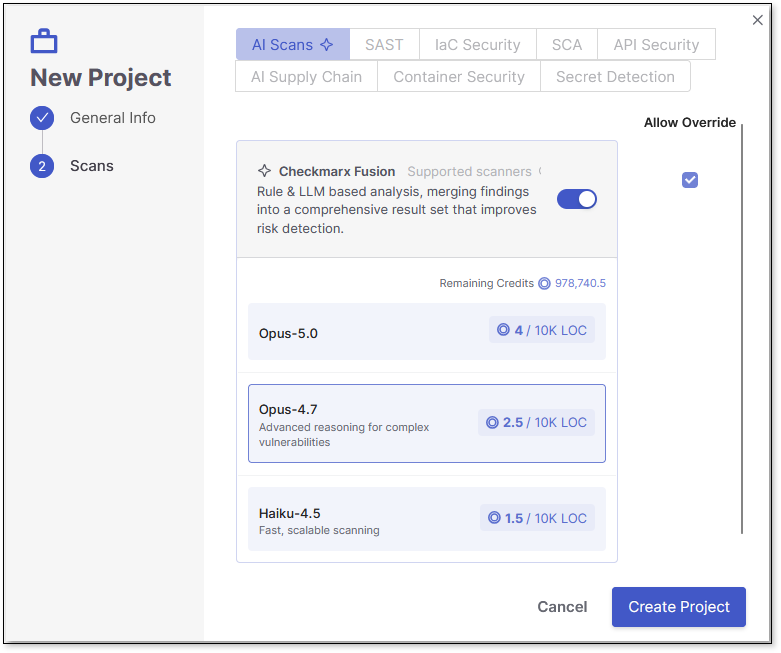
For a new project: On the Applications and Projects page, click + New > choose between New Project - Manual Scan and New Project - Code Repository Integration then click Next. Navigate to the AI Scans tab and toggle Checkmarx Fusion on. Click Create Project when done.
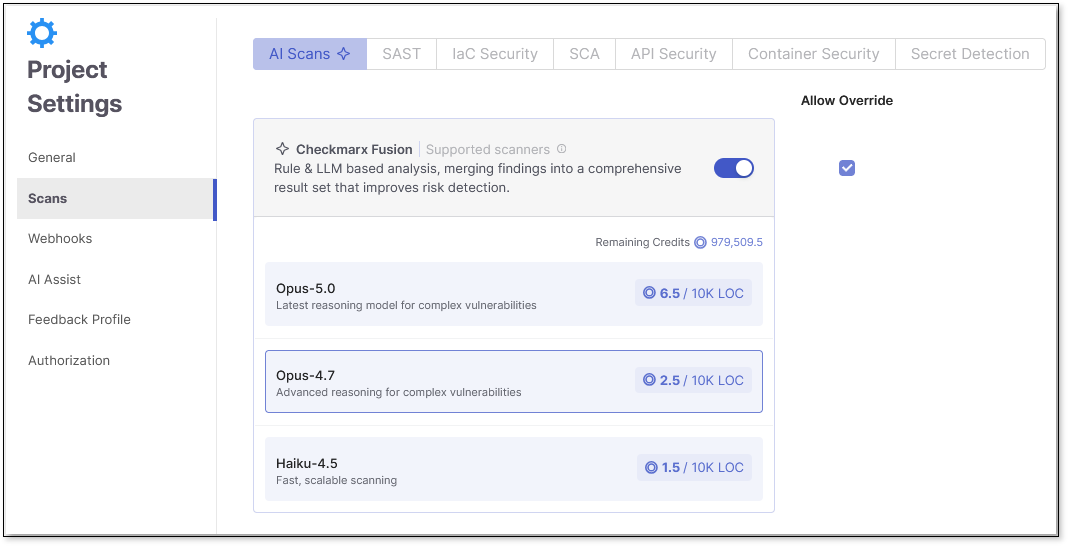
For an existing project: Go to Projects > at the end of the project row, select
 > Project Settings > Scans > AI Scans, and then toggle Checkmarx Fusion on and select the model. Each model uses a certain amount of credits per 10,000 lines of code (LOC). Click Save when done.
Scan-level: To scan an existing project with Fusion, navigate to the end of the project's row, click
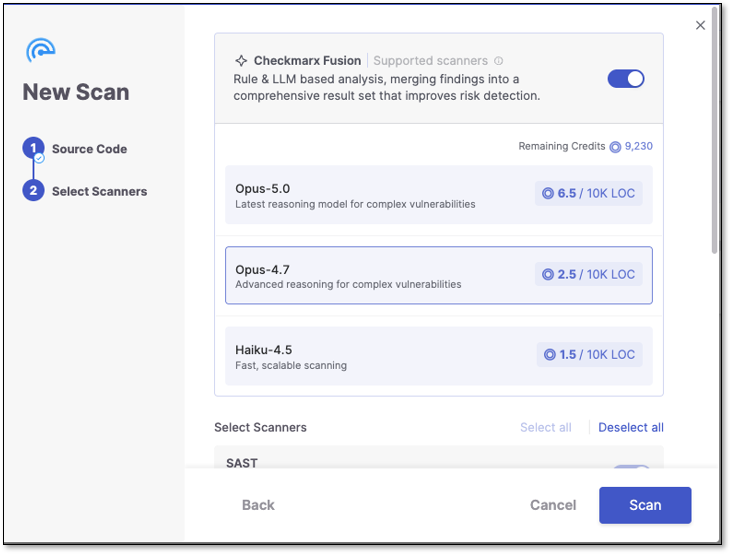
 , confirm the source code and scan details in the pop-up window > Click Next > Ensure the correct Fusion model and scanners are selected > Click Scan when done.
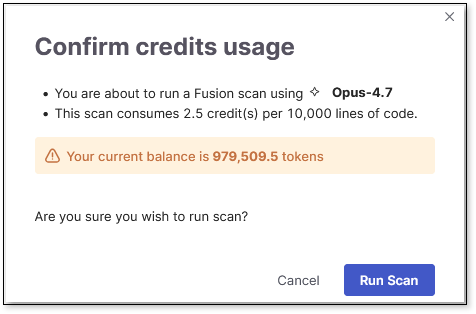
You will receive a pop-up prompt to confirm the credit usage for the scan. Click Run Scan when ready.
Viewing Fusion Results
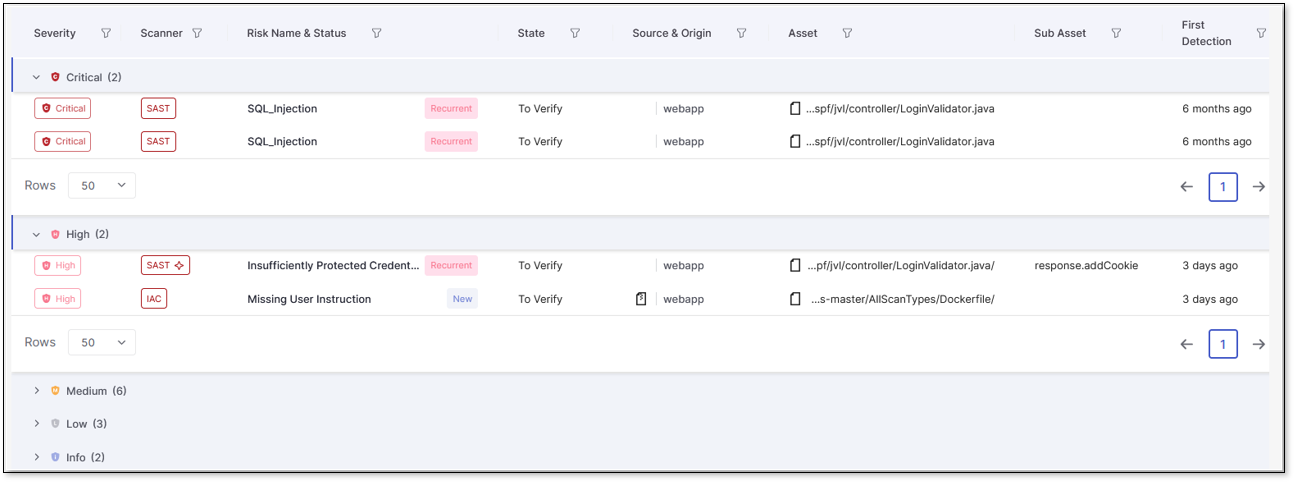
After a scan is complete, you can view the results as you would a non-Fusion scan in the Risk Orchestration page. This page highlights the vulnerabilities found by the LLM with a star. See here for more information on viewing scan results in Risk Orchestration.
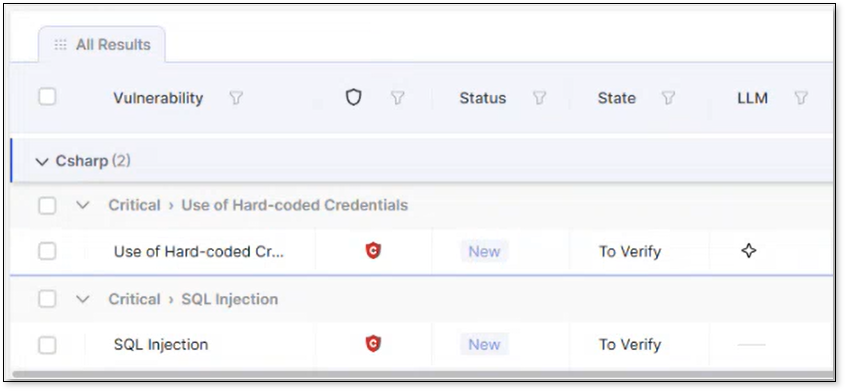
Similarly, view your Fusion results as you would SAST results (see here for more information on viewing results). The key difference is the inclusion of the LLM column. If this column is marked with the star for a vulnerability, that means that it was found by an LLM.
Note
If the column is not visible, you must toggle it on. Click the column management  at the top of the table to include it in the table view. See here for more information on column management.
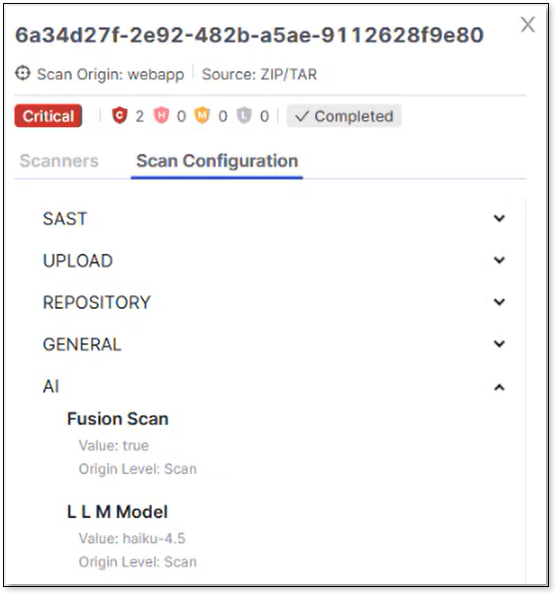
To confirm the LLM model used in a scan, check it's Scan Configuration: Navigate to Scan History > click on the scan > Scan Configuration > AI > LLM Model.