Installing and Configuring the Web Portal
The third component to install in this sequence is the Web Portal. Once the Web Portal has been installed, you have to configure it.
Notice
You have to install the Web Portal before installing CxEngine as part of installing CxEngine is logging on to and registering the new engine via the web portal.
Installing the Web Portal
Select
 Install Web Portal only.
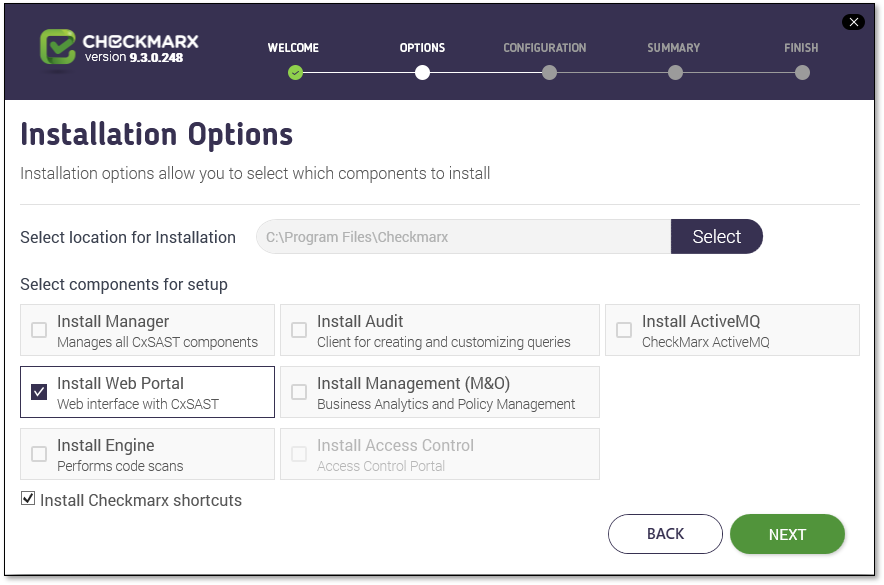
Click Next to continue. The Prerequisites Check window is displayed, showing the status of the required components to install the Web Portal. For additional information and instructions on installing and preparing the required software, refer to Preparing to Install CxSAST.
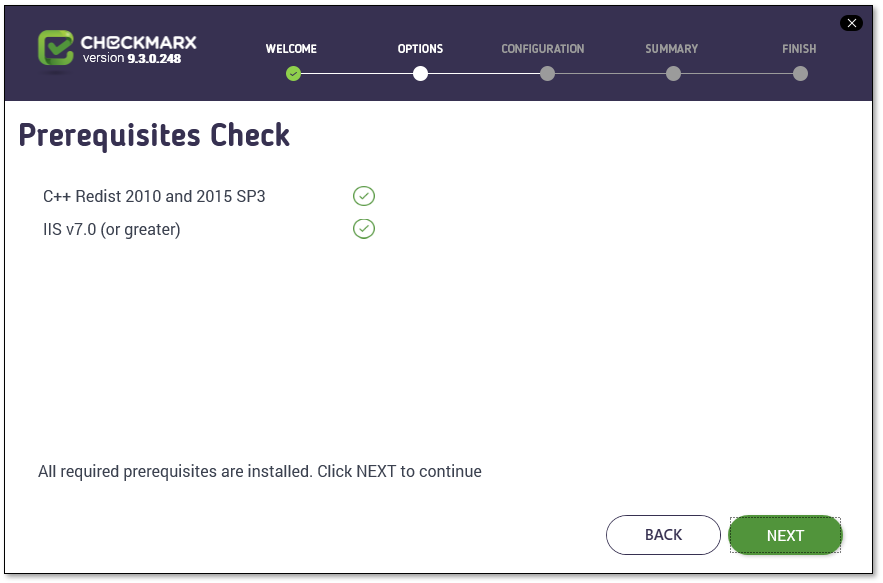
Once all components are available
 , click <NEXT>. The setup summary appears.
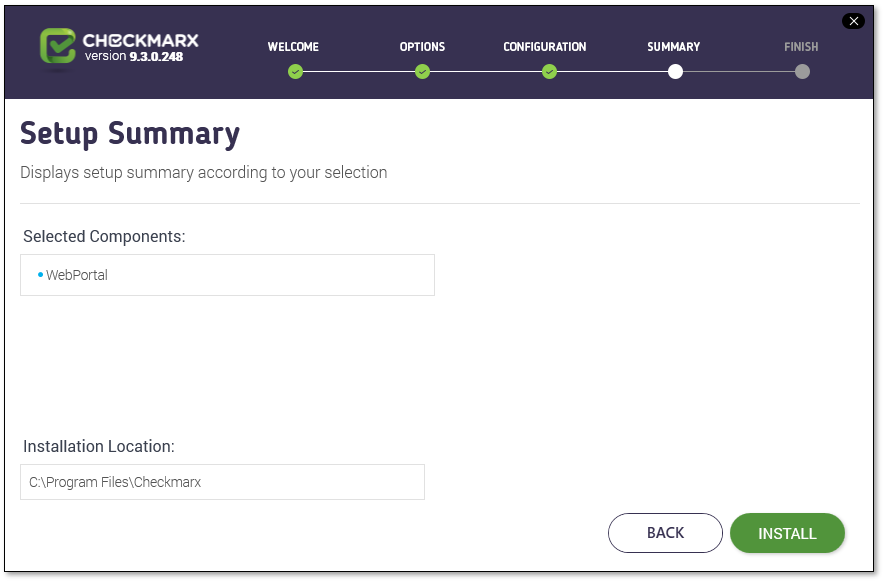
Click <INSTALL> to continue. The Installation in Progress window is displayed and the installation continues.
To return to the previous window, click <BACK>.
To exit, click <X>.
Once successfully installed, the Installation Completed Successfully window is displayed.
Click <CLOSE> to complete the installation.
Configuring the Web Portal
To secure communications between all Checkmarx Software Exposure Platform components, we recommend that you install a signed certificate and enable SSL on the CxManager to enforce SSL security (HTTPS). This instruction defines the procedure for enabling SSL support on the CxManager.
The Checkmarx web portal can be configured using the Microsoft Web Platform Installer and the IIS Management console on the Checkmarx Web Portal server. The configuration steps can be performed manually from the Checkmarx Web Portal server. Once you have installed the IIS application components of the Checkmarx Software Exposure Platform setup, you can start configuring the Web Portal as explained below.
To configure the Web Portal:
Go to the Microsoft Web Platform Installer and click Install this extension to download the installation file.
Run the Microsoft Web Platform Installer on the Checkmarx Web Portal server station. The Microsoft Web Platform Installer is displayed.
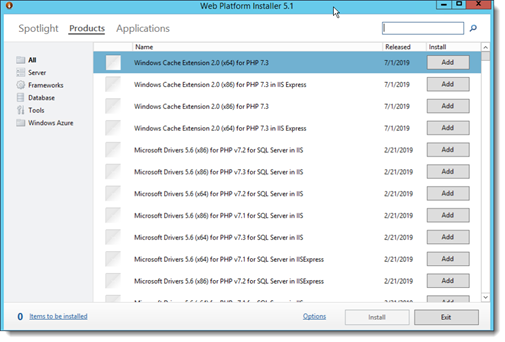
Open the Products tab and do the following:
Search for the URL Rewrite 2.1 module and click <Add>.
Search for the Application Request Routing 3.0 module and click <Add>.
Click <Install>. The prerequisites for Web Platform Installer are displayed.
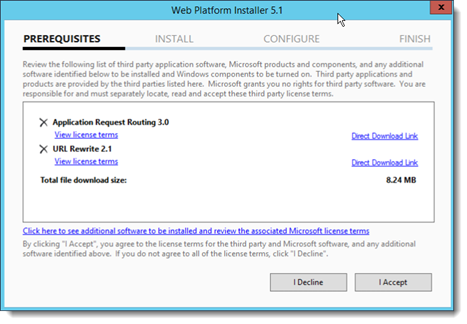
Click <I Accept>. The installation progress is displayed. You are notified once the installation is completed successfully.
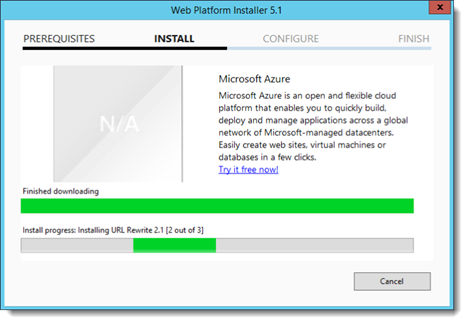
Click <Finish>.
Open the Internet Information Services (IIS) Manager on the Checkmarx Web Portal server (IIS Manager > Sites > Default Web Site > IIS > URL Rewrite).
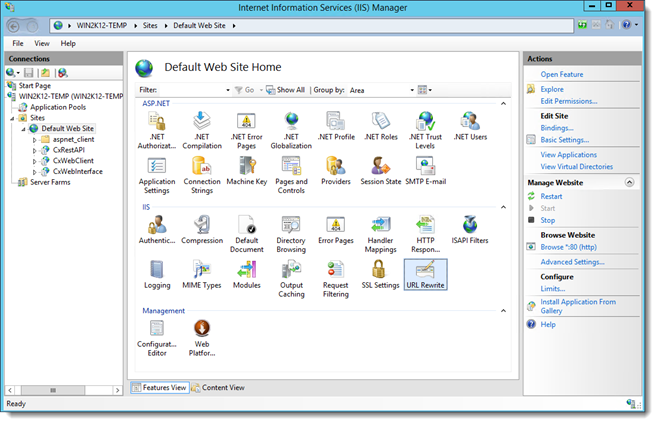
Right-click on URL Rewrite and select Open Feature. The URL Rewrite Rule option is displayed.
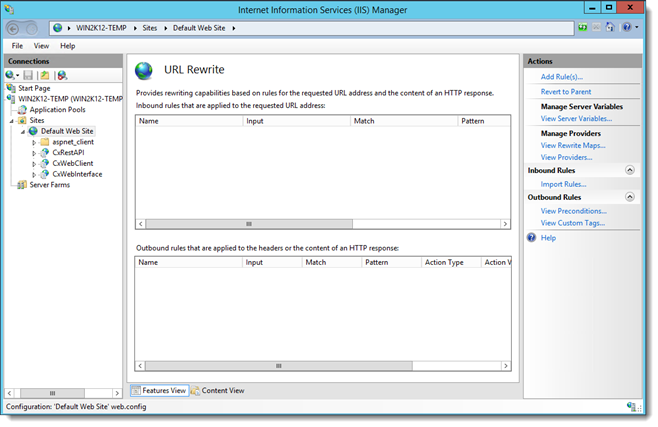
From the Action panel, select Add Rule(s). The Rule Templates List is displayed.
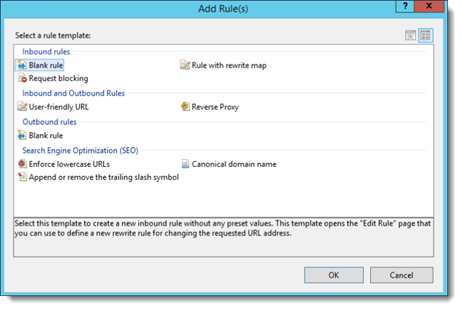
From Inbound and Outbound Rules, select Reverse Proxy and click <OK>. The Add Reverse Proxy Rule dialog is displayed.
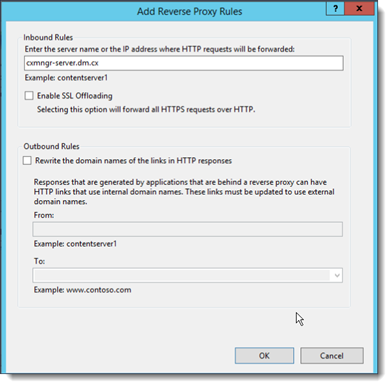
Enter the CX Manager Server name into the Inbound Rules field (e.g., cxmngr-server.dm.cx).
Disable the SSL Offloading option.
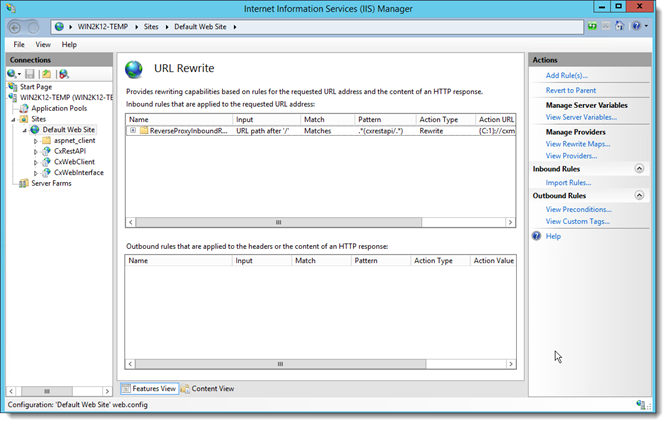
Click <OK> to save the changes. The new rule is displayed.
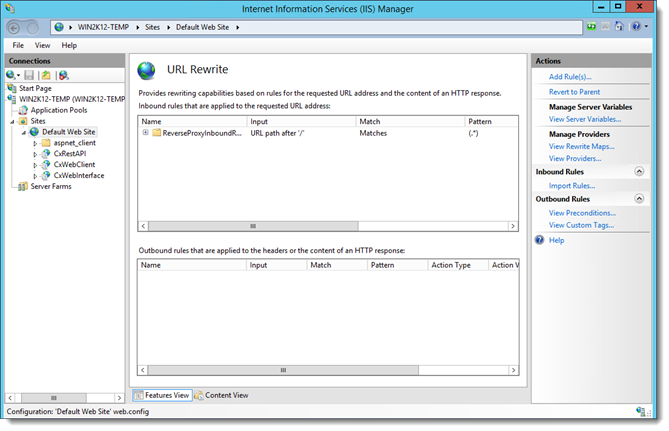
Select the newly created Rule then from the Inbound Rules panel (right) and click <Edit>. The Edit Inbound Rule window is displayed.
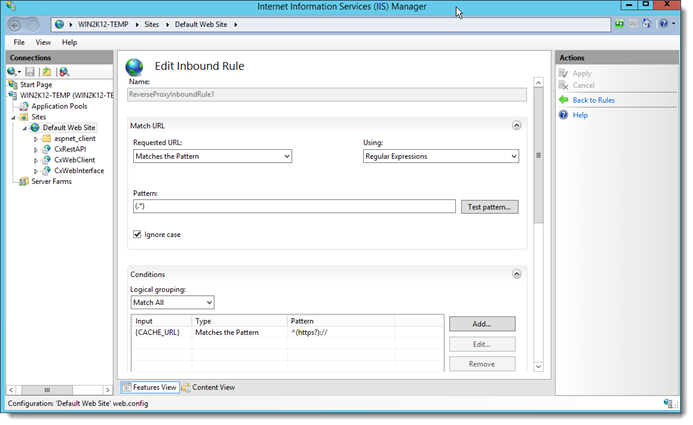
Add/change the following:
Pattern: .*(cxrestapi/.*)
Action Type: Rewrite
Click <Apply> and verify the changes in the URL Rewrite rule.
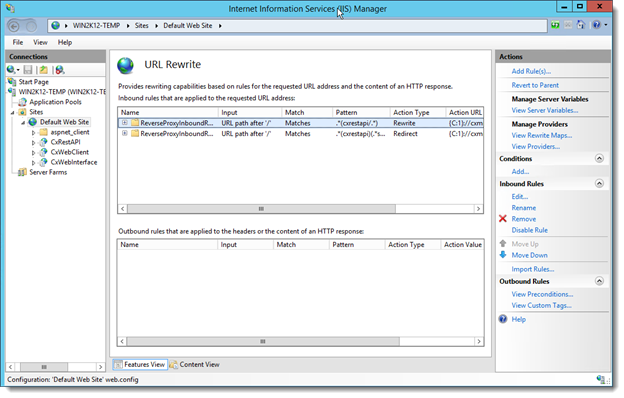
If you are using SAML, add a second rule, add/change the following:
Pattern: .*(cxrestapi)(.*samlLogin).*
Action Type: Redirect
Click <Apply> and verify the changes in the URL Rewrite rule.
Once both rules should be displayed, select the new rule and click ‘move up’.
On the Checkmarx Web Portal server, under C:\Program Files\Checkmarx\CheckmarxWebPortal\Web, open the ‘web.config’ file in the editor and update the following for the value of 'CxWSResolver.CxWSResolver' with the CxManager server IP/domain name.
For example, change the following:
<add key="CxWSResolver.CxWSResolver" value="http://localhost:80/Cxwebinterface/CxWSResolver.asmx" />to...
<add key="CxWSResolver.CxWSResolver" value="http://manager-domain-name.com/Cxwebinterface/CxWSResolver.asmx" />Open the command line interface (CMD) as Administrator and enter the following command:
appcmd.exe set config -section:system.webserver/proxy -preserveHostHeader:true /commit:apphost
Test the Checkmarx Web Portal and Software Exposure Platform. The system is now ready for CxEngine to be installed.