CxSAST Reporting Client API Installation (as a Windows Service)
Notice
Dependency Requirements:
The Client API can be installed as a Windows service, and the CxSASTReporting Client can be deployed on IIS. It requires the dependencies described at CxSAST Reporting Windows Prerequisites.
The Authorization Setup Script must be executed before the Client API Installation. The script and guide can be found at CxSAST Reporting Authorization Setup.
Following is a step-by-step guide for installing the CxSAST Reporting Client API component as a Windows Service.
Notice
Use the exact path and folder names indicated in the instructions for best results.
Note
Starting with version 5.x, you may need to include TrustServerCertificate=True in the connection string to enable connections to older SQL Server versions. This is required if the system raises the following error: “A connection was successfully established with the server, but then an error occurred during the login.” For more details, refer to the Microsoft documentation.
Extract zip contents of CxSASTReportingClient to
C:\Checkmarx\CxReportingClientGive binaries folder and exported scans source code folder permissions. This must be exactly the same as described in CxSAST Reporting Manager Installation Step 2 but on this new directory.
Check the appsettings.json file for the required settings, especially the DB connection, as shown in the following code:
{
  "Database": {
    "CxDBClient": {
      "ConnectionString": "Data Source= ;Initial Catalog=CxDB;Integrated Security=False;User ID= ;Password= ;Pooling=True;", // ConnectionString for the CxSAST DB instance to export
      "EncryptionKey": "",
      "EncryptionVector": ""
    }
  },
  "ReportConfigurations": {
    "ReportsOutputPath": "C:\\CxReporting"
  }
}
Example:
{
  "Database": {
    "CxDBClient": {
       "ConnectionString": "Data Source=10.35.26.165 ;Initial Catalog=CxDB;Integrated Security=False;User ID=test ;Password=Cx123456 ;Pooling=True;", // ConnectionString for the CxSAST DB instance to export
                "EncryptionKey": "",
      "EncryptionVector": ""
    }
  },
  "ReportConfigurations": {
    "ReportsOutputPath": "C:\\CxReporting"
  }
}
Validate the updated appsettings.json file.
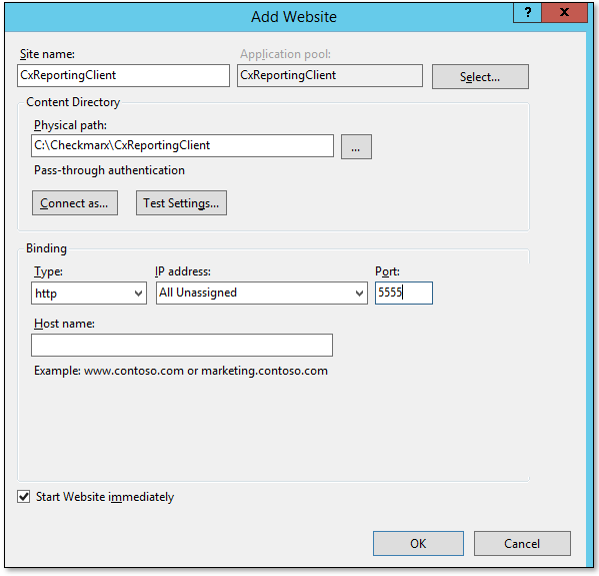
In IIS manager, open the server's node in the Connections panel. Right-click the Sites folder. Select Add Website from the contextual menu. In the Add Website dialog, perform the following:
Provide a Site name (example: ‘CxReportingClient').
Create a new Application Pool and make sure that the AppPool Identity matches the specified network user provided previously (in step 2. b CxSAST Reporting Manager Installation (as a Windows Service)) or select 'CxPoolRESTAPI’.
Set the Physical path to the directory where CxSASTReportingClient was extracted to (example:
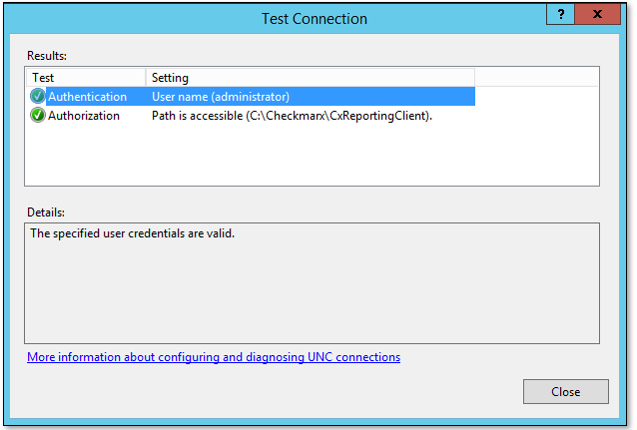
C:\Checkmarx\CxReportingClient).Connect as a user with the proper permissions.
Provide the Binding configuration Type as HTTP/HTTPS, with
All Unassignedas the IP address and the desired Port. Select the proper SSL Certificate if HTTPS is enabled.Create the website by selecting OK.


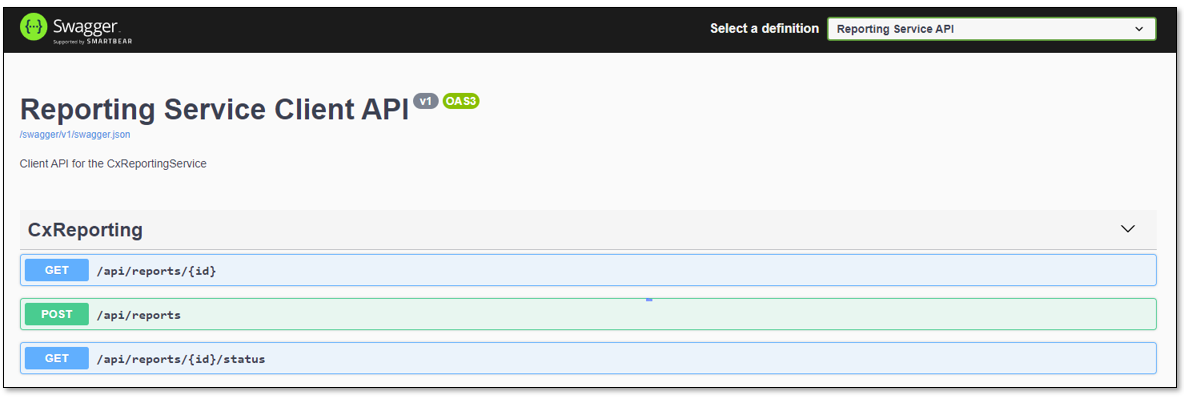
You can verify that the installation was successful by checking
<ip>:<port>/swagger/. This will provide the familiar Swagger interface with all the available endpoints listed, as shown below.