- Checkmarx Documentation
- Checkmarx Codebashing
- Managing Users and Teams as Manager
- Managing their Users
Managing their Users
This section enables you as manager to easily view and manage the users assigned to you, and link them up with courses. If you log in individually (via user name and password), you have to invite users by email as explained below.
From the menu, select
 Users. The Users Dashboard appears displaying the users assigned to you with their current status, their primary course and their training progress. For further information and illustrations on these properties, refer to Managing All Users.
Note
Unlike the User Dashboard for administrators, the User Dashboard for managers does not display information on admins in the system, the license status etc.
Note
For a manager being able to invite users, Enable Managers to Invite Users must be set to <ON> under Manager Permissions as explained in Resources and Settings for Administrators.
Users must be assigned to at least one team.
From the menu, under RESOURCES, select
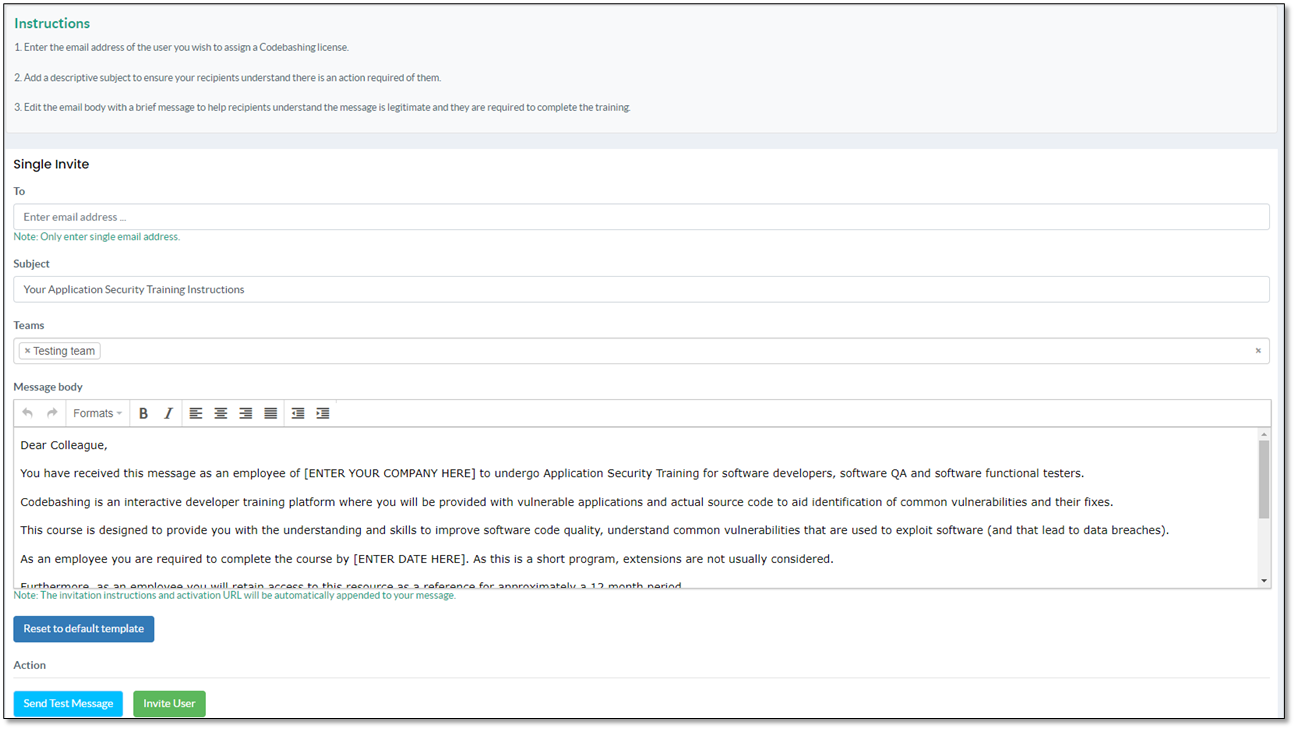
 Single Invitation. An email form appears.
Enter the email address of the desired new user.
Under Subject, enter an informative subject.
Under Teams, assign the user to at least one of your teams.
Customize the text in the email body.
If needed, do one of the following before you send the invitation:
Click <Send Test Message> to view it as the invited users see this message.
If needed, reset the customized message to the default by clicking <Reset to default template> and customize it again.
Click <Invite User> to send the invitation.
Note
For a manager being able to invite users, Enable Managers to Invite Users must be set to <ON> under Manager Permissions as explained in Resources and Settings for Administrators.
The users you add must be assigned to at least one team.
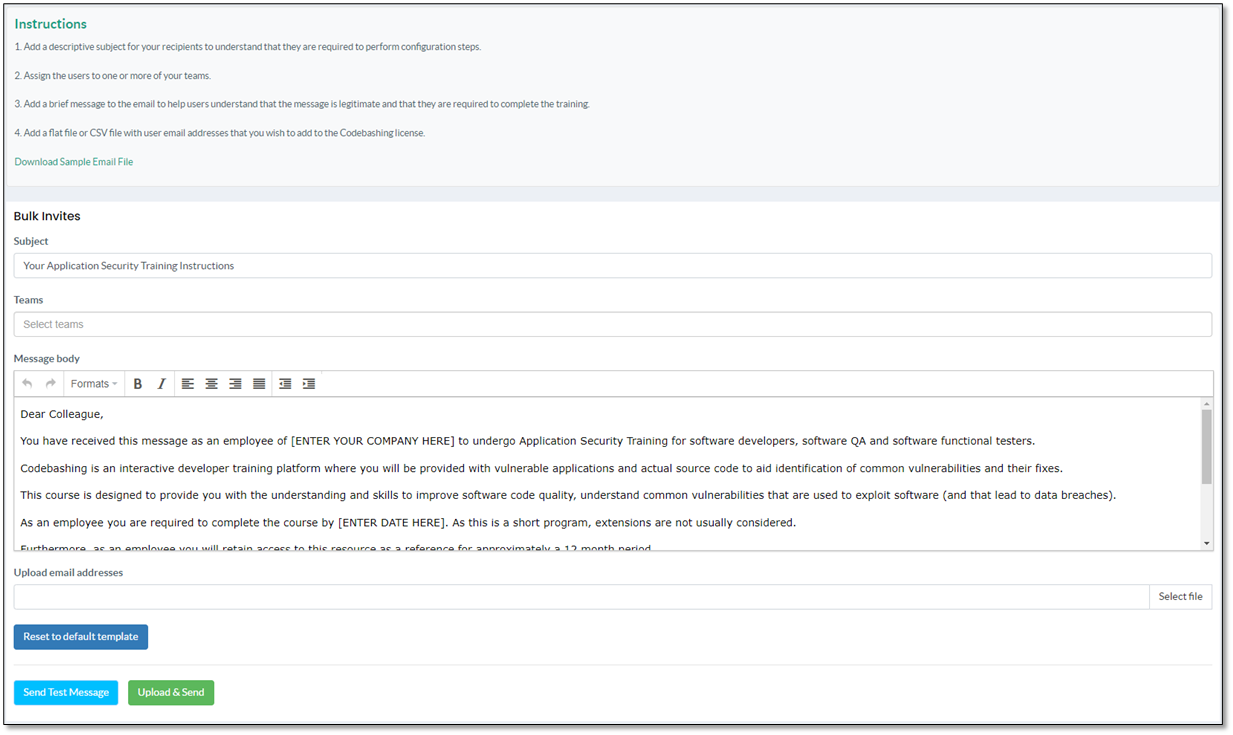
First, prepare a text file with the email addresses of the desired users in the format outlined below. To download a sample file that you may use as a template to create your own file, click Download Email Sample.
user_1@example.com
user_2@example.com
user_3@example.com
From the menu, under RESOURCES, select
 Bulk Invitation. An email form appears.
Under Subject, enter an informative subject.
Under Teams, assign the users to at least one of your teams.
Customize the text in the email body.
If needed, do one of the following before you send the invitation:
Click <Send Test Message> to view it as the invited users see this message.
If needed, reset the customized message to the default by clicking <Reset to default template> and customize it again.
Click <Upload & Send> to upload the email address file and send out the invitation.
Note
For a manager being able to invite users, Enable Managers to Invite Users must be set to <ON> under Manager Permissions as explained in Resources and Settings for Administrators.
New users must be assigned to a team. If you leave this option blank, an error message appears.
From the menu, under MANAGEMENT, select Users. The users that are part of at least one of your teams appear listed.

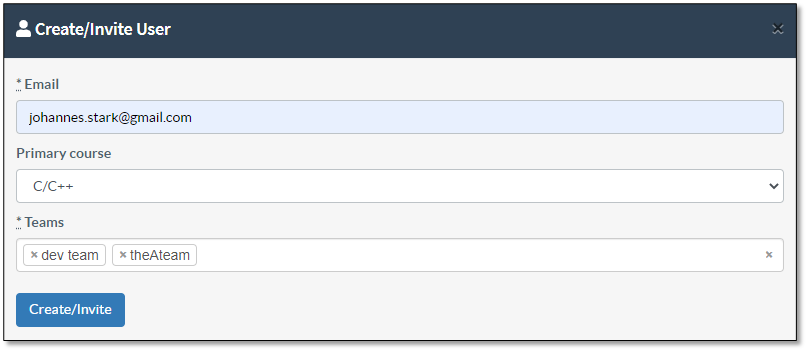
Click <Create/Invite User>. The Create/Invite User dialog appears.
Do the following:
Email: Enter the email address of the desired user, which will be his/her username.
Primary Course: Assign a primary course to the user.
Teams: Assign the new user to at least one team.

Click <Create/Invite>. The new user is added to the specified team(s).