Tenant-level Webhooks
Webhooks allow you to send post-scan events to an external notification service. You can manage webhooks at the tenant level, defining global settings that automatically apply across all projects. This eliminates the need to configure webhooks individually for each project, significantly reducing manual effort and streamlining administration.
Centralizing webhook management makes it easier to maintain consistency across all your projects. Admins can set up global webhooks once and have them apply everywhere while still letting individual projects use their own if needed. Global webhooks do not interfere with project-specific ones. They run separately, so anything you set at the tenant level does not override or block what is already set up in individual projects. This keeps everything aligned without locking you into a one-size-fits-all setup.
Global Webhooks Configuration
Select Webhooks under Account Settings to add a new webhook.
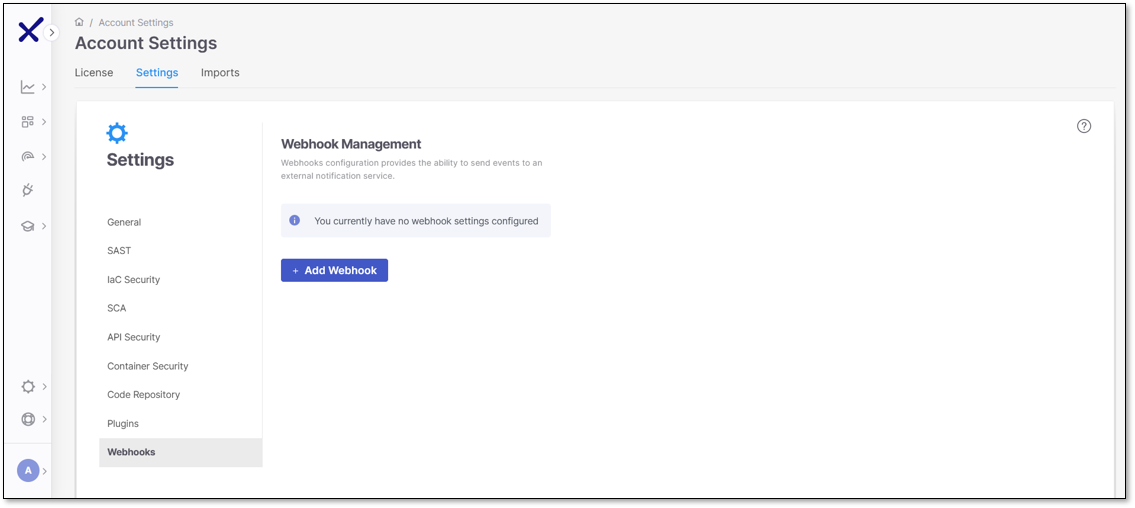
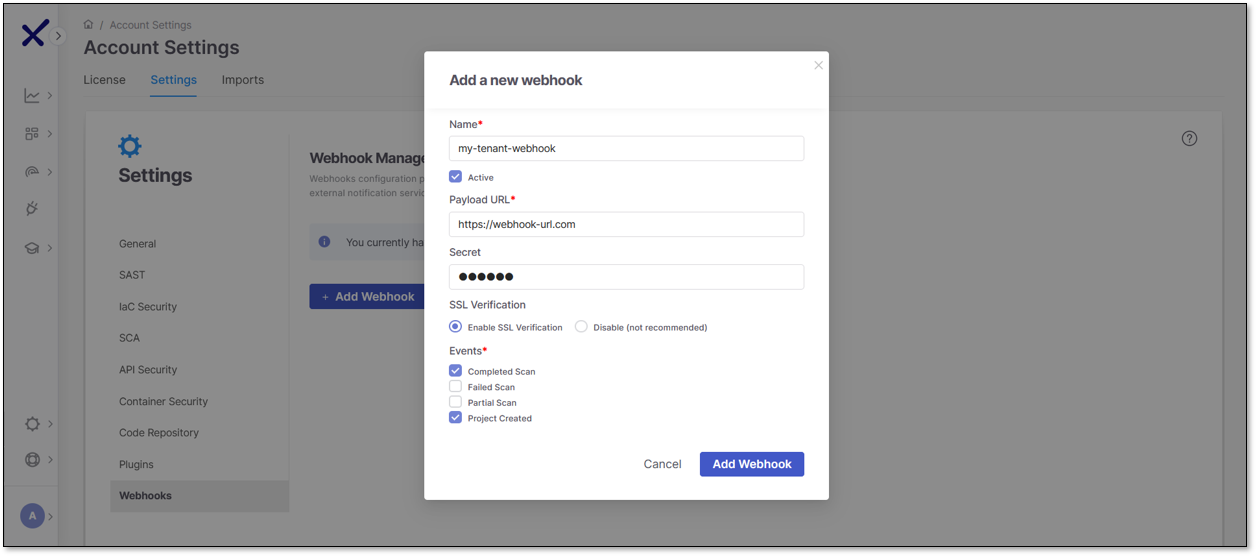
Click + Add Webhook to begin. You can create webhooks with the following fields:
Webhook Name: Descriptive label
Active: Toggle to activate webhook
Payload URL: Endpoint for webhook delivery
Secret (optional): For added security
SSL Verification
Events:
Completed Scan
Failed Scan
Partial Scan
Project Created (new trigger for when a project is created)
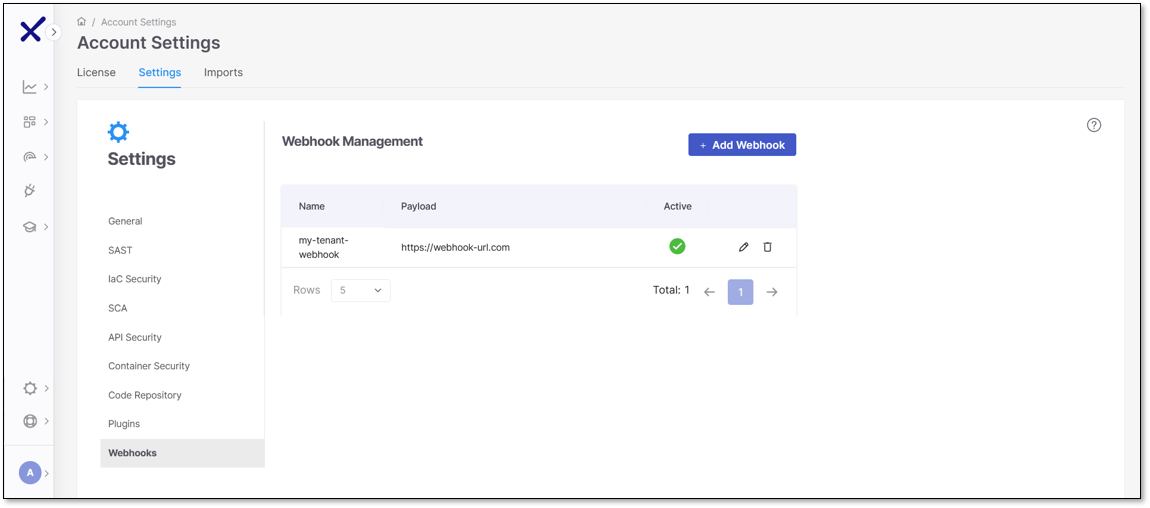
When done, you will see your active webhook and its payload.
Permissions
To manage global webhooks, you will use the existing manage-webhook permission set, which includes the following:
Create: Add new global webhooks
Read: View existing global webhooks
Update: Edit webhook settings
Delete: Remove global webhooks