Importing SAST to Checkmarx One
Prerequisites
Before you can import an existing SAST environment into Checkmarx One, ensure you have the following:
Exported SAST environment archive: A .zip file containing the exported SAST environment.
Checkmarx One Tenant name
Checkmarx One Admin username and password
Symmetric key: A .txt file containing the symmetric key. This file is automatically generated with the exported SAST archive.
To retrieve the symmetric key:
Open the .txt file in any text editor.
Copy the key string to use during the import process.
Import Procedure
To import the SAST exported environment to Checkmarx One, proceed as follows:
Log in to Checkmarx One using the Tenant name and Admin credentials.
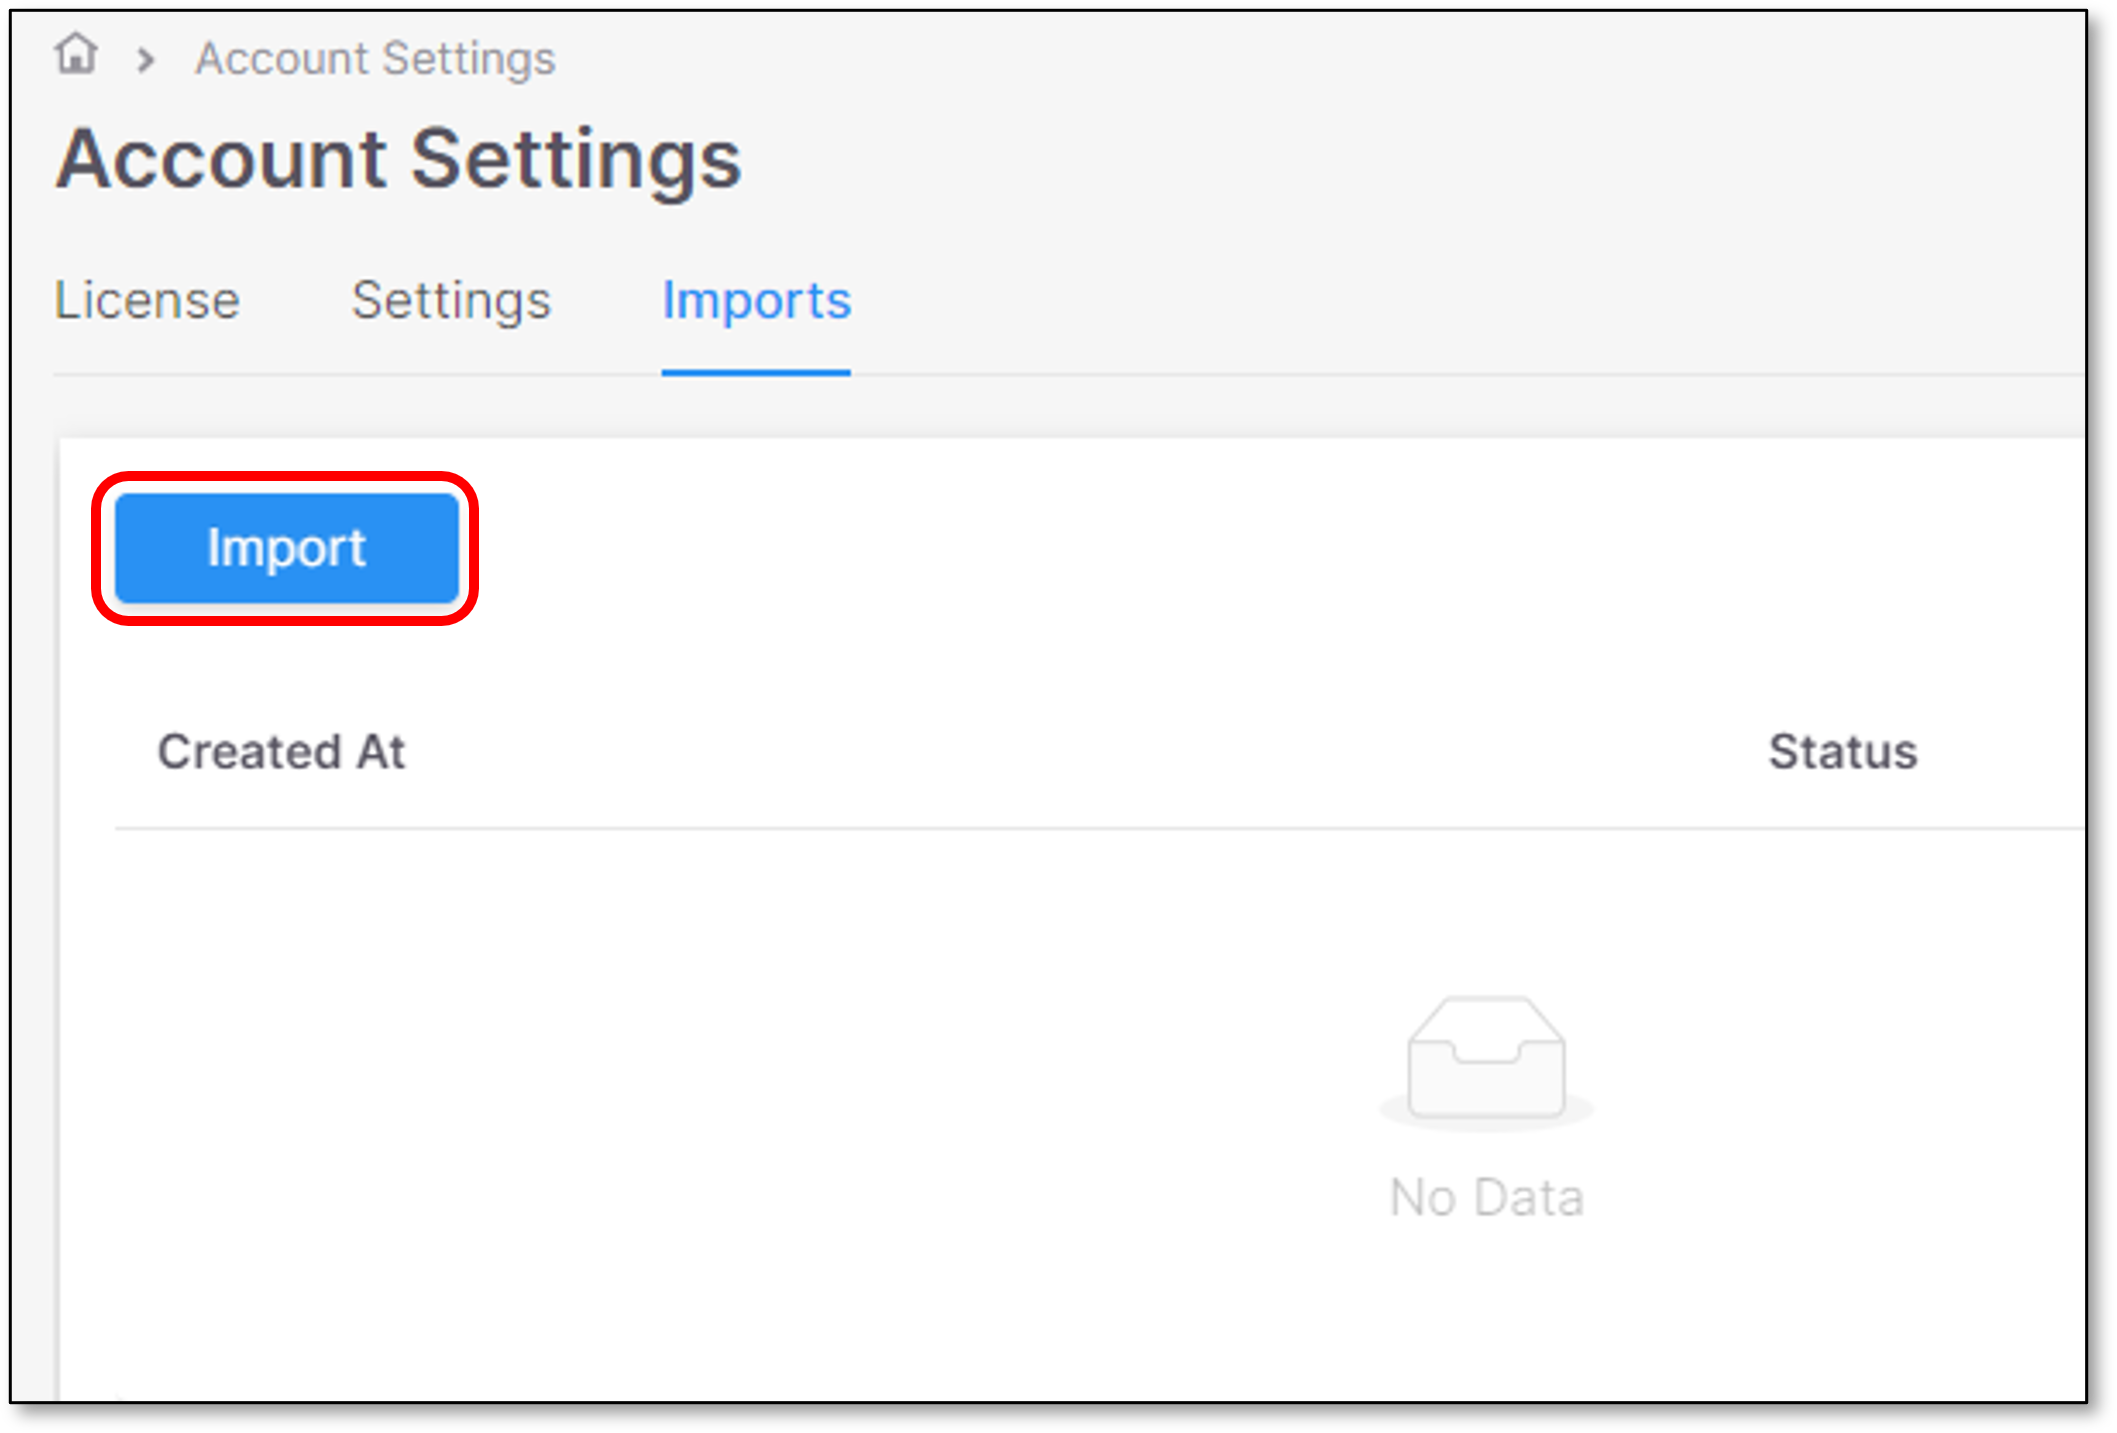
Click on the Settings icon in the left Navigation pane. The Account Settings page is displayed.
Open the Imports tab and click Import.
The screen for importing a a SAST Environment into Checkmarx One is displayed:
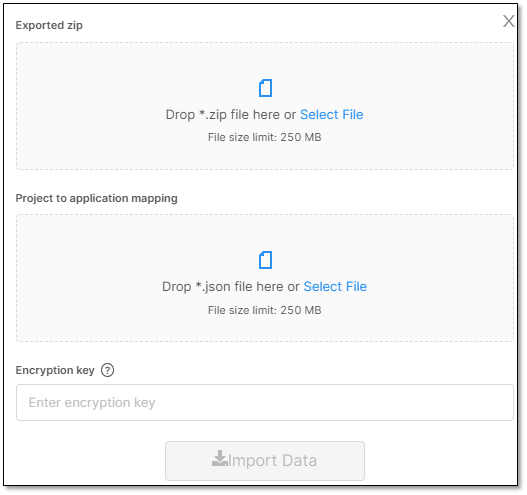
Upload the exported SAST archive by doing one of the following:
Drag and drop the file into the Exported zip area.
Click Select File and browse to the .zip file on your system.
Enter the Symmetric key (Encryption key)
Note
A notification that the file is successfully uploaded will appear at the top
Upload the project-to-application mapping file in JSON format by doing one of the following:
Drag and drop the file into the Project to application mapping area.
Click Select File to browse and upload the file manually.
Click Import Data. The import process starts and its status is displayed.
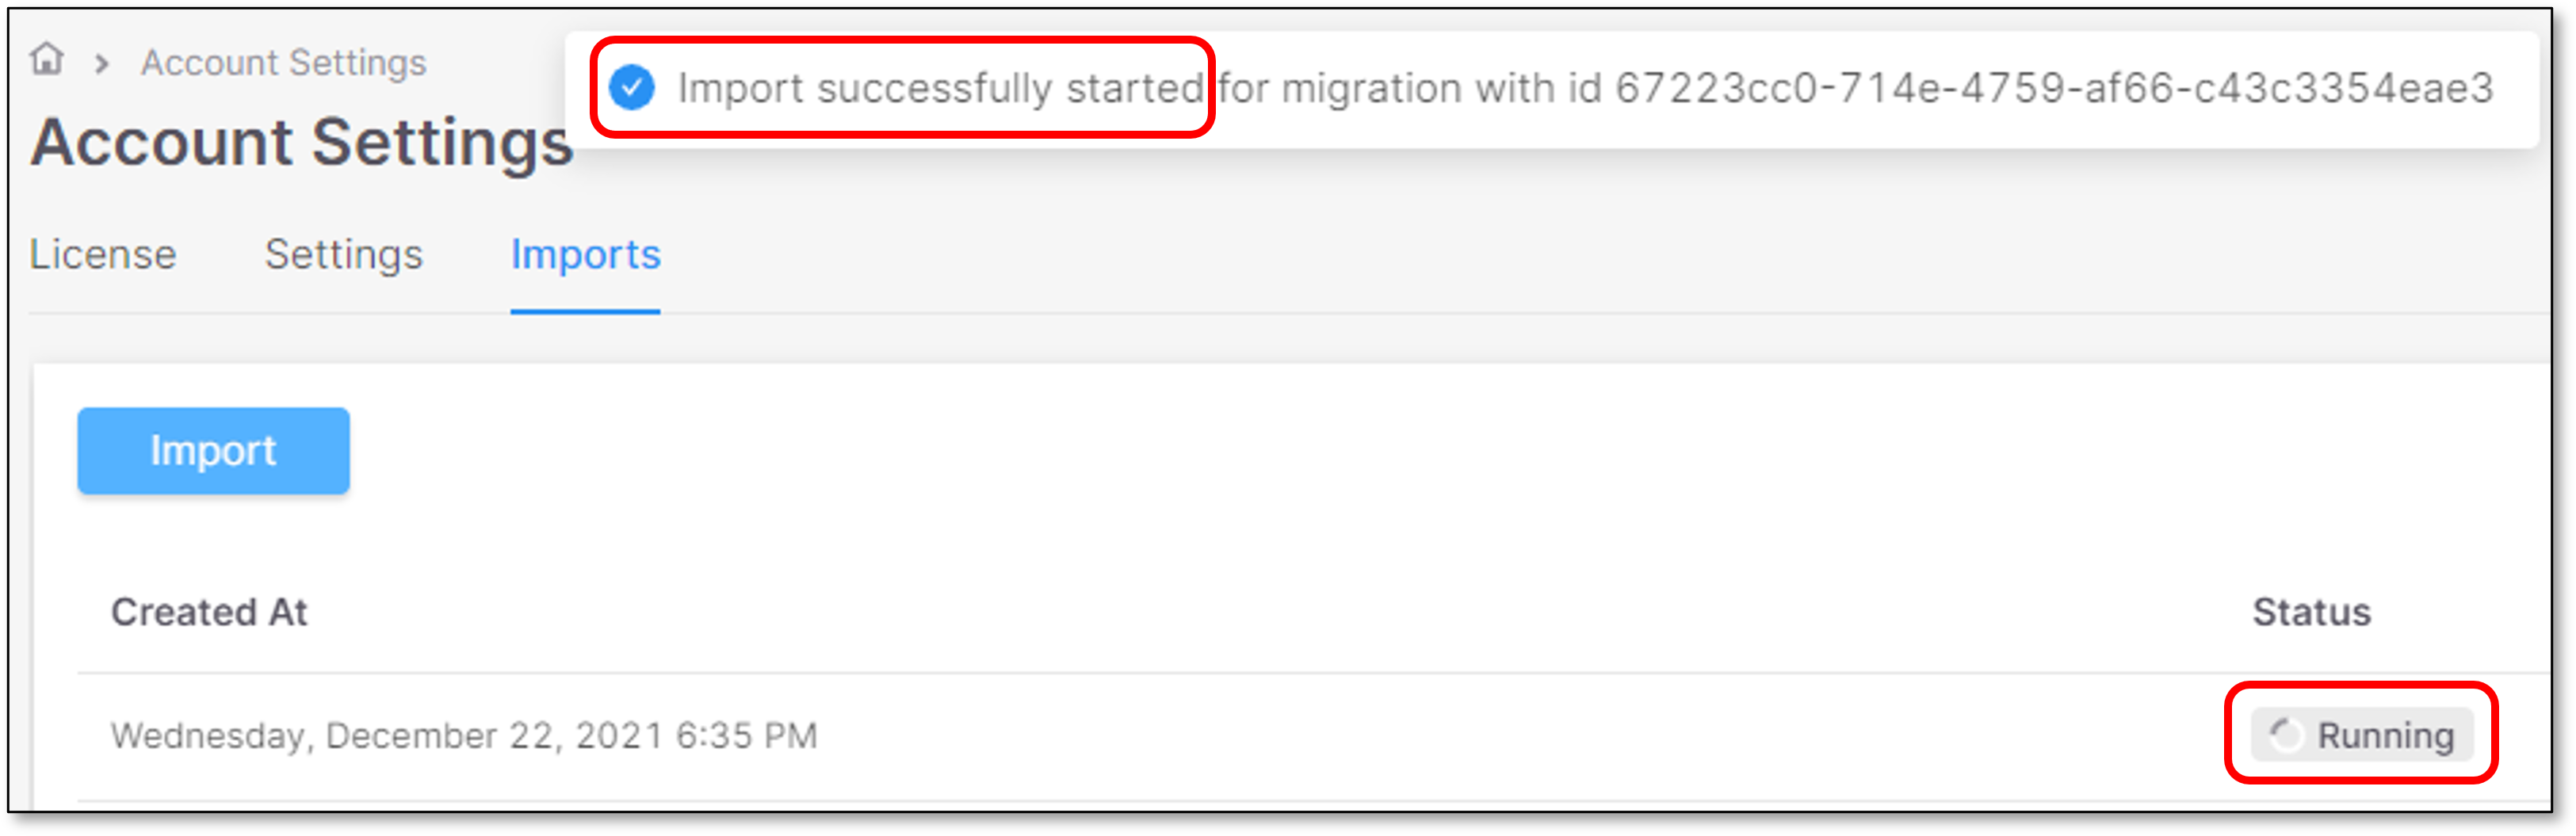
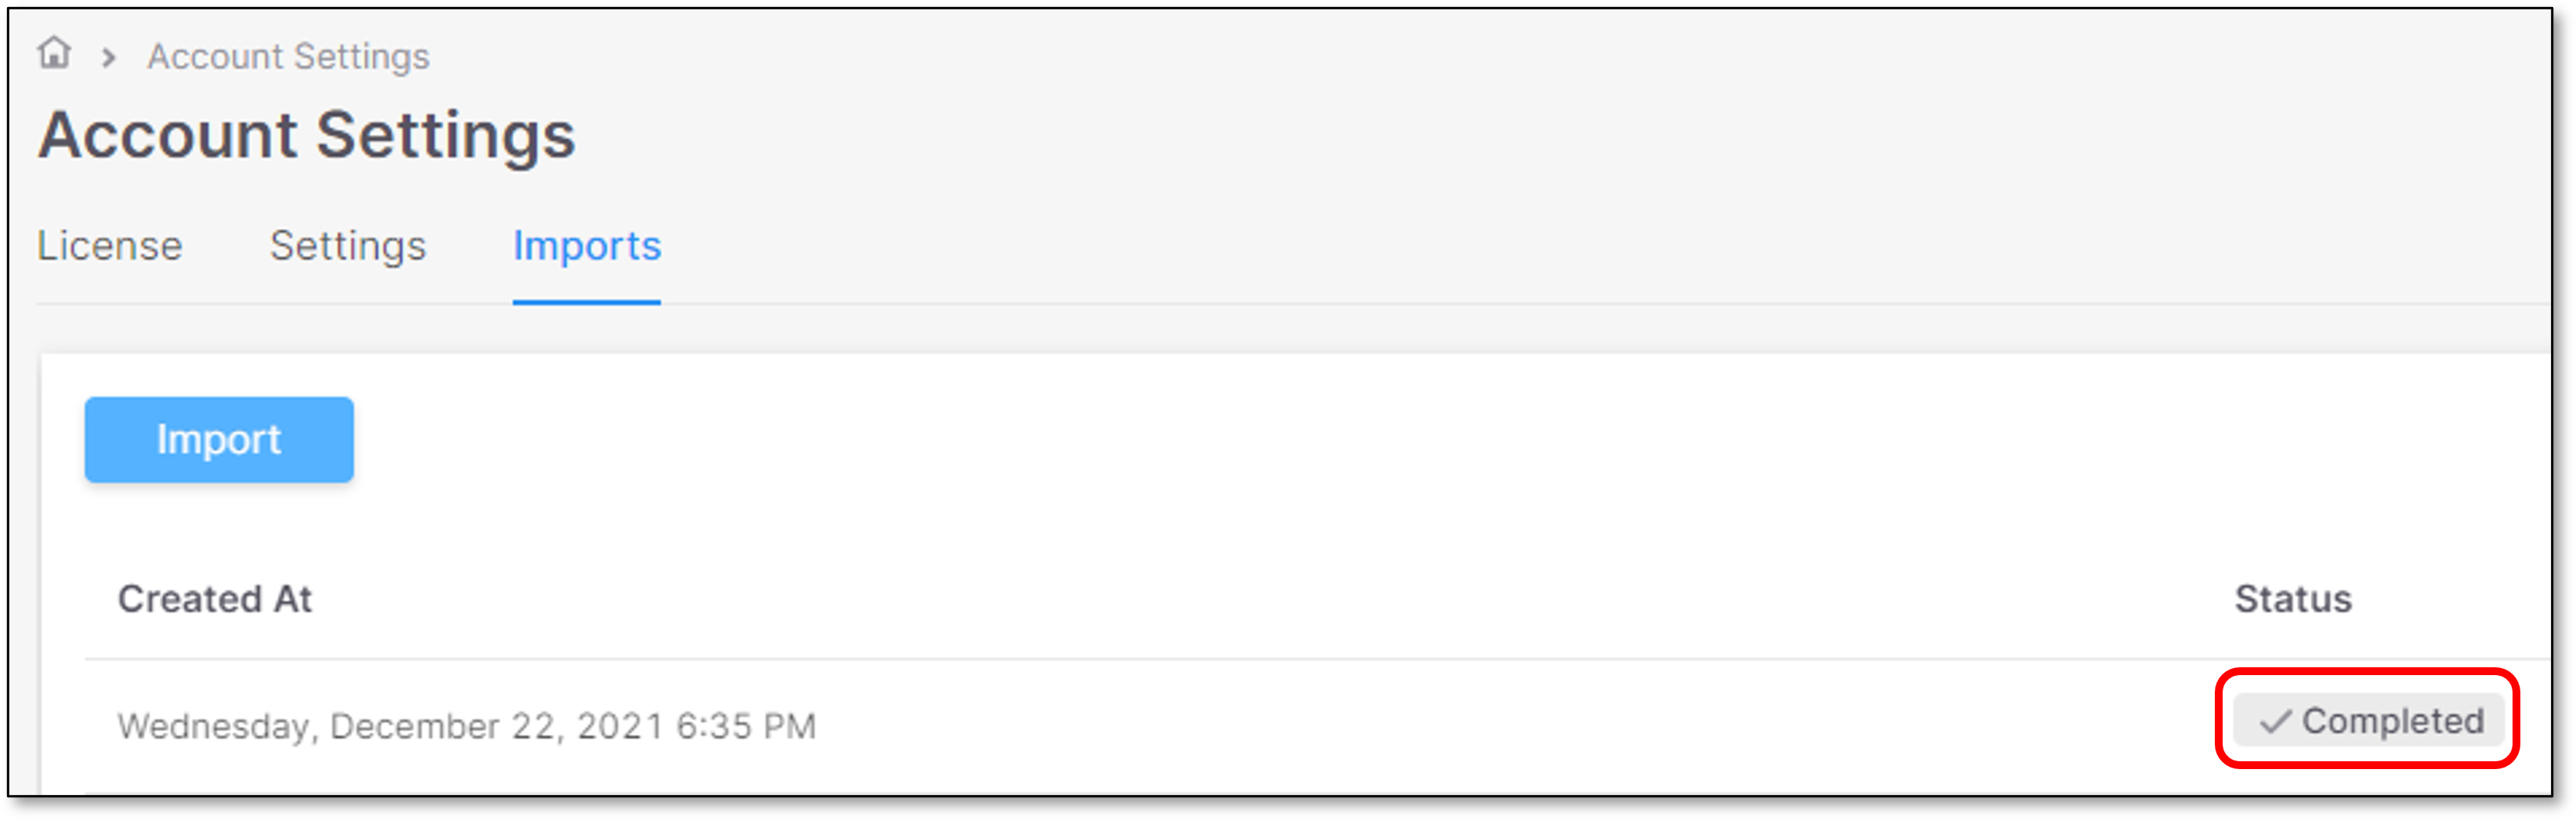
When the import process is completed, the status will be updated accordingly.
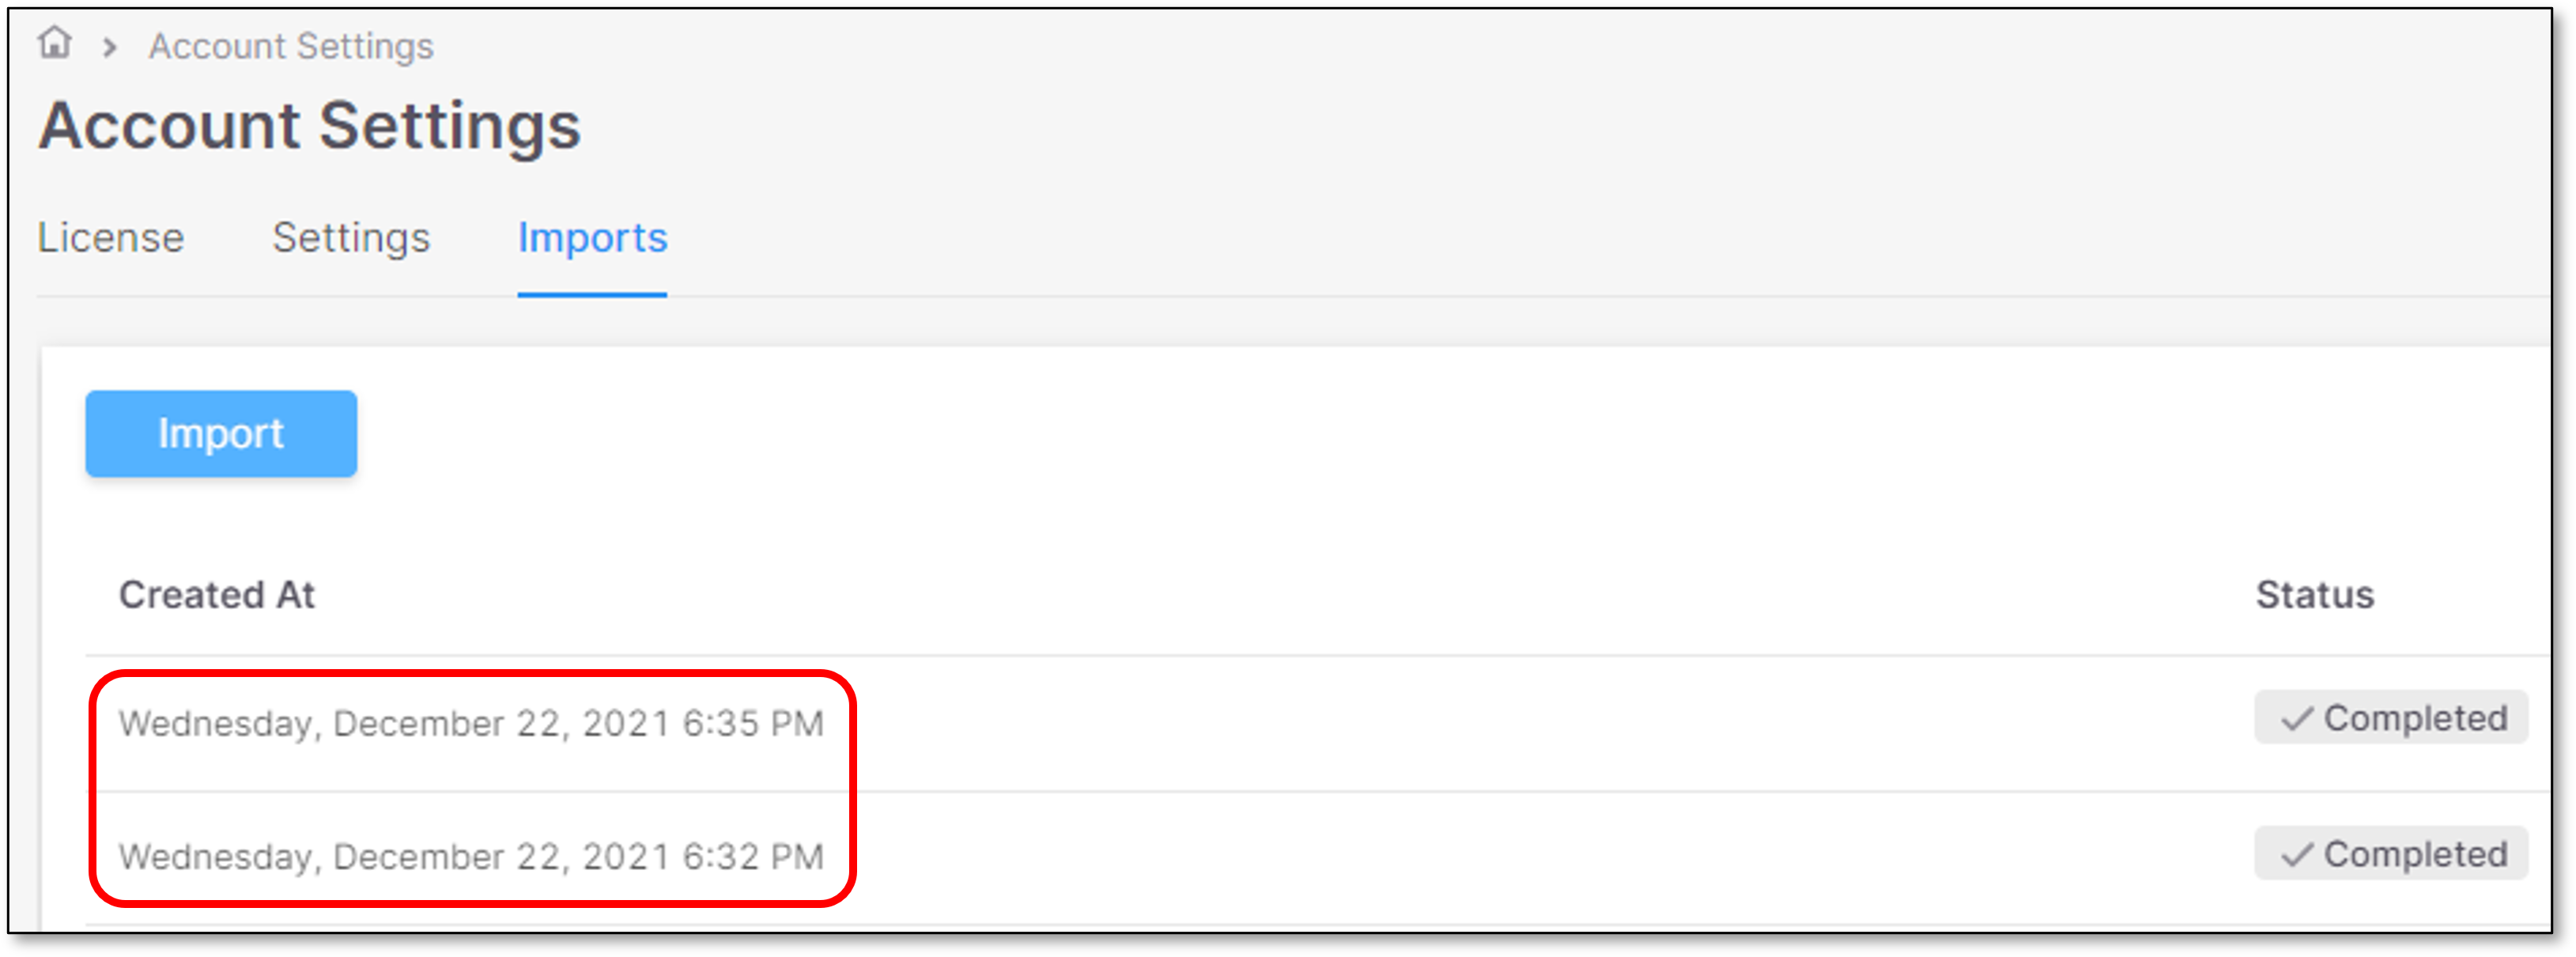
Import Statuses & History
There are 4 import statuses: Running, Pending, Completed, Failed.
The Import screen contains the history of all the Imports timestamps.
For example:
 |
Import Panel
Click on the relevant Import line in the main Import screen.
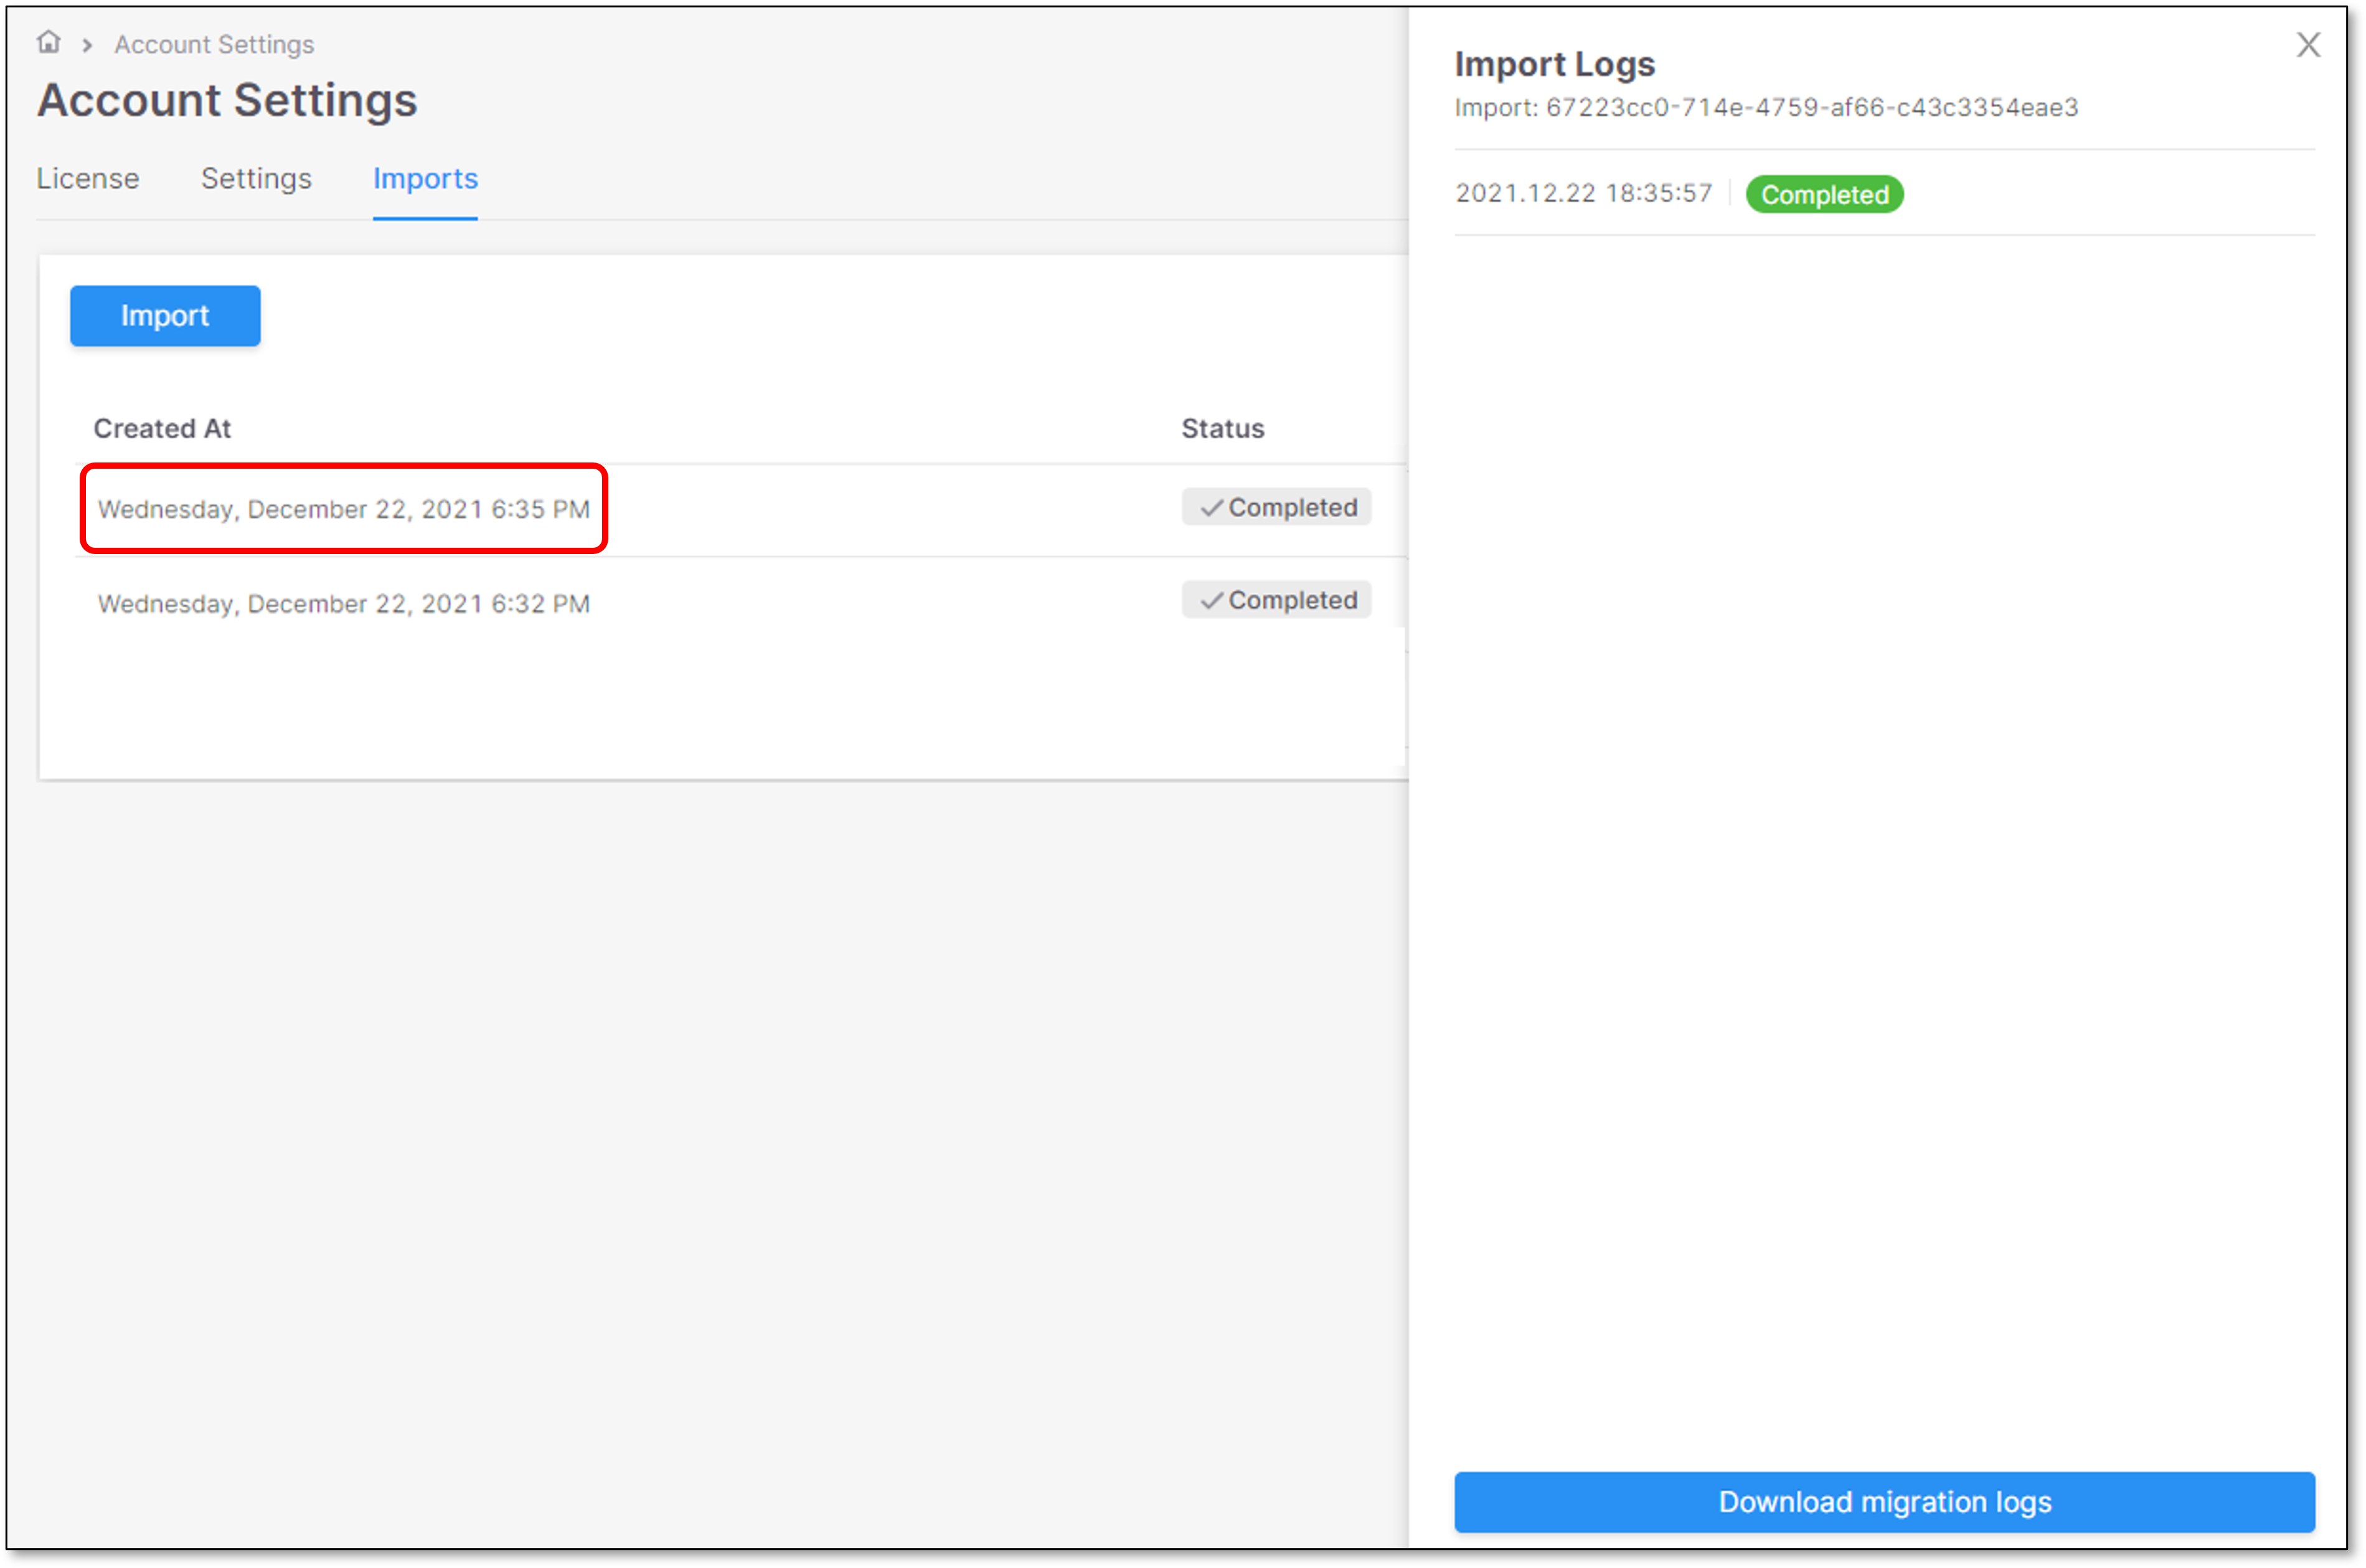 |
The import panel is opened on the right screen side, containing the following Import details:
Import ID
Import timestamp
Status
Download logs button
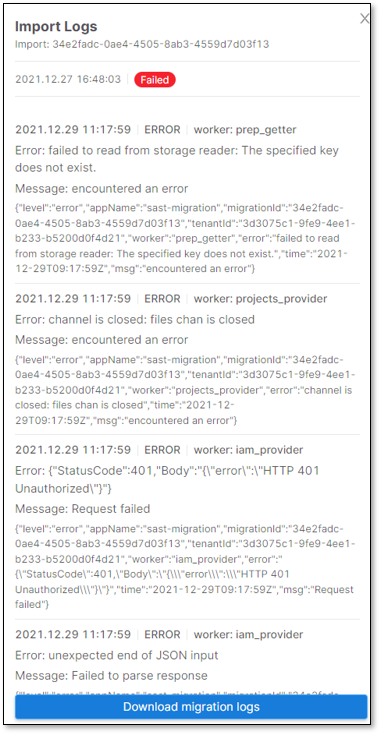
Import Logs
Click on Download migration logs button  .
.
The migration logs will be downloaded to the browser’s default download folder.
Note
Error logs will be printed to the screen for a quick analysis (they will be also included in the downloaded logs)
For example:
 |