Configuring the Checkmarx One Vulnerability Integration
Configuration is typically a one-time activity performed after the initial installation. Before proceeding, ensure the OAuth2 Client has been created in Checkmarx One with all the required permissions. For a list of permissions, see the Preparing for the Checkmarx One Vulnerability Integration section.
Important
Switching between multiple Checkmarx One tenants within the same ServiceNow integration instance is not supported and may lead to data inconsistencies or incorrect vulnerability data. Each integration instance should be configured for a single Checkmarx One tenant only.
To Configure the Checkmarx One Vulnerability Integration:
When branch names are entered, the integration retrieves and processes only the latest scans and results associated with the specified branches.
Branch level filtering works in combination with the following conditions:
Configured Project filter, if applicable
Selected Scan Synchronization option
Defined Start Time for the integration run
All conditions are evaluated together to determine which scans are included.
Close AVITs of Obsolete Branches
An additional checkbox is available in the branch filter to close AVITs linked to branches that are no longer used or have been deleted. Because the plugin cannot detect deleted branches directly, enabling this option allows Checkmarx One Vulnerability Closure Integration to automatically close AVITs for any branches not included in the filter. When selected, the branch filter must include specific branch names. This action should be performed only once, as enabling the option in later runs may cause performance issues due to extra lookups.
Navigate to your instance of Service Now and log in.
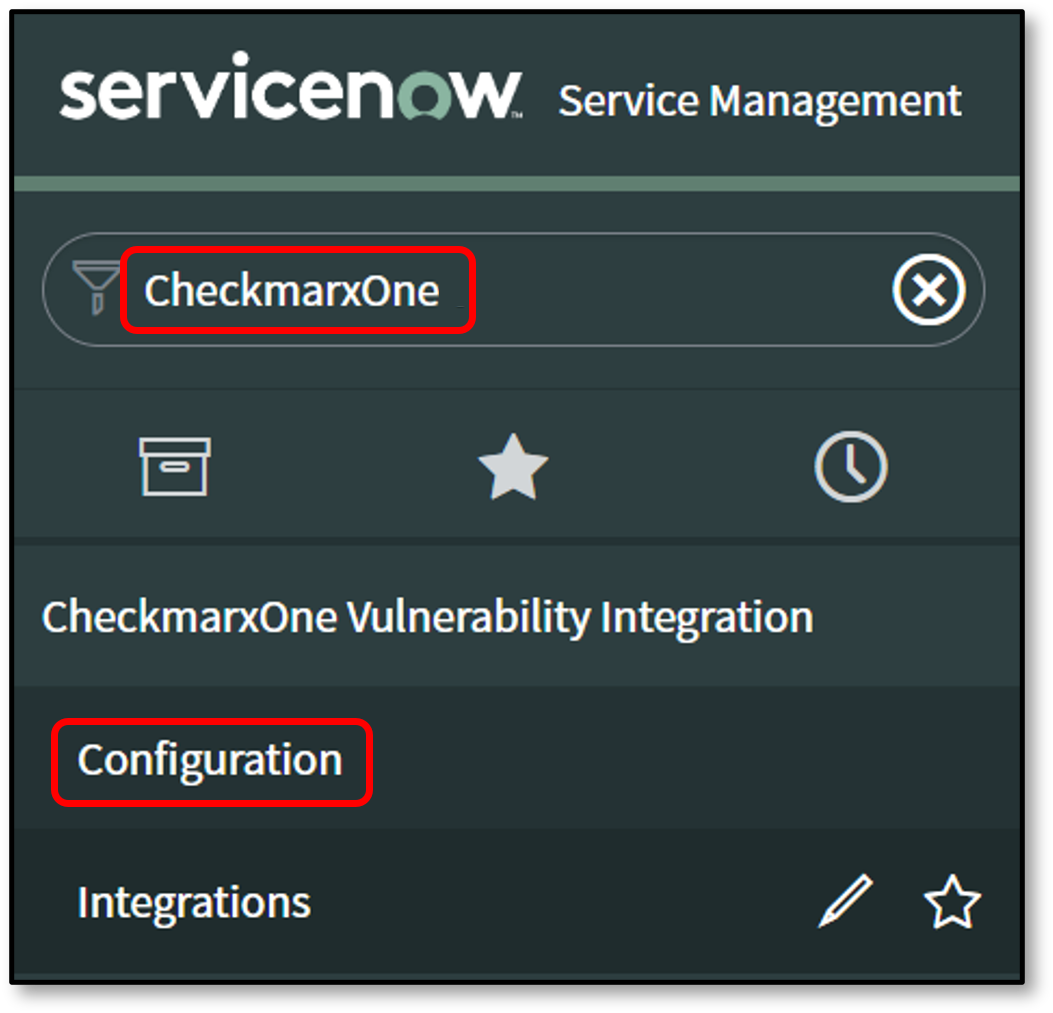
Search for Checkmarx One Vulnerability Integration.
Click Configuration.
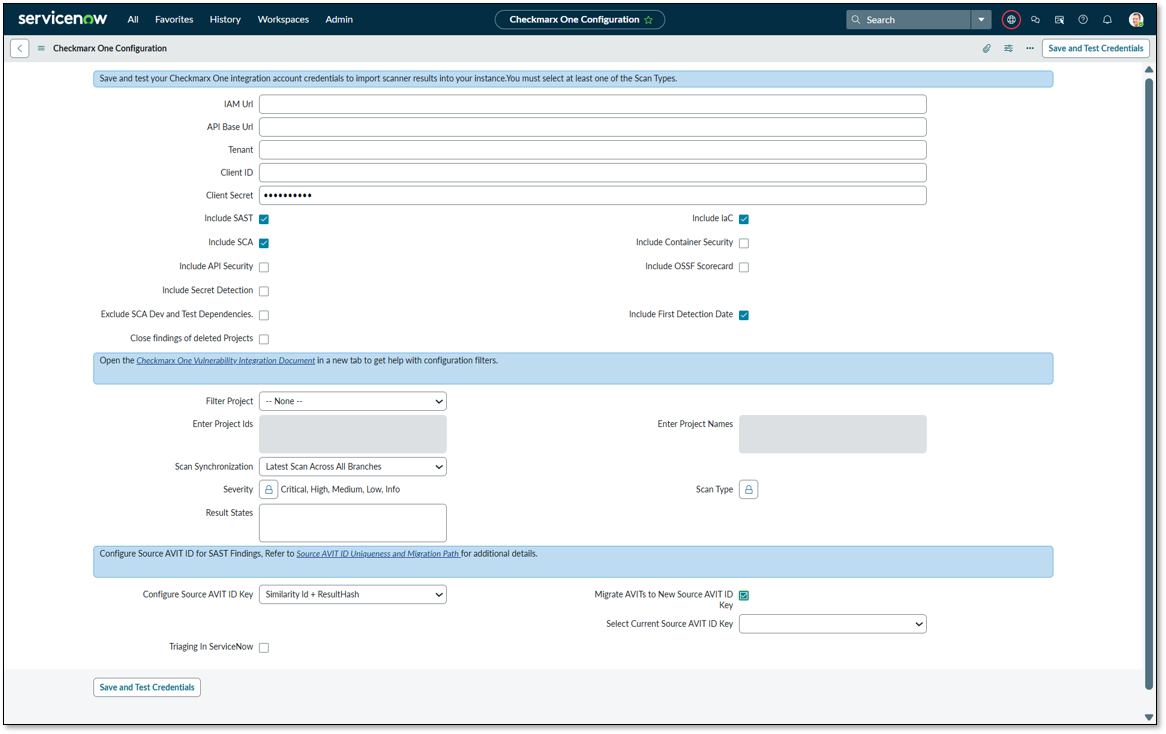
Provide the information required to complete the Checkmarx One configuration.
Note
Fields marked with a red asterisk are compulsory.
Enter the following in the required fields on the Configuration page:
IAM URL: Checkmarx One IAM URL (remove ‘/’ from the end of the URL)
API Base URL: Checkmarx One Base URL (remove ‘/’ from the end of the URL)
Tenant: Checkmarx One Tenant
Client ID: Oauth 2 Client ID
Client Secret: Oauth 2 Client Secret
Select the checkboxes for the scanner results you wish to import (e.g.,Include SCA, Include SAST, Include IaC, Include Container Security, Include API Security, Include 2MS, Include OSSF Scorecard, or all to get the scanner results).
Source AVIT ID Uniqueness and Migration Path
Configurable Source AVIT ID Key
A new Configure Source AVIT ID Key option has been introduced, allowing customers to control how Source AVIT ID is generated for SAST findings. This provides flexibility in defining how findings are uniquely identified and managed.
Available Key Options
The Configure Source AVIT ID Key dropdown includes the following options:
Similarity ID + ResultHash (Default)
Uses a combination of Similarity ID and ResultHash from SAST results.
Ensures a 1:1 mapping between CxOne and ServiceNow findings.
Highly unique but sensitive to changes (e.g., file path or line number updates may generate a new ID).
Derived Unique Key
Uses a composite identification strategy:
Primary: Similarity ID
Secondary: Context-based composite hash (e.g., code location)
Less sensitive to minor changes, reducing false closures or duplication.
Will change if file name or path changes.
Does not maintain 1:1 mapping between CxOne and ServiceNow.
Multiple findings can share the same key, and aggregation is applied.
Similarity ID
Based solely on Similarity ID.
Remains stable across scans, even if file name, location, or line number changes.
Does not maintain 1:1 mapping between CxOne and ServiceNow.
Multiple findings can share the same ID, and aggregation is applied.
Migration Support
To support transitioning between key formats, the following options are available:
Select Current Source AVIT ID Key. Dropdown to specify the existing key format used in the system.
Migrate AVITs to New Source AVIT ID Key. Checkbox to enable migration.
When migration is enabled:
Existing AVITs created using the selected current key format are automatically re-keyed to the new format during the next integration run.
The system uses the selected current key format to accurately identify and update existing records.
Aggregation of Findings
When multiple SAST findings share the same Source AVIT ID:
Their associated links are aggregated into the Source Vulnerability Summary field of the AVIT table.
A maximum of 30 links is appended (existingCounter <= 30).
The Dependency Type field of the AVIT table reflects the total count of aggregated findings.
Configure branch level filtering.
Branch level filtering is available on the Configuration page. This feature allows users to define up to 20 branch names, separated by a semicolon.
Note
This feature does not impact the Checkmarx One Application List Integration. It applies only to Checkmarx One Scan Summary Integration and Checkmarx One Application Vulnerable Item Integration.
Click Save and Test Credentials.
The URL will be the same for Single Tenant, IAM URL, and API Base.
 |
The system tests the credentials and confirms if the validation is successful.
If the authentication is successful, proceed with the Checkmarx One Vulnerability Integration.