- Checkmarx Documentation
- SAST/SCA Integrations
- CI/CD Plugins
- TeamCity Plugin
- Setting Up the TeamCity Plugin
Setting Up the TeamCity Plugin
Prerequisites
To run TeamCity plugin scans, you must have both Scanner and Reviewer role permissions for Access Control.
Note
To run plugin scans using the TeamCity plugin version (2024.1.6), you must also have the Edit Project role permission enabled in Access Control.
As a prerequisite for all platforms, you must install TeamCity and the TeamCity Checkmarx plugin. For the required versions, refer to Supported Tool Version under the version of your Checkmarx plugin in the TeamCity Plugin Change Log.
CxSAST: 8.9.0 and higher. For further information and instructions, refer to the CxSAST Setup Guide.
NuGet: To initiate a NuGet scan, NuGet must be installed.
Python: To initiate a Python scan, Python must be installed.
POM: Maven must be installed locally.
For all Maven and NPM configuration files, CxManager downloads the necessary packages, calculates metadata, and submits them to the Cloud engine. Repositories must be accessible to CxManager.
Notice
You are unable to start using CxOSA unless the end user license agreement (EULA) has been viewed and accepted.
In order to scan dependencies used by NPM, NuGet and Python, “Execute dependency managers 'install packages' command before Scan” must be checked. This checkbox replaces the “Enable NPM Install” checkbox.
NPM: To initiate an NPM scan, the following is required:
NPM must be installed.
An NPM project must contain at least one JS file to be scanned.
Dependencies are internally resolved by running the “NPM LS” command.
NuGet: To initiate a NuGet scan, NuGet must be installed.
Python: To initiate a Python scan, Python must be installed.
POM: Maven must be installed locally.
CxSAST: 8.9.0 and higher. For further information and instructions, refer to CxSAST Setup Guide.
Licensed CxOSA version enabled.
MPM and Maven must be installed.
Java 8 must be installed to run OSA scans.
Installing and Configuring the TeamCity Plugin
The Checkmarx TeamCity Plugin supports a remote agent, but no configuration is required.
If not already done, download and install TeamCity as explained in the TeamCity documentation. Once TeamCity has been installed and the TeamCity components have been initialized, you are asked to accept the license terms.
Review and accept the license terms. You are asked to create a TeamCity account.
Create a user account by defining a user name and password. You are asked to log in to the account.
Log in to the account with the credentials you just defined. The Getting Started with TeamCity dialog appears.
Notice
It may take several minutes for TeamCity to initialize, depending on the resources of the host.
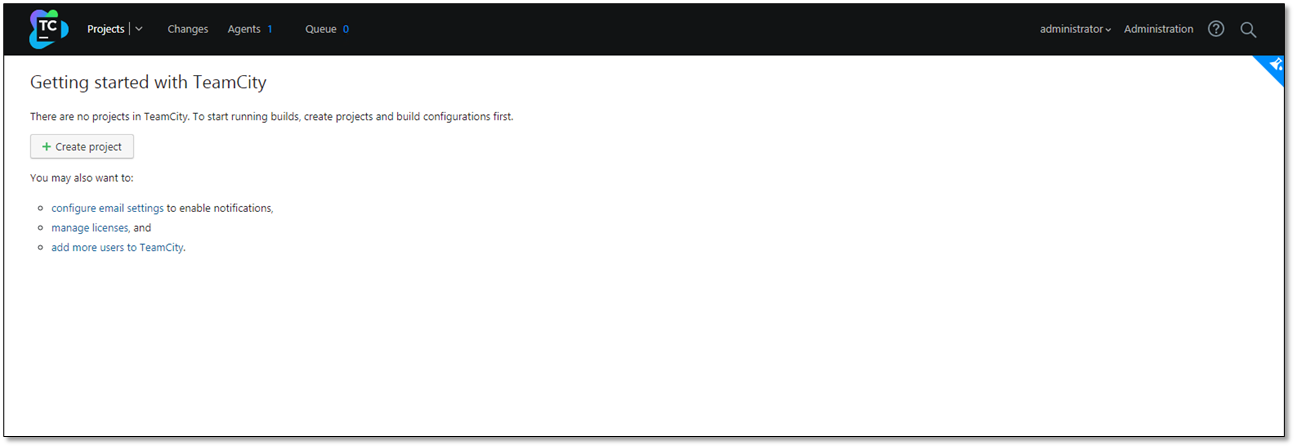
Click <+ Create Project>. The Create Project dialog appears
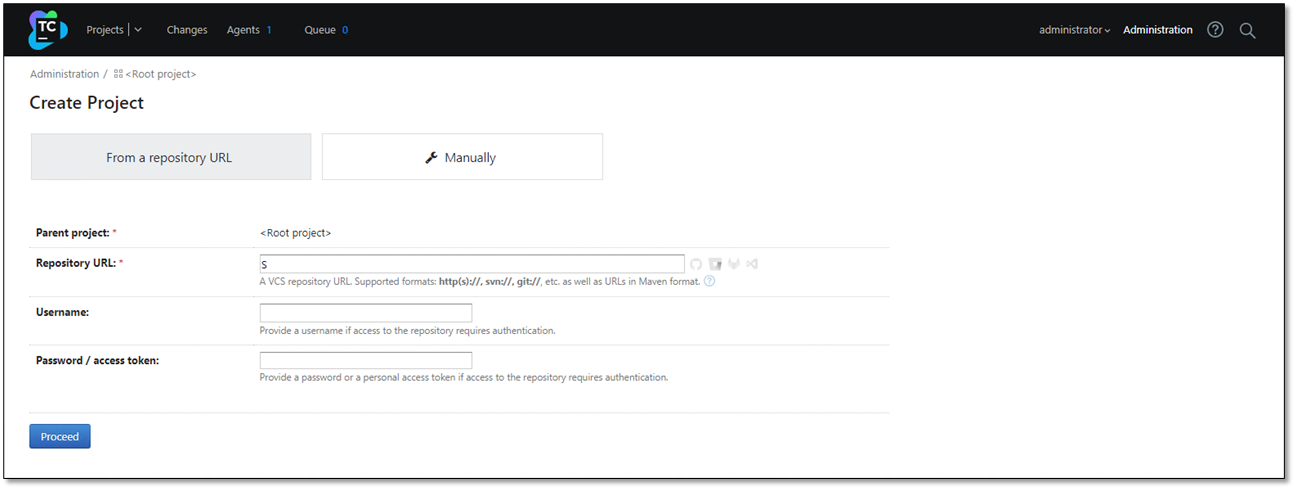
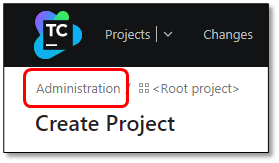
In the Create Project dialog, click Administration. The Administration menu appears.
Select Plugins from the Administration menu. A list of plugins appears.
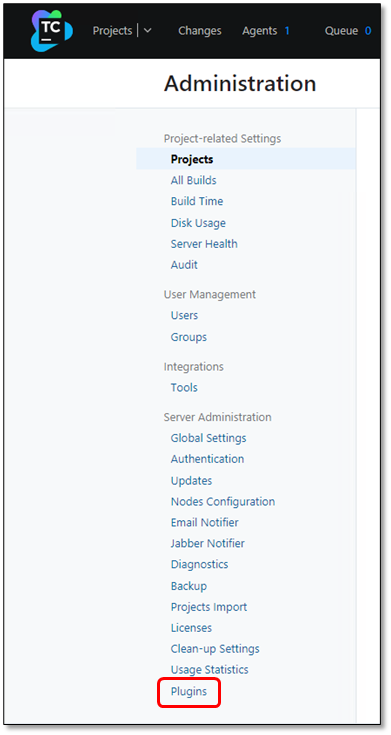
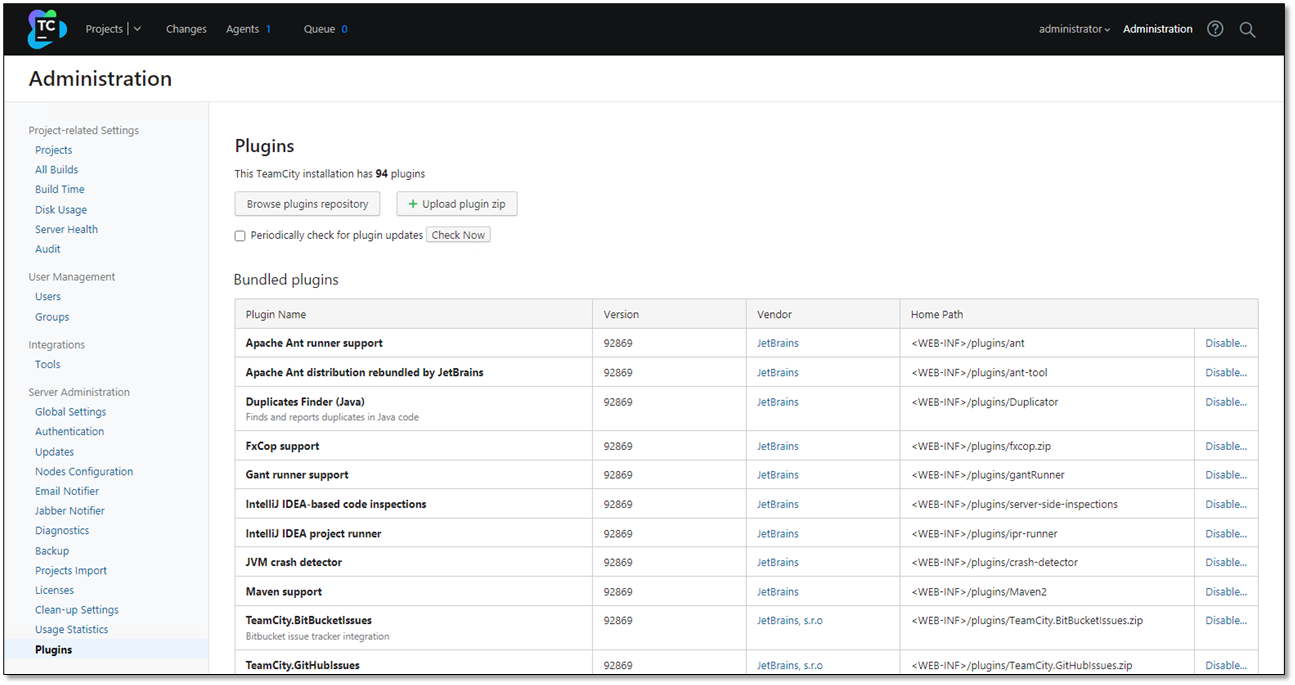
If the Checkmarx plugin is not listed, click <Browse Plugins Repository> and then confirm your request. The JetBrains Marketplace appears and you are asked to accept the license terms.
Accept the license terms to make the JetBrains Marketplace available.
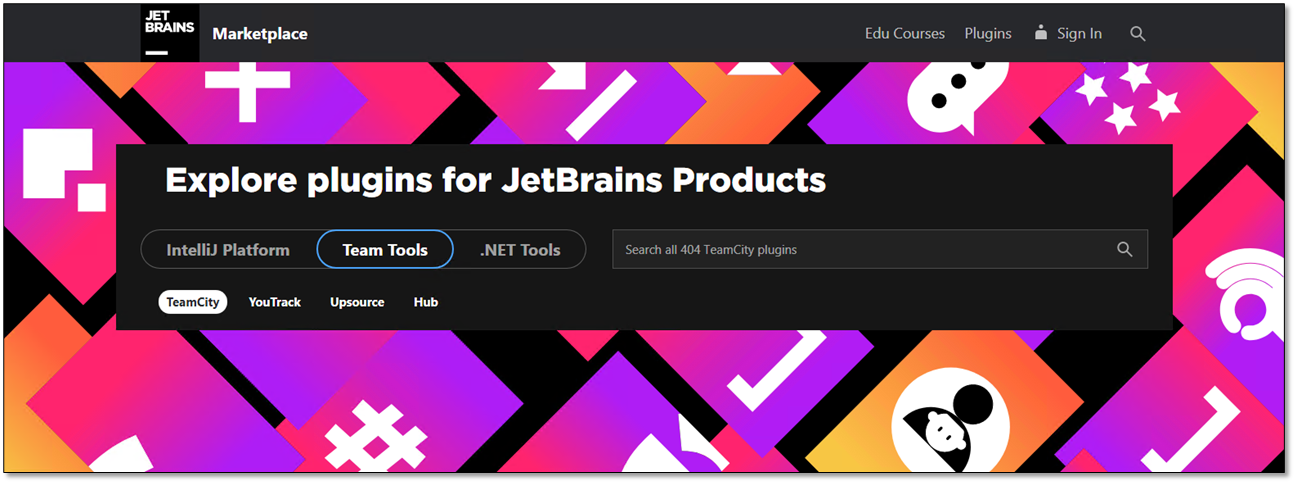
Enter Checkmarx plugin into the search field. The Checkmarx plugin is indicated.
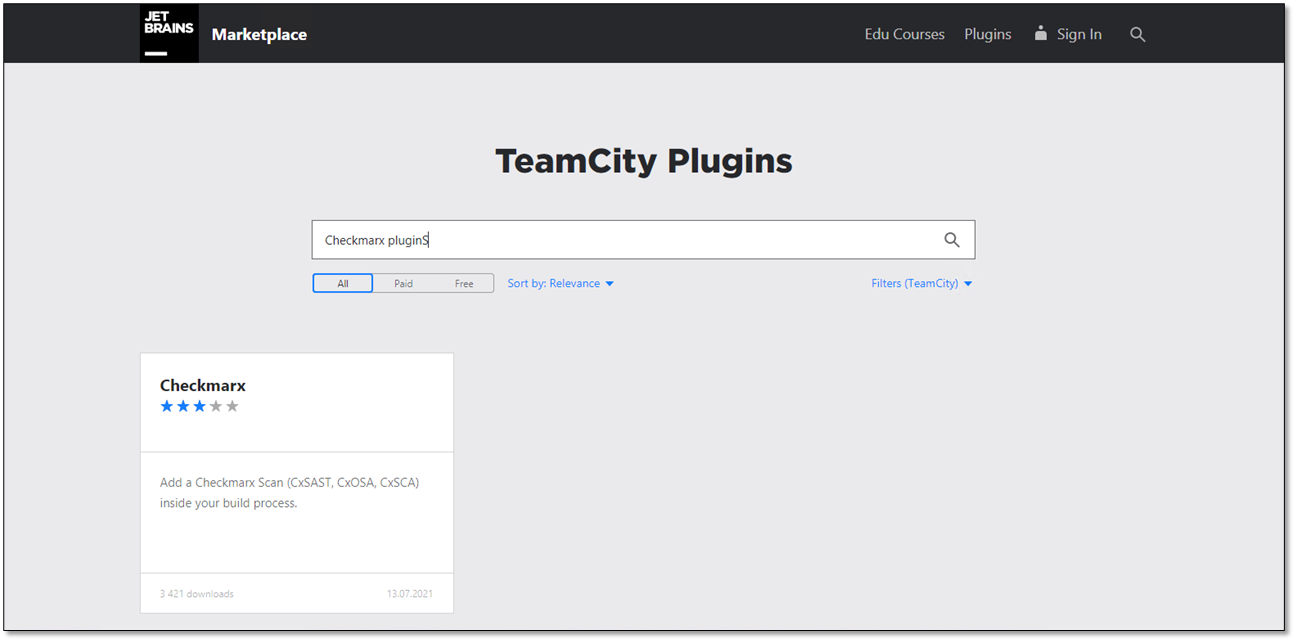
Follow the link to the TeamCity Checkmarx plugin. The JetBrains Marketplace appears with the Checkmarx plugin overview and the download link
 .
.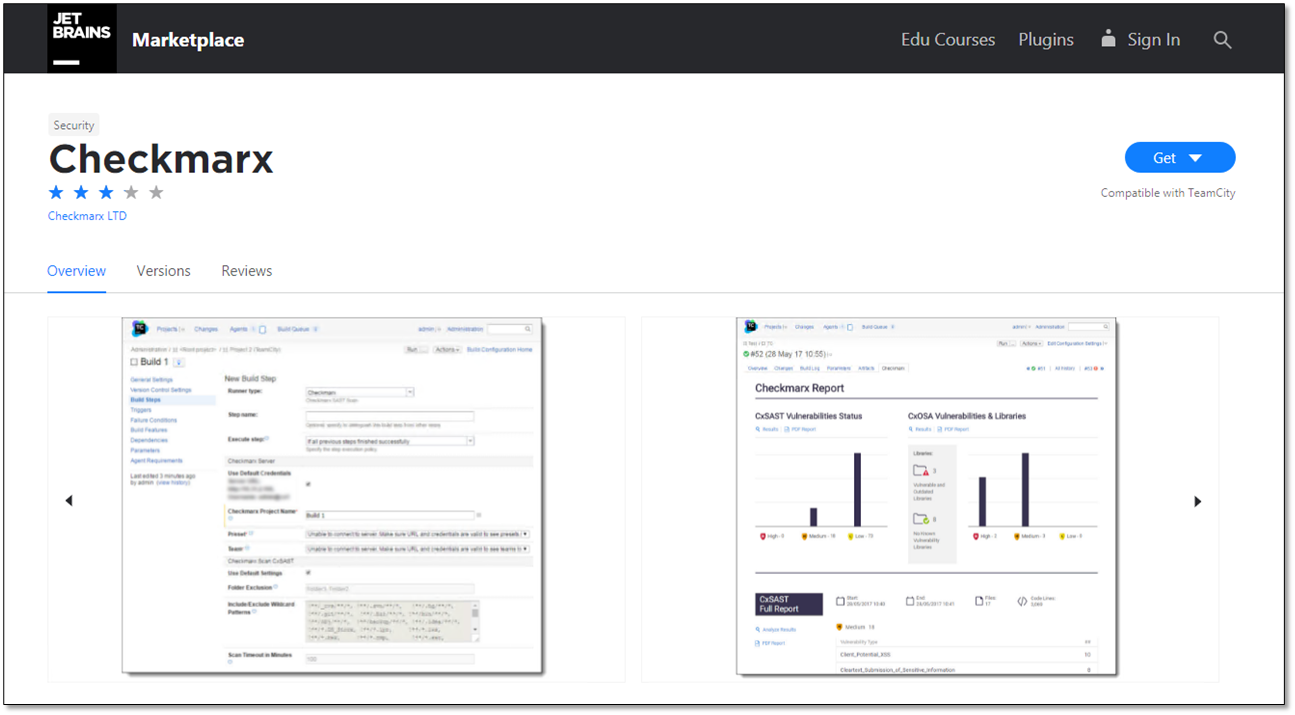
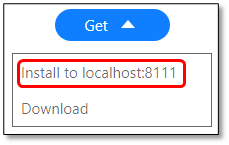
Follow the download link and install the plugin from its download location. An installation prompt appears.
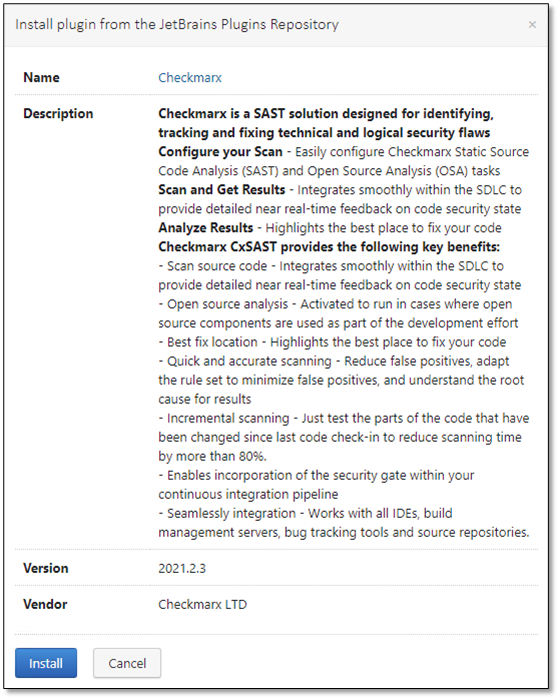
Click <Install> to install the plugin. You are prompted to enable the plugin once the installation is complete.

Enable the plugin. The Checkmarx plugin is installed and ready for use as indcated in the Plugins list under External Plugins. The global configuration for the Checkmarx TeamCity plugin is performed from within TeamCity as explained in the next section.
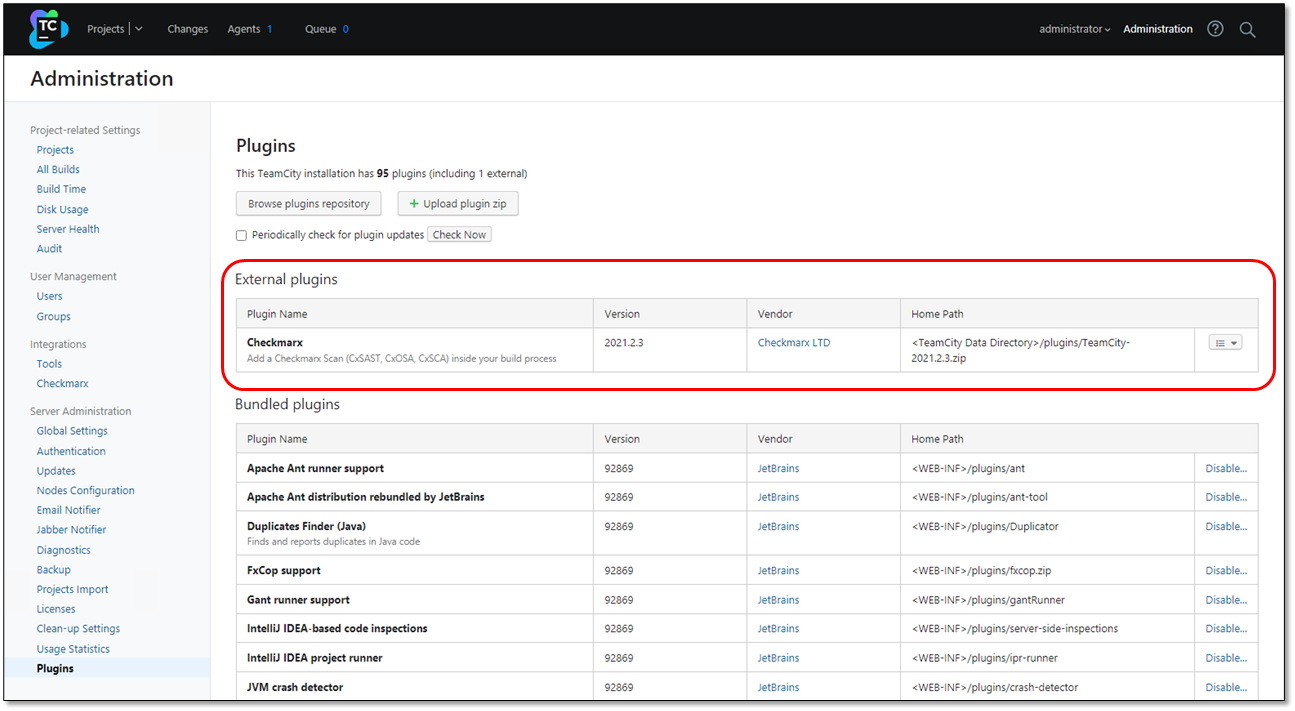
In the Plugins list, go to Integrations and click Checkmarx. The Checkmarx Plugin Default Configuration screen is displayed.
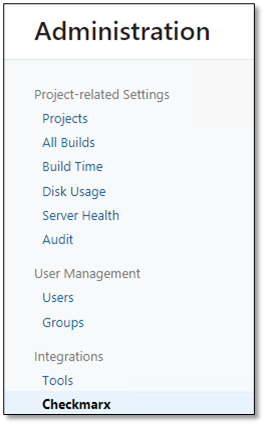
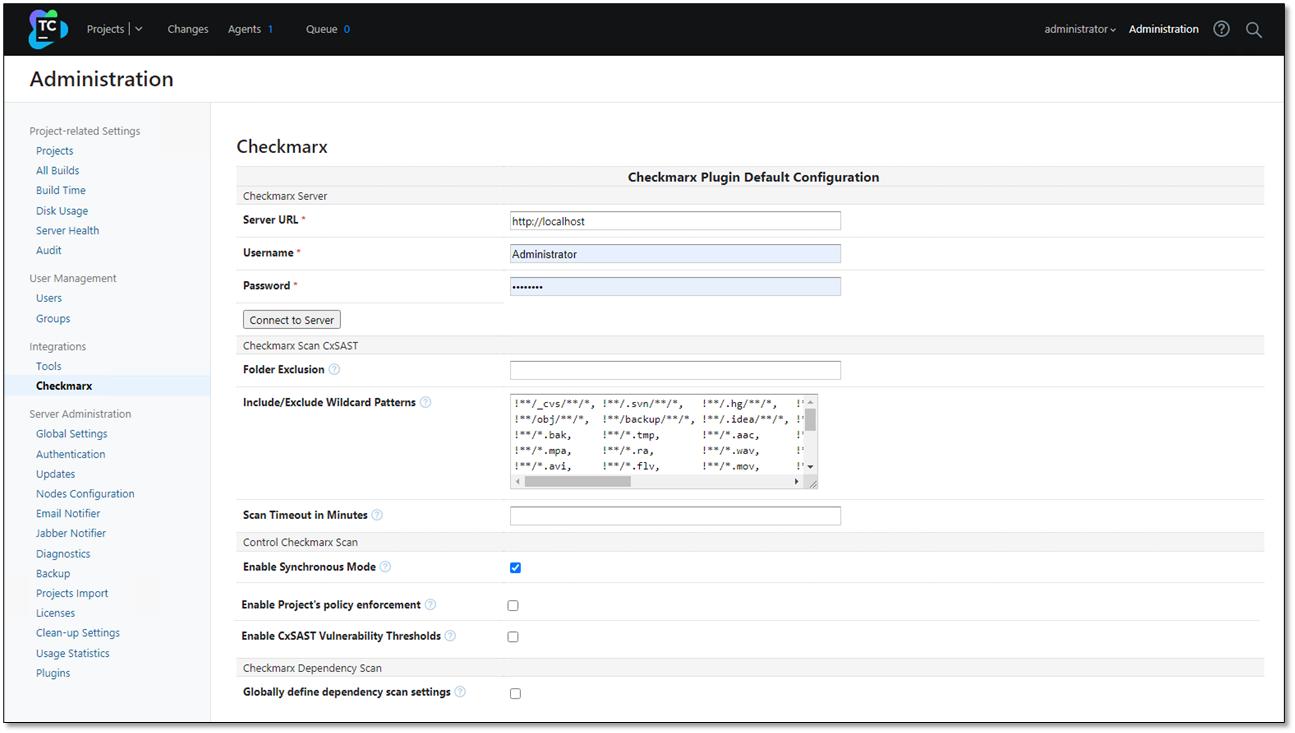
Define the Checkmarx Plugin Default Configuration parameters listed in the table below.
When done, click <Save> to save the changes.
Parameter | Description |
|---|---|
Checkmarx Server | |
Server URL | Checkmarx Server URL or IP address with or without port, for example http://<server-name>, https://<ip-address>:<port>. NoticeYou can override these settings later for individual scan steps. |
Username | Enter a login username. |
Password | Enter a login password. |
<Connect to Server> | Click <Connect to Server>. Wait until the credentials are validated and the Success status is indicated. |
Checkmarx Scan CxSAST | |
Folder Exclusion | Define a comma separated list of folders to exclude from the scan. Entries in this list are automatically converted to exclude wildcard patterns and appended to the full pattern list provided in the Include/Exclude Wildcard Patterns section. For example, fold1, fold2, fold3 is converted to: !**/fold1/**/*, !**/fold2/**/*, !**/fold3/**/*, NoticeYou can override these settings later for individual scan tasks. |
Include / Exclude Wildcard Patterns | Define the include/exclude wildcard patterns. For example, **/*.java, **/*.html, !**\test\**\XYZ* |
Scan Timeout In Minutes | Define the scan timeout threshold (minutes). Abort the scan if the threshold exceeds the specified timeout. |
Control Checkmarx Scan | |
Enable Synchronous Mode | Enable the synchronous mode option. Synchronous mode allows viewing scan results in TeamCity. If unchecked (asynchronous mode) a link to the scan results in the CxSAST web application is provided in the build results in TeamCity. This is enabled by default. |
Enable Project’s Policy Enforcement | Mark the build as failed or unstable if the project's policy is violated. A policy is assigned to a project from within CxSAST. |
Enable Project's SCA policy enforcement | Mark the build as failed or unstable if the project's SCA policy is violated. ImportantA policy is assigned to a project from within SCA. |
Enable CxSAST Vulnerability Thresholds | Enable this option to initiate vulnerabilities threshold setting options if Enable Synchronous Mode is enabled. |
High / Medium / Low | Configure a threshold for the high, medium, and low severity vulnerabilities. The build is marked as failed, if the number of high, medium or low severity vulnerabilities exceeds the threshold. Available only, if Enable CxSAST Vulnerability Thresholds is checked. If left blank, the respective threshold is ignored. NoticeYou can override these settings later for individual scan tasks. |
Checkmarx Dependency Scan | |
Globally define dependency scan settings | Check to enable the globally defined dependency scan and associated settings. |
Include/Exclude wildcard patterns | Define a comma-separated list of included or excluded wildcard patterns. You may override these settings later for individual jobs/projects. Available, if Globally define dependency scan settings is enabled. |
Use CxOSA dependency scanner | Select to enable the CxOSA dependency scanner and associated settings. Available, if Globally define dependency scan settings is enabled. NoticeYou can either enable OSA scans or SCA scans. |
Archive extract patterns | Define a comma-separated list of archive wildcard patterns to include their extracted content for the scan, for example, *.zip, *.jar, *.ear. Supported archive types are: iar, war, ear, sca, gem, whl, egg, tar, tar.gz, tgz, zip, rar. Leave empty to extract all archives. Available, if Globally define dependency scan settings is enabled and Use CxOSA dependency scanner is selected. |
Execute dependency managers 'install packages' command before Scan | Select this option to scan packages from various dependency managers as part of the dependency scan. Available if Globally define dependency scan settings is enabled and Use CxOSA dependency scanner is selected. NoticeTo use this option, the relevant dependency managers must be installed on every Jenkins worker and/or orchestrator instance running the job. |
Enable CxSca Scan | Select to enable the CxSCA dependency scanner and associated settings. Available, if Globally define dependency scan settings is enabled. NoticeYou can either enable OSA scans or SCA scans. |
CxSCA Server URL | URL of the SCA API endpoint. This option is available, if Enable CxSca Scan has been selected. |
Access Control Server URL | URL of the Access Control server used to log in to SCA. This option is available, if Enable CxSca Scan has been selected. |
CxSCA Web App URL | URL of the SCA web application, used to generate the web report URL. If omitted, the SCA scan runs as usual, but without generating a report URL. This option is available, if Enable CxSca Scan has been selected. |
CxSCA Username | Username to log on to SCA. This option is available, if Enable CxSca Scan has been selected. |
CxSCA Password | Password to log on to SCA. This option is available, if Enable CxSca Scan has been selected. |
CxSCA Account | Customer account in CxSCA used to log in. This option is available, if Enable CxSca scan is enabled. |
<Test Connection> | Click <Test Connection>and wait until the credentials are validated and a successful connection is indicated. |
Package Manager's Config File(s) Path | Use this parameter to provide configuration files of the package managers used in the project, for example Settings.xml for Maven, Nuget.config for Nuget, .npmrc for npm etc. This option is available, if Enable CxSCA Scan has been selected. It is relevant for projects that use private artifactory. Use the CxSCA agent to perfom the scan. the CxSCA agent attempts to perform a dependency resolution using the package manager’s configuration files provided. Example: - “c:\user\.m2\settings.xml”, “c:\user\npm\.npmrc” |
Private Registry Environment Variable | This option is available, if Enable CxSCA Scan has been selected. It is relevant for the Package Manager's Config File(s) Path parameter. In many cases, package manager configuration files reference environment variables, often to provide credentials without storing them in a file. Pass all these variables using this option, for example -env param1:value1,param2:value2 |
Enable Exploitable Path | CxSCA leverages the CxSAST ability to scan the project code in parallel with the manifest file to test whether your code calls the vulnerable open-source packages and uses the vulnerable methods. This means it tests whether an 'exploitable path' exists from your project code to the vulnerable package code. For additional information on this functionality, refer to Exploitable Path in the CxSCA documentation space. Check to enable this functionality. |
Server URL | The URL of the Checkmarx SAST Endpoint. This is the Checkmarx server endpoint used to retrieve scan results from the CxSAST server, which are required for the Exploitable Path detection by the CxSCA scan. |
Username | Username to access the Checkmarx server |
Password | Password to access the Checkmarx server |
<Connect to Server> | Click to verify the server connectivity. |
Enable Project's Policy Enforcement | If this functionality is active, the build breaks, if either the CxOSA, CxSAST or the CxSCA policies have been violated. The project policy is defined inside CxSAST or CxSCA. If Jenkins is used without a policy assigned to the project, the output still reads "Policy: Compliant". In case of a CxSCA scan, the name and description of all violated policies and rules within are displayed. In addition, the build is reported as failed, if any of the violated policies indicate a ‘Break the Build’ action. |
Enable Dependency Scan Vulnerability Thresholds | Enable the Dependency Scan vulnerability threshold settings for all job and project options that are not using local settings. This enables you to define thresholds for vulnerabilities of high, medium and low severity. NoticeYou may override these settings later for individual jobs/projects. |
High/Medium/Low | Define the dependency scan high severity vulnerability threshold. If set, the threshold is crossed in case the number of high/medium/low severity vulnerabilities exceeds it, available if Enable Dependency Scan Vulnerability Thresholds is enabled. |
Adding a Proxy Server between the TeamCity System and the CxSAST Server
If your network requires a proxy server to connect to the CxSAST server, you have to set it up in your TeamCity deployment. Once the proxy server is in place, you have to enable it for the TeamCity server and for every TeamCity agent.
The syntax to enable the proxy server is the following:
-Dhttp.proxyHost=<proxy-host> -Dhttp.proxyPort=<proxy-port>-Dhttp.proxyUser=<proxy-user> -Dhttp.proxyPassword=<proxy-password> -Dcx.isproxy=true
To disable the proxy server at a later stage, replace -Dcx.isproxy=true with -Dcx.isproxy=false for the respective TeamCity server or TeamCity agent.
Navigate to the bin folder inside the TeamCity installation folder, for example <TeamCity installation>\bin.
Open teamcity-server.bat in your text editor. Paste the following line to the beginning of the file:
set TEAMCITY_SERVER_OPTS=-Dhttp.proxyHost=<proxy-host> -Dhttp.proxyPort=<proxy-port>-Dhttp.proxyUser=<proxy-user> -Dhttp.proxyPassword=<proxy-password> -Dcx.isproxy=true
Save the file and restart the TeamCity server.
Notice
Under Linux, add the line provided above to the beginning of <TeamCity installation>/bin/teamcity-server.sh .
Navigate to the bin folder residing under the buildAgent folder, for example <TeamCity installation>\buildAgent\bin.
Open agent.bat in your text editor. Paste the following line to the beginning of the file:
set TEAMCITY_AGENT_OPTS=-Dhttp.proxyHost=<proxy-host> -Dhttp.proxyPort=<proxy-port>-Dhttp.proxyUser=<proxy-user> -Dhttp.proxyPassword=<proxy-password> -Dcx.isproxy=true
Save the file and restart the TeamCity agent.
Repeat this for each TeamCity agent.
Adding a Self-Sign Certificate to work over HTTPS
Download the certificate from the destination host. To do so, follow the instructions below for your respective browser.
Enter the URL of the certificate, for example https://90selfsigned.dm.cx.
Click the HTTPS certificate chain. The HTTPS certificate chain is represented by the lock icon next to the URL.
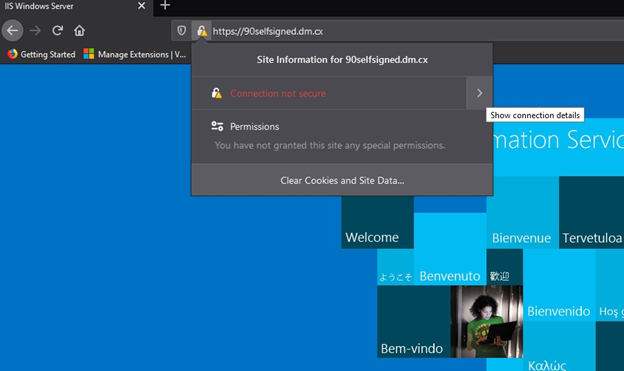
Click More Information to view the Page Info site. The Page Info menu appears with the General parameters displayed.
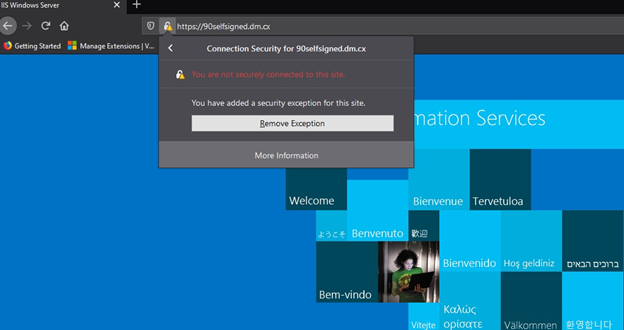
From the menu, select Security to display security parameters. From this page, you also can view the certificate.
Click <View Certificate> to display the certificate summary and download the certificate.
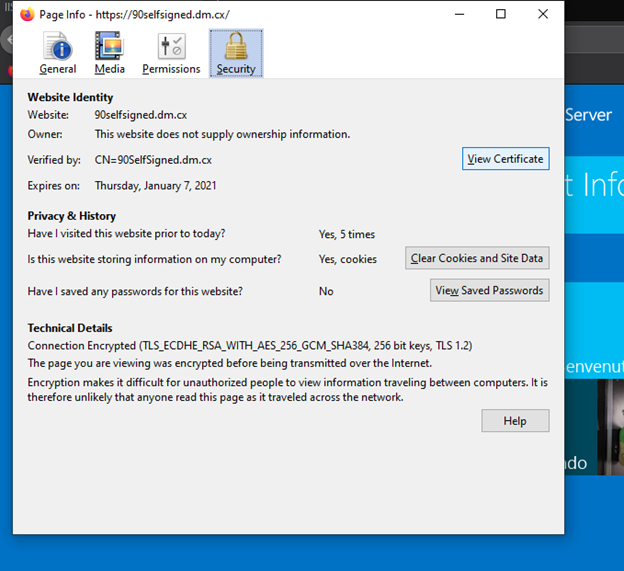
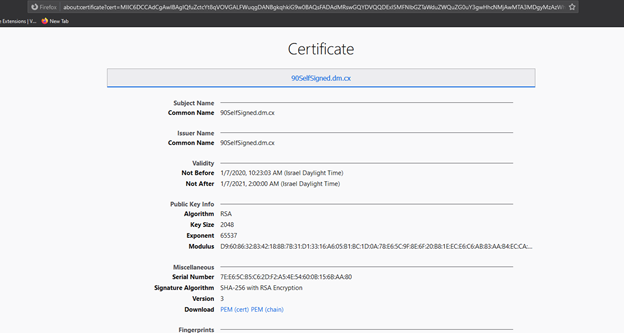
Follow the Download link to download the certificate.
Enter the URL of the certificate, for example https://90selfsigned.dm.cx.
Click <Not secure>. A menu with security options appears.
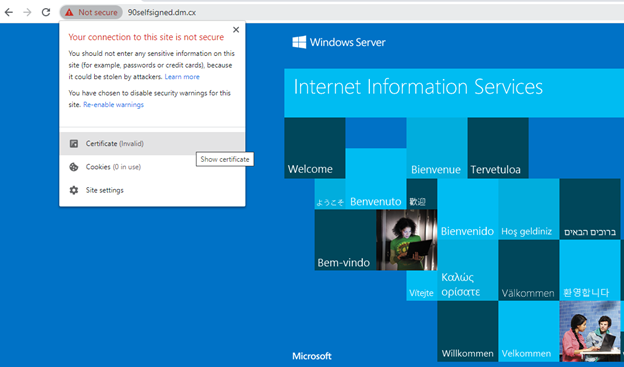
Click Certificate. The certificate is displayed.
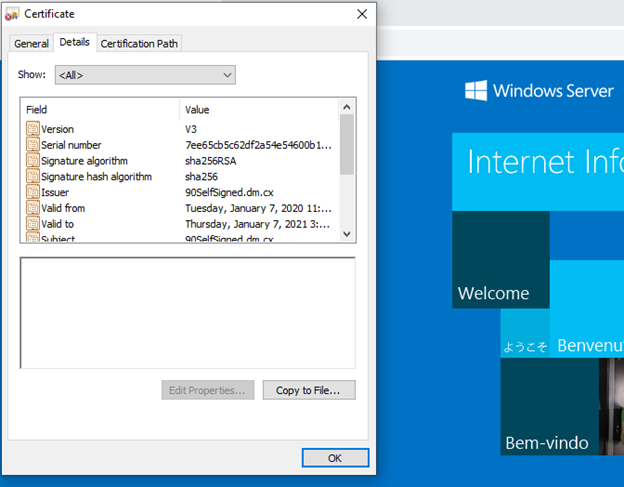
Select the Details tab and click <Copy to File...>. The Certificate Export wizard appears.
Follow the onscreen instructions and select the options as illustrated with the screen images below.
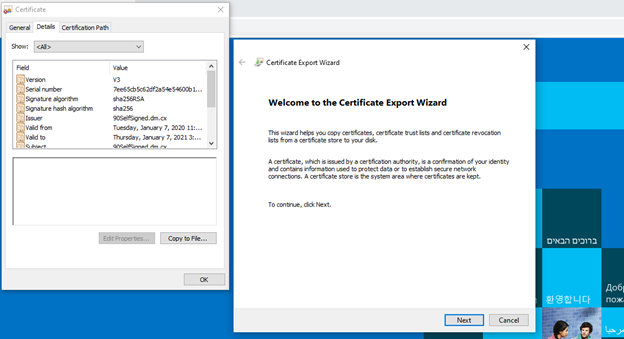
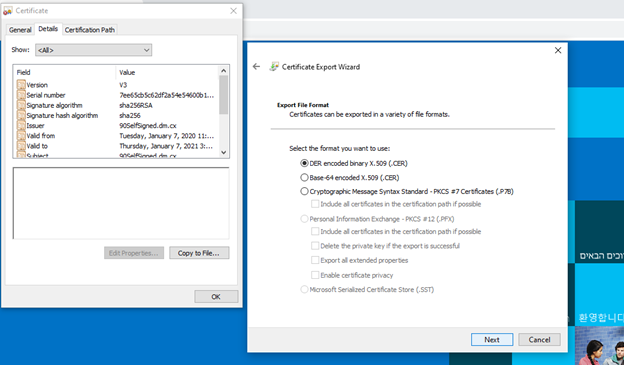
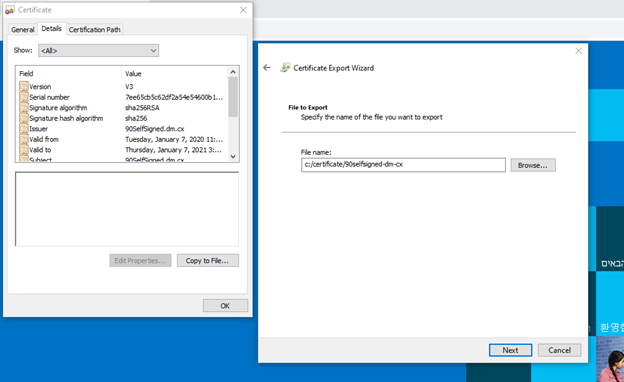
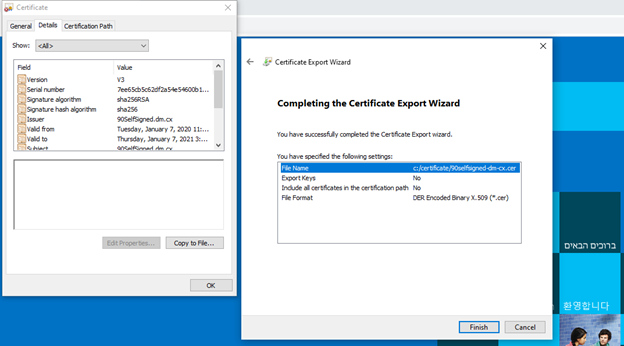
Select File Name and click <Finish> to download the certificate file.
Once the certificate has been downloaded, navigate to teamCityPath\jre\lib\security\ and locate the file called cacerts.
Open the Windows Command Prompt (CMD) in Administration mode.
Enter keytool -import -alias certificate1 -keystore cacerts -file cert.pem.
Enter the default password when prompted. The default password is changeit.
In the syntax above, alias is the name of the certificated and cacerts is the Keystore file.
Notice
If the TeamCity server uses the Java installed on the host and not the JRE, the certificate must be added to the the installed Java's JRE instead at <Java location>\jre\lib\security\cacerts. The certificate must be added accordingly.