Configuring OpenID Connect Integration
Configuring an OpenID Provider via OKTA
Create an Application via OKTA
Log in to the OKTA console using an admin account.
In the OKTA home page, click Applications → Add Application
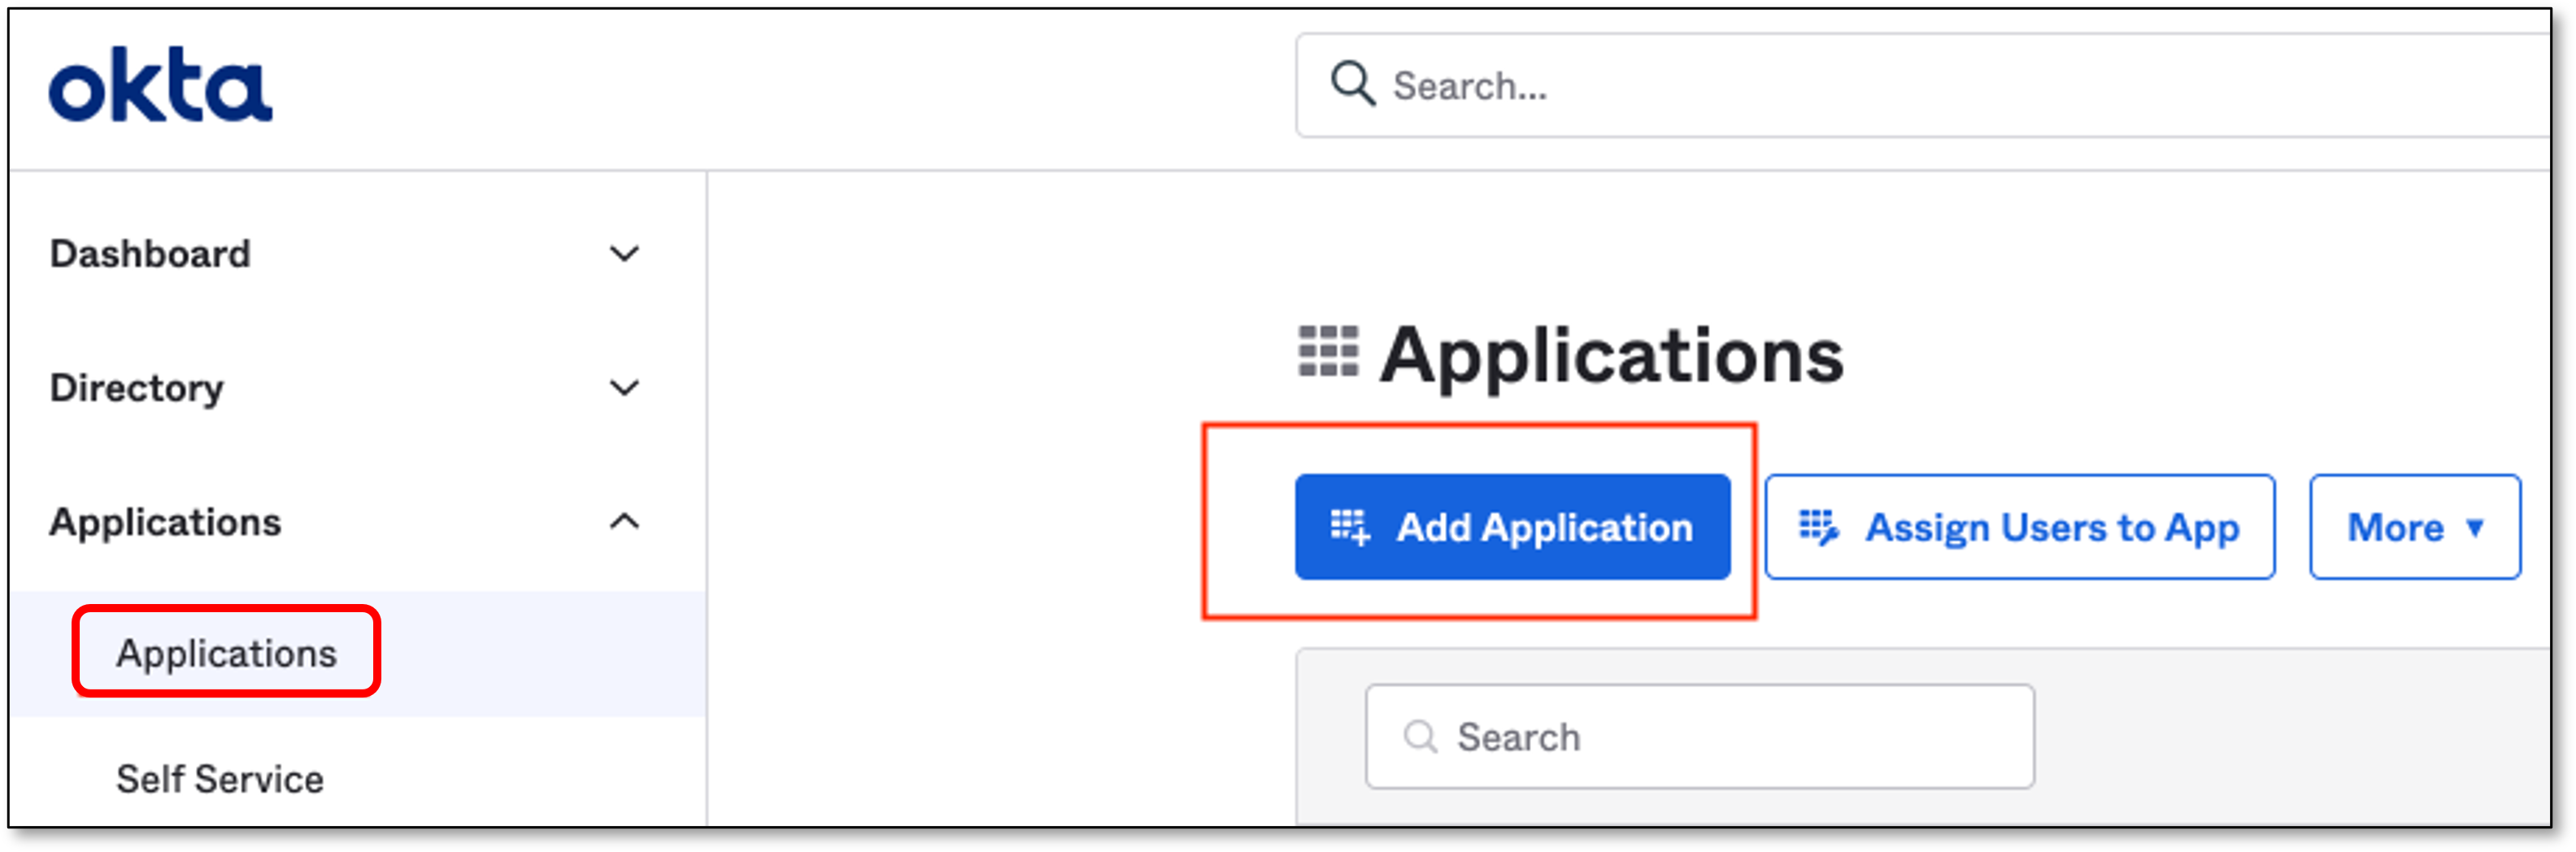
In the Add Application screen, click Create New App
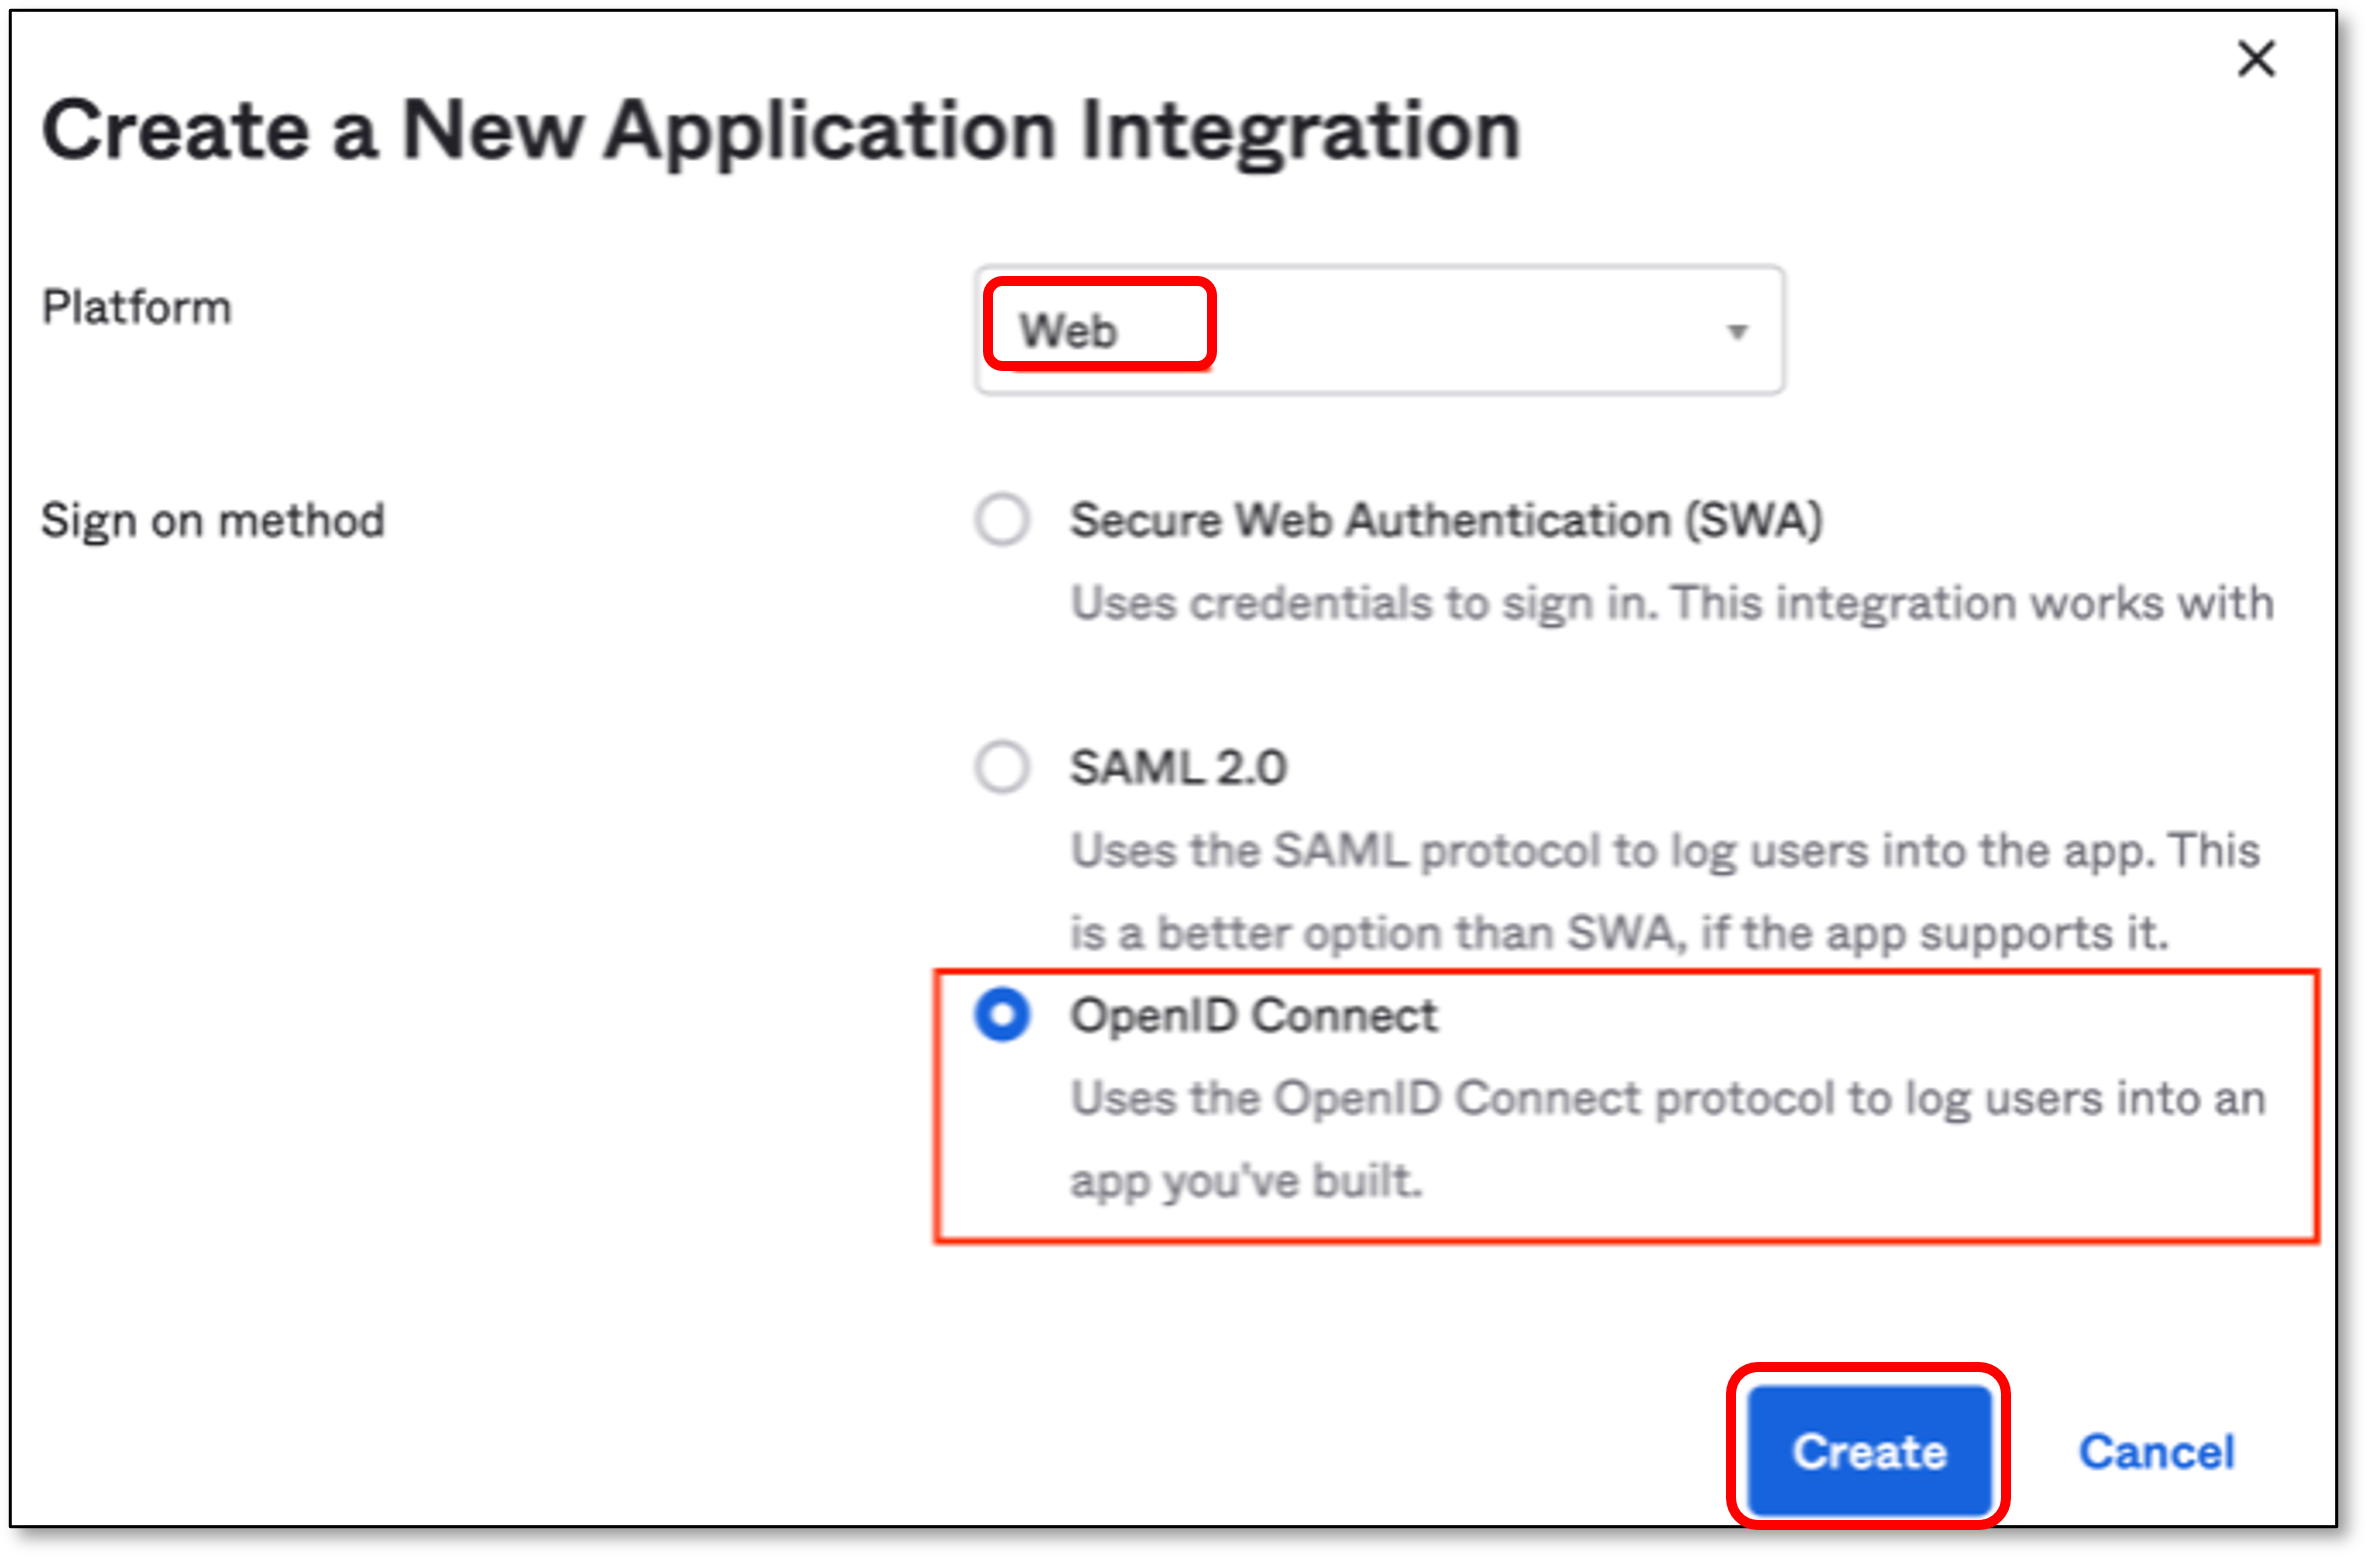
In the Create a New Application Integration screen, perform the following:
In the Platform field, verify that Web is selected (default).
In the Sign on method section, select OpenID Connect
Click Create
In the General Settings section, fill in the Application name field with a name for the SSO application.
Note
Other fields are optional
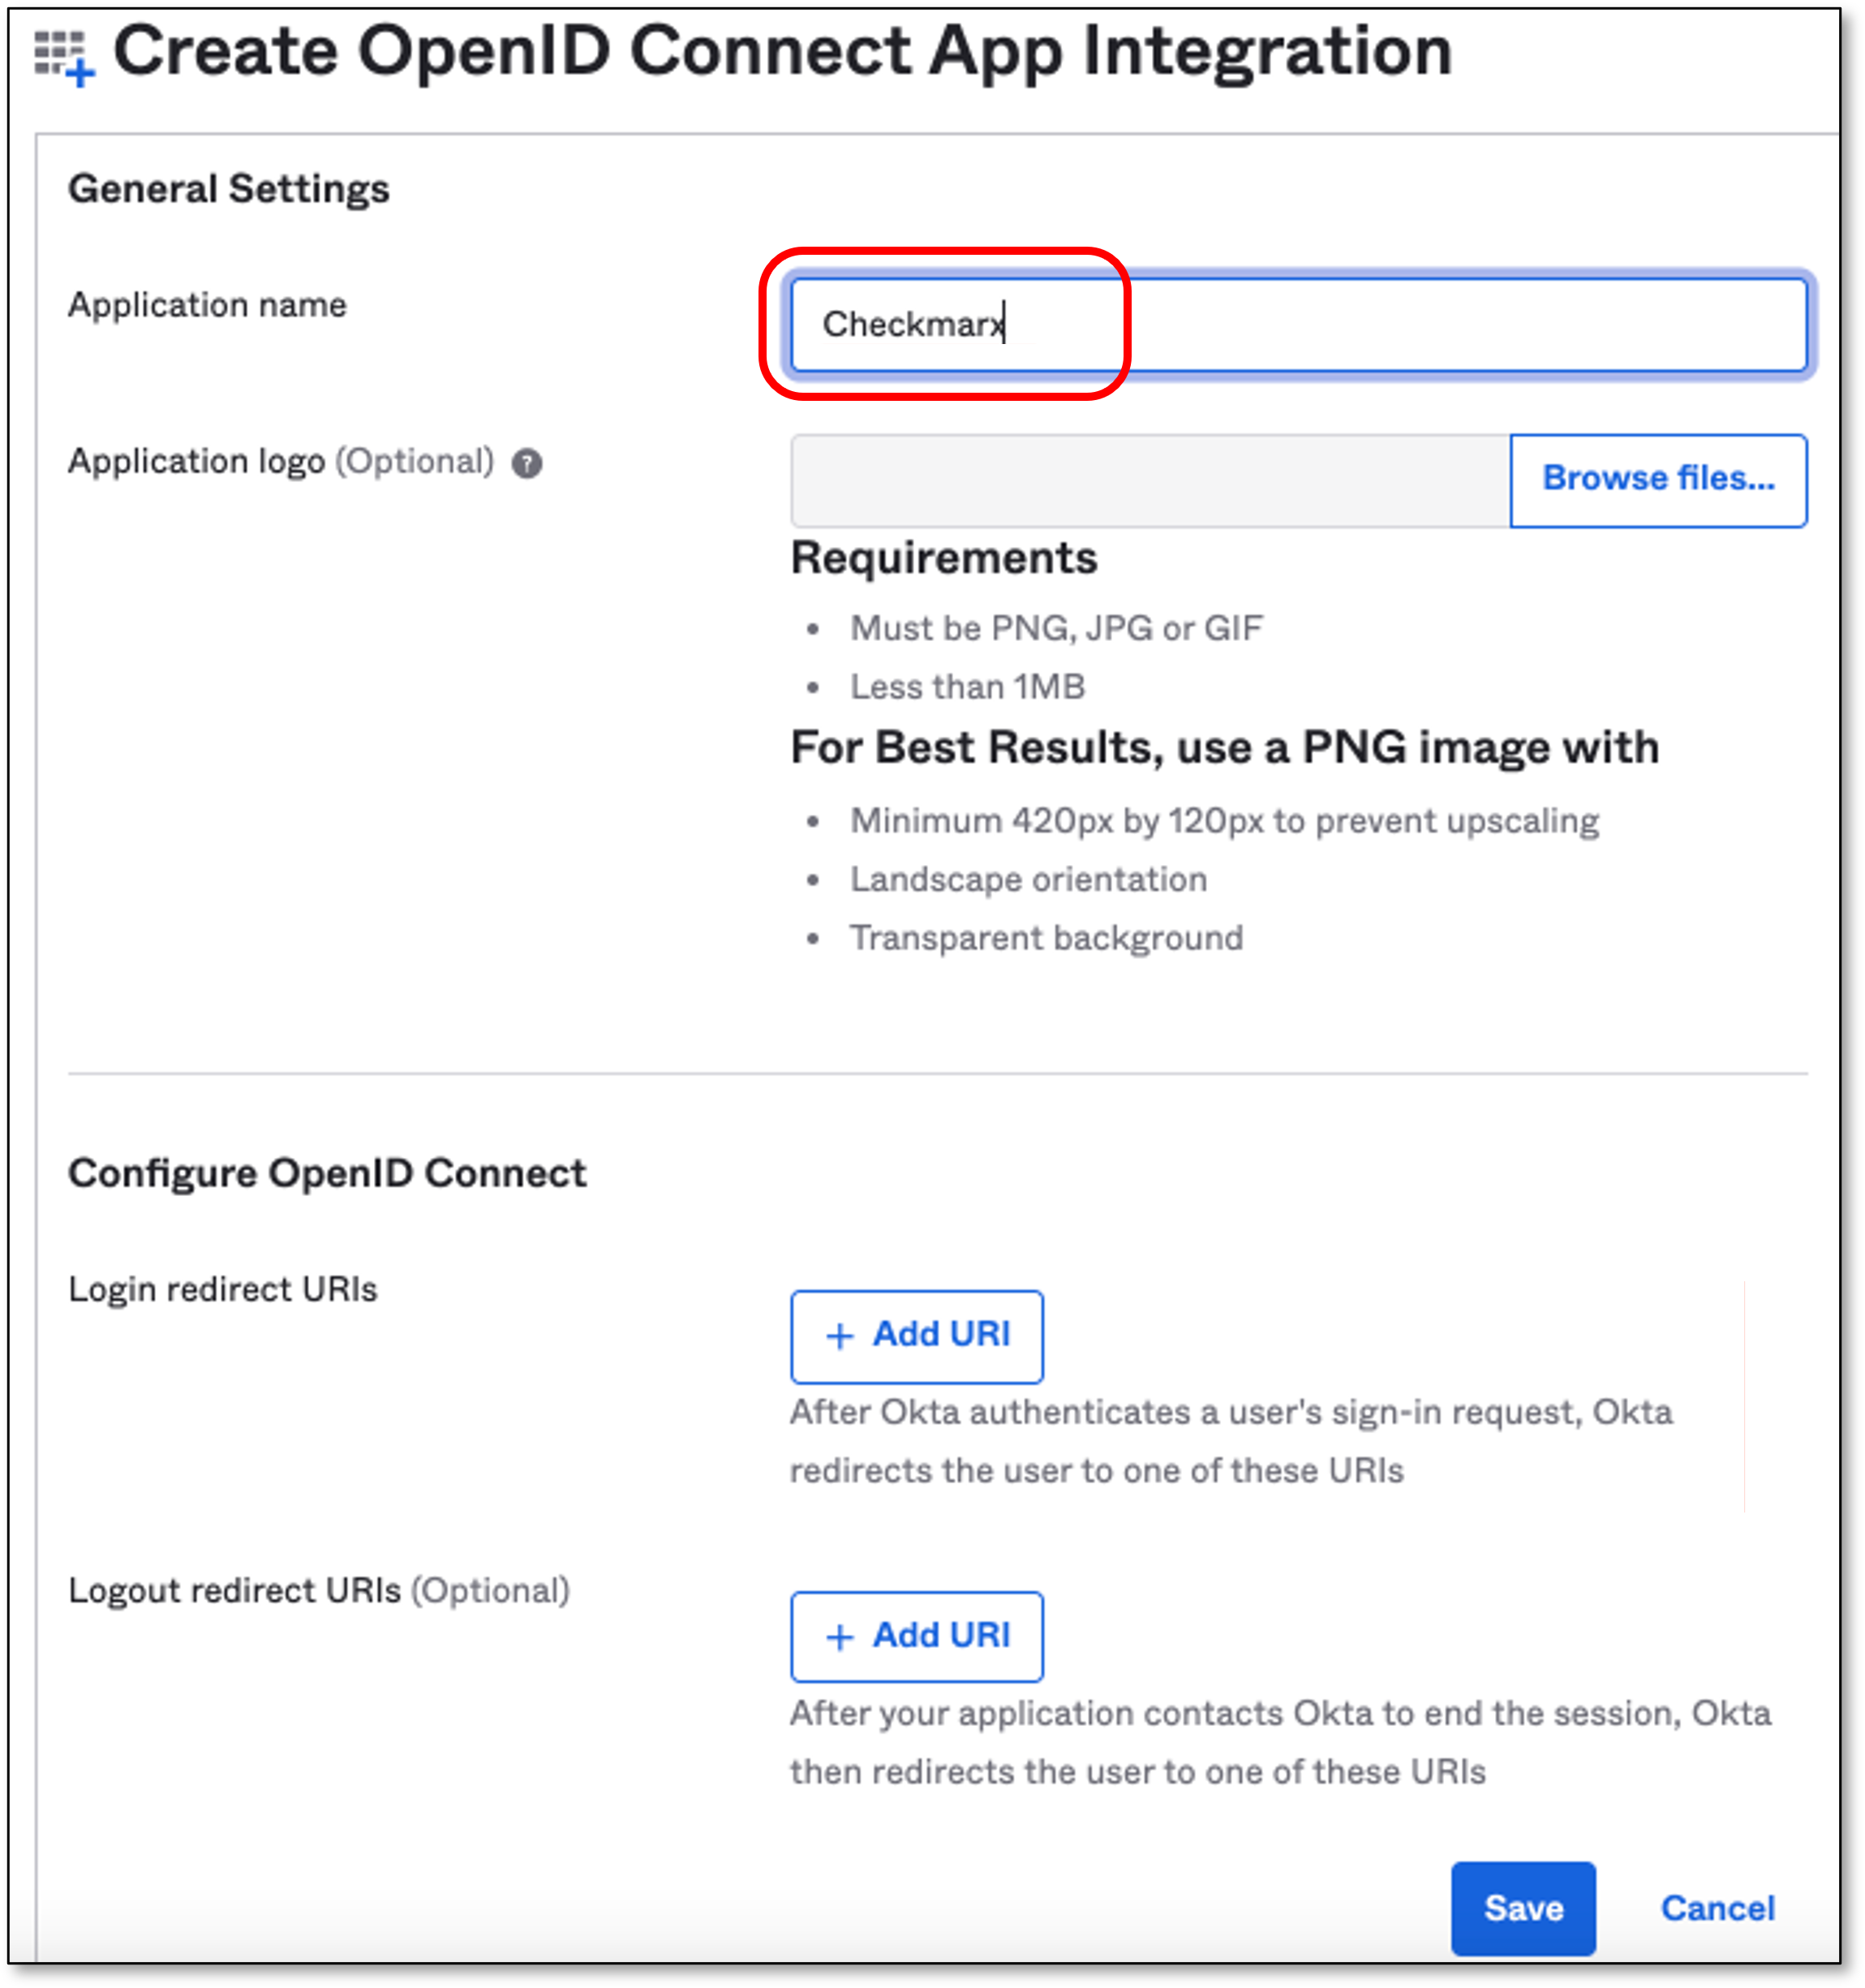
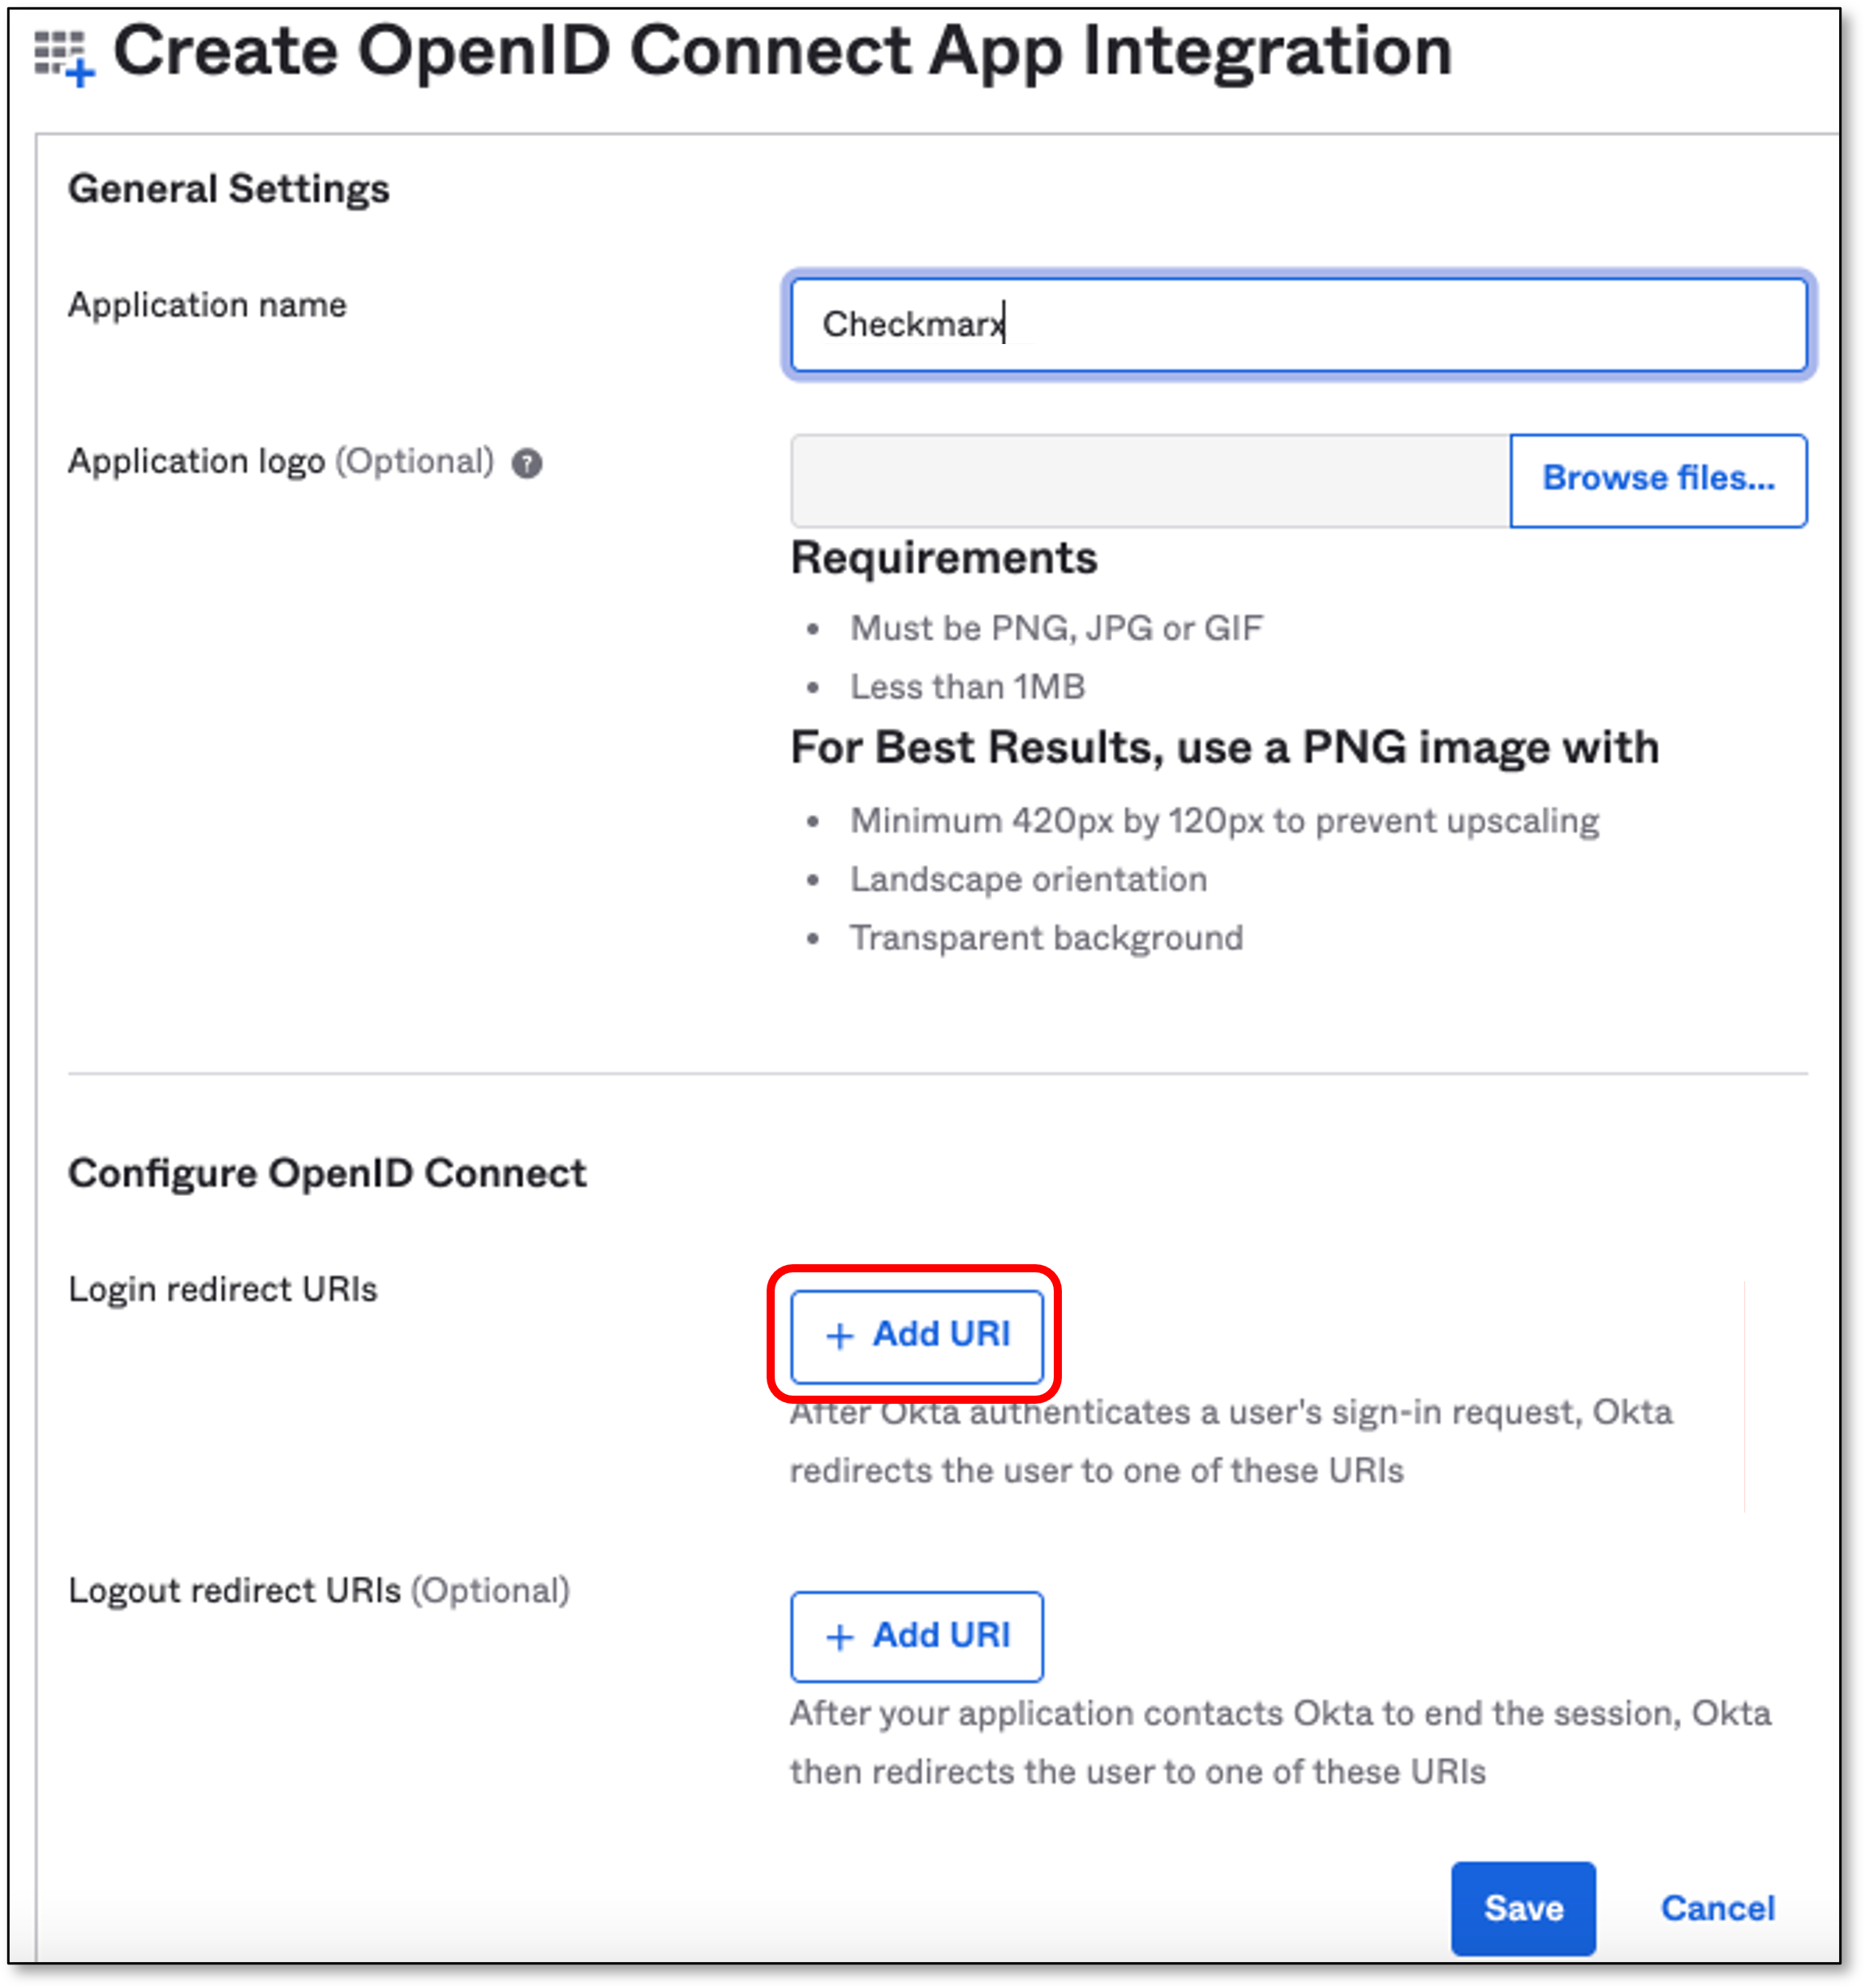
In the Configure OpenID Connect section, click Add URI
Note
The Login Redirect URI should be taken from Checkmarx Identity and Access Management console.
Create an OpenID Connect Identity Provider via Checkmarx
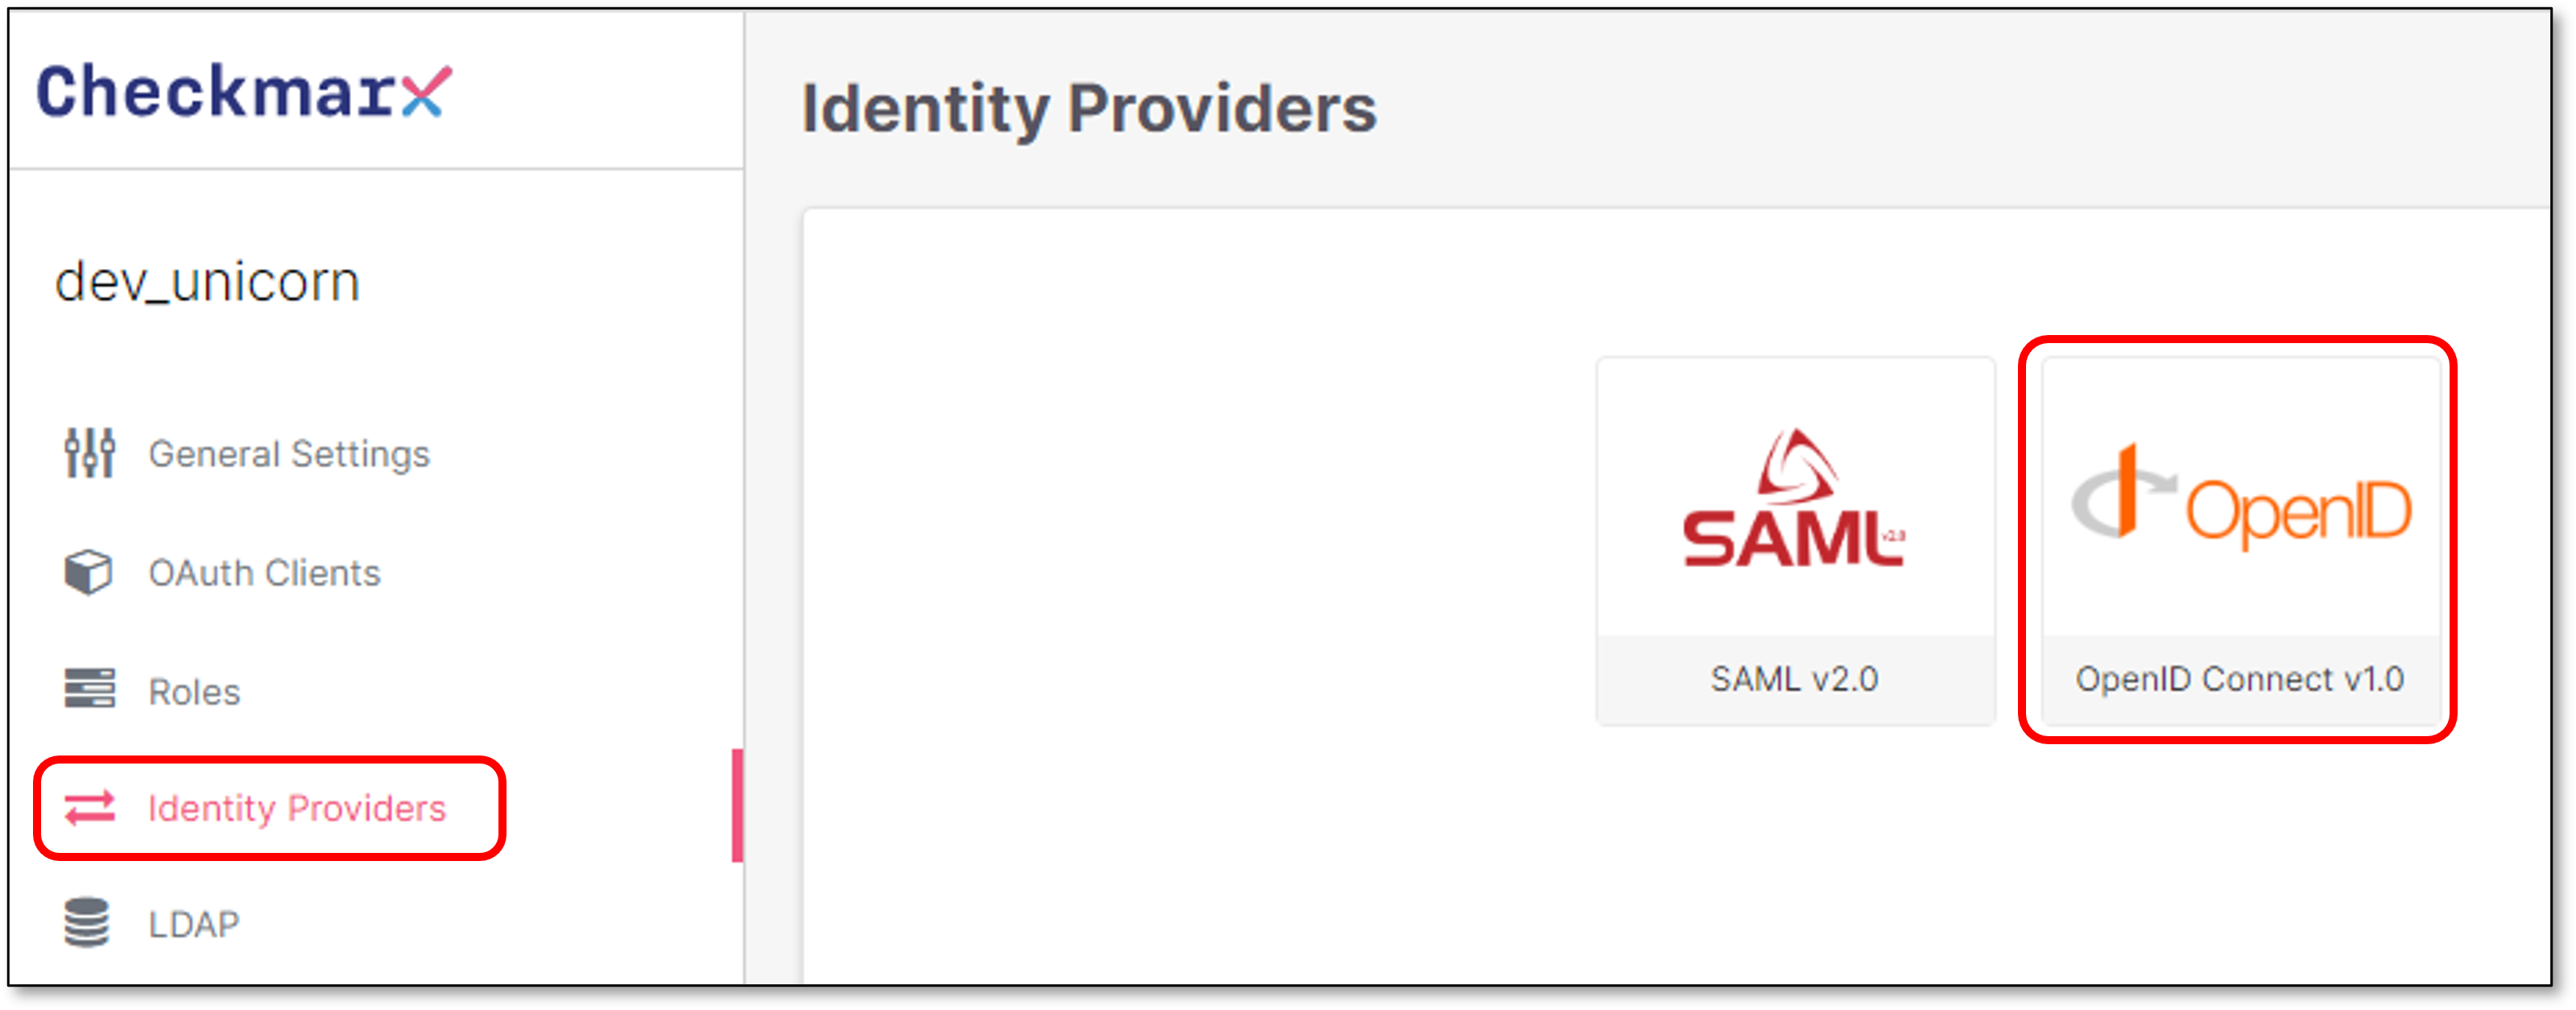
Go to Checkmarx Identity and Access Management console → Identity Providers and click OpenID Connect v1.0
In the Add Identity Provider screen → App Settings section, configure the Provider’s Alias.
Note
The Alias will be a part of the Redirect URI
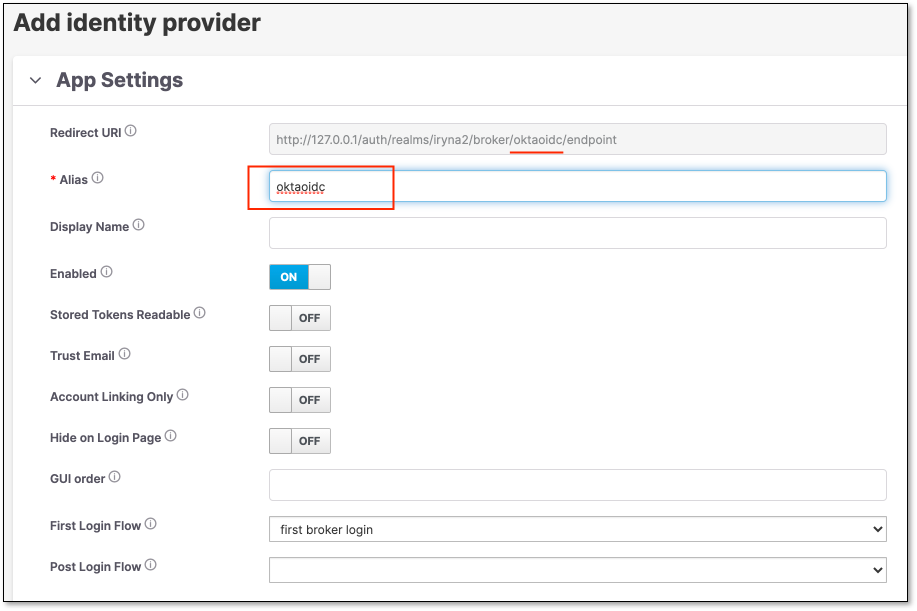
Copy the Redirect URI from the App Setting section.
Configure Checkmarx Identity Provider Details via OKTA
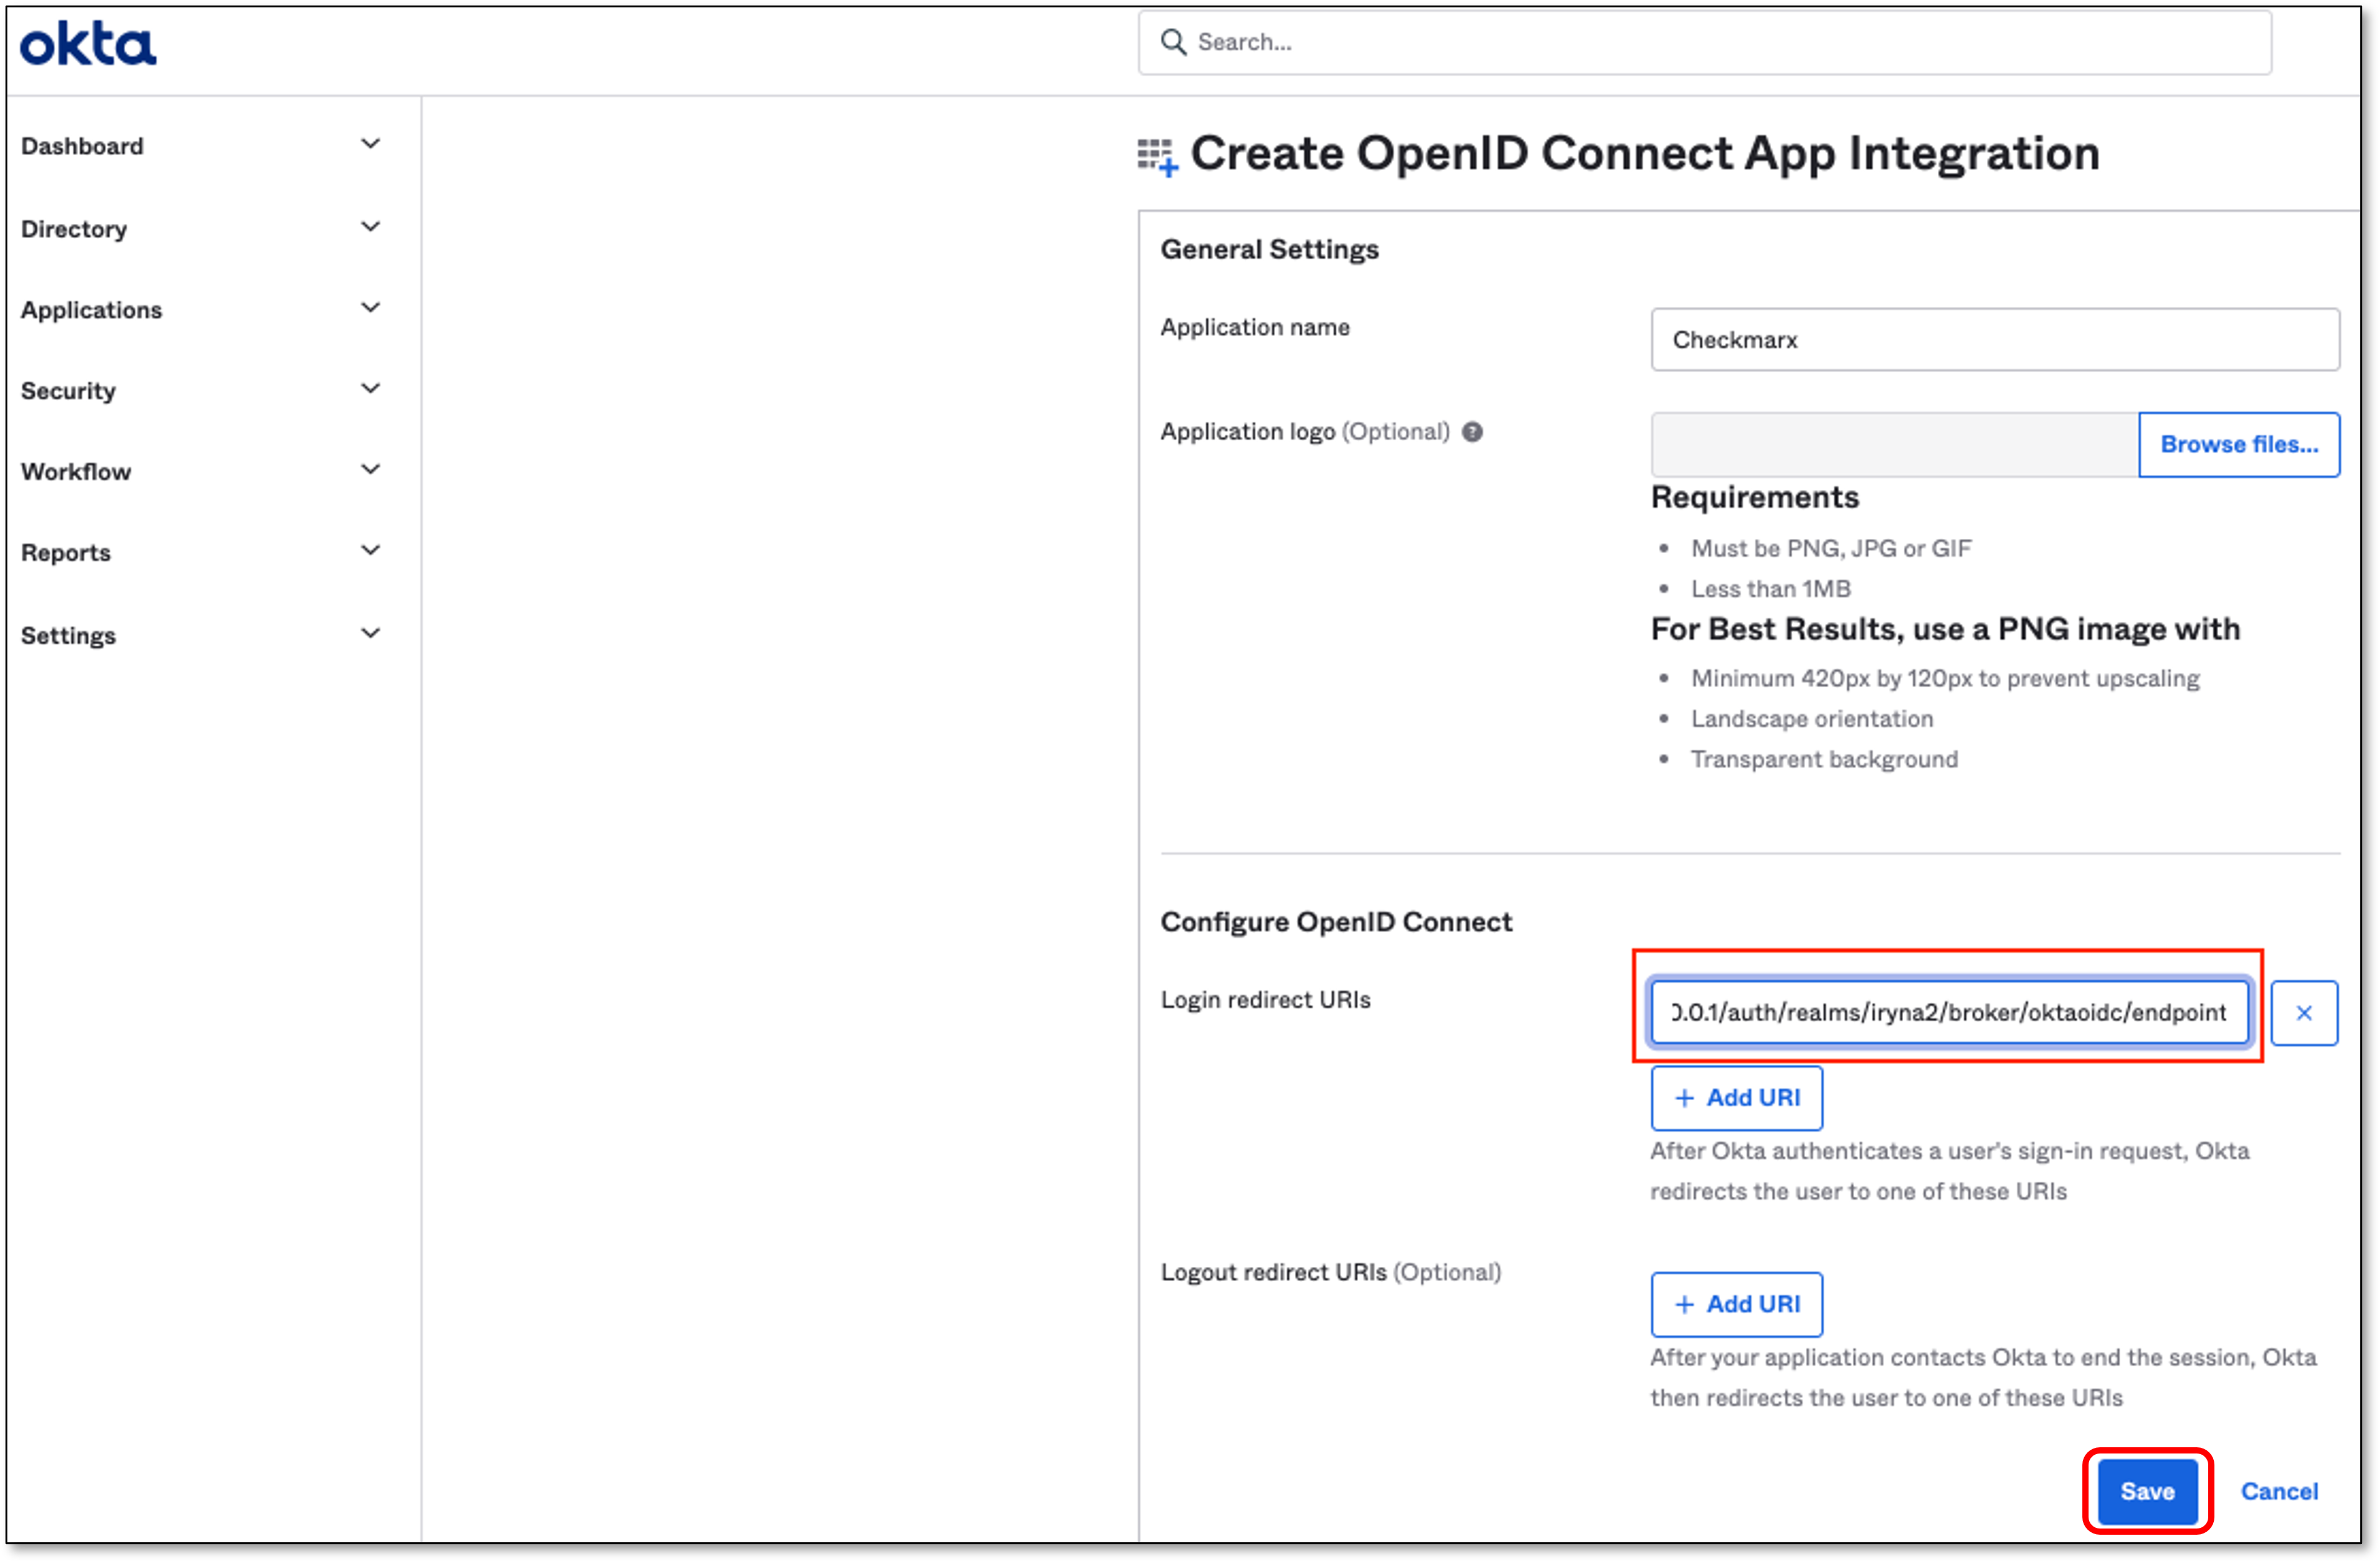
Go back to OKTA and perform the following:
In the Configure OpenID Connect section → Login redirect URIs, paste the copied Redirect URI from the previous step.
Click Save
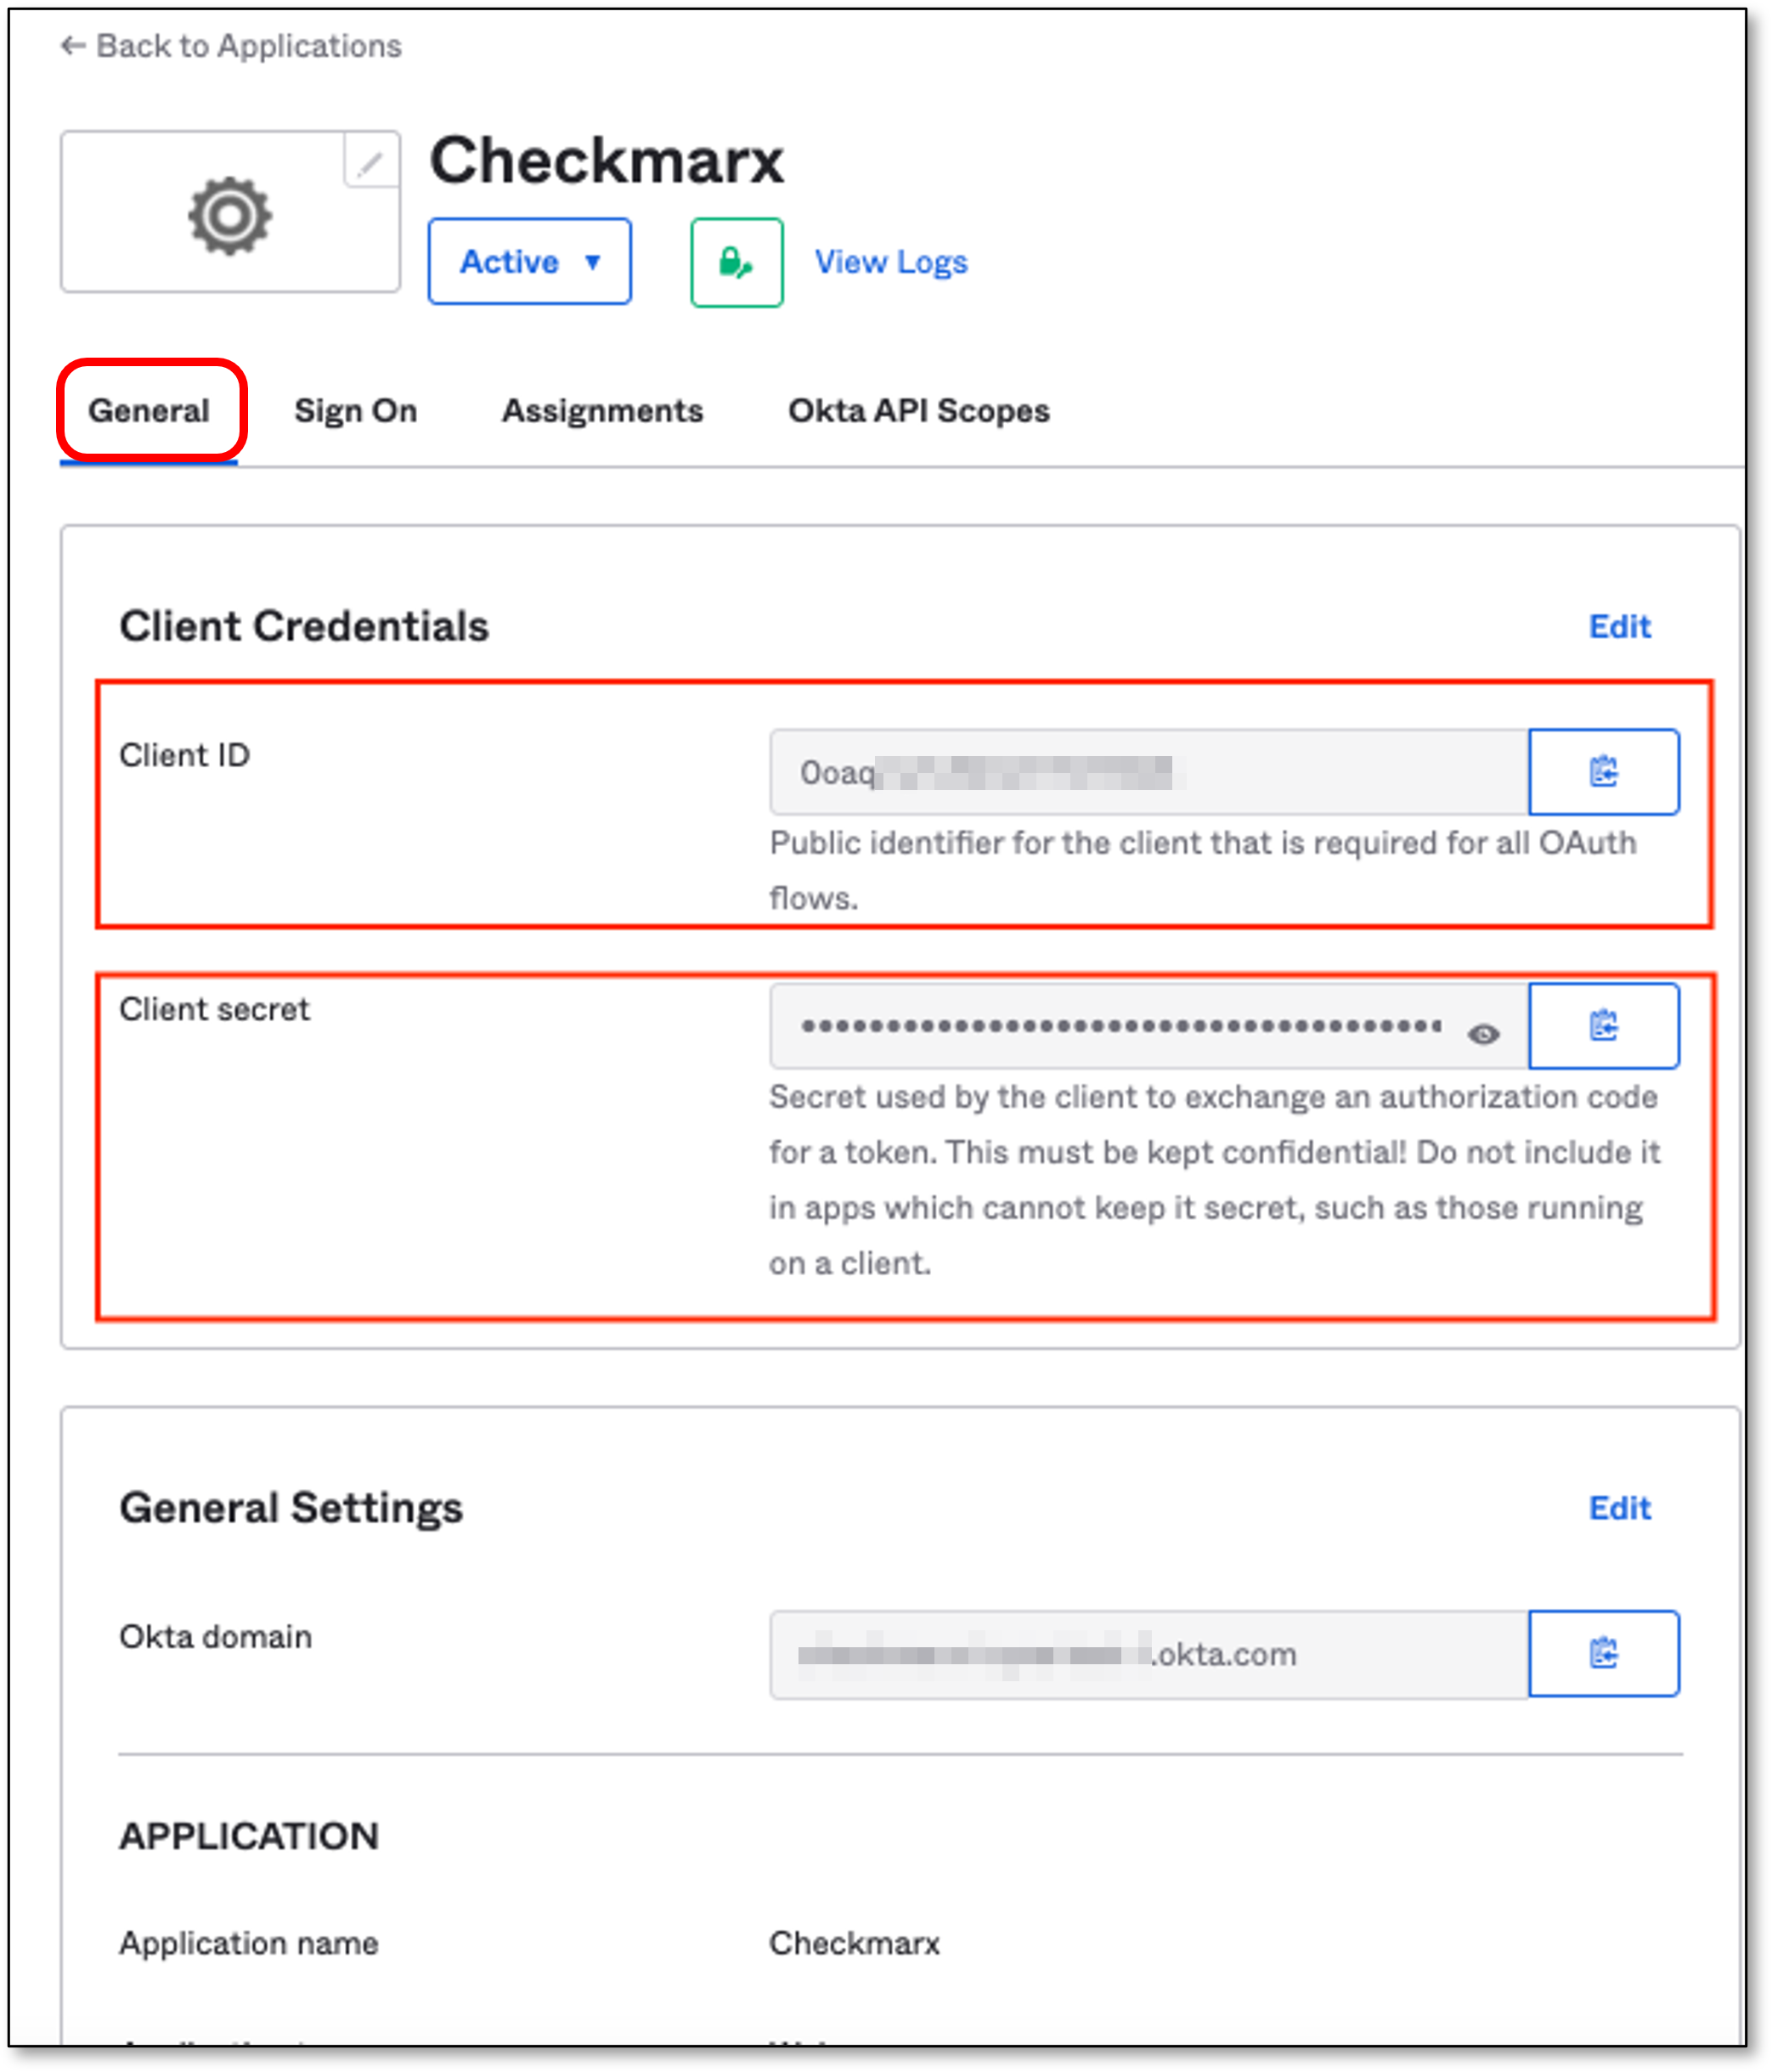
The page with the Application details opens automatically.
Upon the save of the Application, OKTA will generate Client Credentials.
Click on the General tab.
Copy the Client ID & Client secret
Configure OpenID Connect Settings via Checkmarx
Go back to Checkmarx Identity and Access Management console.
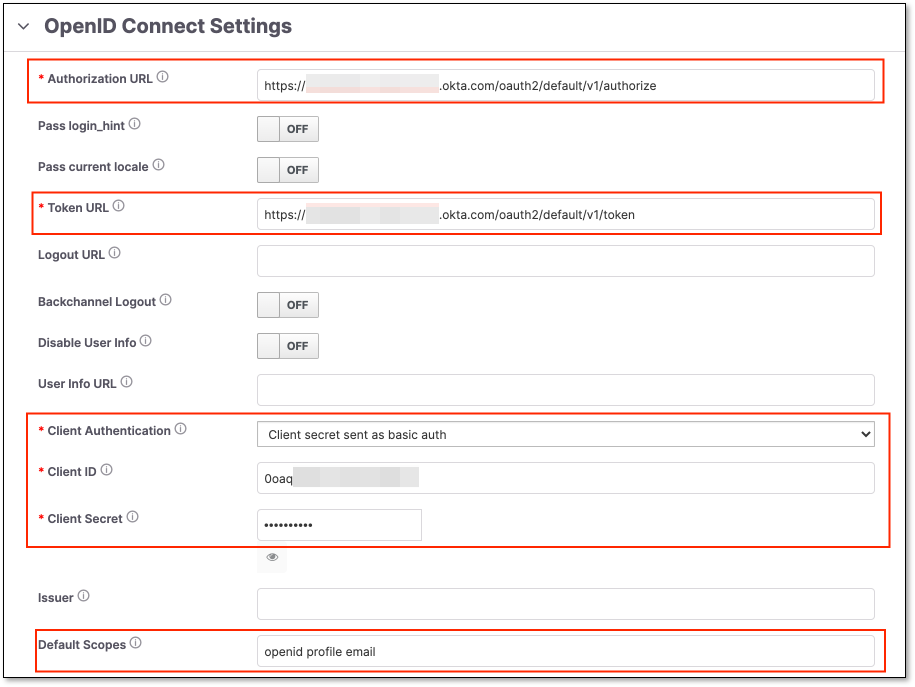
In the OpenID Connect Settings section fill in the following fields:
Authorization URL and Token URL - Should be taken from the following page:
https://<OKTA account URL>/oauth2/default/.well-known/openid-configuration?client_id=<Application Client ID>Replace <OKTA account URL> with your actual account URL and the <Application Client ID> with the Application Client ID.
For example, for Checkmarx OKTA it will look like:
{"errorCode":"invalid_client","errorSummary":"Invalid value for 'client_id' parameter.","errorLink":"invalid_client","errorId":"oaeFAmNeUfFQR2k5EQVEjlwpQ","errorCauses":[]}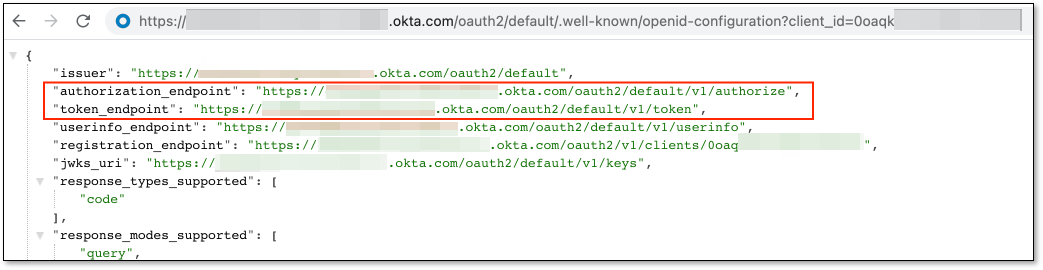
Client Authentication - Should be Client secret sent as basic auth
Client ID and Client Secret - OKTA Client ID and Client Secret.
Default Scopes - Should be openid profile email
Assign People via OKTA
Go back to OKTA and perform the following:
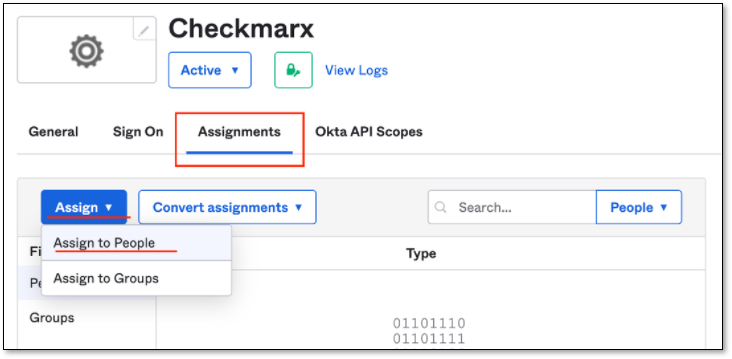
Click on Assignments tab.
Click Assign → Assign to People
The Assign Checkmarx to People popup will be presented.
Select people who will be able use the SSO.
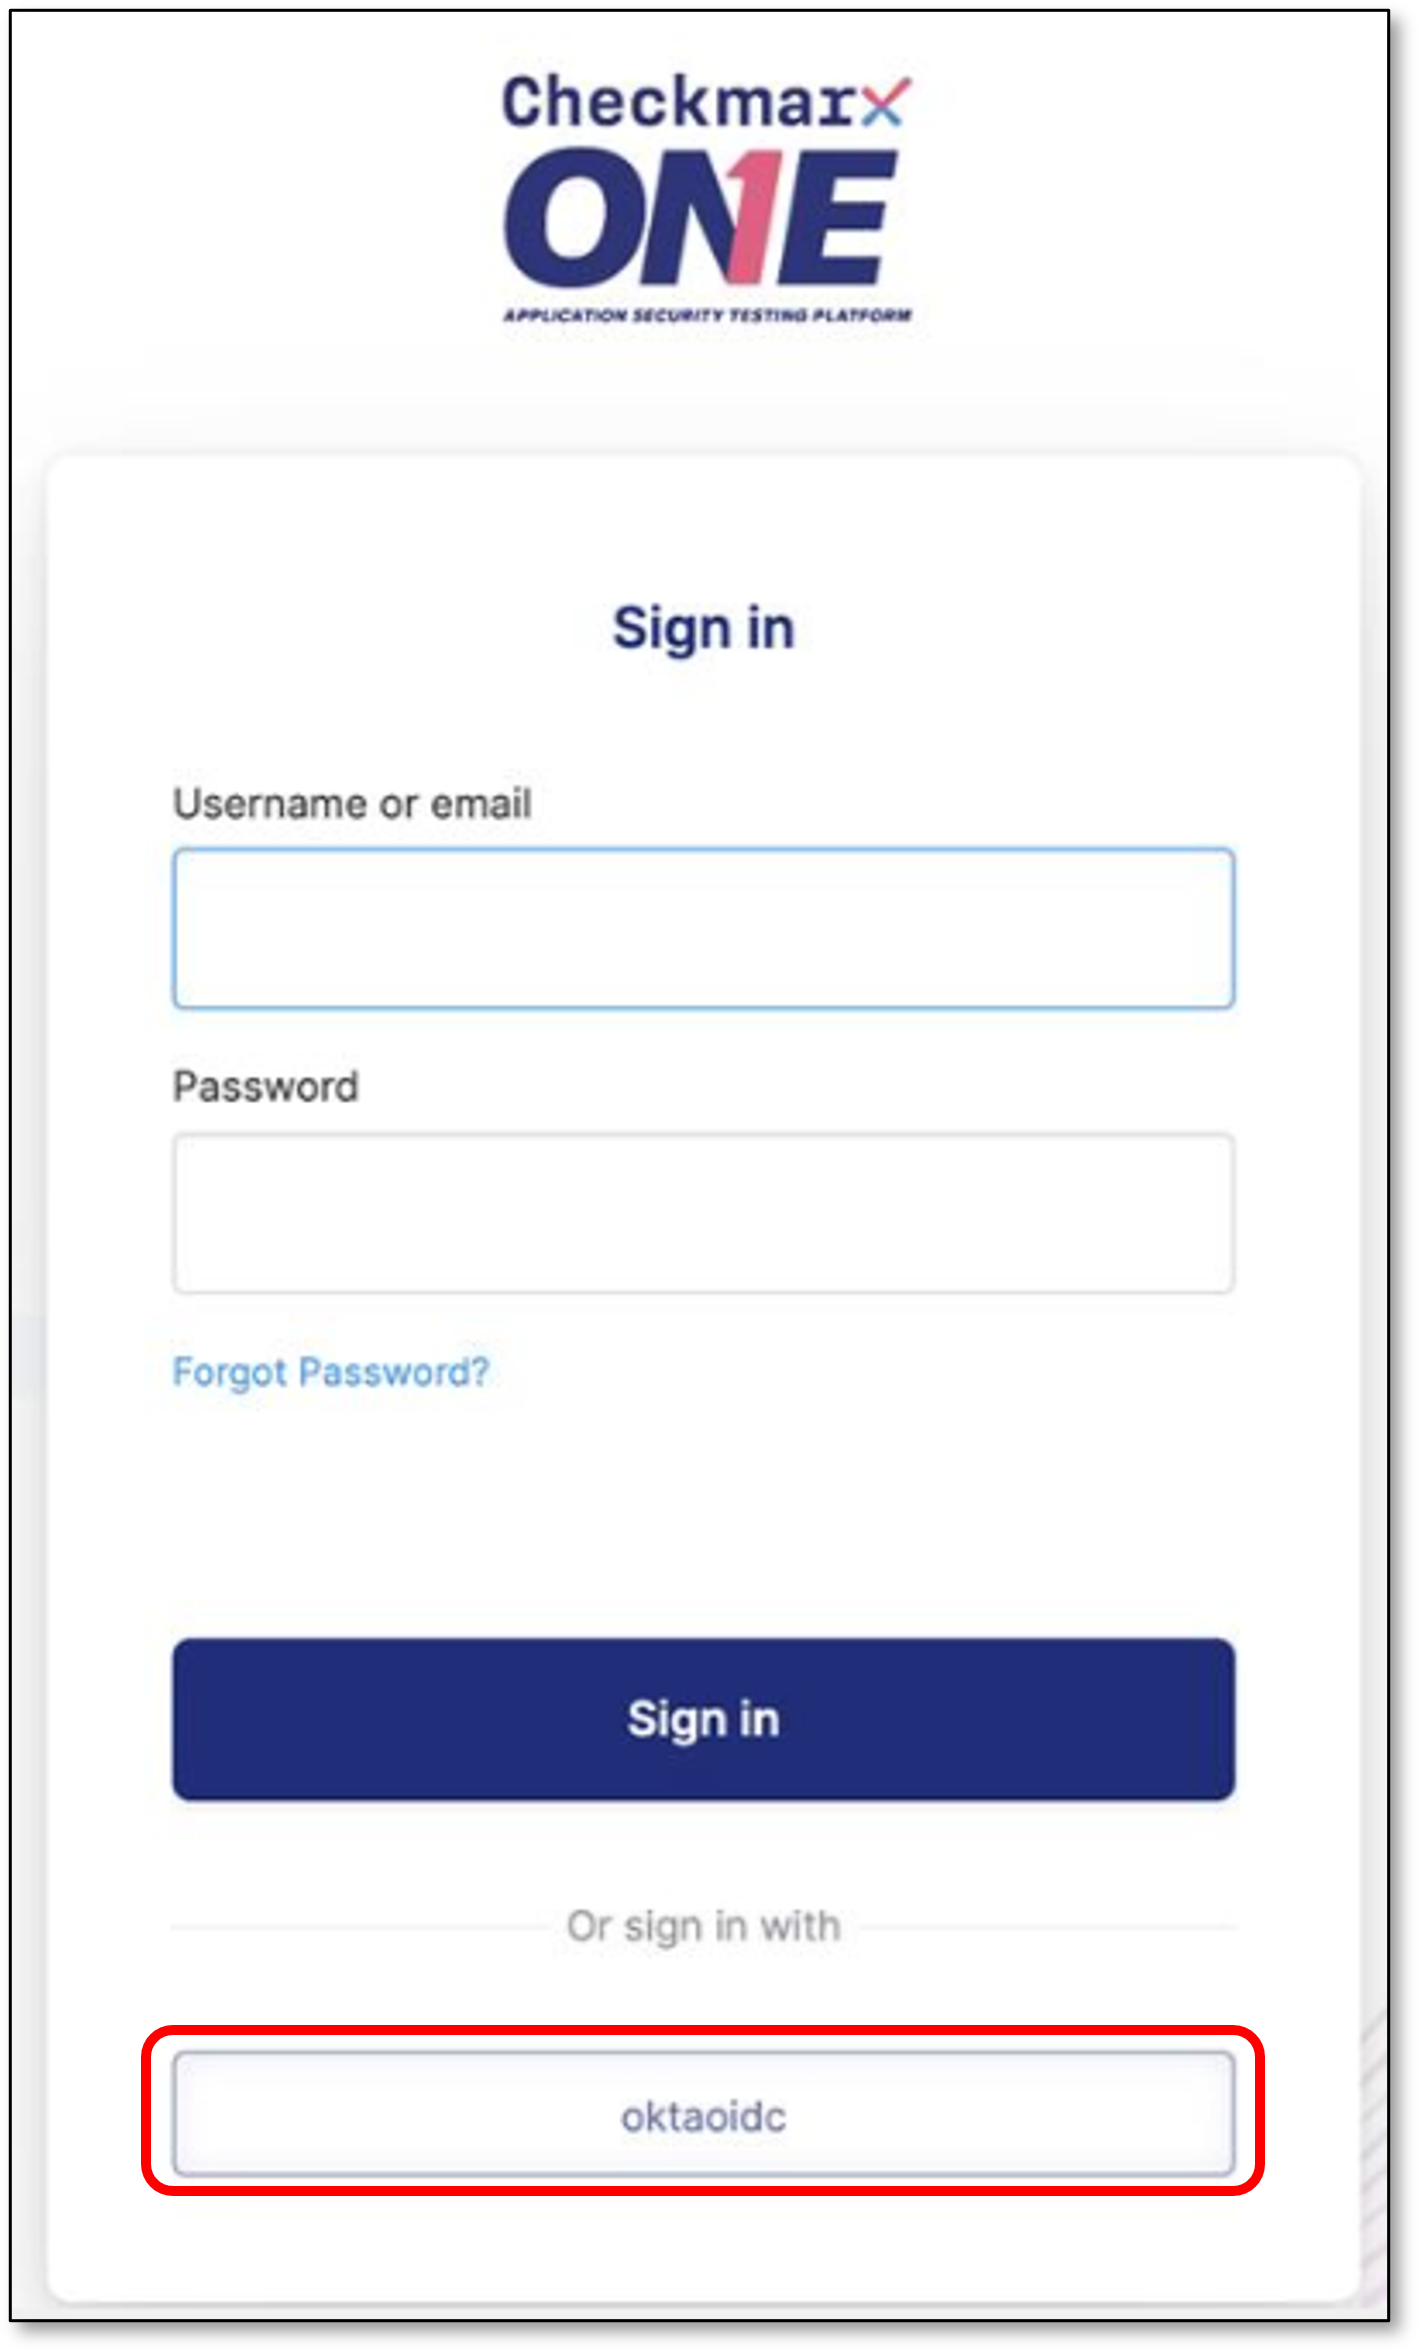
Login to Checkmarx One using the created OKTA OpenID Connect account.
OpenID Connect Mappers
The following are the OpenID Connect Mappers available in Checkmarx One:
Teams to Groups Mapper: This mapper does not create new groups and only allows mapping values from the configured claim to existing groups.
Advanced Claim to Group: If all claims exist, the user is assigned to the specified group.
Hardcoded User Session Attribute: When a user is imported from a provider, a specific user session attribute is hardcoded.
Set Client Roles from Exchange Token: When a user is imported from a provider, the client roles are set from the token claim.
Attribute Importer: Imports the declared claim if it exists in ID, access token, or the claim set returned by the user profile endpoint into the specified user property or attribute.
Advanced Claim to Role: If all claims exist, the user is granted the specified realm or client role.
Hardcoded Role: When a user is imported from the provider, it hardcodes a role mapping.
Hardcoded Group: Assigns the user to the specified group.
User Session Note Mapper: Adds every matching claim to the user session note. This can be used together for instance with the User Session Note protocol mapper configured for your client scope or client, so that claims for 3rd party IDPs would be available in the access token sent to your client application.
Claim to Role: If a claim exists, grants the user the specified realm or client role.
Hardcoded Attribute: When a user is imported from provider, hardcode a value to a specific user attribute.
Username Template Importer: Format the username to import.