- Checkmarx Documentation
- Checkmarx One
- Checkmarx One CLI Tool
- Configuring the Checkmarx One CLI
Configuring the Checkmarx One CLI
Configuration Methods
CLI configuration parameters can be submitted using three different methods, as follows:
CLI parameters - when submitting any CLI command you can add the configuration parameters.
Configuration file - a configuration file can be created by running the CLI
configurecommand. See configureNote
By default, the configuration file is stored in the user's home directory under a subdirectory named ($HOME/.checkmarx). It is possible to store the file in a different location and use the environment variable
CX_CONFIG_FILE_PATHto reference the file location.Environment variables - the environment variables of your system.
Variables Hierarchy
When variables are submitted using multiple methods, the following precedence is used when there is a conflict between the different provided values:
CLI parameters
Configuration file
Environment variables
Authentication
In order to submit CLI commands you need to be authenticated for your Checkmarx One account. The required authentication parameters can be submitted as part of the CLI command or via Config or Environment variables (see Checkmarx One CLI Config and Environment Variables for details). Authentication can be done either via an OAuth Client or an API Key.
Required Parameters
The following parameters are required for authentication, depending on the type of authentication used.
cx_apikey
To generate an API Key use the following procedure:
Creating an API Key for Checkmarx One Integrations You can generate an API Key by logging in to Checkmarx One and generating a new API Key, as described below. Alternatively, an API Key can be generated using the Authentication API.
The roles (permissions) assigned to an API Key are inherited from the user who is logged in when the API key is generated. Therefore, make sure that you are logged in to an account with the appropriate permissions.
Note
The minimum required role for running an end-to-end flow of scanning a project and viewing results via the CLI or CI/CD plugins is
plugin-scanner.Alternatively, you can use the combination of the following roles: CxOne composite role
ast-scanner, CxOne roleview-policy-managementand IAM roledefault-roles.Warning
Whenever you update your Checkmarx One license (e.g., adding a new scanner) all existing API Keys become invalid. You will need to generate new API Keys to replace those that are used in your integrations and plugins.
To Log in to Checkmarx One:
Open the URL for your environment.
US Environment - https://ast.checkmarx.net
US2 Environment - https://us.ast.checkmarx.net
EU Environment - https://eu.ast.checkmarx.net
EU2 Environment - https://eu-2.ast.checkmarx.net
DEU Environment - https://deu.ast.checkmarx.net
Australia & New Zealand – https://anz.ast.checkmarx.net
India - https://ind.ast.checkmarx.net
Singapore - https://sng.ast.checkmarx.net
UAE - https://mea.ast.checkmarx.net
Israel - https://gov-il.ast.checkmarx.net
Log in to your Checkmarx One account by entering your Tenant Account, Username and Password.
Generating an API Key To generate an API Key:
Log in to the Checkmarx One web portal and select Settings
 > Identity and Access Management in the main navigation.
The IAM portal opens.
In the main navigation, click API Keys, then click on the Create Key button.
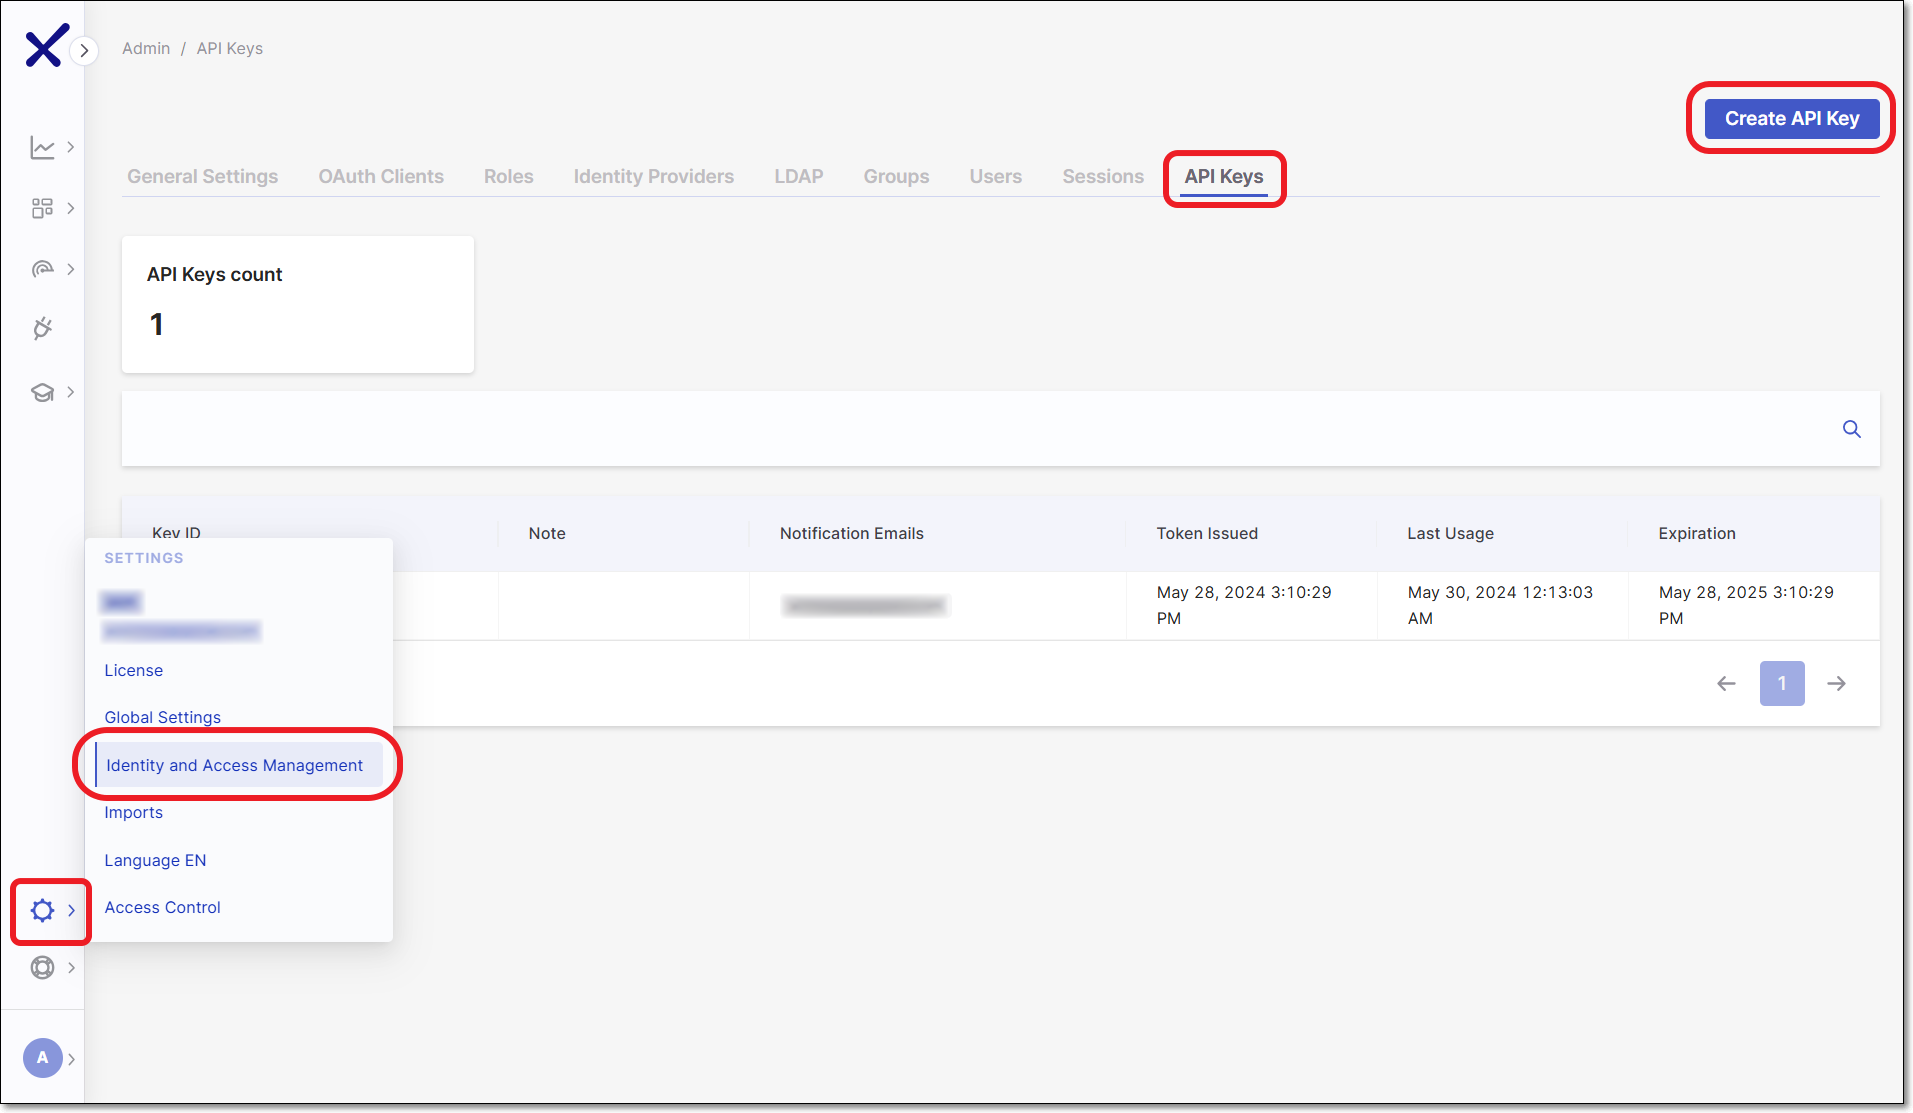
The API Key configuration window opens.
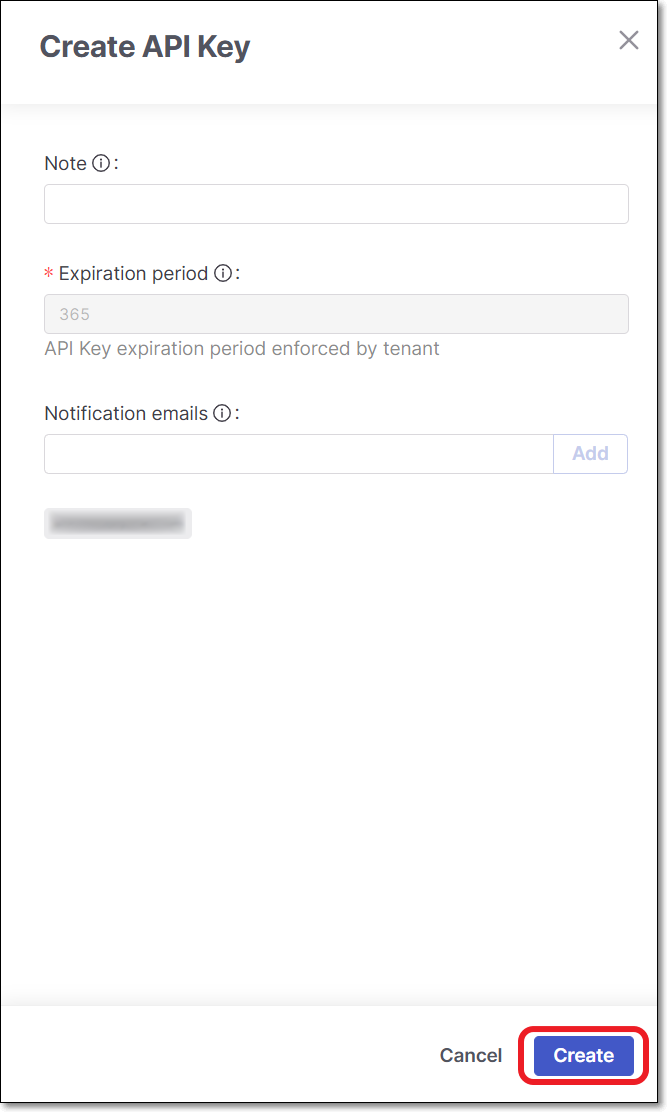
You can optionally adjust the configuration as follows:
Note - Add a descriptive note to the API Key.
Expiration period - Adjust the period of time until the key expires. The value can be from 30 to 365 days.
Notice
If an administrator set the default expiration period to be "enforced", then this field will be locked.
Notification emails - Enter emails of each recipient who you would like to receive notifications regarding expiration of the key. After entering each email, click Add. By default the email of the current user is included.
Click Create.
The API Key is created and a window opens showing the key.
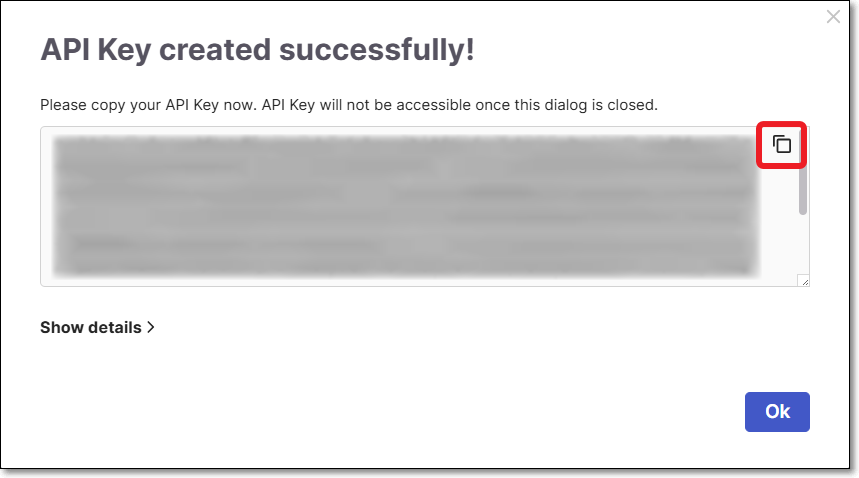
Copy the key and save it in a place where you will be able to retrieve it for future use.
Notice
Once you close the window, you will no longer be able to access this API Key.
Notice
You can obtain a curl for submitting the request for an access token, by clicking on Show details and copying the content.
Notice
The CLI automatically extracts all relevant account info (Base URL, Auth URL, Tenant name) from the API Key. You can use arguments to submit these values explicitly, overriding the extracted values. However, this is generally not recommended.
cx_base_uri
cx_base_auth_uri
cx_tenant
cx_client_id
cx_client_secret
To create an OAuth client, use the following procedure:
Creating an OAuth Client for Checkmarx One Integrations You can create an OAuth Client by logging in to Checkmarx One and creating a new client.
Note
If the new access management is enabled, the OAuth client must be granted resource-level authorization (at the tenant, application, or project level) to function properly.
Logging in to Checkmarx One To log in to Checkmarx One:
Open the URL for your environment.
US Environment - https://ast.checkmarx.net
US2 Environment - https://us.ast.checkmarx.net
EU Environment - https://eu.ast.checkmarx.net
EU2 Environment - https://eu-2.ast.checkmarx.net
DEU Environment - https://deu.ast.checkmarx.net
Australia & New Zealand – https://anz.ast.checkmarx.net
India - https://ind.ast.checkmarx.net
Singapore - https://sng.ast.checkmarx.net
UAE - https://mea.ast.checkmarx.net
Israel - https://gov-il.ast.checkmarx.net
Log in to your Checkmarx One account by entering your Tenant Account, Username and Password.
Notice
To create an OAuth Client, you need to be signed in as an admin user.
Creating an OAuth Client To create an OAuth Client, you must have the following permissions:
assign-project-all-groups: Allows assigning any existing group when creating or updating a projectview-access: – Allows viewing endpoints.
To create an OAuth Client:
Log in to Checkmarx One and click on Settings
 > Identity and Access Management in the Menu panel.
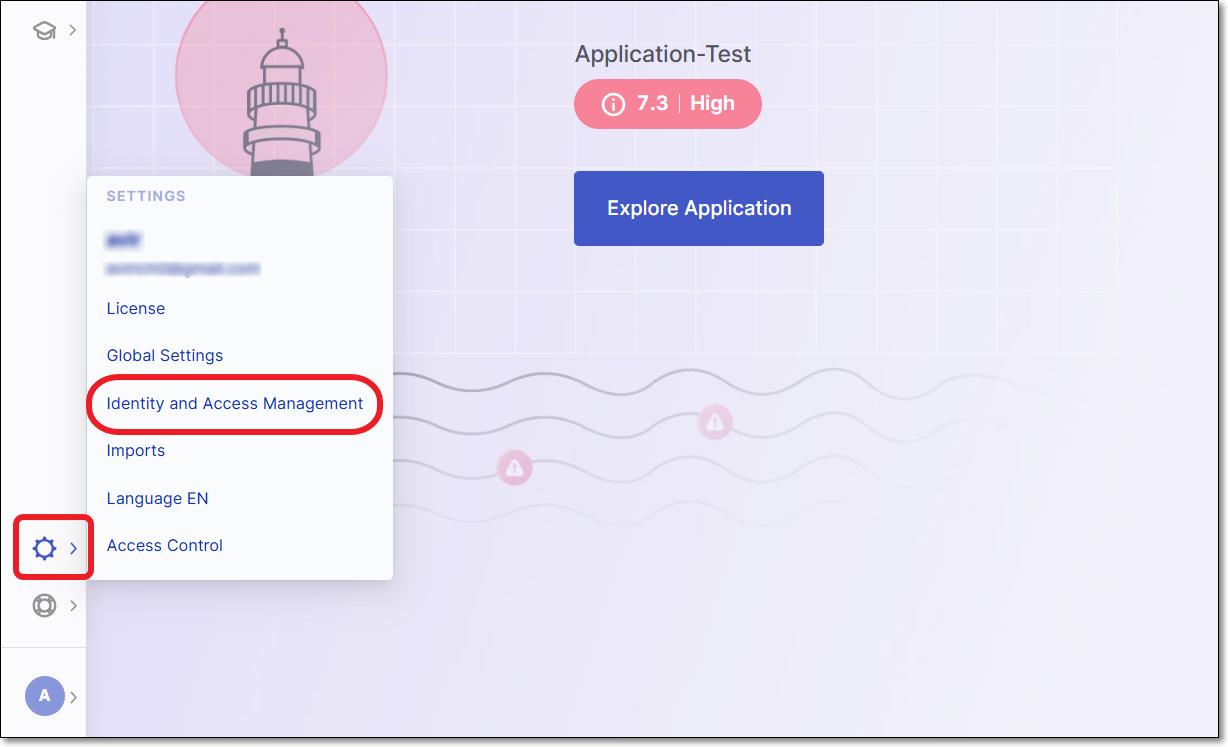
In the Identity and Access Management console, click OAuth Clients and then click Create Client.
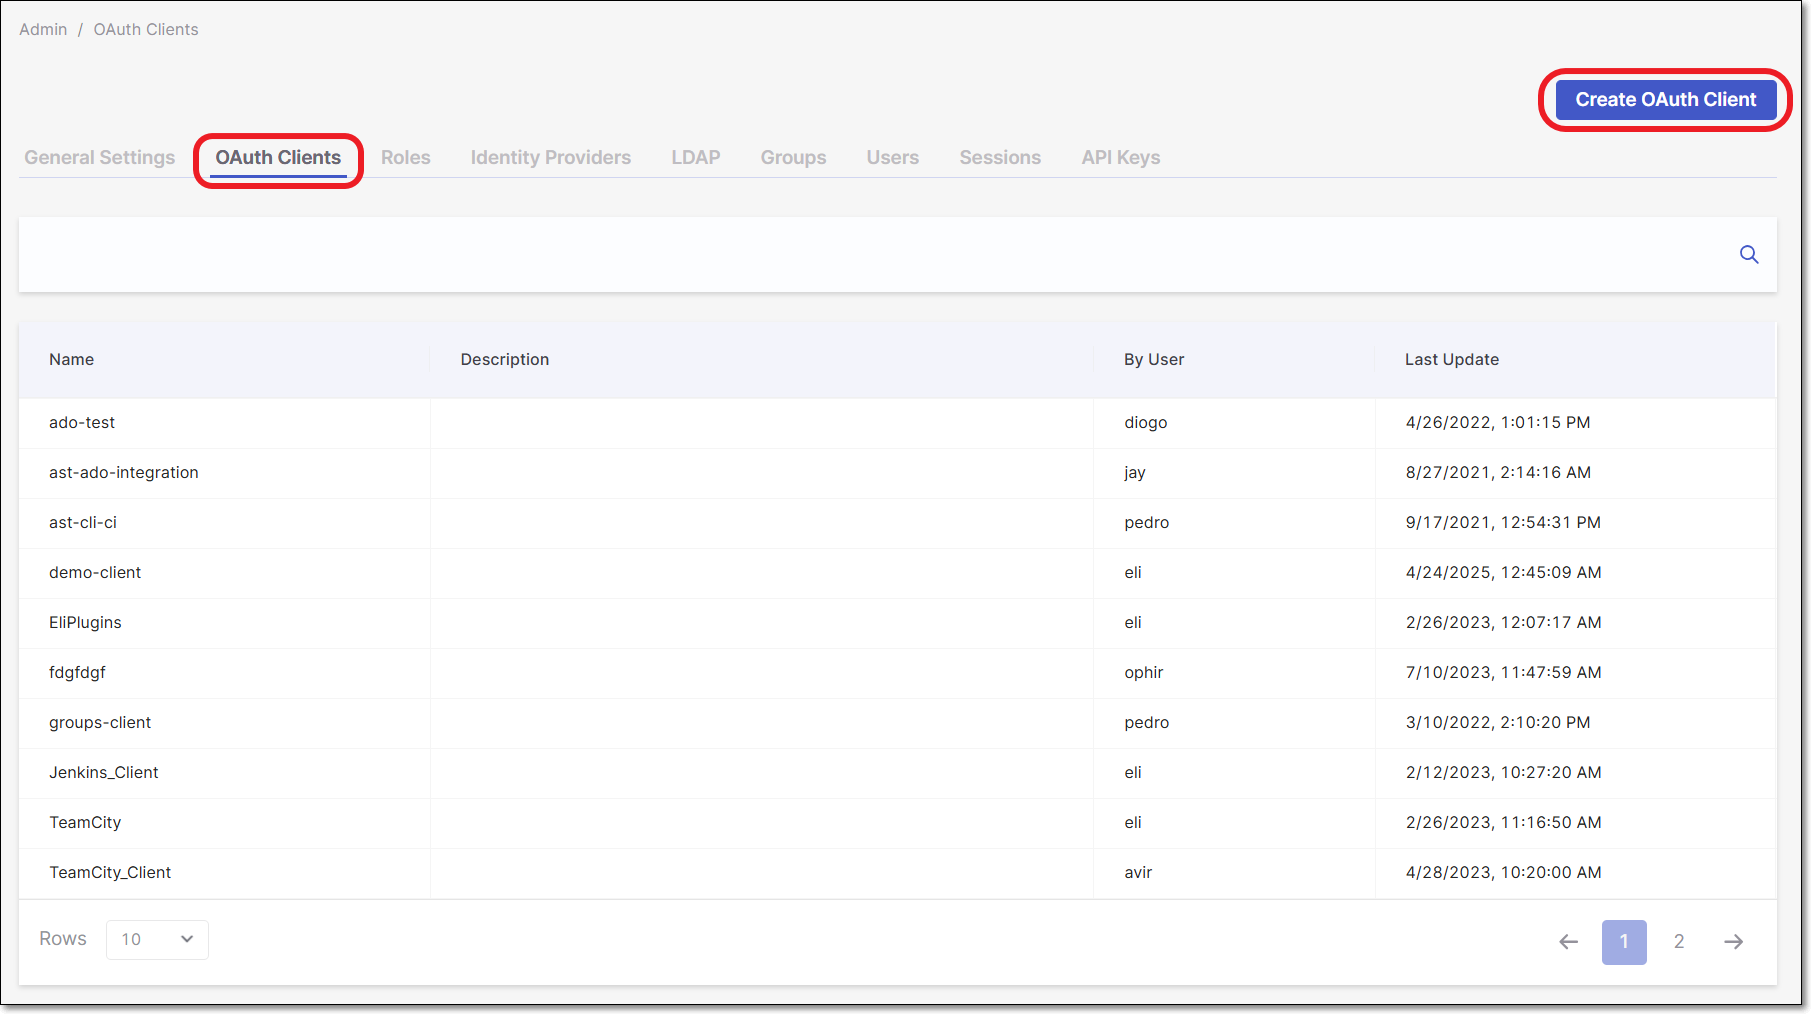
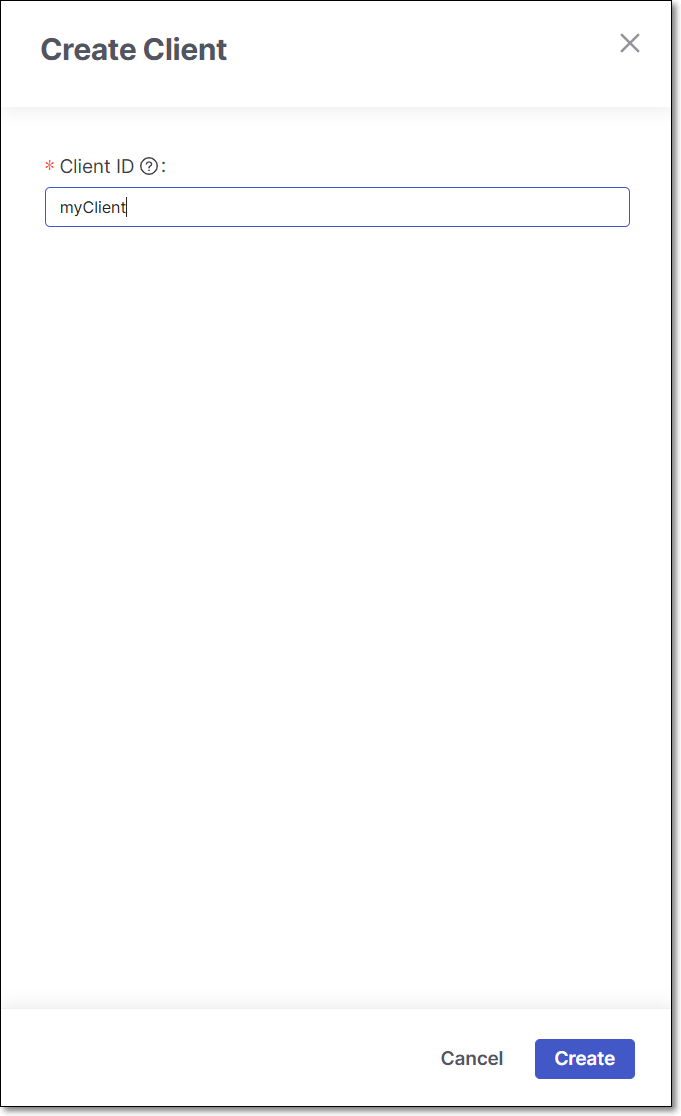
In the Client ID field, enter a descriptive name for Client, and then click Create.
Note
The Client ID field accepts only letters, numbers, spaces, and these symbols:
. ( ) [ ] { } - _.
The Client Settings screen is shown.
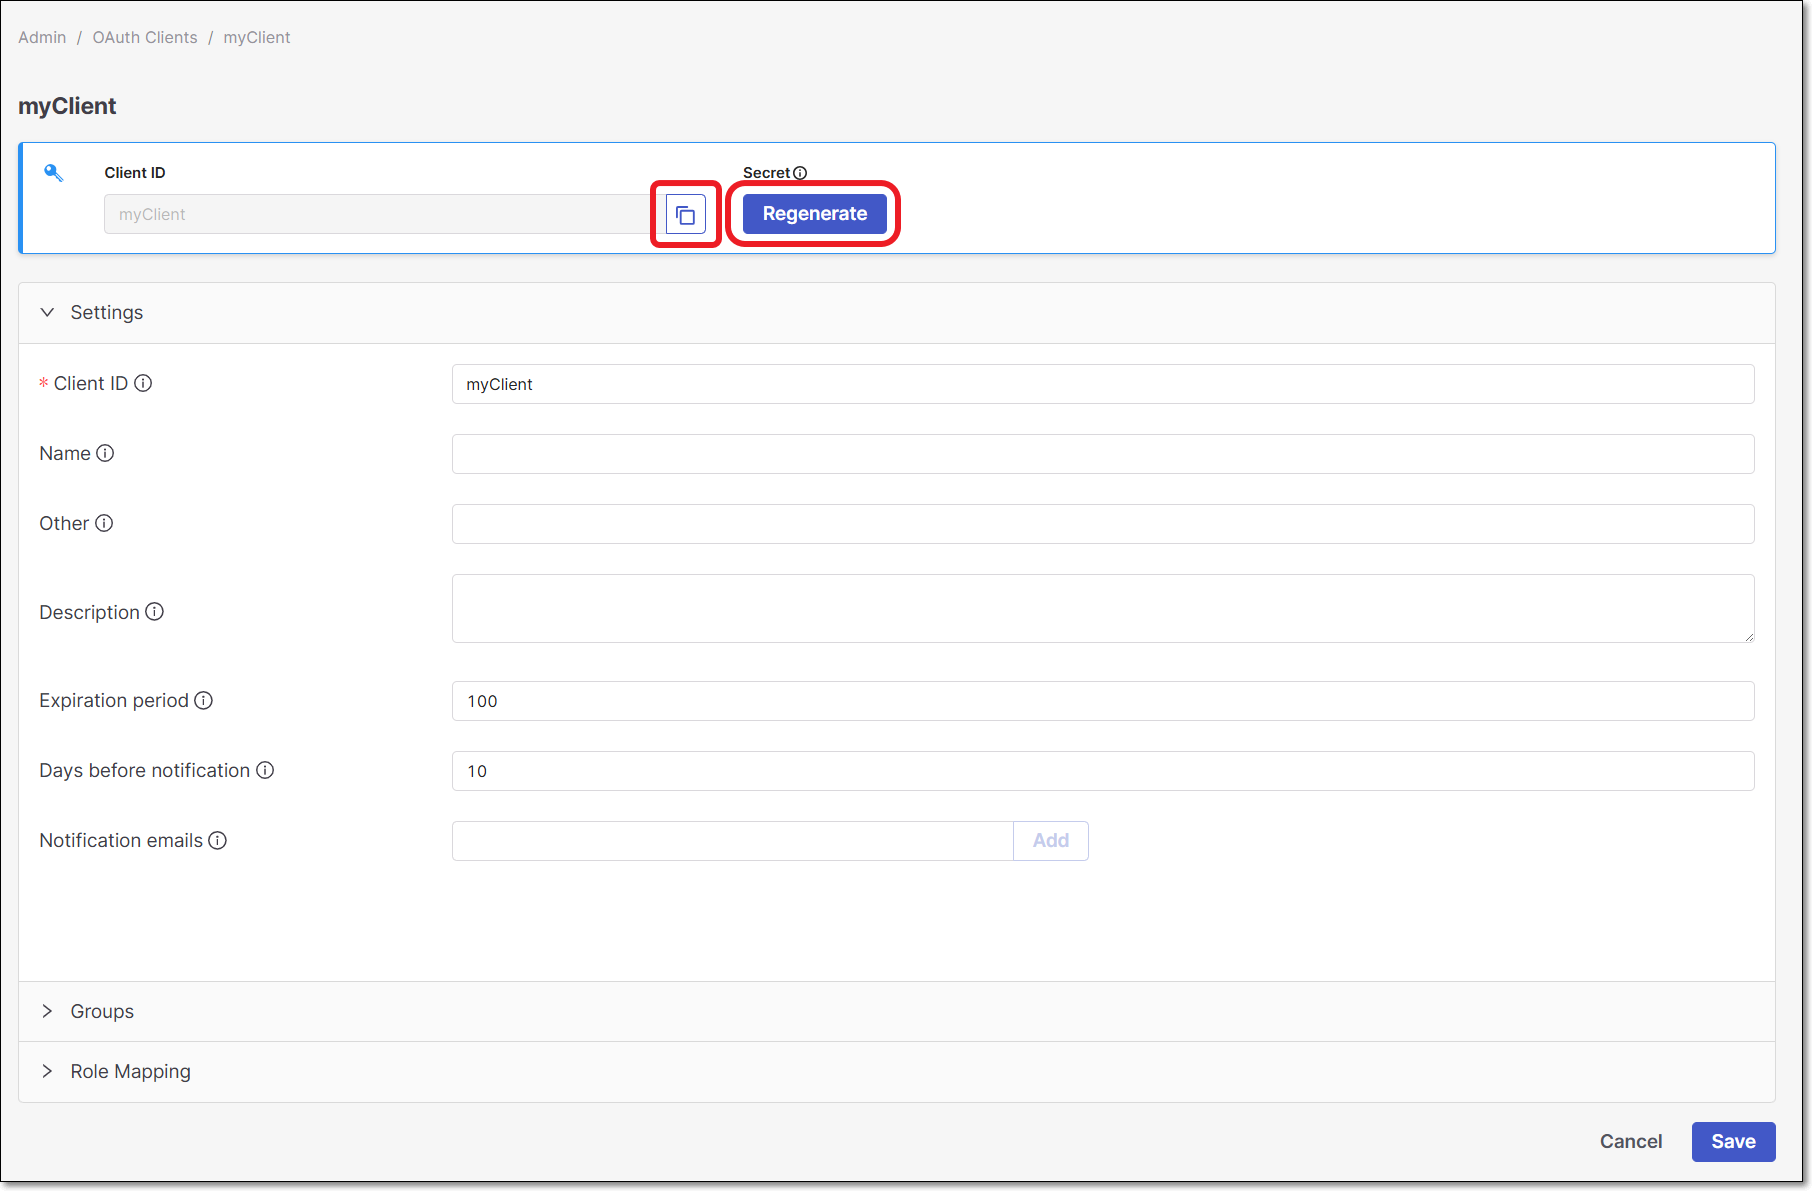
Copy the Client ID for use in the plugin configuration.
Click on the Regenerate button to generate the Secret.
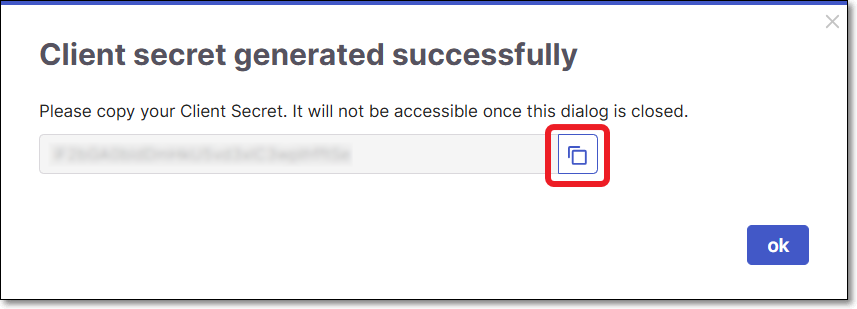
In the dialog that opens, copy the Secret for use in the plugin configuration, and then click Ok to close the dialog
You can optionally adjust the Settings as follows:
Name - Specify the name that will be displayed for this Client.
Other - Enter additional information about this Client.
Description - Enter a description of this Client.
Expiration period - Specify the period of time until the key expires. The value can be from 30 to 365 days.
Notice
If an administrator set the default expiration period to be "enforced", then this field will be locked.
Days before notification - Specify the number of days before the Client will expire that notifications will start being sent. Notifications will be sent on a daily basis from the day on.
Notification emails - Enter emails of each recipient who you would like to receive notifications regarding expiration of the key. After entering each email, click Add. By default the email of the current user is included.
Under Groups, you can optionally assign groups to the Client.
For more information, refer to Groups.
Under Role Mapping select the relevant roles, and click on Add selected.
Important
The minimum required role for running an end-to-end flow of scanning a project and viewing results via the CLI or CI/CD plugins is
plugin-scanner.Alternatively, you can use the combination of the following roles: CxOne composite role
ast-scanner, CxOne roleview-policy-management(not required for IDE plugins) and IAM roledefault-roles.Click Save Client.