Reviewing Scan Results in Eclipse
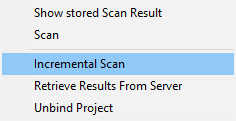
To update the IDE with the latest scan results for a bound project, in Eclipse, right-click the project and select CxViewer > Retrieve Results From Server.
To view the latest downloaded results (for a bound project) or the results of the last manual scan from Eclipse (for an unbound project), in Eclipse, right-click the project and select CxViewer > Show stored Scan Result.
Eclipse prompts you to confirm the CxViewer perspective and then displays the scan results.
After a scan, the results are displayed in the following windows: CxViewer Path, CxViewer Tree, Graph Navigation, Full Graph, CxViewer Results, CxViewer Description.
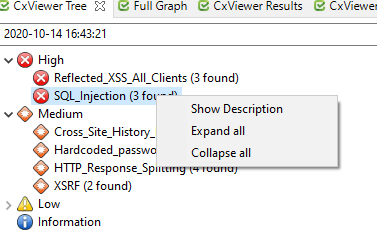
CxViewer Tree This window displays the vulnerabilities found in this scan, grouped by severity level [ High, Medium, Low, and Information]. The number of times the vulnerability was found in the scan is indicated next to each vulnerability.
To open the CxViewer Description page for a vulnerability, right-click the vulnerability name and choose Show Description.
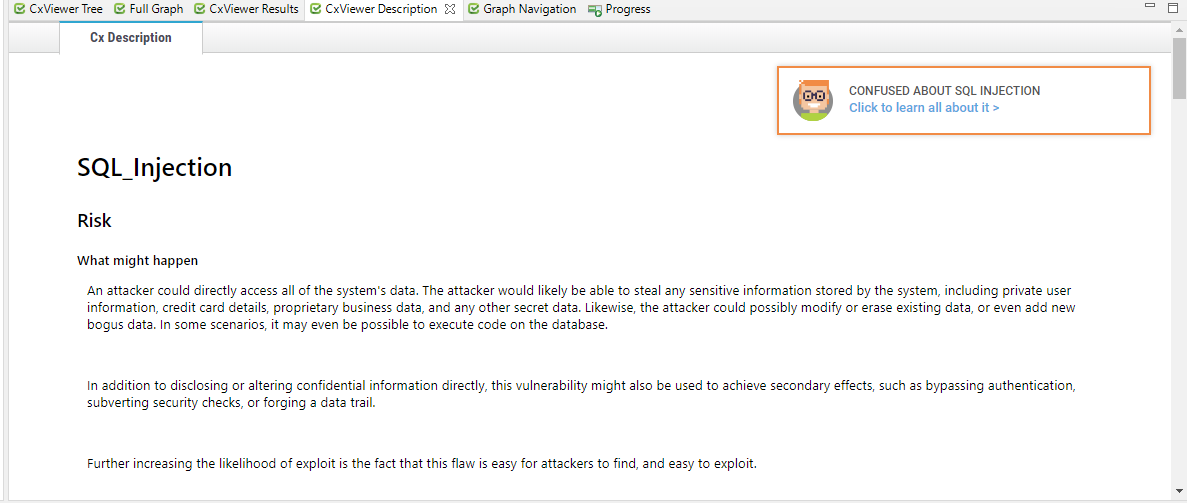
CxViewer Description Page The CxViewer Description page describes the vulnerability risk and usage. It also contains a link, indicated by the Codebashing icon at the top of the page, to the Codebashing section of the Checkmarx Academy, where tutorials on how to fix the vulnerability can be found.
Note
You may be asked to log in to view the CxViewer Description tab and the vulnerability descriptions. After logging in, the login screen will not be displayed when selecting subsequent items in the CxViewer tree.
The vulnerability description is not displayed on Linux variants.
While using SAST server 9.6 on a MAC OS, the CxViewer Description page may not be displayed.
Caution
After the Windows Defender update 1.421.1630.0., the verification time for Chromium binaries has increased. There are two ways to address this situation quickly:
Add the directory with Chromium binaries to the whitelist.
Rollback the Windows Defender update.
Our recommendation is to add the binaries directory to the whitelist by doing the following:
Chromium binaries will be available in the User’s temp directory on Linux and macOS and the AppDataLocalJxBrowser directory on Windows. Navigate to Start → Settings → Update & Security → Windows Security → Virus & threat protection.
Under Virus & threat protection settings, select Manage settings.
Under Exclusions, select Add or remove exclusions.
Select Add an exclusion, then select the Chromium binaries directory.
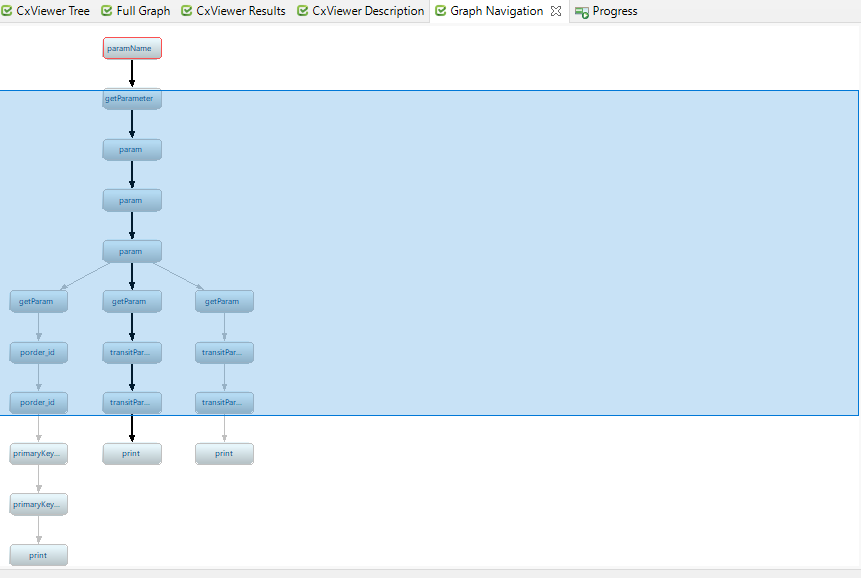
Graph Navigation This window displays the flow with parameter names to reach a specific vulnerability.
For example:
CxViewer Results
This window displays the description of the vulnerability, its status, severity, and assigned users. Accessing the detailed description from the SAST Result Viewer directly within the Eclipse plugin improves usability and streamlines your security analysis.
You edit the information for a specific vulnerability by selecting the vulnerability in the table and using the Change State, Change Severity, and Assign User drop-downs.
You can use the Comments option if comments are needed, as illustrated in the example below.

Making Comments Mandatory on Result Severity State Change
CxSAST offers the option to require adding comments when changing the result state.
This functionality is configured via a flag in the SQL database and disabled by default. If you wish to enable this feature, you have to enable the following flags in the respective SQL database table - CxComponentConfiguration:
MandatoryCommentOnChangeResultState: When set to true, a comment is required for any result state change.
MandatoryCommentOnChangeResultStateToNE: When set to true, a comment is required when changing the result state to Not Exploitable. All other result state changes do not require a comment.