Creating Checkmarx One Pipelines in Azure
You can add a Checkmarx One scan to an existing pipeline or you can create a new pipeline for the scan.
There are several ways to create a new pipeline in Azure DevOps. The following sections describe the two primary methods for creating a new pipeline with a Checkmarx One scan build step.
Additionally, you can set a pipeline variable to use a proxy server, as described here.
Output Variables
When a scan is completed, Checkmarx saves the scan ID as an environment variable, CHECKMARXAST_CXONESCANID. You can use this variable in the post-scan workflow of your pipeline. For example:
- displayName: 'Display Scan ID'
  script: |
       echo "The scan ID is $CHECKMARXAST_CXONESCANID"
Creating a Checkmarx One Pipeline Using a Pre-configured Task
Creating a Pipeline without using a YAML
To create a Checkmarx One scan pipeline without using a YAML:
In your Azure DevOps console, in the main navigation, select Pipelines
 .
.On the Pipelines screen, click Create Pipeline.
A new pipeline form opens.
Click on Other Git.
This will take you to the classic editor, which enables you to create a pipeline without using a YAML.
Notice
If you don't see this option, go to Project Settings > Settings and turn off the toggles for Disable creation of classic build pipelines and Disable creation of classic release pipelines. Alternatively, you can create the pipeline using the procedure described in Creating a Checkmarx One Pipeline Using a YAML.
Select the platform where the source code is located.
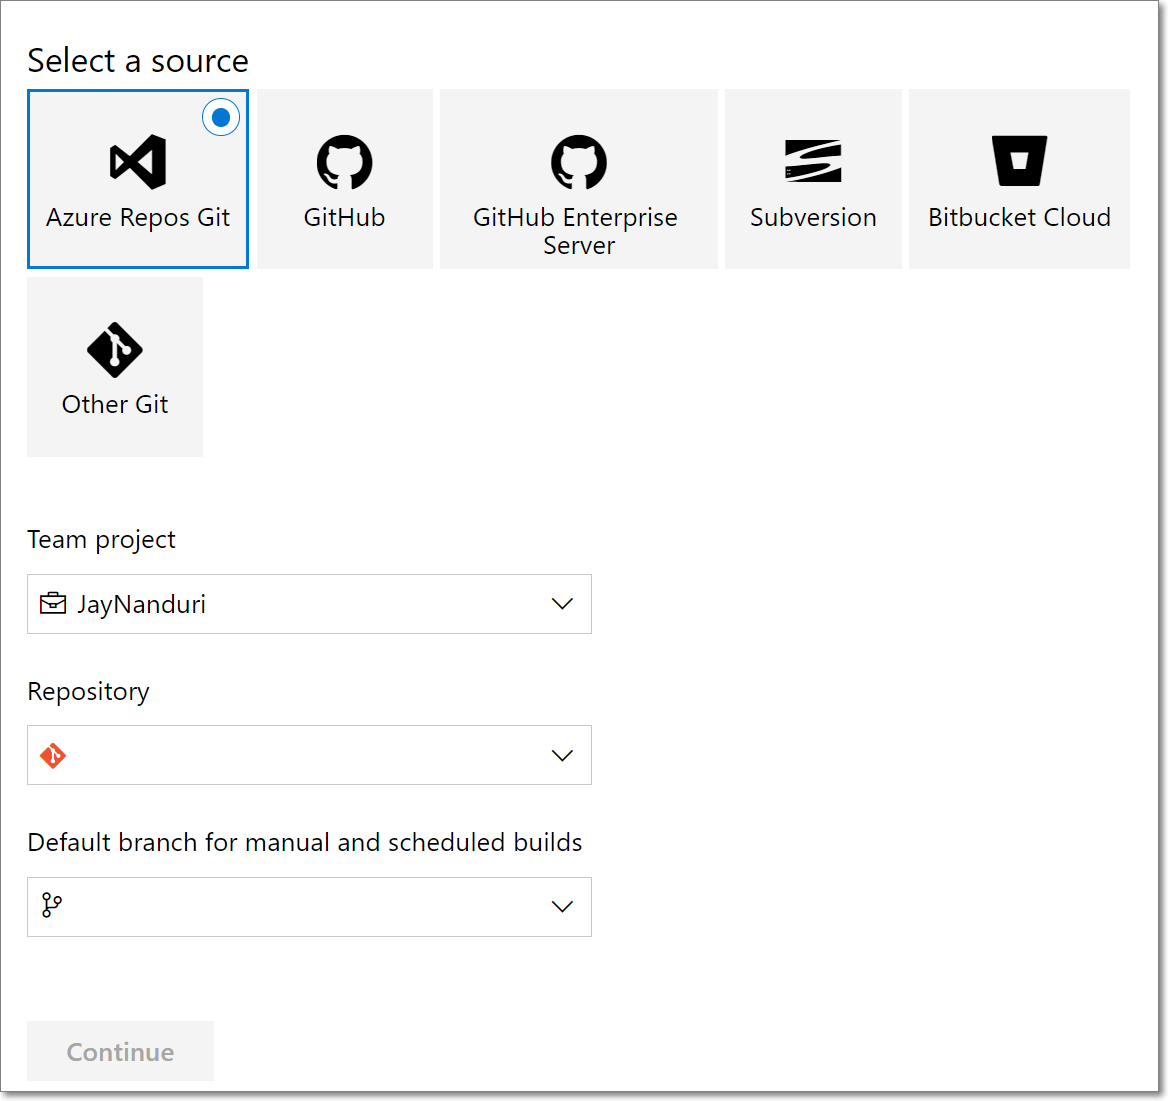
If you haven’t created a connection for that platform, you will be prompted to do so.
Once you have created the connection, you will be prompted to fill in the relevant fields specifying the project, repo and branch of the source code that you would like to scan.
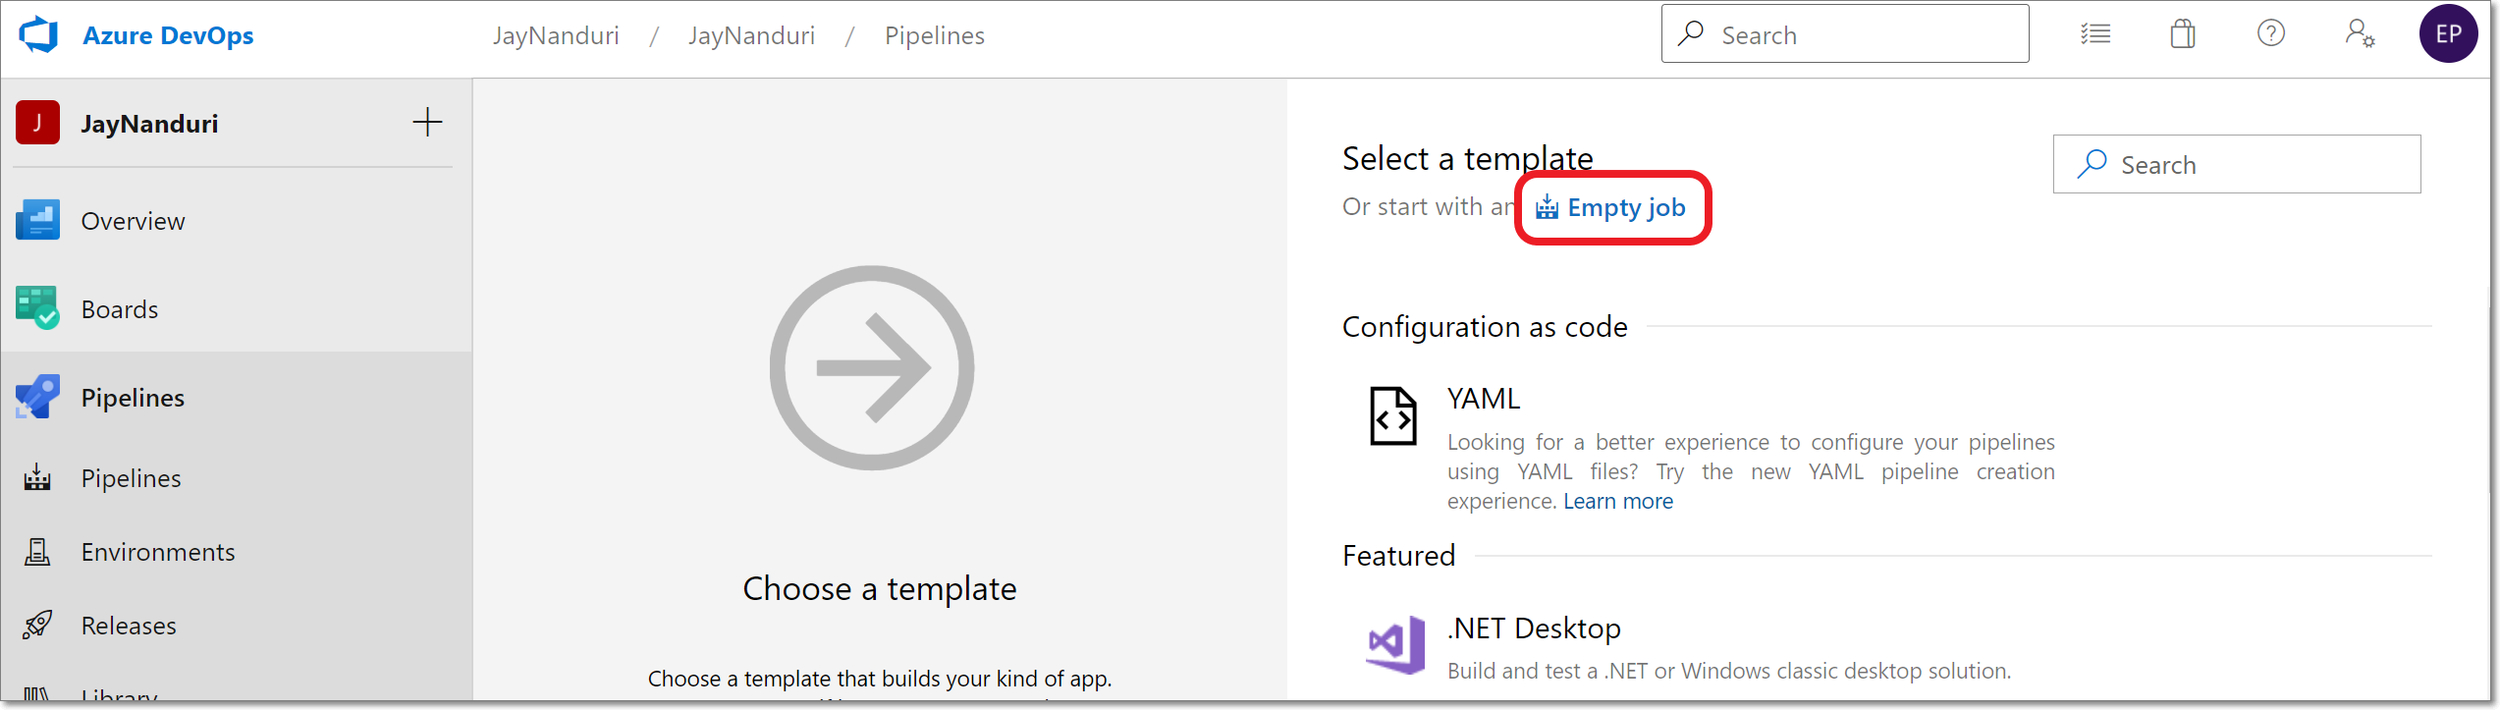
In the Select a template section, click on Empty job.
Click on the “+” button for “Agent job 1” and search for the Checkmarx AST plugin.

Hover over the Checkmarx AST plugin and click Add.
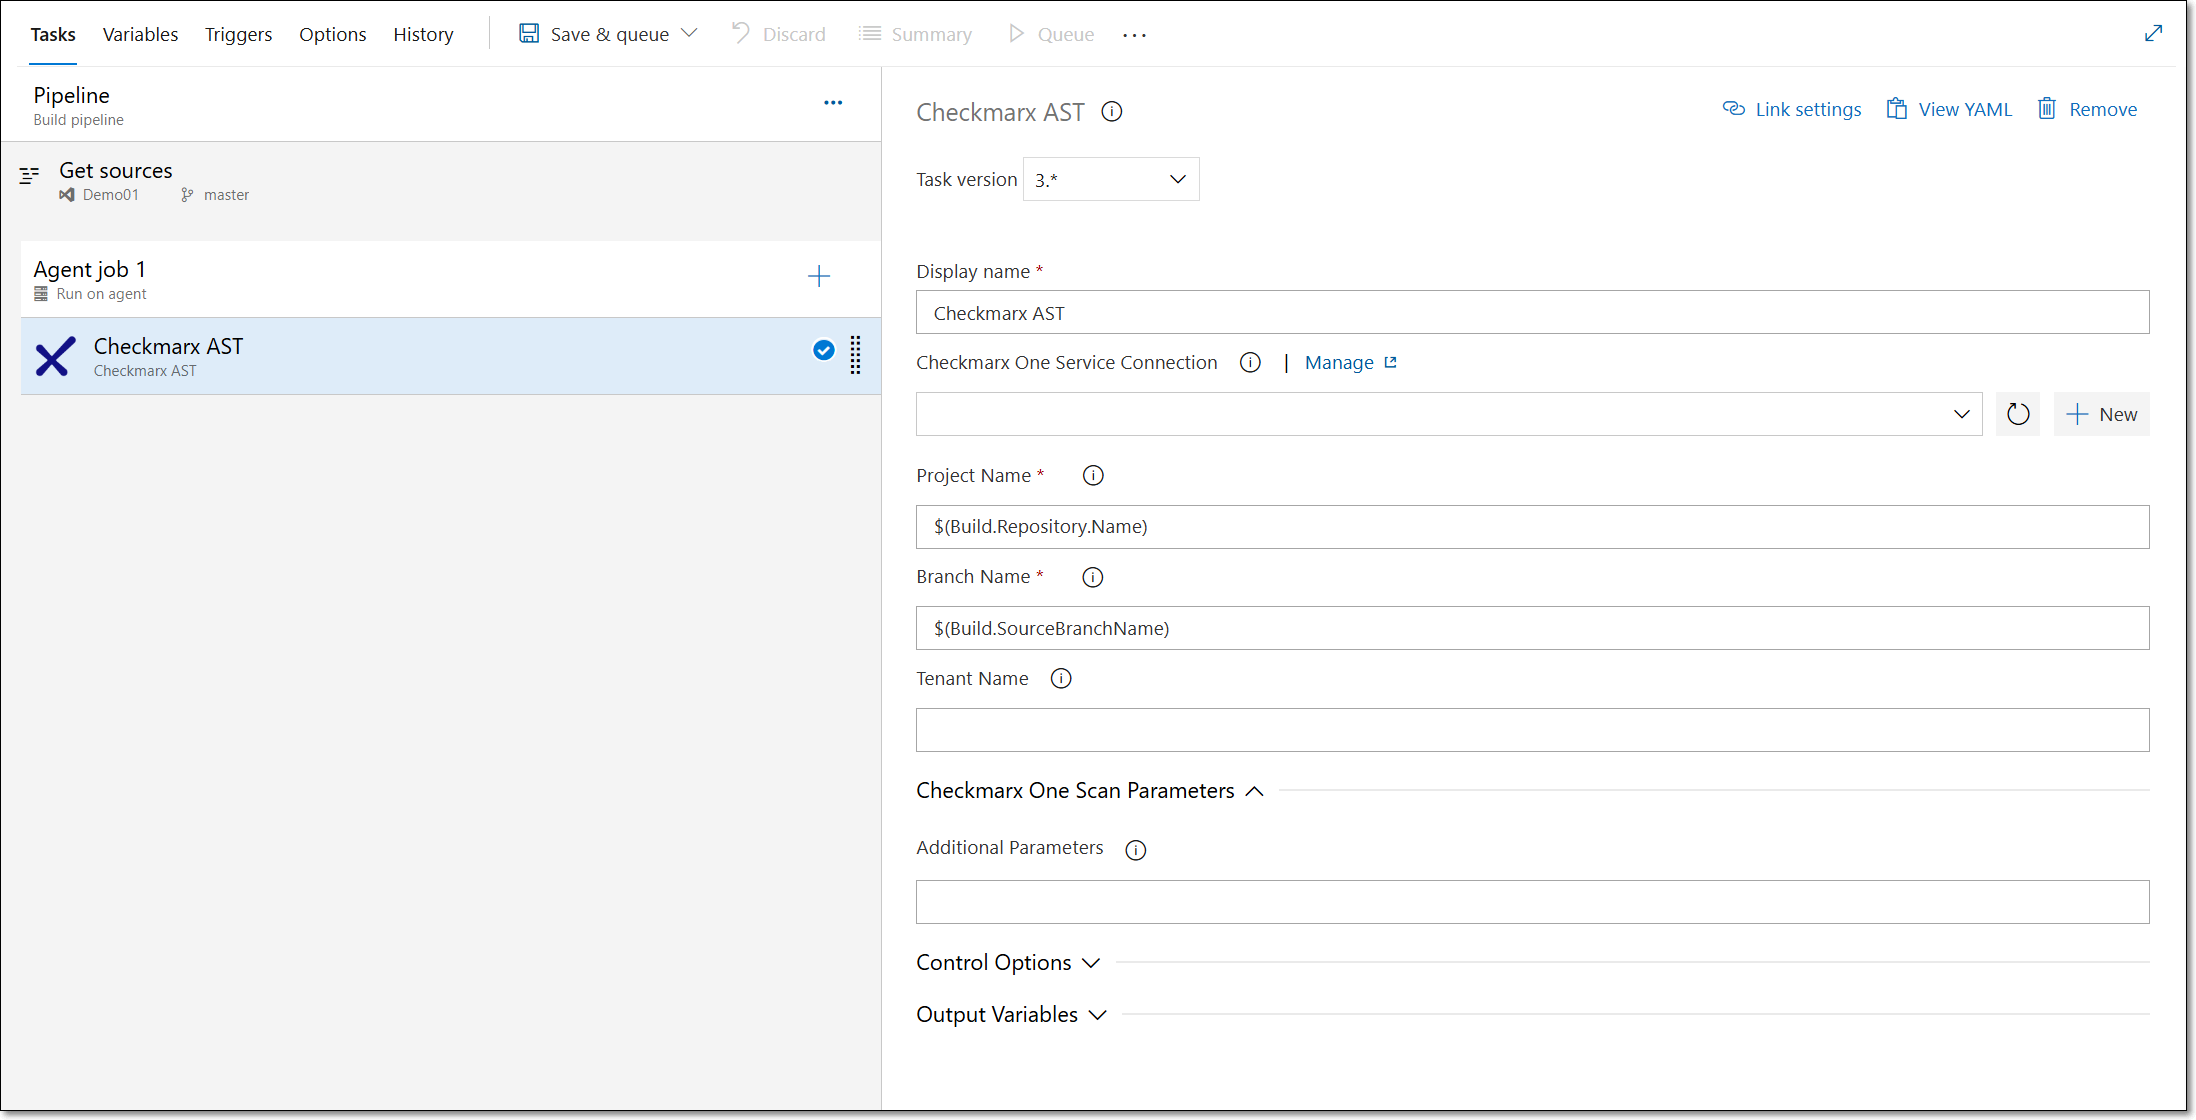
The Checkmarx AST task is shown under “Agent job 1”.
Click on the Checkmarx AST task to open the configuration form in the right-side panel.
Notice
If you have already installed the plugin, it will appear in the top section. If you haven't installed it yet, then you need to hover over the plugin in the Marketplace section, click Get it free and follow the prompts to install it.
Under Checkmarx One Service Connection, select from the dropdown list the connection that you configured for Checkmarx One earlier. For more information, see Checkmarx One Azure DevOps Plugin Initial Setup.
For Project Name, specify the name of the Project to be used in Checkmarx One. (Default: $(Build.Repository.Name).
For Branch Name, specify the name of the branch to be used in Checkmarx One. (Default: $(Build.SourceBranchName).
Under Tenant Name, enter the name of your Checkmarx One tenant account.
Under Checkmarx One Scan Parameters, under Additional Parameters, you can specify any CLI arguments that you would like to apply to scans of this project. See documentation here.
Notice
By default all scanners that you are authorized to run (licensed or open source) will run. To limit scans to one or more specific scanners, add the argument
--scan-types {scanner},where{scanner}is one or more of the following scannerssast,sca,iac-security,api-security,container-security, orscs.You can optionally adjust the Control Options and Output Variables.
You can add additional tasks to the Agent job both before and after the Checkmarx One scan. You can also add additional Agent jobs to the pipeline.
Click on the Triggers tab and specify how this pipeline will be triggered. You can create schedules to run periodic scans or you can specify the build completion events that will trigger scans.
You can optionally set up a proxy pipeline variable. See below.
When you are finished configuring the pipeline, click Save & queue.
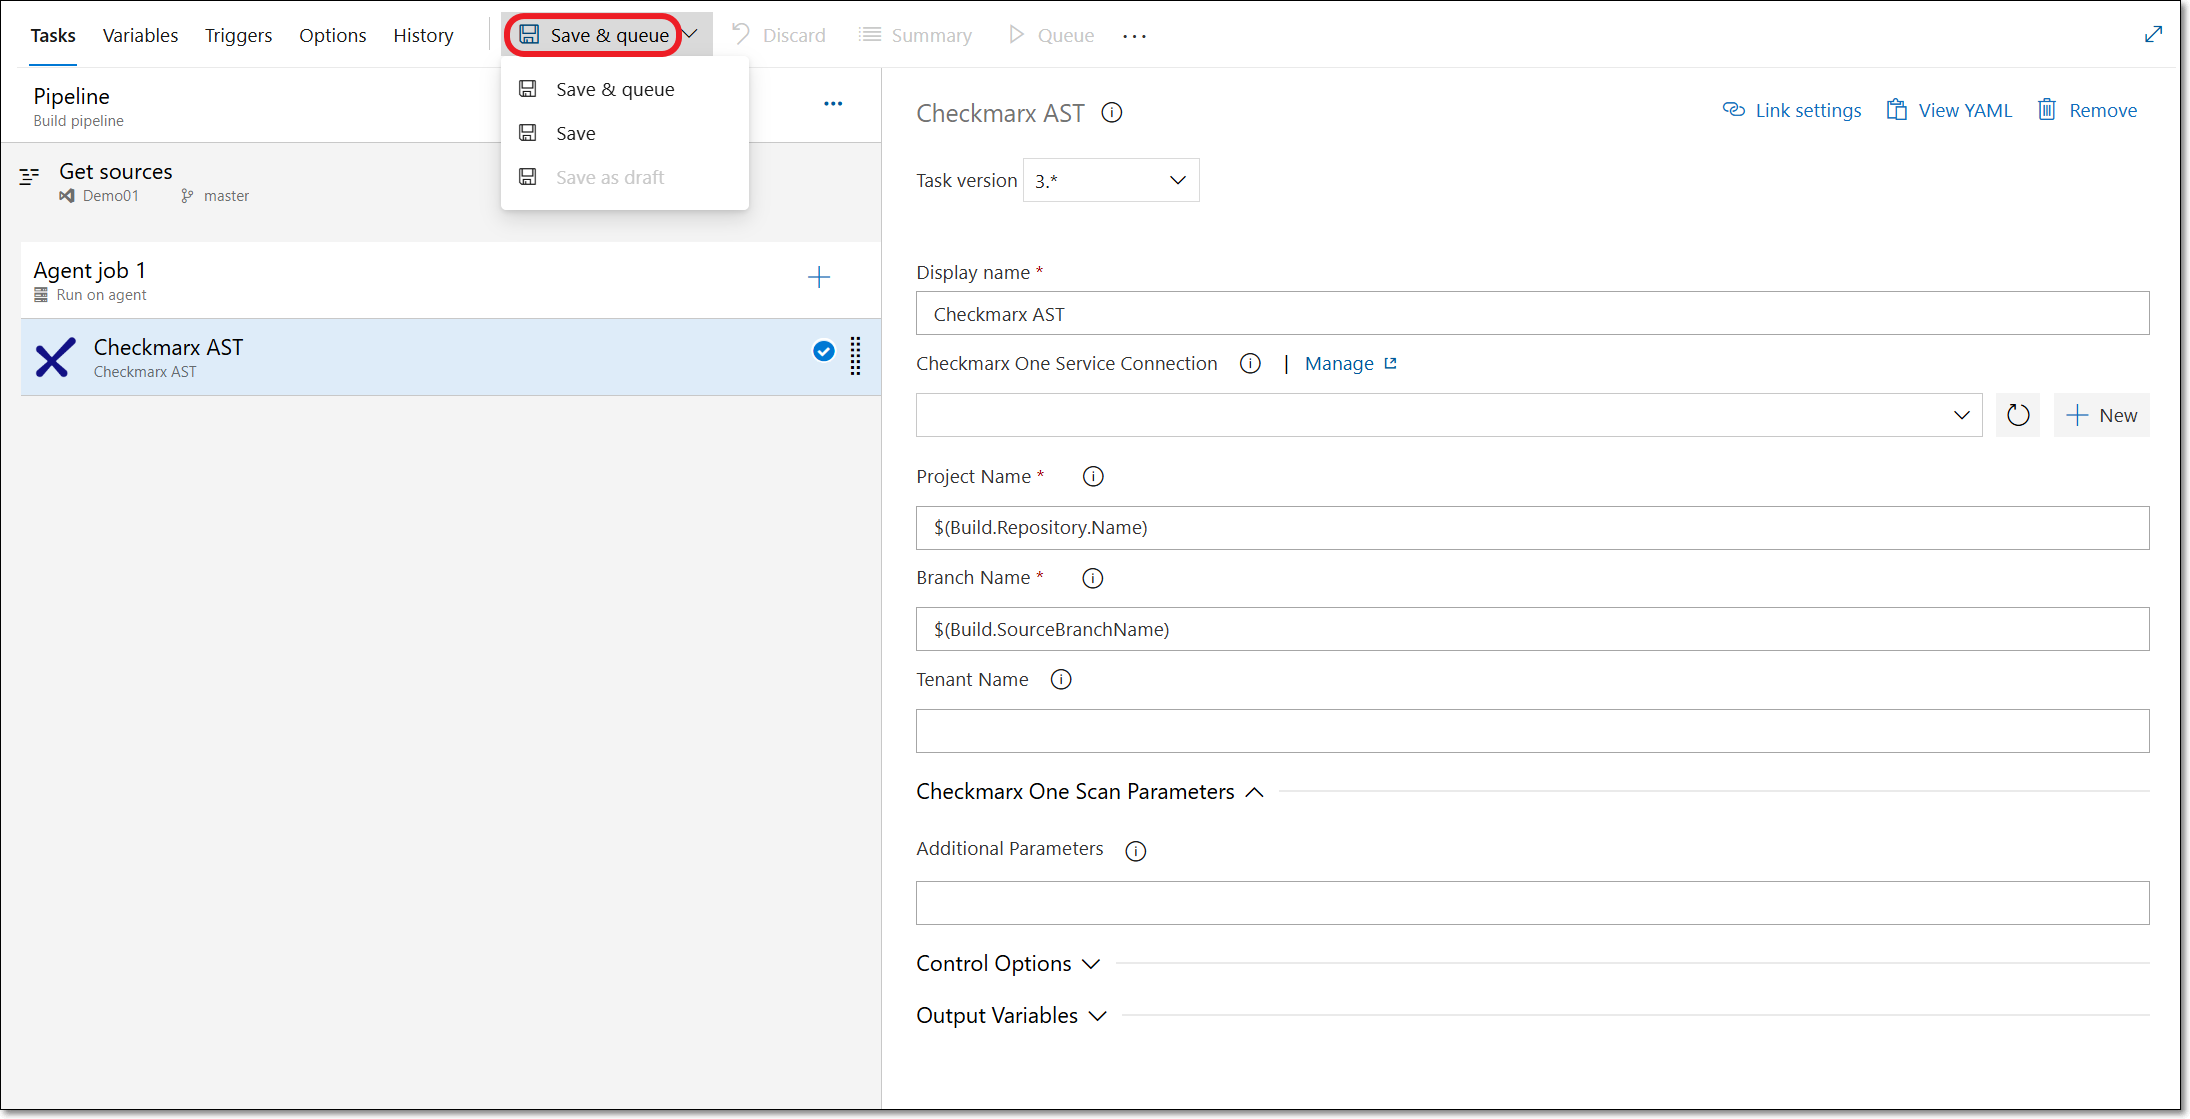
Select one of the following options from the dropdown menu:
Save - save the pipeline without running an initial scan.
Save & queue - save the pipeline and run it, executing an initial scan. You will be prompted to add a save comment and specify the run configuration before confirming the run command.
Setting up a Proxy Pipeline Variable (Optional)
To set up a pipeline variable:
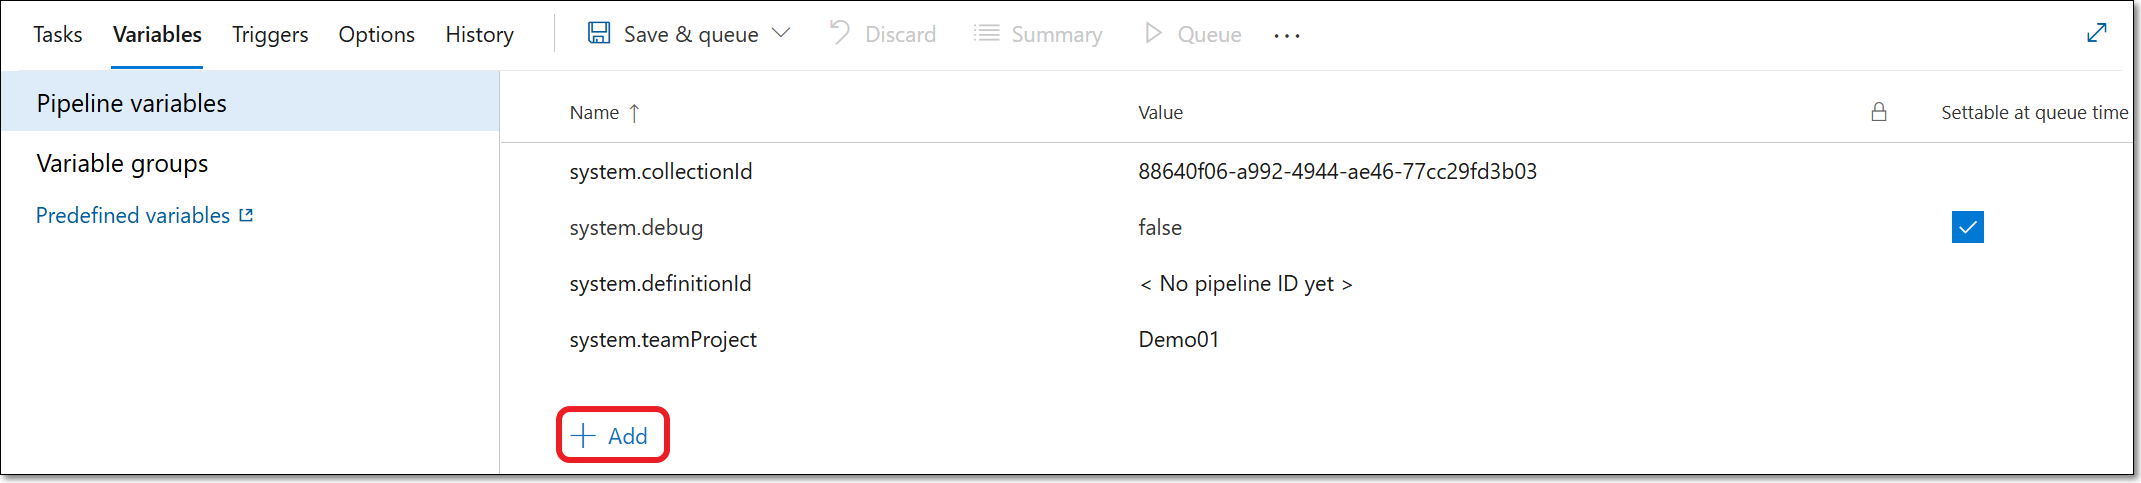
On the pipeline configuration screen, click on the Variables tab.

Click + Add.
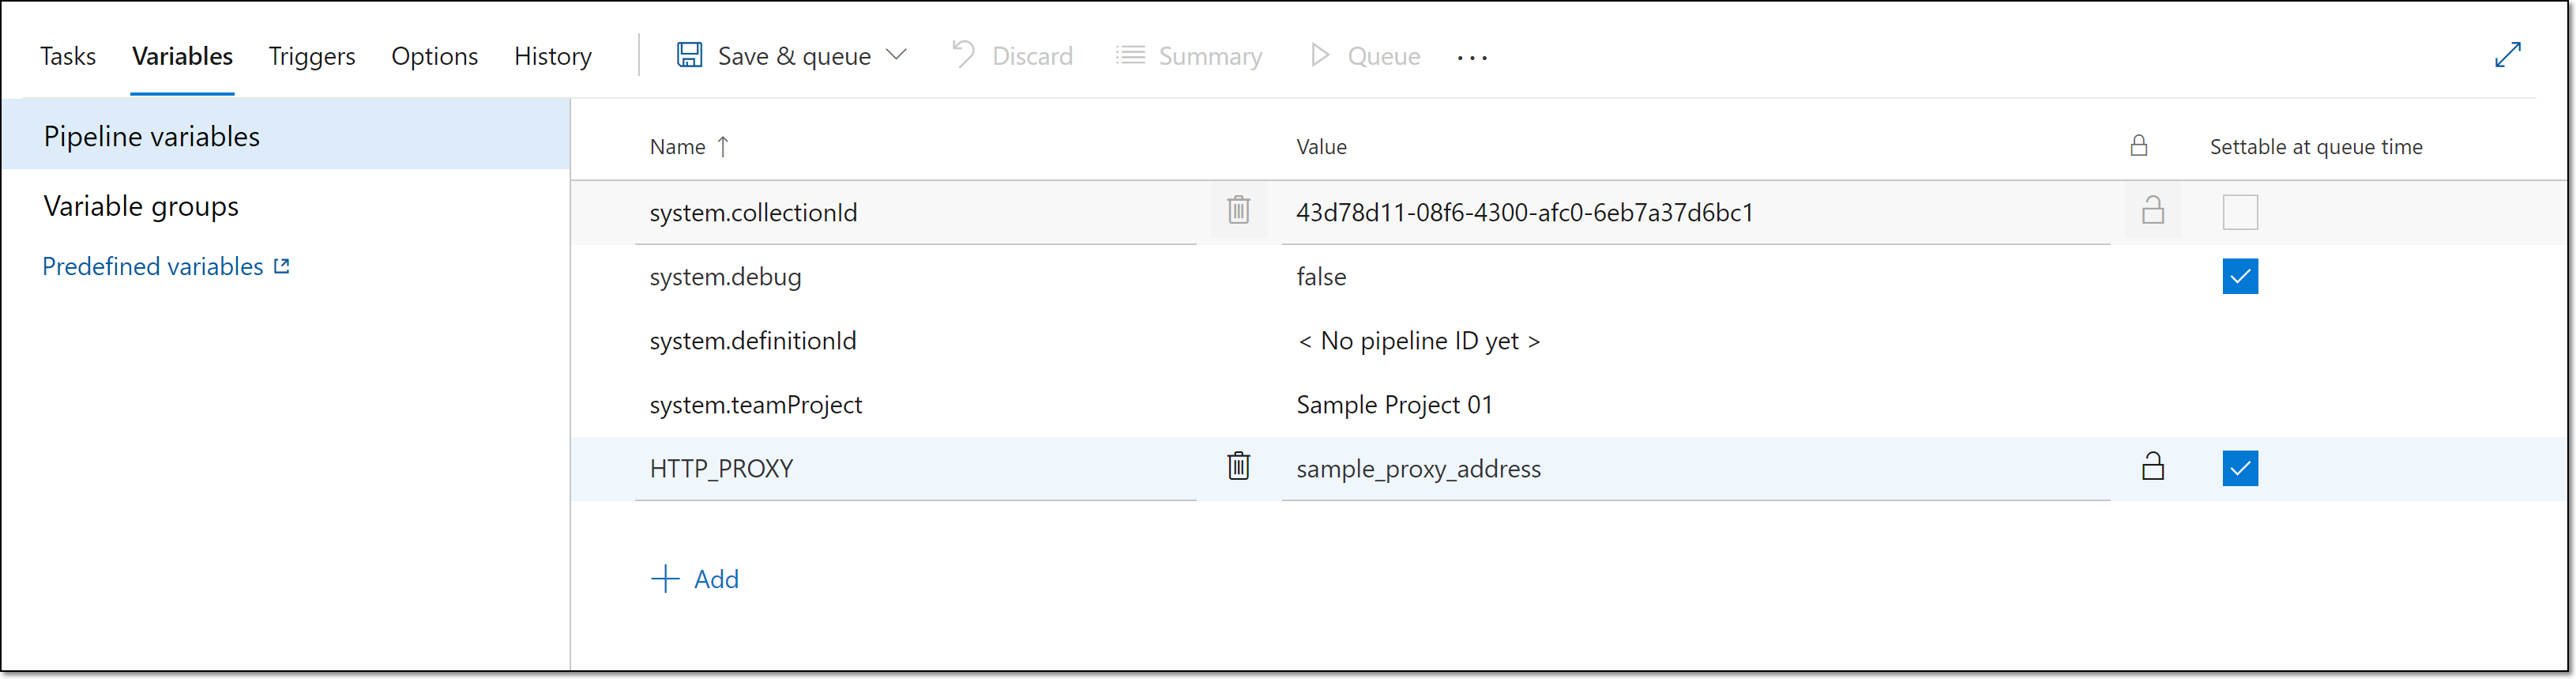
Enter the following configuration information:
In the Name field, enter HTTP_PROXY.
In the Value field, enter the value of your proxy address.
Ensure that the lock symbol
 is open, indicating that this is not a "secured secret". This integration does not support using "secured secrets" for proxy variables.
Select the Settable at queue time check box.
When you are finished configuring the pipeline, click Save & queue.

Under Checkmarx One Scan Parameters, under Additional Parameters, set the following parameters:
For basic:
--proxy $(HTTP_Proxy)For NTLM:
--proxy $(HTTP_Proxy),--proxy-auth-type ntlmand--proxy-ntlm-domain xxxx
Select one of the following options from the dropdown menu:
Save - save the pipeline without running an initial scan.
Save & queue - save the pipeline and run it, executing an initial scan. You will be prompted to add a save comment and specify the run configuration before confirming the run command.
Creating a Checkmarx One Pipeline Using a YAML
To create a Checkmarx One pipeline using a YAML file:
In your Azure DevOps console, in the main navigation, select Pipelines
.On the Pipelines screen, click New pipeline.
A new pipeline form opens.
Select the repo platform where the source code is located. Select one of the options that shows
YAMLin the title.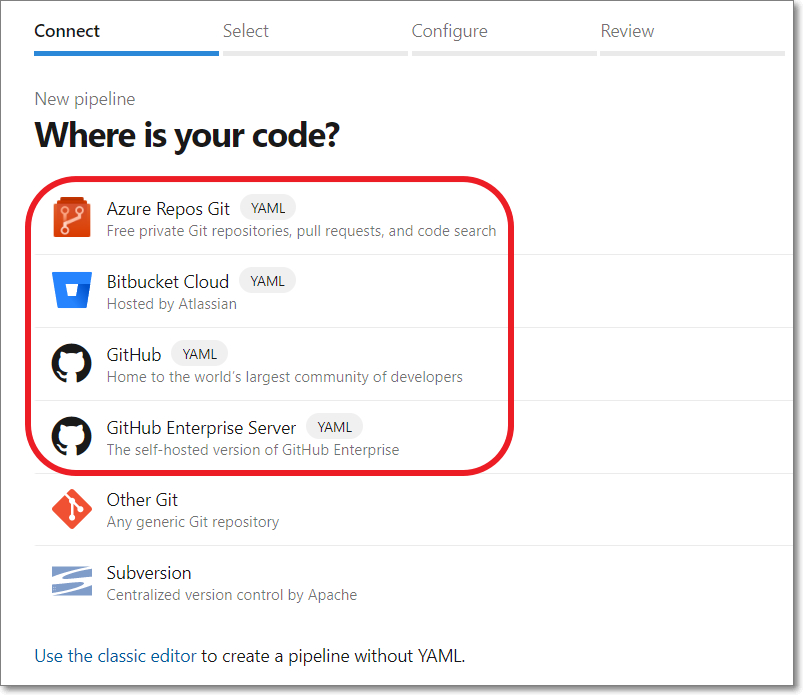
If you haven’t authorized access to this repo through Azure, then you will be redirected to do so.
Once you have authorized the connection, the Select a repository screen is shown.
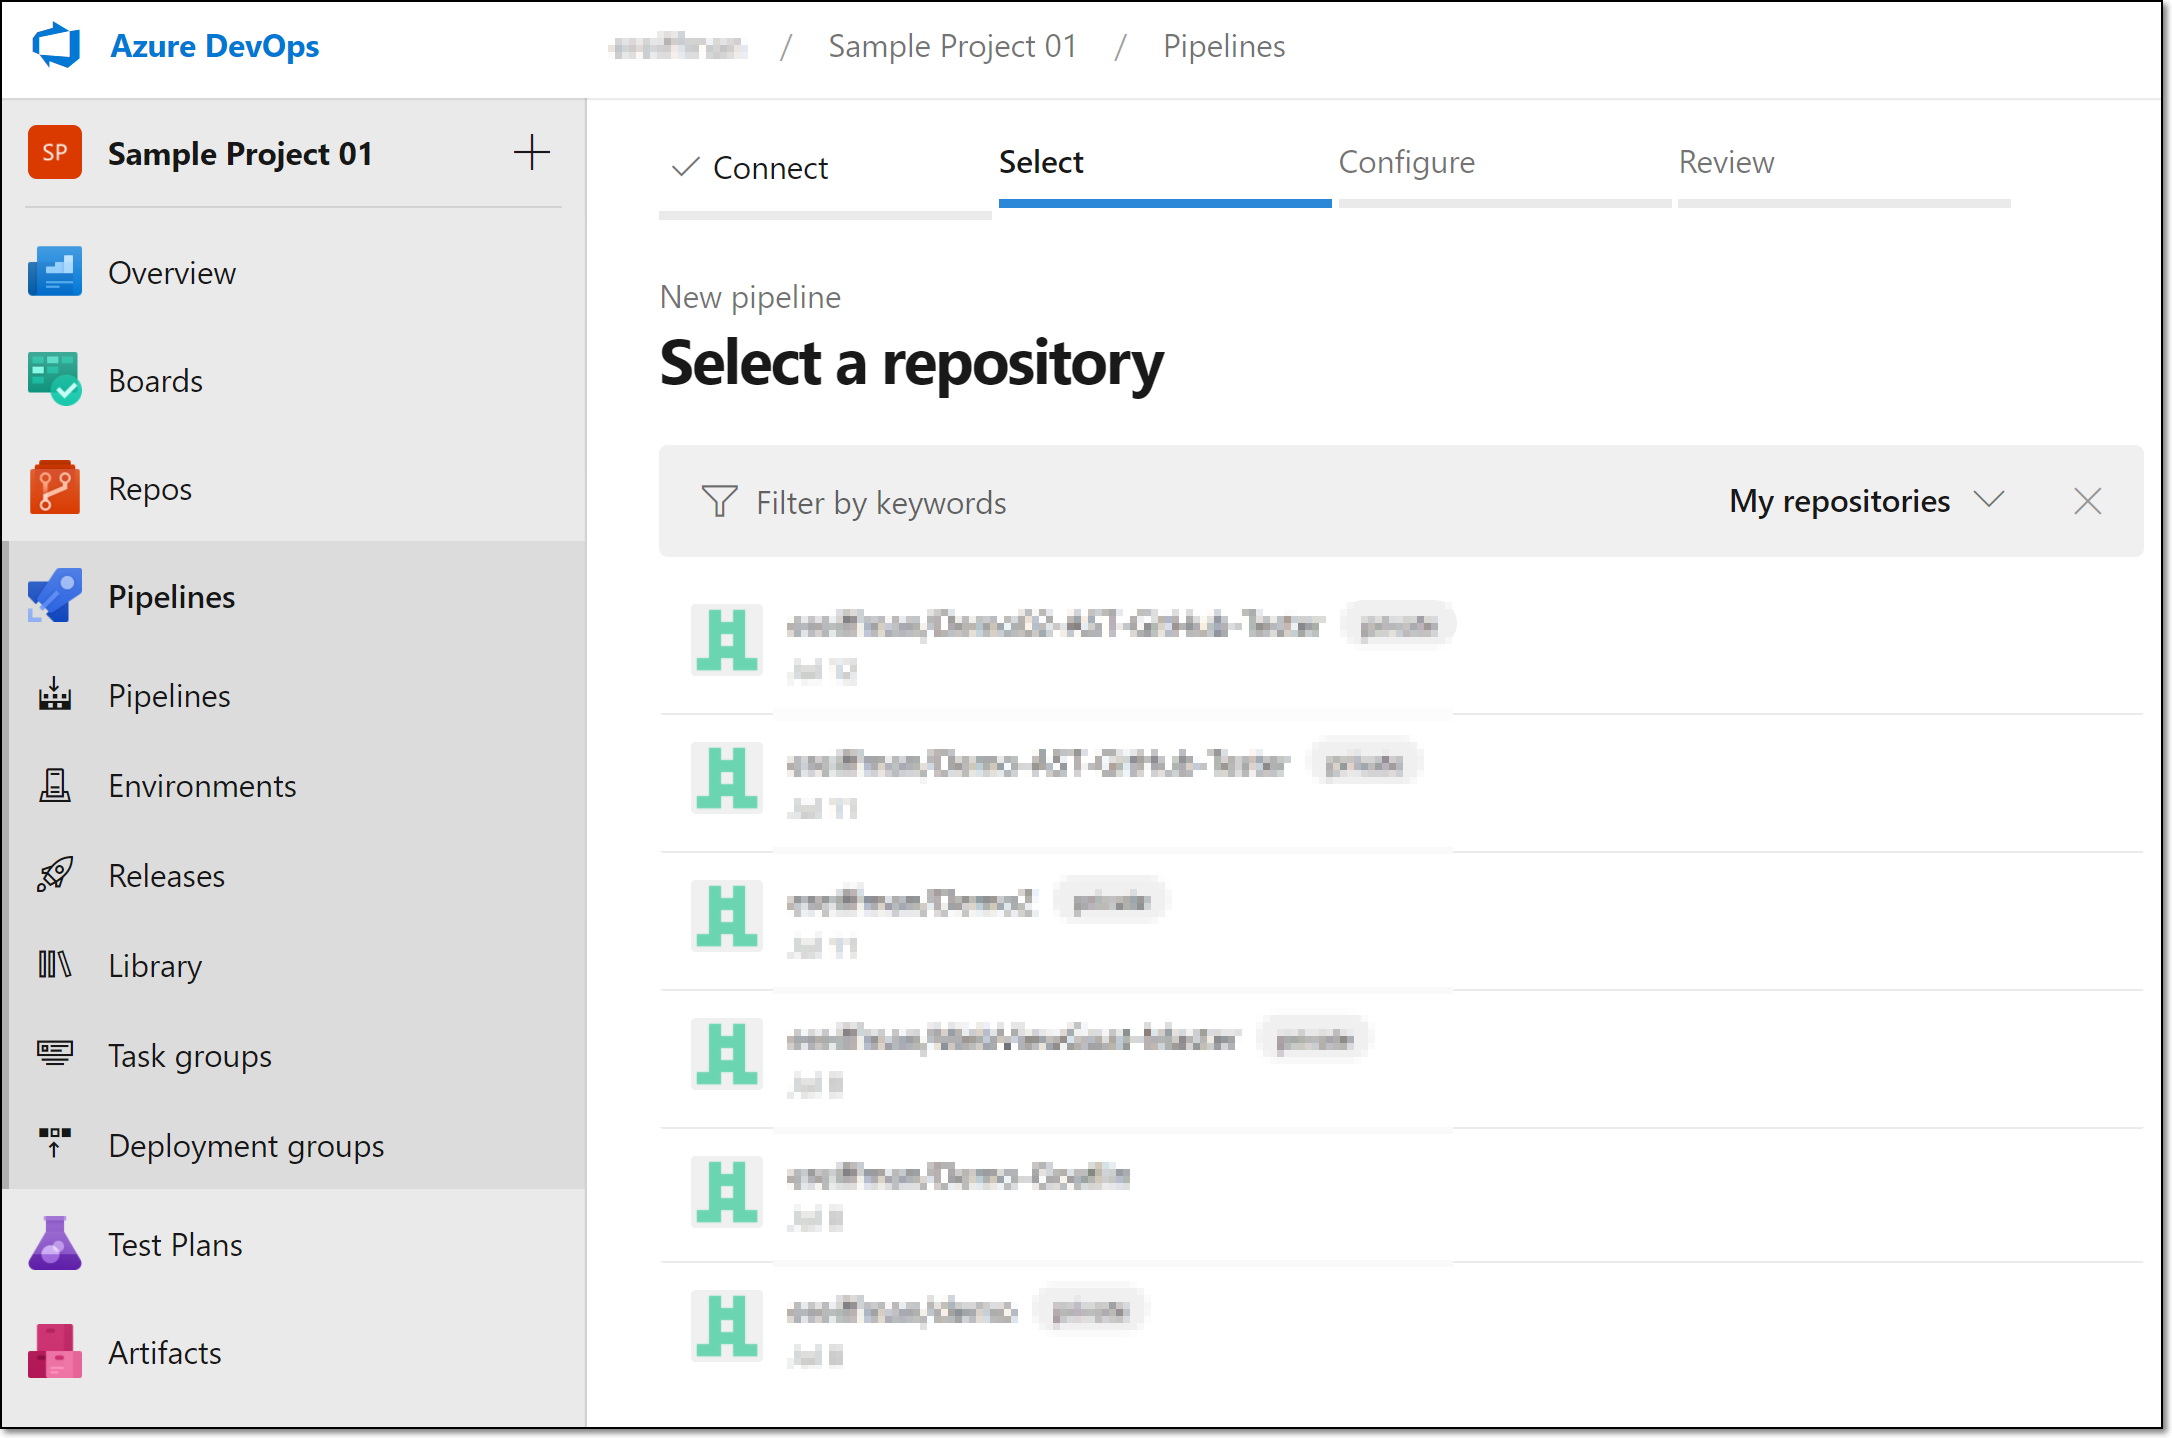
Select the desired repository. If necessary, follow the prompts to approve access to the repo.
The Configure your pipeline screen is shown in your Azure DevOps console.
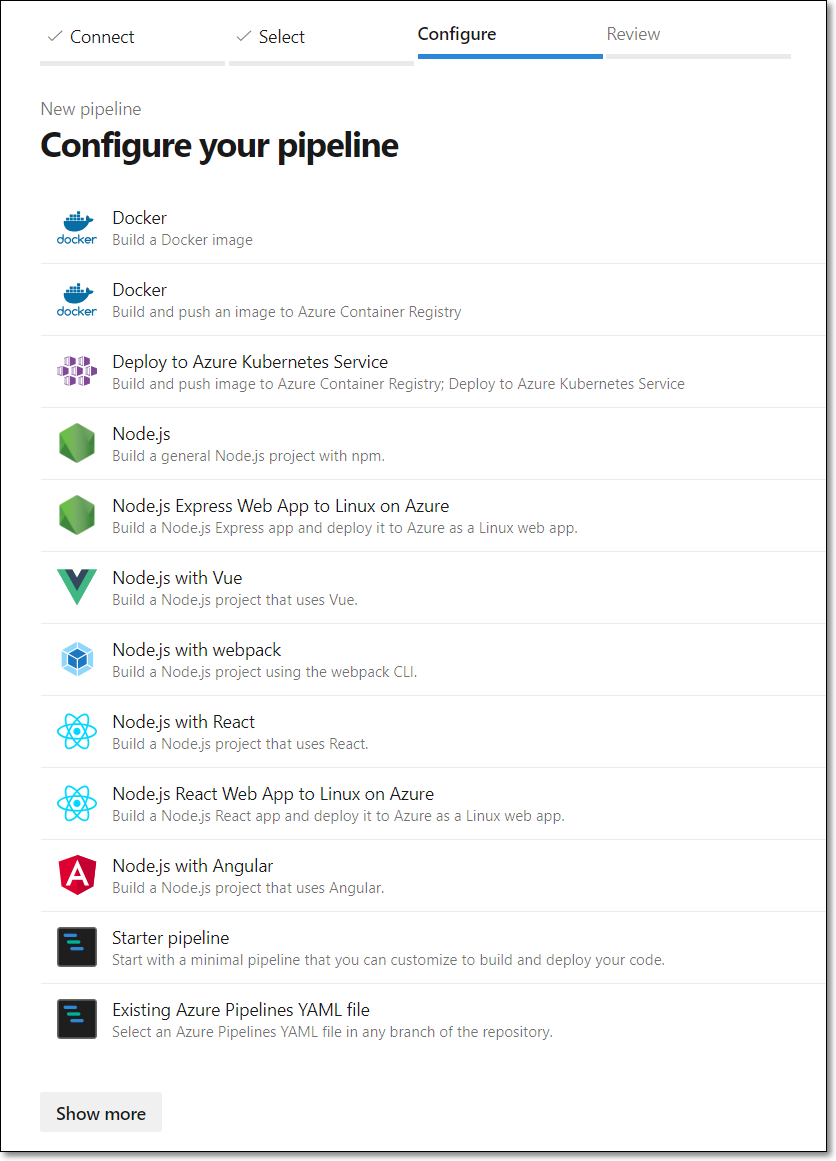
Select the type of pipeline to which you would like to add the Checkmarx One scan. To create a basic pipeline, click on Starter pipeline. Alternatively, you can add the Checkmarx One task to an existing pipeline by clicking on Existing Azure Pipelines YAML file.
The Review your pipeline YAML screen is shown.
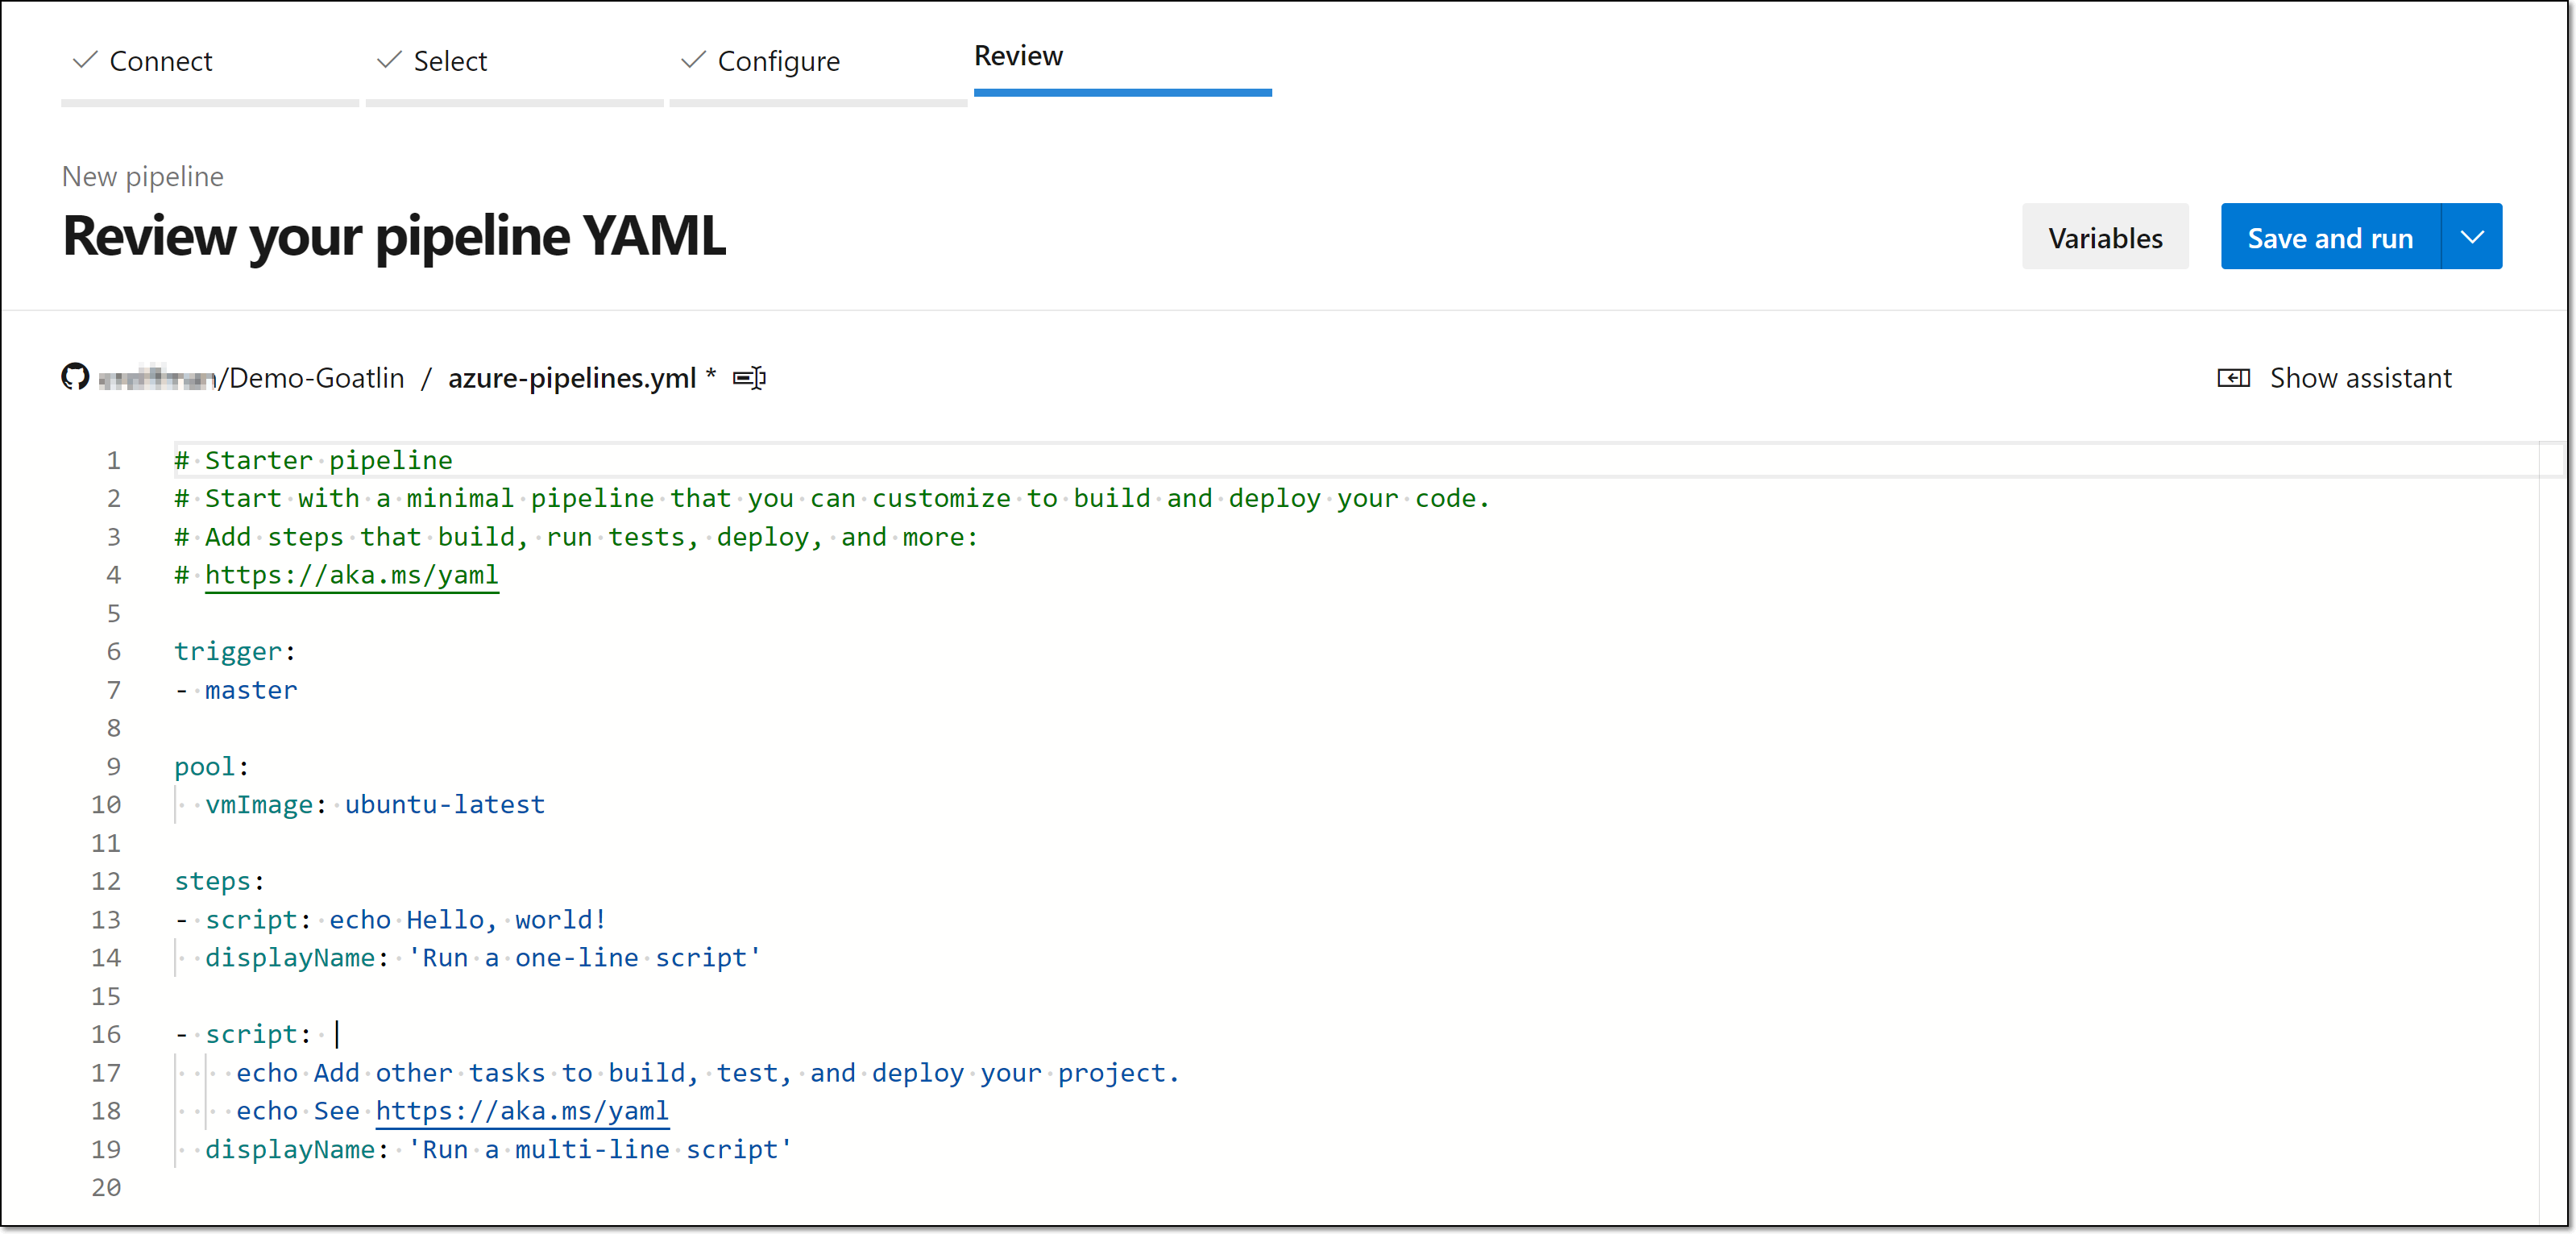
Place your cursor at the end of your YAML code.
Click Show assistant at the top right of the screen.
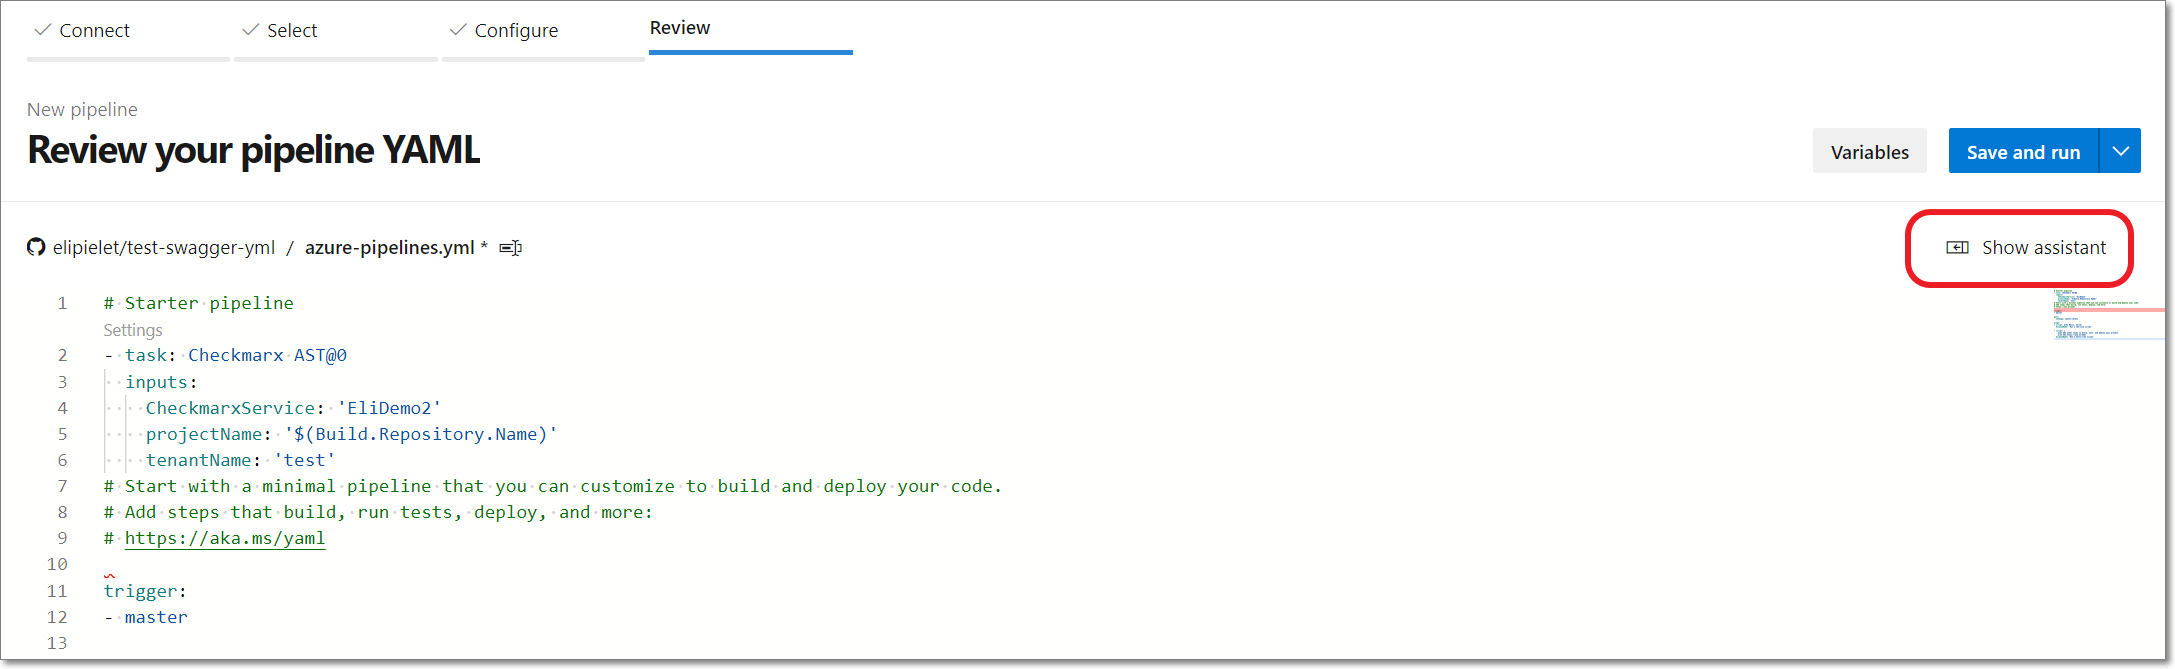
Search for Checkmarx AST and select it.
The Checkmarx AST configuration form is shown in the right-side panel.
Under Checkmarx One Service Connection, select from the dropdown list the connection that you configured for Checkmarx One earlier. For more information, see Checkmarx One Azure DevOps Plugin Initial Setup.
For Project Name, specify the name of the Project to be used in Checkmarx One. (Default: $(Build.Repository.Name).
For Branch Name, specify the name of the branch to be used in Checkmarx One. (Default: $(Build.SourceBranchName).
Under Tenant Name, enter the name of your Checkmarx One tenant account.
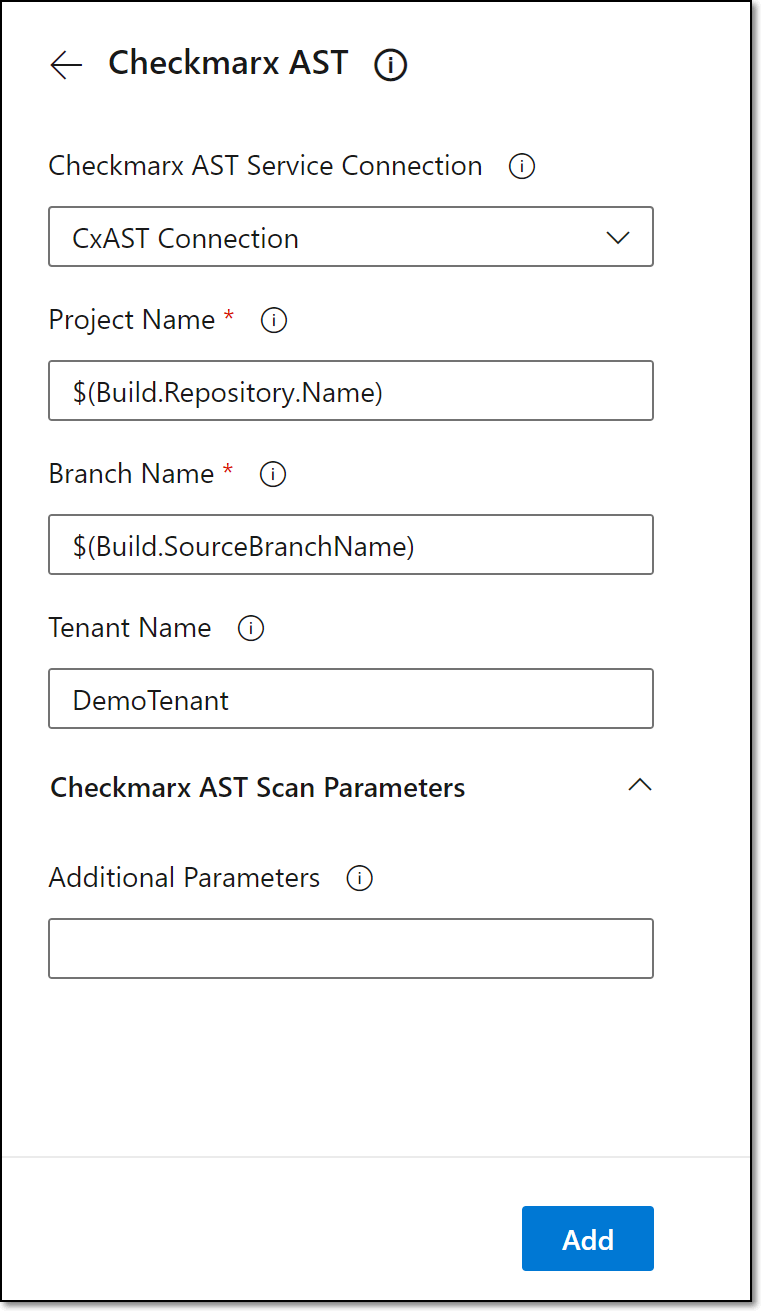
Under Checkmarx One Scan Parameters, under Additional Parameters, you can specify any CLI arguments that you would like to apply to scans of this project. See documentation here.
Notice
By default all scanners that you are authorized to run (licensed or open source) will run. To limit scans to one or more specific scanners, add the argument
--scan-types {scanner},where{scanner}is one or more of the following scannerssast,sca,iac-security,api-security,container-security, orscs.Click Add.
The Checkmarx code is added to your build process.
Add additional code for any other tasks that you would like to add to the pipeline either before or after the Checkmarx One scan.
To save the pipeline and run an initial scan, click Save and run at the top right of the screen. Alternatively, you can save without running by clicking on the down arrow and selecting Save.
The Save and run panel opens.
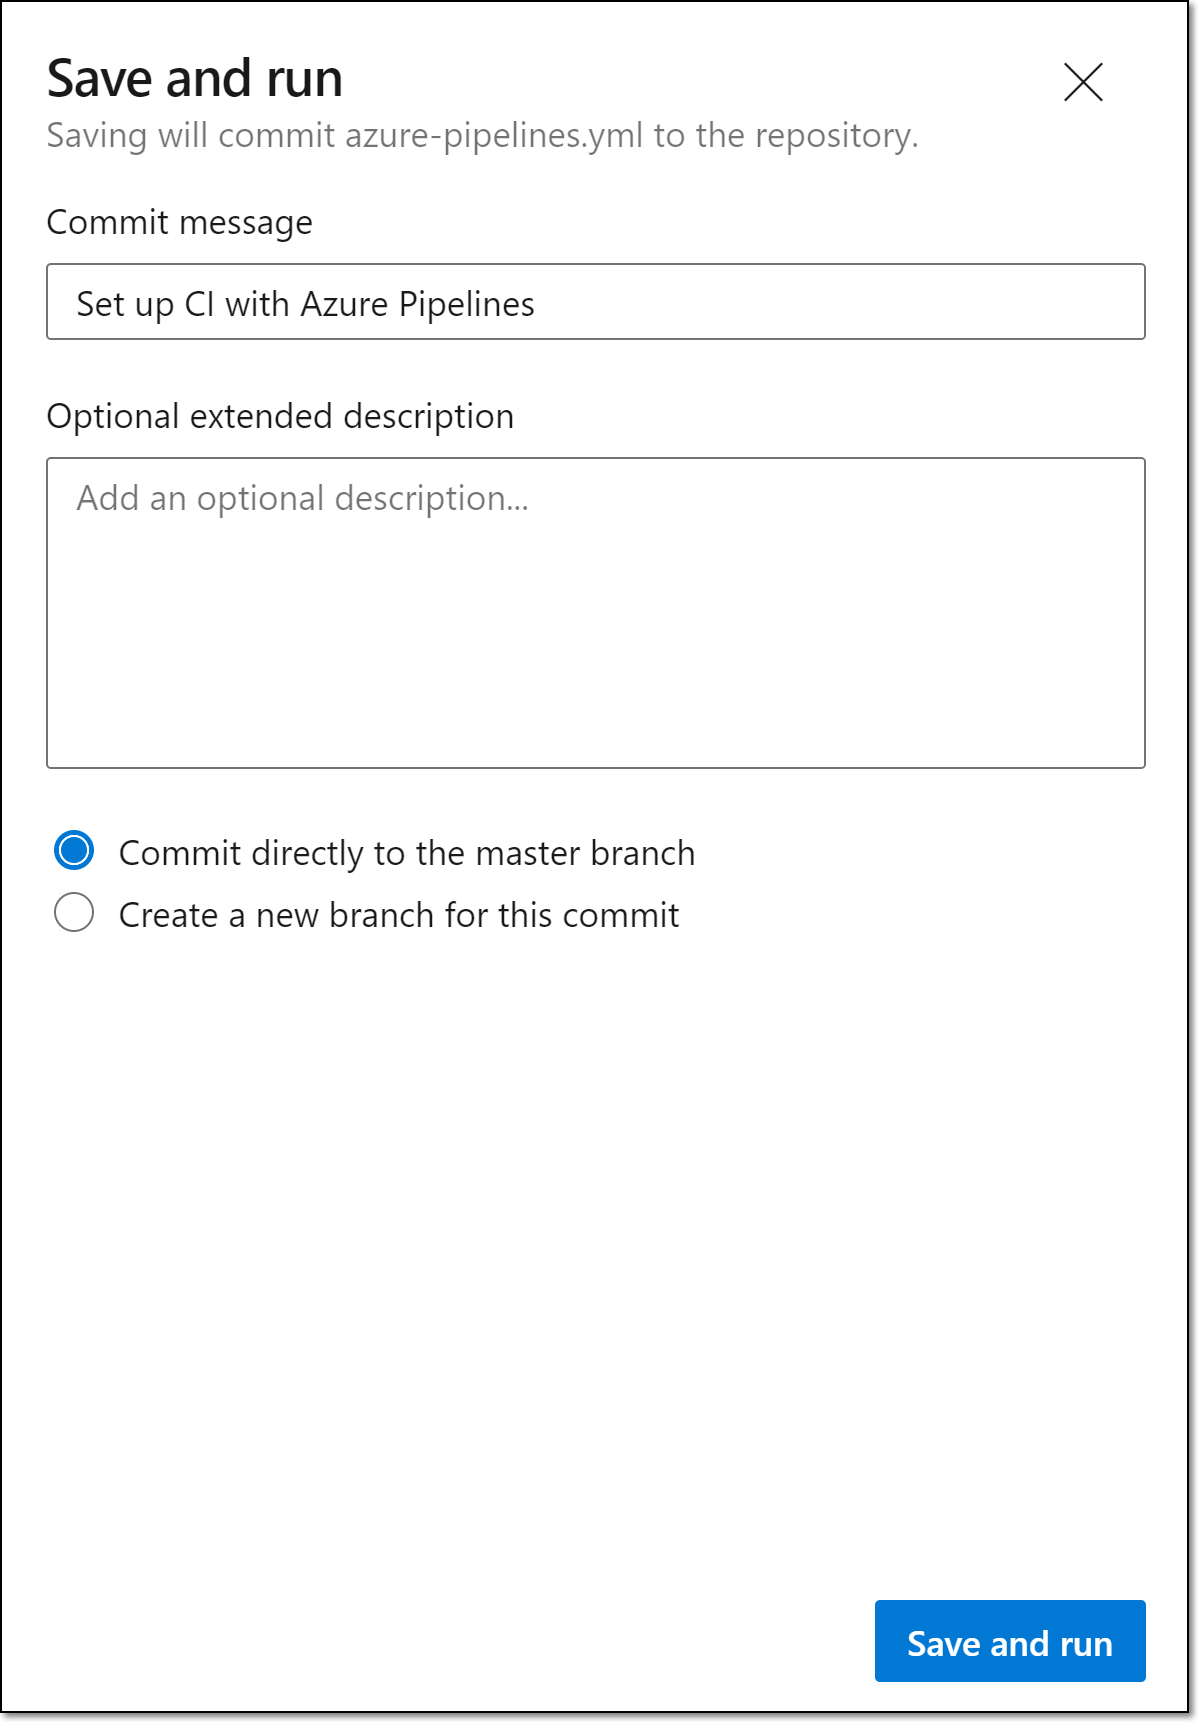
In the Save and run panel enter a Commit message and an Optional extended description.
Select the radio button for your desired commit branch.
Click Save and run.