CxOSA Quick Start
The Quick Start takes you through the main steps for setting up a CxSAST project, executing your first CxOSA scan, viewing the scan results and generating a CxOSA report.
Setup Project & Execute CxOSA Scan
Step 1: Create and Configure a Project
Creating and configuring a project is currently dependent on CxSAST and is achieved as part of the CxSAST project creation and configuration. You can add CxOSA to any CxSAST project performing a scan. For more information about this subject, refer to Creating and Configuring Projects.
Step 2: Accept End User License Agreement (EULA)
Notice
The EULA is available for Admin users only.
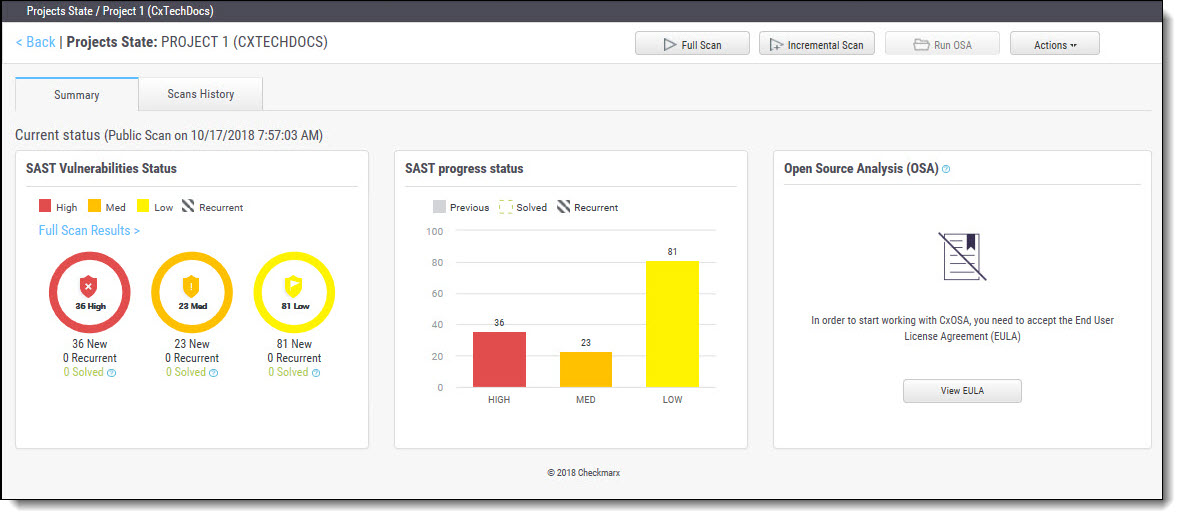
Click Dashboard, select Project State and then choose your project by clicking the Project Name link. The Consolidated Project State is displayed.
Click View EULA, read and accept the End User License Agreement (EULA).
 |
Step 3: Execute CxOSA Scan
From the Consolidated Project State screen, click Run CxOSA, browse to the local zip file containing the CxOSA project files and then click Upload.
You can initiate scan from web interface in one of the two methods:
Upload zip file containing all open source components
Upload zip file containing the manifest file. For resolving the manifest file, the package manager should be installed on the server.
Code Examples
You can scan using the following code examples;
JavaVulnerableLab
Language / Package manager / Framework: Maven / Java
Requirements:
Maven installed
Download:
Zip: https://github.com/CSPF-Founder/JavaVulnerableLab/archive/master.zip
Clone: git clone https://github.com/CSPF-Founder/JavaVulnerableLab.git "C:\JVL"
OWASP's NodeGoat
Language / Package manager / Framework: NPM / JAVASCRIPT
Requirements:
Npm Installed
Download:
Clone: git clone https://github.com/OWASP/NodeGoat.git "C:\Nodegoat"
FluentEmail
Language / Package manager / Framework: NUGET / .NET CORE
Requirements:
.NET installed
Download:
Zip: https://github.com/lukencode/FluentEmail/archive/master.zip
Clone: git clone https://github.com/lukencode/FluentEmail.git "C:\FluentEmail"
Once initiated the CxOSA scan in progress indicator is displayed.
Once the CxOSA scan has completed successfully, a summary of the scan results is displayed in the Open Source Analysis (OSA) panel. For more information and detailed CxOSA scan results, see Review Scan Results and Generate CxOSA Report, below.
For more information about the CxOSA scan execution, refer to Initiating a CxOSA Scan.
Review Scan Results and Generate CxOSA Report
Click Dashboard > Project State > Project Name link > Actions > Open CxOSA Viewer and perform the following procedures:
Step 1: Review CxOSA Scan Results
View detailed project related scan results in the CxOSA Viewer. The CxOSA Viewer is divided into the following areas of interest; Libraries, Vulnerabilities and Policy Violations.
 |
For more information about the CxOSA scan results, refer to Getting to Know the CxOSA Viewers.
Step 2: Generate CxOSA Scan Report
Click the Open Report icon and generate a CxOSA Report. The CxOSA report is divided into the following areas of interest; Security Summary, Security Vulnerabilities, License Risk and Compliance, Outdated Libraries, High-Medium Risk Licenses, Policy Violations and Inventory Libraries.
 |
For more information about the CxOSA scan report generation, refer to Generating a CxOSA Scan Results Report.