Installation Guide for SAST v9.4.0 Short-Term Projects
This quick installation guide describes how to install Checkmarx SAST in either a centralized architecture, where all CxSAST components are installed on a single host or in a distributed architecture. For additional information, refer to the CxSAST documentation.
Preparations
This section covers requirements, prerequisites, outlines the installation process and guides through the initial steps of using CxSAST.
Hardware and Software Requirements for POC
Requirements\Max. Lines of Code (LOC) | 200K | 500K | 1200K | 2000K | 4000K |
|---|---|---|---|---|---|
RAM | 8 GB | 16 GB | 24 GB | 40 GB | 72 GB |
Processor | 64 bit - Recommended: 8 up to a maximum of 12 cores | ||||
Available Disk Space | Recommended: 80 GB SSD | ||||
Operating System | Windows 10/Windows Server 2008R2, 2012, 2012R2, 2016 | ||||
Software | .Net 4.7.1, IIS 7/7.5/8/8.5/10 | ||||
Latest Version and Documentation
It is highly recommended to install the latest CxSAST version with the latest hotfix as indicated on the Checkmarx download page.
The latest CxSAST version can be obtained from the Customer Portal.
For further information on installation options, refer to the next sections in this document. For the entire library of installation instructions for CxSAST 9.4, refer to the complete installation instructions.
Obtaining a License for CxSAST
During the installation, select Request New License to continue the installation without issues.
Your CxSAST license is dedicated for a specific host (server), identified by an HID (hardware identification number), which you can obtain by running the Cx HID Generator. The HID Generator can be downloaded from the Checkmarx Utilities page.
After completing the installation successfully, submit the HID to your technical contact or your sales manager. They will send back your license. If you are not sure whom to send the HID to, submit a request to Technical Support.
Prerequisites
If not already done, install the software applications listed below before installing CxSAST. The respective installation files are included with the installation zip file (in the “third party” folder):
C++ Redist 2010 and 2015 SP3
IIS v7.0 or higher
ASP.NET Core 2.1.16 (or higher 2.1.x versions) Runtime & Hosting
MS SQL
Java JRE 1.8.0 (64-bit)
Not every CxSAST component requires all the listed prerequisites. The required location of the respective prerequisites depends on the installation option you choose. For information on installation options for CxSAST 9.4, refer to the next section.
Installing CxSAST
To start installing CxSAST, extract the downloaded zip archive (specified above) and run CxSetup.exe for any of the installation options you choose.
Depending on your needs, you can choose one of the installation modes listed below to install CxSAST:
Centralized. All CxSAST components installed on one host.
Distributed. CxSAST components installed on multiple hosts. CxSAST Engine can be installed on any common Linux distribution and runs across platforms with the other CxSAST components.
Centralized Silent. Same as Centralized, but with CLI commands (no GUI).
Distributed Silent. Same as Distributed, but with CLI commands (no GUI).
Making Required Prerequisites Available
For information about the required prerequisites and how to make them available for either the Centralized or the Distributed installation mode, use the relevant link in the following table.
The information for each mode applies to both the regular and the silent installation methods.
Installation Mode | Resource |
|---|---|
Centralized | |
Distributed |
Installing the CxSAST Application
For information and instructions on installing CxSAST, use the link associated with the desired installation mode.
Installation Mode | Resource |
|---|---|
Centralized | |
Distributed | Distributed Installing the CxSAST components on separate hosts |
Centralized Silent | Centralized Silent Installing all CxSAST components on one host using CLI |
Distributed Silent | Distributed Silent Installing the CxSAST components on separate hosts using CLI |
Checking the Installed Services
Go to Start > Control Panel > System and Security > Administrative Tools > Services.
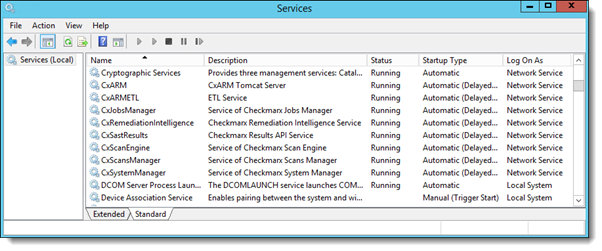
Make sure the following installed services are started:
CxSystemManager
CxJobsManager
CxScansManager
CxSastResults
CxEngineService
Shared services: ActiveMQ
Web Server - IIS Admin Service & World Wide Web Publishing Service
Checking the Installed Application Pool
Notice
If the IIS Pools are not started automatically after installation, restart the host.
Go to Start > Control Panel > All Control Panel Items > Administrative Tools > Internet Information Services (IIS) Manager .
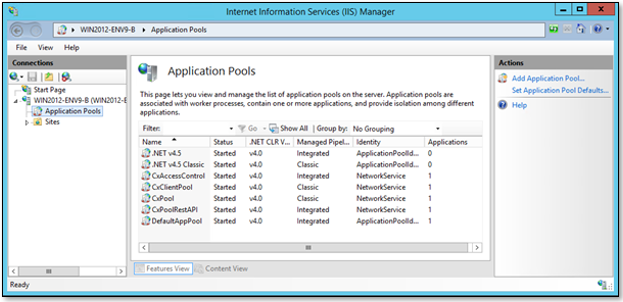
Make sure the following installed application pools are started:
On a centralized host:
CxClientPool
CxPool
CxPoolRestAPI
CxAccessControl
Enable Long Path Support in CxSAST Applications
.NET Framework 4.7.1 and above supports the Long Path feature by default. The following must be performed to enable the Long Path support.
Notice
This configuration should only be added to a host with .NET 4.7.1 or above installed, otherwise there will be issues in the application.
The following configuration must be added to the Web Service and REST API (if .NET Framework 4.7.1 is installed):
<httpRuntime targetFramework="4.7.1" />
Notice
The web.config file is usually located in the following path: C:\Program Files\Checkmarx\Checkmarx Web Services\CxWebInterface\web.config.
If a different version of .NET is installed, you must adapt the syntax accordingly.
For example:
<system.web>
</system.web>
Notice
If the httpRuntime already exists, add the targetFramework attribute as follows: <httpRuntime maxRequestLength="2097151" executionTimeout="36000" targetFramework="4.7.1" />
Uninstalling and Modifying CxSAST
The CxSAST installer has two additional options:
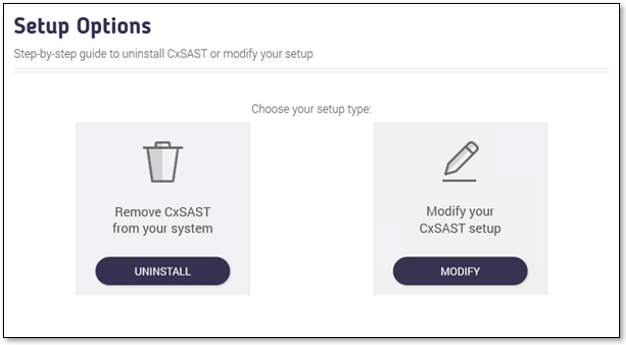 |
Uninstall – Removes CxSAST from your Server (excluding client`s properties – CxSRC sources folder and both Cx SQL databases)
Modify – Provides the option to modify the installation (remove / add Cx components).
Logging in to the Web Interface
To log in to the CxSAST web interface:
CxSAST locally (from the server host) – Use the Checkmarx Portal shortcut on the Desktop or navigate to the Checkmarx folder (Start > All Programs > Checkmarx > Checkmarx Portal).
CxSAST from any other computer – Make sure that organizational routing and firewall configuration allows the client computer to access the CxSAST Server. Point your browser to: http://<server>/cxwebclient where <server> is the IP address or resolvable hostname of the CxSAST Server.
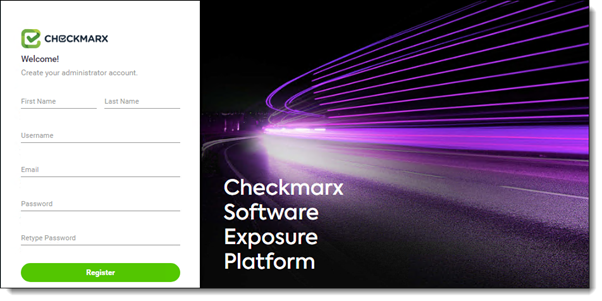
Once the Set Administrator Credentials window is displayed, add the following credentials:
First and Last Name
Administrator Username
Email
Password
Retype Password
Notice
The required password complexity is as follows: 9 to 400 characters, at least 1 uppercase letter, at least 1 lower case letter, at least 1 special character, at least 1 digit.
Click Register to complete.
You can subsequently change the Administrator password and add CxSAST users once you are inside the CxSAST web interface.
Configuring CxSAST for the First Time
To configure CxSAST for the first time:
In the CxSAST web interface, go to Settings > Application Settings > General. The General Settings window is displayed.
Click Edit.
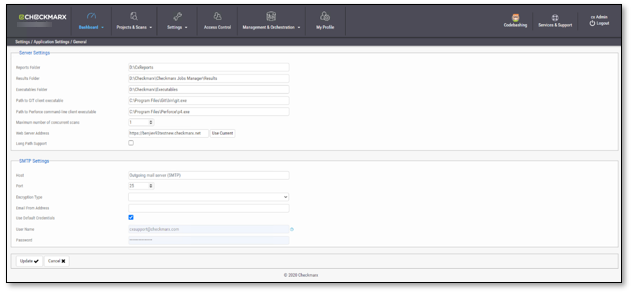
If permitted by your CxSAST license, set the Maximum number of concurrent scans parameter to the desired number (affective as a total for all the CxEngine Servers).
Provide SMTP settings and click Update.
Leave any additional settings as they are.
Verifying the Installation
To validate that you have successfully installed the correct version and/or hotfix:
In the CxSAST web interface, go to Settings > Application Settings > Installation Information. The Installation Information window is displayed.
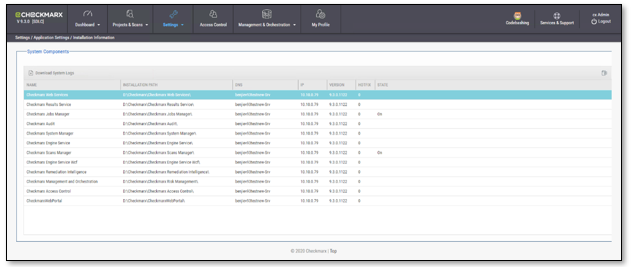
Review all CxSAST components ensuring that they are all the same version.
Scanning CxSAST Projects
Refer to our Quick Start to acquire additional information about scanning with CxSAST.
To learn more on what to do after completing the scan and reviewing the results, coordinate an advanced technical session.
CxZip Utility
For local CxSAST projects, you are required to upload zipped un-compiled source code. The CxZip Utility enables you to zip only relevant source files and reduce the size of your project.
Learn how to use the CxZip Utility by using the available information.
Knowledge Base
For additional information and explanations on the CxSAST application, visit the Checkmarx Documentation Portal.
Support
For any question or assistance, please do not hesitate to contact us at Checkmarx Support Center.