Access Control User Management
Checkmarx Access Control is a user management platform that offers administrators a centralized hub to oversee user access, roles, and permissions. This page details the navigation and management of user access, including but not limited to adding and deleting users, assigning roles and teams, and mapping LDAP groups. This page is intended exclusively for administrator use, except for the My Profile dropdown, which is accessible to users too.
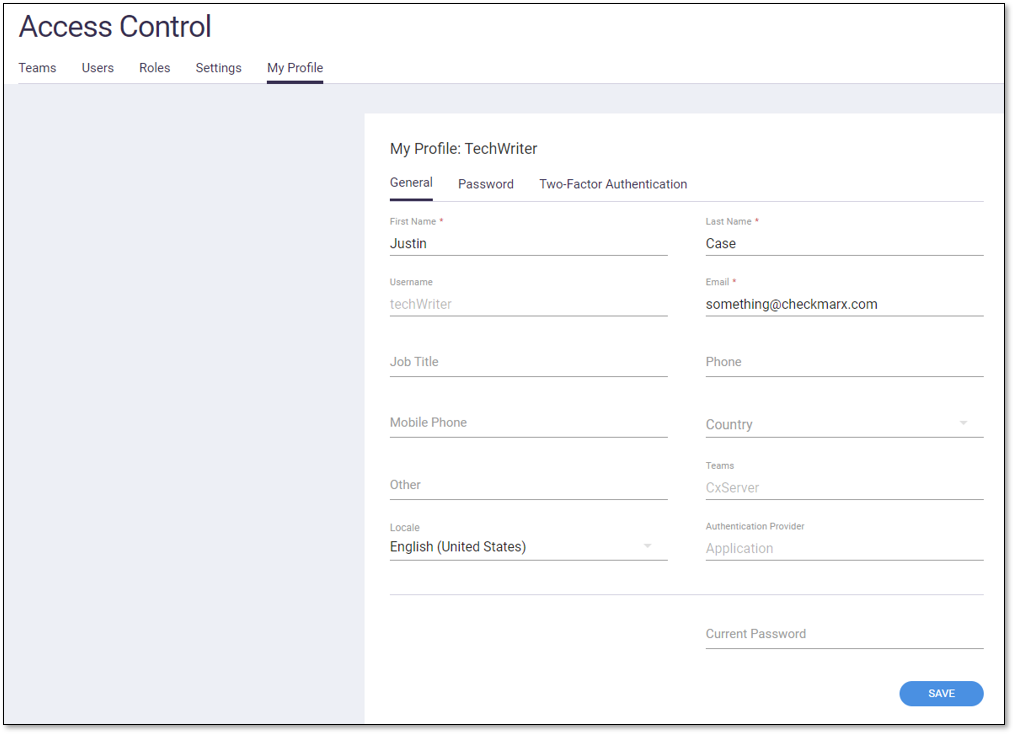
The My Profile tab includes your details and login information and is your first step when logging into Access Control as a new user. Without an assigned role in Access Control, first, navigate to the My Profile tab to customize and confirm your login info and personal details; ensure you fill in the mandatory fields (*), then click Save. On the Password page, if you are an Application user, you may modify your login passwords, but if you are an LDAP/SAML/domain user, you cannot since those passwords are managed externally. You may also set up Two-Factor Authentication by following the instructions under the respective tab.
 |
Notice
The password must contain at least 8 characters, including at least one special symbol, one lower-case letter, and one upper-case letter.
Note
This feature is intended for administrator use only.
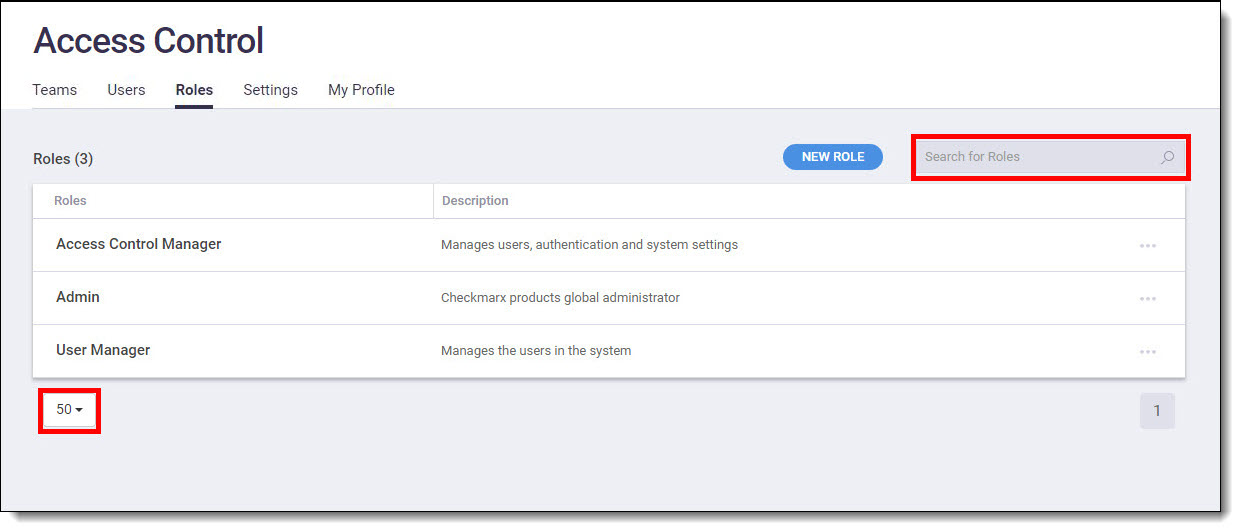
As your company's administrator, you must tailor access control to different departments. For utmost efficiency and security, it's best practice to assign only the necessary roles to each user. On the Roles tab, you can create, edit, and duplicate roles, as well as view all existing roles, including both user-created and predefined ones. You can also search for specific roles using the Search for Roles field and adjust the number of roles displayed in the window.
 |
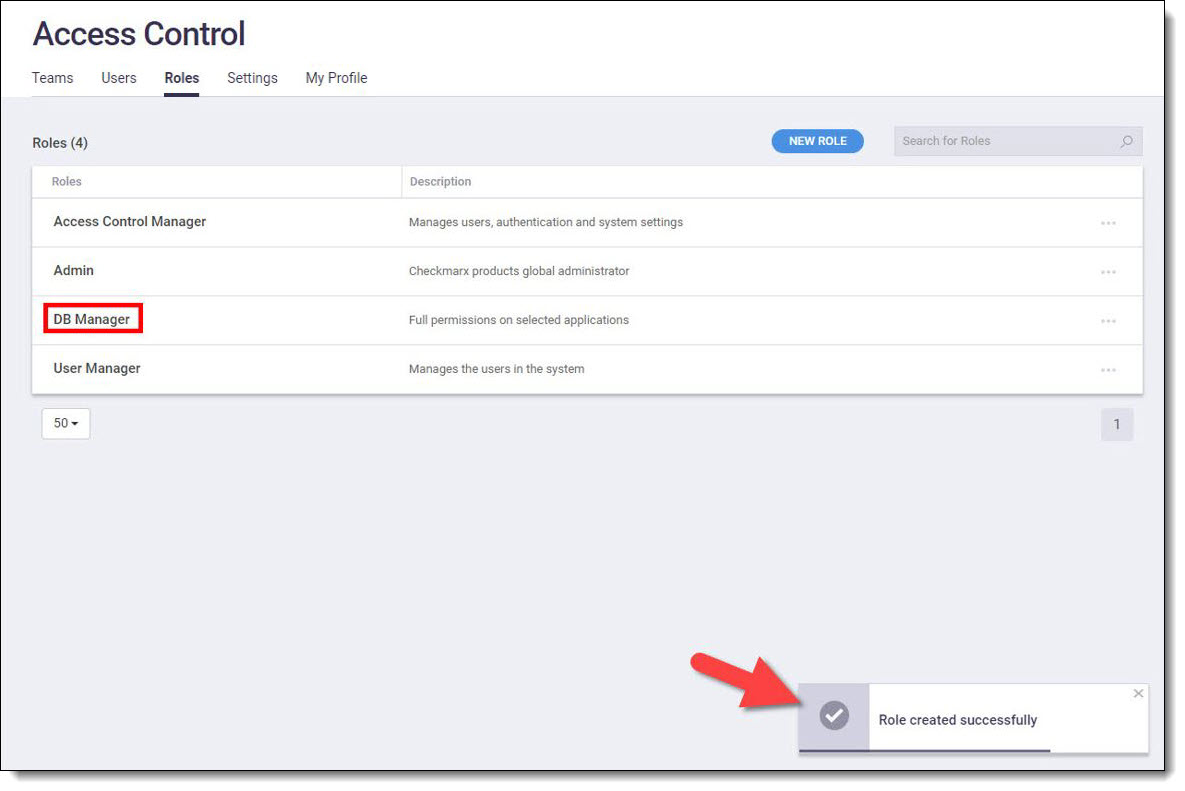
To begin creating a new role, navigate to the Roles tab and click on New Role to open the Role window, where you can define the role's name and description and select the appropriate permissions for access control. Manage permissions by expanding and collapsing the permission lists and their sub-categories by clicking  . Click Select All or Clear All to apply all the permissions in the category to the role, or select individual permissions manually. Once you've configured the role, click Save to add it to the list of roles.
 |
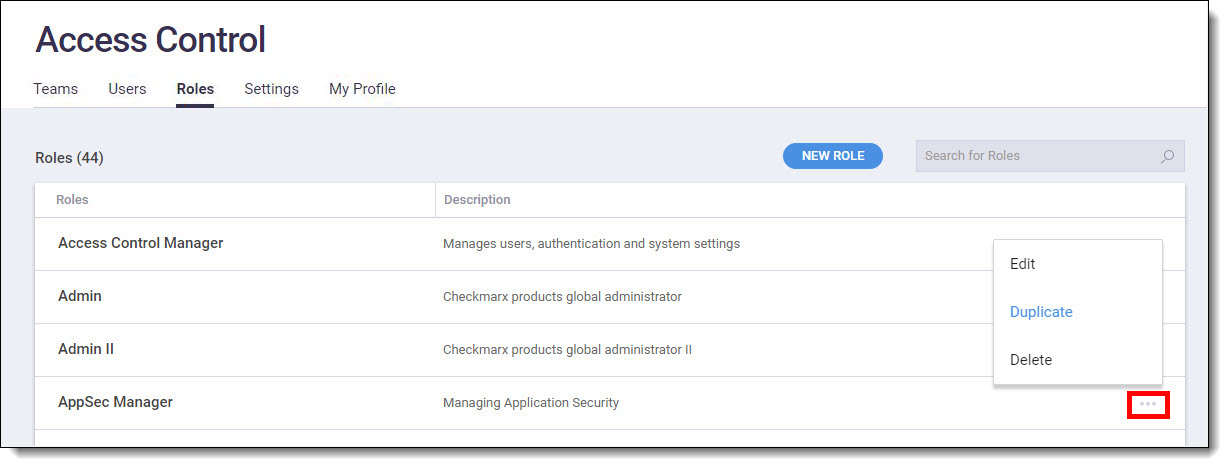
If adjustments are needed to a user's role, you may Edit , Duplicate, or Delete it by clicking on the  at the end of the role's row.
 |
Before editing a role, it is recommended first to duplicate it and then make the necessary changes to the duplicated role, including assigning a unique name (see Duplicating Roles below). Like the process above for assigning permissions to a new role, edit permissions by expanding and collapsing the permission lists and their sub-categories by clicking . Click Select All or Clear All to apply all the permissions in the category to the role, or select individual permissions manually. Once you've configured the role, click Save.
Note
Any changes performed to a role (adding or removing permissions) will only occur after the assigned user logs out and re-logs into the system or once the access token is renewed (usually once every hour).
As an administrator, you may duplicate roles to quickly create new ones suited to a project's requirements while maintaining the integrity of other roles within Access Control. If you need a new role mirroring the characteristics of an existing role, whether it's a user-generated role or a predefined one that can't be edited, duplicate the role and customize it. The duplicated role must be assigned a new name to protect against unintentionally altering an existing role. Like the above process for assigning permissions to a new role, manage permissions by expanding and collapsing the permission lists and their sub-categories by clicking . Click Select All or Clear All to apply all the permissions in the category to the role, or select individual permissions manually. Once you've configured the role, click Save.
To delete a role, under the Roles tab, click the and select Delete.
Notice
Predefined roles in Access Control cannot be updated or deleted and are displayed as relevant to the Checkmarx product(s) installed.
Note
This feature is intended for administrator use only.
Administrators who need to add new employees can do so under the Users tab by clicking 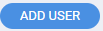 and filling in the relevant fields within the General tab and by marking the relevant checkboxes in the Teams and Roles tabs. Every User must be associated with at least one team; assigned roles are optional. Alternatively, they can import an existing user from an LDAP directory or Windows domain.

Administrators manage their users by manipulating the table. They can search for and view users, filter columns, add or delete users (including LDAP/domain user import), modify user statuses (activate or deactivate), assign teams and roles, edit user data, reset passwords, and export user lists to CSV format.
Find a specific user using the search bar, which dynamically filters the list. You can also apply filters to specific columns (Teams, Roles, and Last Login) within the Users tab by clicking  on the column headings, selecting your desired filtering options, and clicking Filter. Resize the column width by clicking and dragging the header dividers.
At the end of each user row, by clicking , open a dropdown that offers options for editing, duplicating, deleting users, resetting passwords, and granting an exemption from two-factor authentication.
Edit users to change their General settings and their Teams and Roles. You may also activate or deactivate them. All new users are activated by default. Deactivated users cannot sign in, but they can be reactivated at any time. Users can also be deactivated via the LDAP Server settings, where a periodically performed sync (if enabled) deactivates all deleted LDAP users (see Access Control - Settings Tab > LDAP Settings – Synchronization)
To export the entire list of Access Control users, click Export, and the displayed table will be downloaded to your default directory.
You cannot reset passwords for LDAP users as they are determined solely by the LDAP Server. LDAP users cannot use the Forgot password link or modify the Username or Expiration Date fields.
To reset an existing user's password, click the user's  and select Reset Password from the dropdown menu. A temporary password is provided for the user’s initial login.
You will need to send the user this temporary password, so make a note of it (or you can click Copy to save it to the clipboard), and then click  to close the message window.
Send the user the temporary password, instruct the user to sign in to Access Control using that temporary password, and then change the password as follows:
Enter the temporary password.
Change the temporary password to one with a minimum of 8 characters, which includes at least 1 in uppercase, at least 1 non-alphanumeric character, and at least 1 digit.
Click Update Password.
Note
This feature is intended for administrator use only.
Under the Teams tab, manage the various levels (hierarchy) of your teams to match project requirements, including adding and deleting members, renaming and restructuring the team hierarchies, assigning users as members to those teams, and resizing the teams' tree view.
Search specific teams within the Hierarchy tree in the search bar. The tree dynamically filters as you type, displaying results in bold text. To clear the filter, erase the search string or click the X on the search bar. The Teams tab further enables the addition, deletion, and renaming of teams within the Hierarchy pane. By clicking on the parent level of a new team and selecting Add Team, you can input the new team's name in the dialogue box and create it.

In the hierarchal tree structure, click on the level that will be the parent level of the team you are creating and select Add Team. Enter a team name in the dialog box using any character (except \, /, and .) and select Add Team. The newly added team name now appears in the hierarchal tree structure.
Note
When a user is assigned to a newly created team, the new team appears immediately for that user in the hierarchal structure. However, other changes will be seen only after logging out and then logging in again. For example, if a logged-in user is assigned to an additional team in a different hierarchy, the user will be able to see the additional team (in the Users tab) and its respective members (in the Teams tab > hierarchal tree structure) only at that point.
Select the same team and click Delete to delete it. Deleting a team will remove all LDAP group mappings connected to the team.
Note
It is impossible to delete a team that is used as a default team in an LDAP server or SAML IDP.
Users can only rename teams that are at a level hierarchically lower than the team(s) to which they belong. As an admin or someone with a Teams Manager role, you're a member of the CxServer team (the highest-level team), so you may rename any child or lower-level teams. To rename a team: In the hierarchal tree structure, click on the team to rename, then click and select Rename Team. Enter a team name in the dialog box and click Save. The renamed team name now appears in the tree. Although a user in the CxServer team can dissociate themselves from the team, there must be another user remaining on the CxServer team.
You may move a team in the hierarchy by dragging it (you may need to position it to the right until you see a blue line marking the position where you are repositioning the team) and selecting Move on the confirmation prompt.
 |
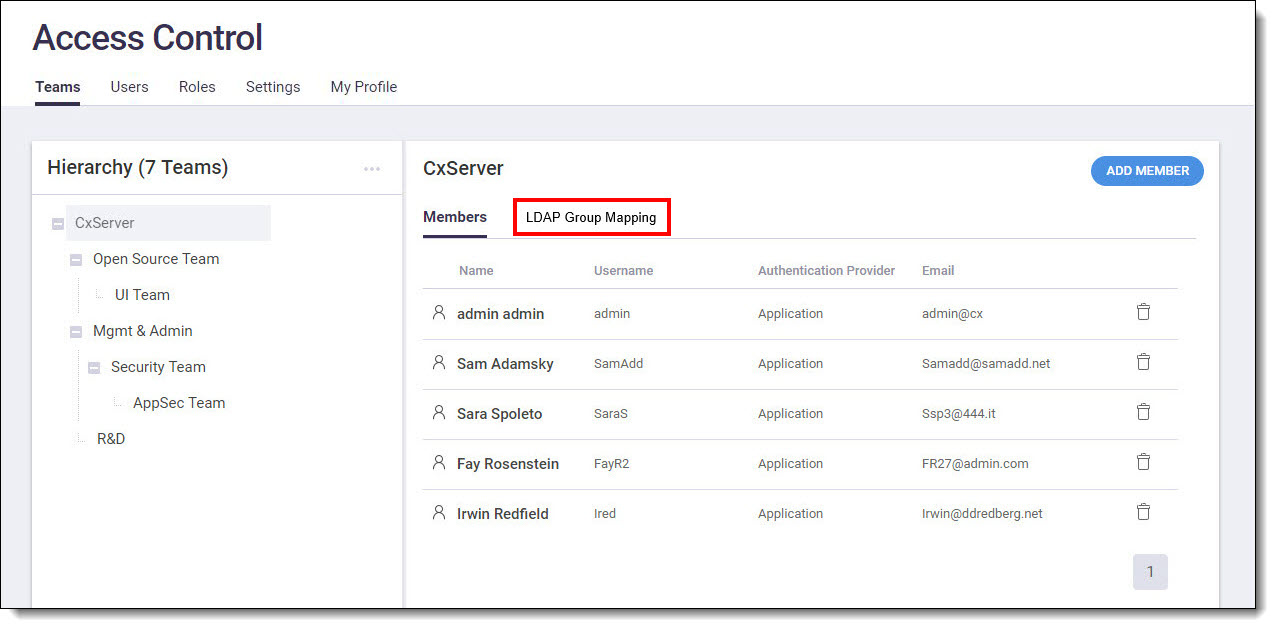
In Teams tab > Members, you can add or delete members for any existing team (the user will not be deleted). In the Hierarchy tree, click on the team that you want to assign member(s) to.
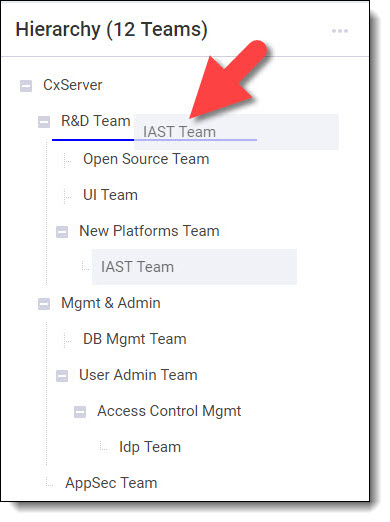
Click Add Member. Existing members of the team are displayed in the Add Team Member window.
Search by name using the Search Users bar, or scroll through the list and mark the checkboxes of members to add to the team.
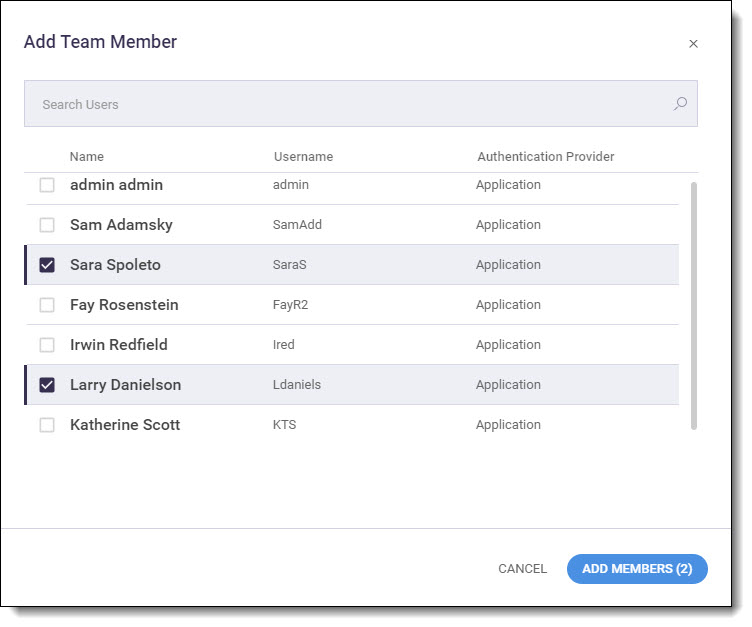 |
Click Add Members. The member(s) are added to the team:
 |
To remove a member, click  and confirm.
Note
LDAP Group Mapping is available only if all of the following apply:
At least 1 configured LDAP server is active.
Synchronization is enabled (see Access Control - Settings Tab > LDAP Settings – Synchronization)
Advanced Team & Role Mapping is enabled (see Access Control - Settings Tab > LDAP Settings – Synchronization)
User has permissions to manage Authentication Providers (Admin or Access Control Manager permissions)