Required Prerequisites for Installing CxEngine
Linux host, equipped with either an x64 or ARM64 processor.
Docker engine, available from https://docs.docker.com/engine/install/
For Amazon Linux images: Increased limit of file descriptors as explained below.
Package Content
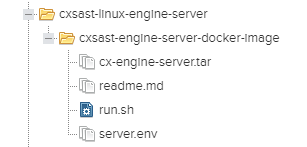
The CxEngine package for Linux contains the following files:
cx-engine-server.tar (CxEngine image)
readme.md
run.sh
server.env
The package is provided with the following directory structure:
 |
Installation and Configuration
These instructions assume the prerequisites are in place and you downloaded the installation package.
Installing CxEngine
Create a new directory.
Copy the three installation files into the new directory:
cx-engine-server.tar
server.env
run.sh
Retrieve the AMQ Password and the URL. The AMQ is usually deployed as part of the CxManager component.
To retrieve the AMQ password, connect to the CxSAST database and execute the following SQL query:
1 SELECT TOP (1000) [Id]2,[Key]3,[Value]4,[Description]5 FROM [CxDB].[dbo].[CxComponentConfiguration]6 WHERE [Key] = 'MessageQueuePassword'To retrieve the AMQ URL, connect to the CxSAST database and execute the following SQL query:
1 SELECT TOP (1000) [Id]2,[Key]3,[Value]4,[Description]5 FROM [CxDB].[dbo].[CxComponentConfiguration]6 WHERE [Key] = 'ActiveMessageQueueURL'
Open server.env and update the following environment variables with the required data as follows:
ES_MESSAGE_QUEUE_PASSWORD={retrieve from database}
ES_MESSAGE_QUEUE_URL=tcp://{client host address as explained below}:{port}
CX_ES_ACCESS_CONTROL_URL=http://{client host address}/CxRestAPI/auth
CX_ES_END_POINT={cx-engine-server host address - example - http://x.x.x.x:8088}
If a proxy is used, add the following proxy environment variables:
HTTP_PROXY=http://<ip>:<port>
HTTPS_PROXY=https://<ip>:<port>
Enter sh run.sh to install CxEngine. The image (cx-engine-server.tar) is extracted and loaded, and the container is established.
Notice
run.sh uses port 8088 by default, which must be entered in the server.env variables as relevant. To use a different port, follow the instructions below and use that new port where entering the port is required.
Warning
Unlike Windows services, the CxSAST Linux container does not restart automatically by default. Therefore, you must configure the CxSAST Linux Engine containers to restart automatically. To do so, open run.sh with your text editor and, in the “docker_run_args=” section, add or uncomment “—restart=always”.
Changing the Port for the Command run.sh
It is recommended to use the default port (port 8088). If you have to use a different port, for example, port 8090, change the port as follows:
Run the “docker run” command 0.0.0.0:{exposed port}:8090
Save the new setting.
Verifying that the Server with CxEngine is Running
The syntax below assumes you use the default port (port 8088).
Run the “docker ps” command. The following is returned if the container is running:
1* IMAGE: cx-engine-server2* PORTS: 0.0.0.0:8088->8088/tcpRun the command "docker logs -f {container ID}”. The following is returned if the server is running.
1* Now listening on: <http://[::]:8088> |Application started
Connecting the CxEngine to the Application
In the web portal, go to Settings > Application Settings > Engine Management and connect to the new engine as explained under Engine Management.
Centos 8 Installation Notes
This note addresses users who use Centos 8 and did not set up a Docker engine yet.
RHEL switched from iptables to nftables, which means that there are no more iptables running on the Centos 8 level and all the firewall functionality is provided by nftables.
The migration from iptables to nftables requires one of the following:
Configuring firewalld to use iptable configurations.
Enabling masquerading.
Configuring Firewalld to use Iptable Configurations
This section explains how to provide an interface to firewalld to add iptables. To do so, do the following:
At the prompt, enter - sudo vi /etc/firewalld/firewalld.conf
Change - FirewallBackend=nftables to - FirewallBackend=iptables
Save the change and reload firewalld. To do so, enter - sudo systemctl restart firewalld.service at the prompt.
Enabling Masquerading
Check what interface docker is using (default is 'docker0').
ip link show
Check available firewalld zones, e.g., 'public'.
- sudo firewall-cmd --get-active-zones
Check what zone the docker interface it bound to, most likely 'no zone' yet.
- sudo firewall-cmd --get-zone-of-interface=docker0
Add the 'docker0' interface to the 'public' zone. Changes take effect once firewalld is reloaded.
- sudo nmcli connection modify docker0 connection.zone public
Add masquerading. It allows for docker ingress and egress.
- sudo firewall-cmd --zone=public --add-masquerade –permanent
Optionally open required incoming ports (optional).
- sudo firewall-cmd --zone=public --add-port=443/tcp
Reload firewalld.
- sudo firewall-cmd –reload
Reload dockerd.
- sudo systemctl restart docker