- Checkmarx Documentation
- SAST/SCA Integrations
- IDE Plugins
- IntelliJ Plugin
- Setting Up the IntelliJ Plugin
Setting Up the IntelliJ Plugin
The instructions below refer to the local installation of the IntelliJ Plugin. You can make the IntelliJ plugin centrally available to organizational IDE users so they can link to it. Upon plugin updates, the organizational IDE users will be automatically prompted to update. For details, search "IntelliJ idea Enterprise Plugin Repositories".
Notice
The IntelliJ plugin within the repository is only compatible with the latest CxSAST version. Therefore, a prior version of the CxSAST IntelliJ plugin must be updated to work with CxSAST v9.5.0 (and up).
IntelliJ Plugin (9.00.45) is compatible with IntelliJ IDEA Community Edition up to version 2025.1.x. However, new versions of IntelliJ IDEA may not work on old JREs. Please check the IntelliJ IDEA online documentation before manually updating the Boot Runtime IntelliJ.
Warning
Starting with version 9.00.42, IntelliJ versions will no longer be available for download from the marketplace.
To install and configure the IntelliJ Plugin:
Download the IntelliJ Plugin zip archive.
In IntelliJ, go to File and click Settings.

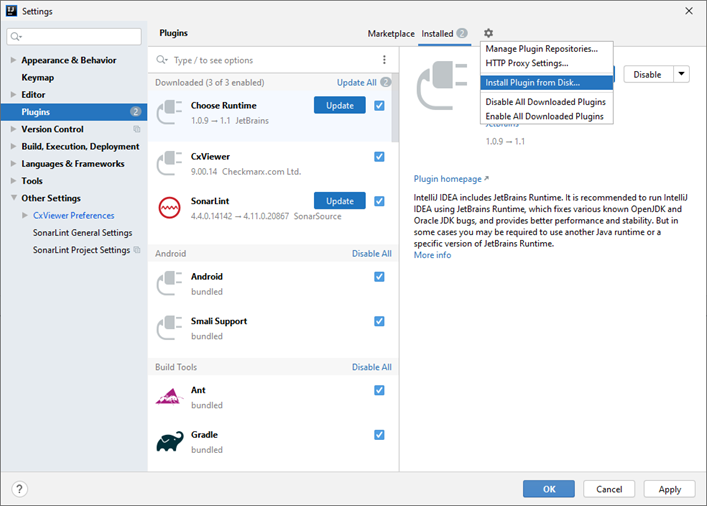
Select Plugins and click Install plugin from disk.

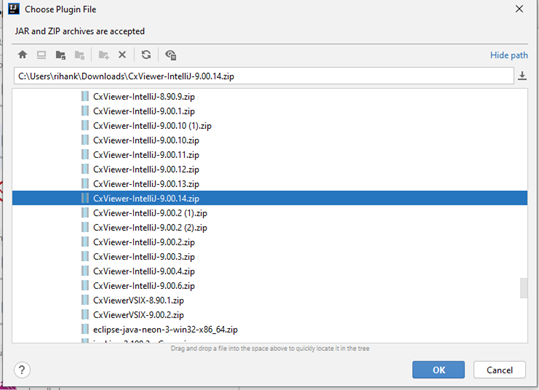
Navigate to the downloaded IntelliJ plugin ZIP file archive and click OK.

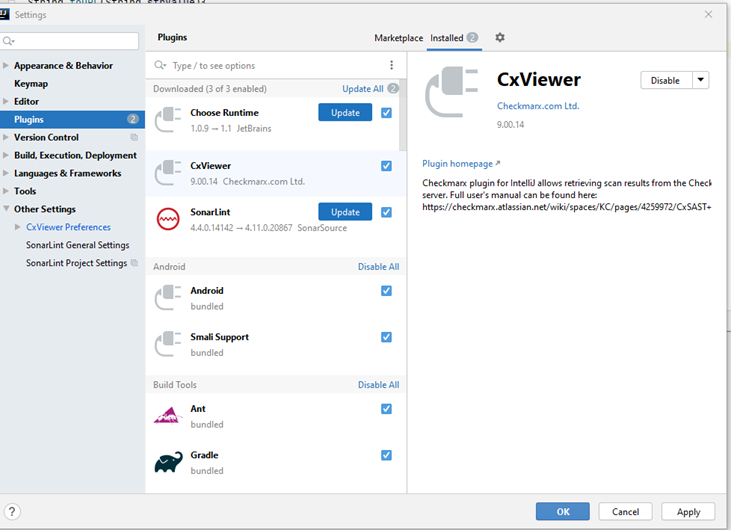
Click OK and restart IntelliJ.
In IntelliJ, go to File and then click Settings.
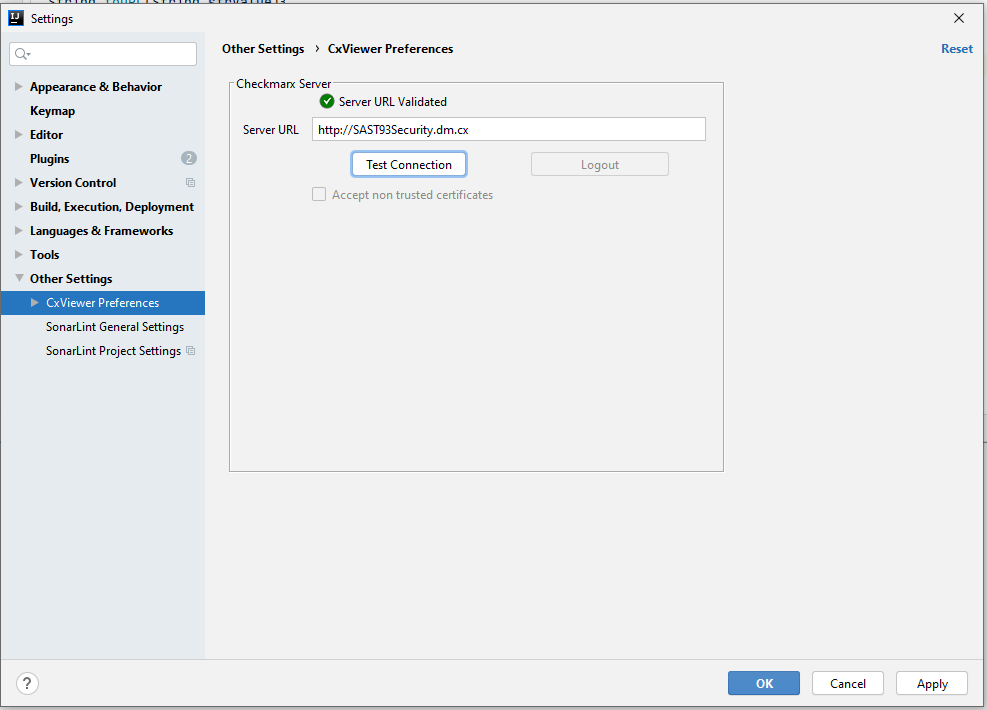
From Other Settings, select CxViewer Preferences. The Authentication window is displayed.

Enter the path to the CxSAST server in the Server URL field (for example, http://<server_name>.
Click <Test Connection> to validate the connection.
Click <Apply> and then <OK>.
Notice
The Logout button can be used if you want to log on to a different server or as a different user.
The ‘Accept non trusted certificates’ checkbox can be used to add certified security to the connection in the following:
When enabled (by default), all non-trusted certificates are accepted, for example, a self-signed server.
When disabled, only certificates signed by a trusted certificate authority can be accepted.
The checkbox is only enabled if the URL starts with https (self-signed).
In case of server connection issues, enter the hostname instead of the IP address in the server URL field. The IP address and the hostname are listed in the etc/hosts file, for example, 10.32.5.117 sdlc-sast-89.cxquality.com.
The OpenId Connect-based authentication requires registered OAuth 2.0 clients with supported redirect URLs. DNS hostname or IP Address can be used if URLs redirect URLs exist. If not present, an 'invalid redirect URL' error could be seen during the authentication. While using the DNS hostname, ensure it resolves to the Checkmarx server's IP address. If the scan results are not displayed while using the IP address, specify the Checkmarx Server URL with the DNS hostname.