Creating a Report
To request a new report generation, click  at the top right corner or on
 the action row available for each custom template.
Both options are available in the Report Templates view.
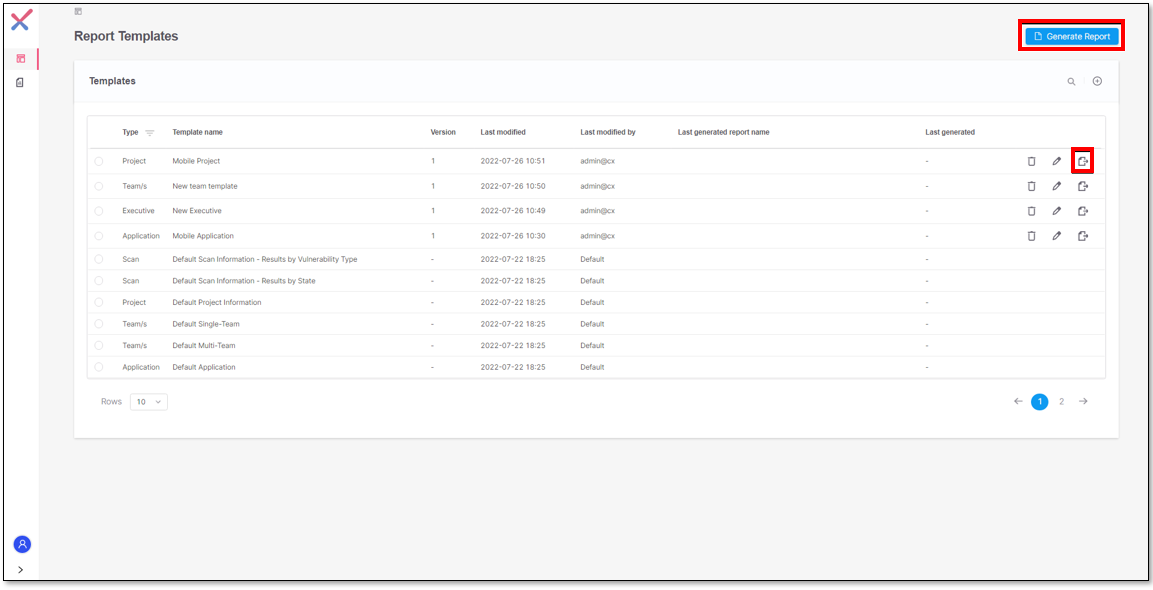 |
Generate Report button
Click
 . A menu for selecting the report type is displayed.
Expand the drop-down list:
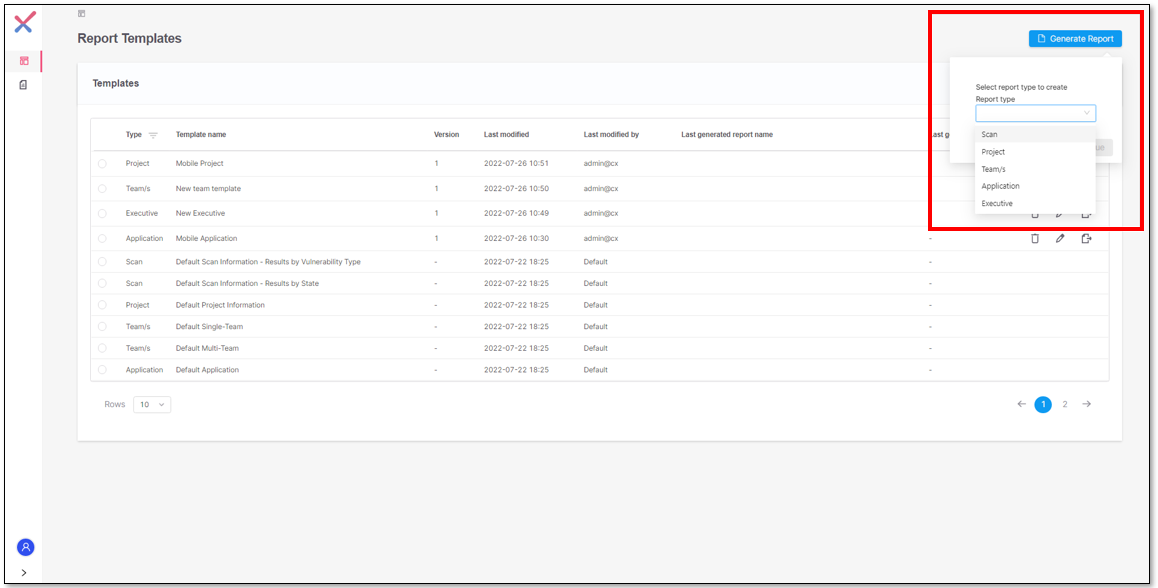
Select the template and click Continue.
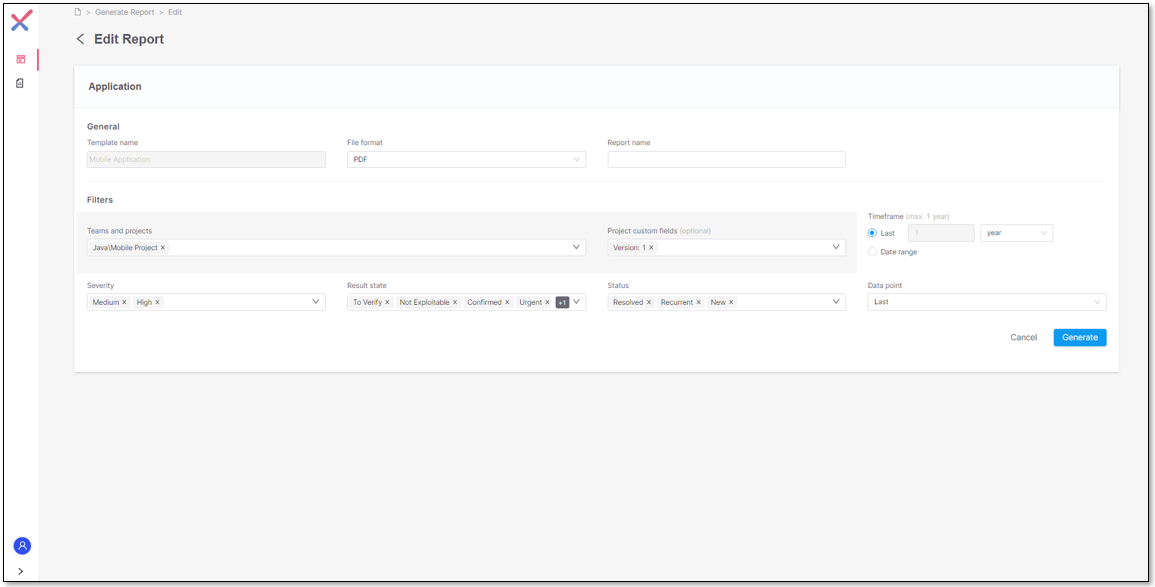
A new screen with the report parameters is displayed:
Template Name: For more details, refer to Template Name.
File Format: For further details, refer to File Format.
Report Name: Name of the report to be generated. The service automatically generates a report ID that will be concatenated to the specified report name.
Scan Id: The Scan Id parameter is available when generating a scan template. You must specify the identifier of the scan for the one you want to get information in the report.
Filters: Refer to Defining Filters.
Metadata: Refer to Defining Metadata.
Click
.
You will receive a message informing you that the report is being generated.

Once the report is generated, you will see a message informing you that the report has been successfully generated.

In case of failure, you will see a warning.

Access the Generated Reports Log screen to download the report or to check the error message.
Generate Report Shortcut
You can request a report generation by clicking , which is available in the templates list for each template. This option is available only for the custom templates.
Once you click the button, the report is automatically generated based on the pre-defined filters. The report name consists of the template name concatenated with an internal ID generated by the service.
If you intend to change the report parameters in some occasional situations, use the Generate Report button and Edit the Report.
Editing the Report and Template
You can edit a report by clicking on the edit icon when generating a report and changing the pre-defined filters  .
.
If you generate a report based on a Default template, you will have the Edit Report option available. Defining filters is mandatory for default templates, so the Generate button appears enabled only after you have finished editing the report and defining the mandatory filters for the selected template type.
Two options are available if you generate the report based on a Custom template: Edit Report and Edit Template.
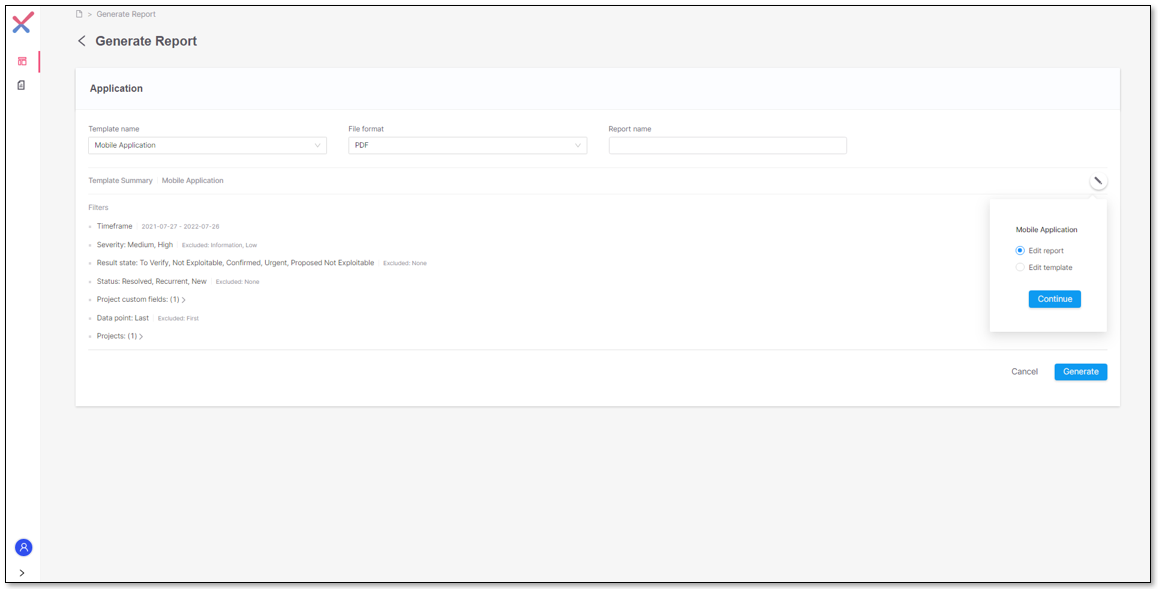 |
For both options, Edit Report and Edit Template are enabled only if you have the proper permissions.
Edit Report
This option allows you to change the report definitions and filters for this request and generation. The changes do not apply to the template itself.
Once you click the Edit Report button, you will see the template General and Filters definitions in edit mode, so you can apply the desired changes before requesting the report generation.
 |
After editing the parameters, you can click to request the report generation.
To cancel changes and proceed with the pre-defined configurations, click Cancel.
Edit Template
This option allows you to change the general definitions and filters of the template. These changes apply to the template itself.
Once you click the Edit Template button, you will see the template General definitions and Filters in edit mode so that you can apply the desired changes to the template.
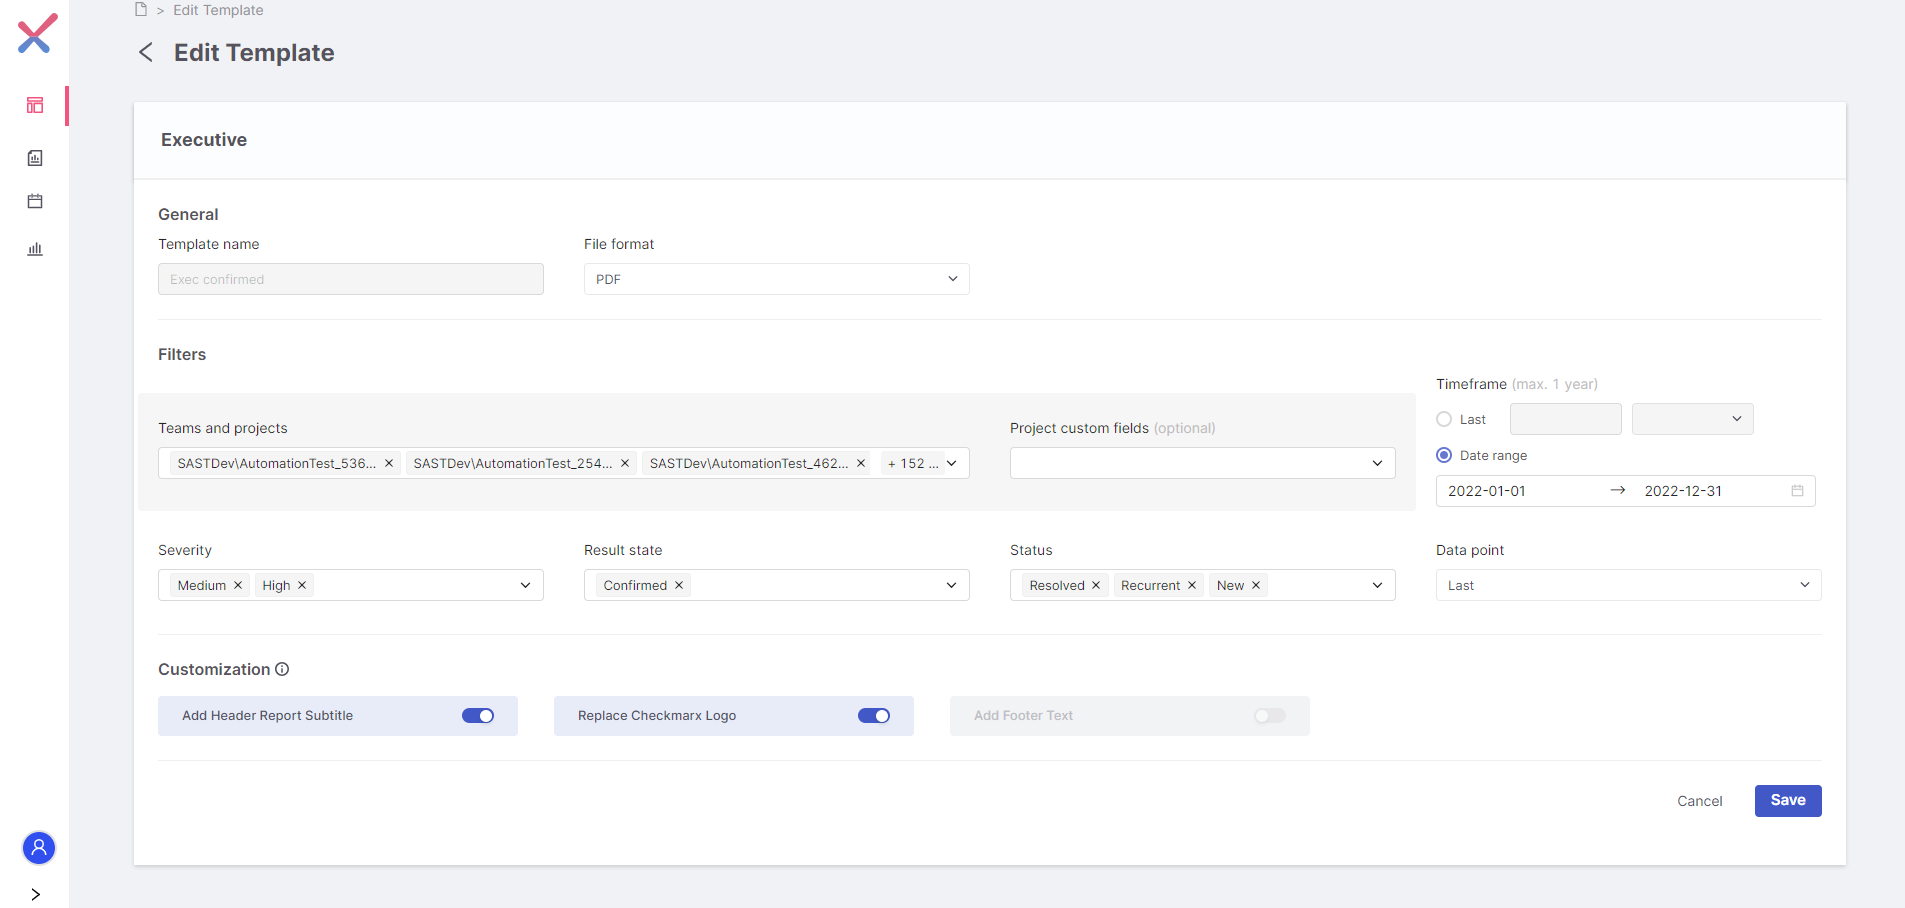 |
For further details on how to edit a template, see Editing a Template.
For editing the report logo, header, and footer, see Customizing Your Report Logo, Header, and Footer