- Checkmarx Documentation
- Checkmarx Codebashing
- Managing Codebashing as an Administrator
- Managing Assessments
Managing Assessments
How much did we learn by going through the courses? The Assessment functionality helps finding an answer as to what has been learnt well and where additional training is necessary.
Assessments are test sessions on specified subjects assigned to specific teams and/or single users of any role.
The Assessment Dashboard provides an overview of strong and weaker ratings, thus showing where teams and single users need to still improve and where they are already on top of things.
Note
Assessments are available in various languages. To select a different language, go to Content Language under Account Settings.
Non-participation does not affect the rating.
The Assessment Dashboard
The Assessment Dashboard provides an overall view for all users as illustrated and listed below:
From the menu, select Assessments. The Assessment Dashboard appears displaying the items for all users.
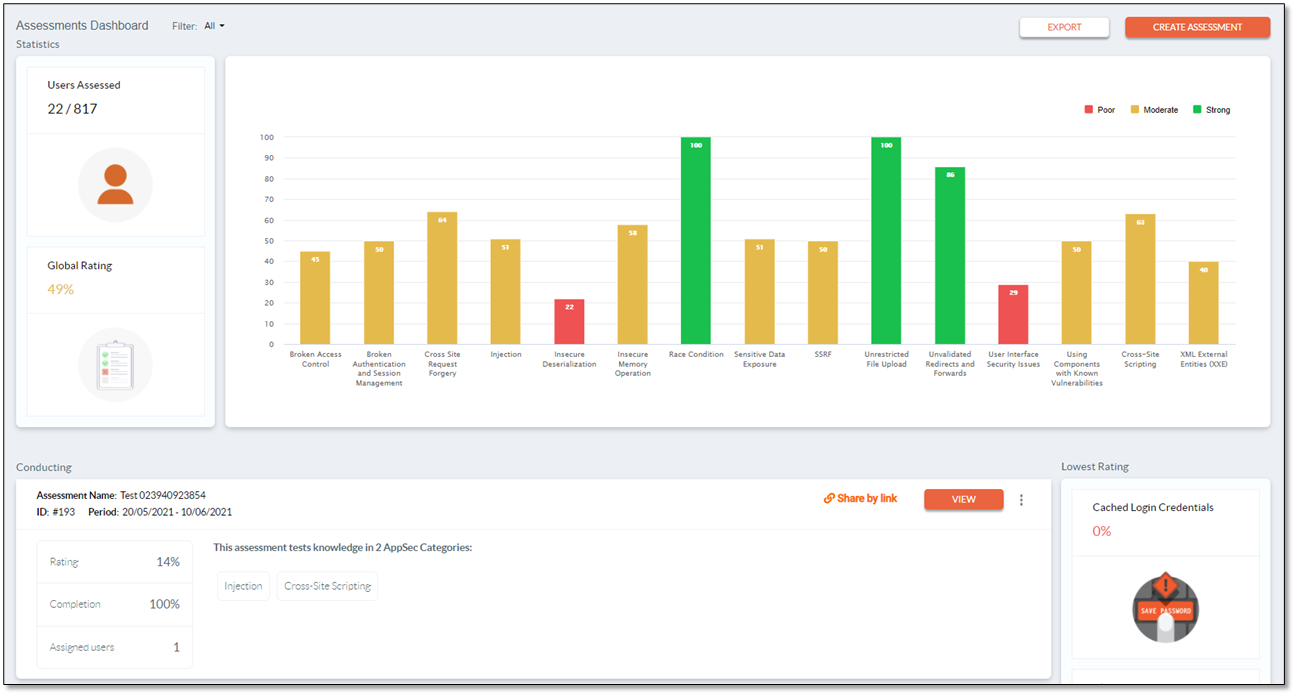
To view the dashboard with the items for a specific team only, select the desired team from the drop-down list under Filter. The Dashboard updates and only displays the item for the selected team, for example test team.

Item | Description |
|---|---|
Users Assessed | The number of users who went through the assessment. In this example for all users, 24 out of 847 users completed the assessment |
Rating Levels | Strong - 80-100% Moderate - 39-79% Poor - 0-38% |
Global Rating | The average achievement of all teams and users in all assessments. Non-participation does not affect the rating. The overall rating in this example was 49% (Moderate) |
Conducting | List of assessments that have been added |
Assessment Details | The assessment details are:
|
Rating | Overall rating of this assessment |
Completion | The completion level in percent |
Assigned Users | The number of assigned users |
 | Click to copy the link to invite users to take the assessment test. To invite users, paste this link into an email or chat and send it to the relevant people. |
 | If the assessment has been assigned to all users, all the team members have been invited to take the assessment test. |
 | Click to open the page with results of the assessment that you are looking at. |
 | Click for additional options:
|
Lowest Rating | The topics on which the users scored the lowest ratings |
Navigate to the desired assessment in your assessment list and click <VIEW> to view the details of this assessment.

The information on that assessment appears in Dashboard view.

Item | Description | |
|---|---|---|
Rating | The overall rating of this course. The rating is derived from the users who participated. Non-participation does not affect the rating. The overall assessment for this assessment stands at 75%, which is moderate. | |
Completion | The average state of completion of the entire team, for example, if there are two users on the team and the completion stands at 50%, both users may have completed half the assessment or one user completed all of it and the other one did not start yet.
| |
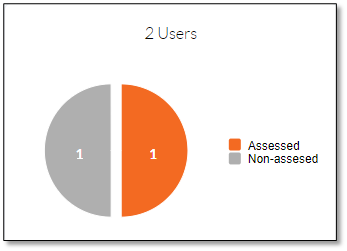
Assessment taken process | Indicates how many users have taken the assessment and when. In the example below, one user took the assessment on March 31st.
| |
Category Ratings | The average score (rating) on categories of all users who took the assessment: 80% - 100% (strong) 39% - 79% (moderate) 0% - 38% (poor) | |
Vulnerability Ratings | The average score (rating) on vulnerabilities of all users who took the assessment: 80% - 100% (strong) 39% - 79% (moderate) 0% - 38% (poor) To view additional vulnerabilities, click the arrows on the left and right side.
| |
Breakdown | The average score (rating) on each question of all users who took the assessment: Strong - 80-100% Moderate - 39-79% Poor - 0-38%
| |
Users | The scores per user. One user scored 75% (moderate) in this example while the second one remained inactive. Therefore the score of this one user is the total score of this team.
NoticeNon-participation of team members does not affect the rating. |
Working with Assessments
This section explains how to create, edit, export and delete assessments.
Click
 in the relevant list entry of the Assessment list or in the detailed view of the desired assessment and select Export from the menu. A CSV file named report_for_assessment_<Assessment ID>.csv is downloaded to your default download location.
In this example, it is report_for_assessment_187.csv as the example used in these instructions is Assessment ID #187.
On the Assessments Dashboard page, click <EXPORT>. A CSV file named report_for_all_assessments.csv is downloaded to your default download location.
Note
Assessments can be created by admin users. In addition, authorized managers can create assessments for their teams.
On the Assessments Dashboard page, click <CREATE ASSESSMENT>. The Create Assessment wizard appears.
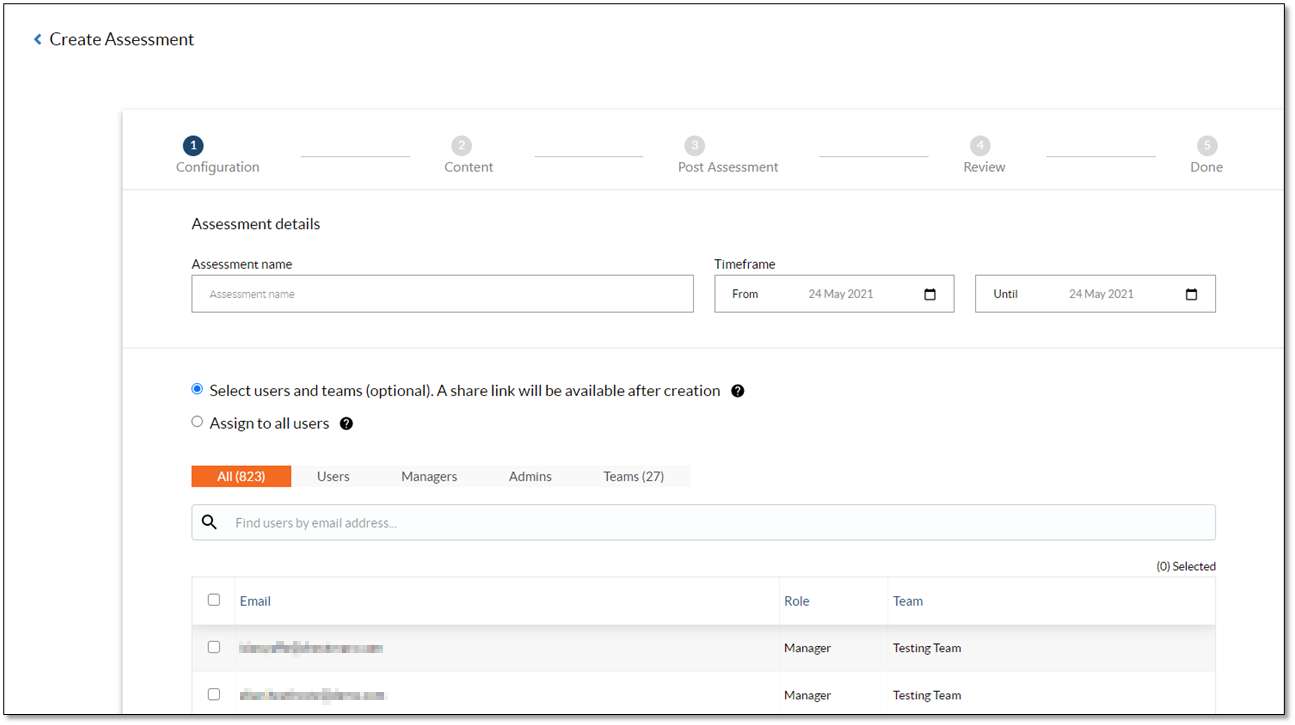
Assign a name, define a time frame and select whether to assign the assessment to all users or only to specific ones.
Select the desired users, if you chose to select specific users.
Note
If you assign the assessment to all users, the assessment is assigned to all users who have been invited to Codebashing even if they did not accept the invitation yet.
Users who have been invited to Codebashing after assigning the assessment to all users are included in this assessment as well once they accept the invitation.
If you assign the assessment to specific users, you may also select users who have not yet accepted the invitation.
Click <CONTINUE> to proceed to the next step specifying content.

Note
You may save your assessment draft by clicking <SAVE AS DRAFT> at any stage and complete it later. To return to the Dashboard, click Assessments.
Drafts are saved as Drafts in the assessment list and you may either continue editing or discard the draft at a later stage.
In addition, you may go back to change previous settings by clicking <BACK> at any stage.
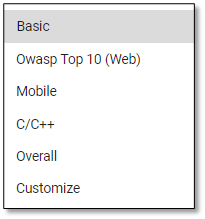
Under Set Content By, either select to customize the content or select a preset as explained below.
To use a preset, select the desired preset. The associated topics are pre-selected :select_preset: and cannot be customized as they are tailored to the selected preset. The default preset is Basic.
To design the content of this assessment yourself, select Customize under Set Content By and then select the desired topics.
Note
Additional information and included lessons for each of them is available below.
Click <CONTINUE> to define the threshold of passing and how to proceed, if the user scores above or below the Training Pass threshold. For further instructions, refer to the table below.

Item
Description
Training Pass
By default, this option is cleared and no passing threshold is defined. To define a passing threshold, check Training Pass. The Post Assessment settings become available.
Vulnerability Threshold
In the Threshold field, enter the desired threshold value, for example 60%.
Above Threshold Action
Mark Training Module Complete: The relevant lesson is marked as completed, if it is part of the user’s primary course training path.
No action: No indicator that the training module has been completed.
Under Threshold Action
Assign Training Module: The relevant lesson is added to the lessons assigned to the user.
No action: No training module is assigned to the user.
Click <CONTINUE> to view a summary.
To send a notification on the newly created assessment to the team, check Send a Notification to Audience. The notification is sent to the user’s team on the day of the assessment.
If you defined a time frame of more than one day for this assessment, it is sent on the first day.
If the option is cleared, no notification is sent.
To create the assessment, click <CREATE ASSESSMENT>. You are asked how to communicate the new assessment to your team.
Click <BROADCAST TO YOUR TEAM>. You are directed to the communication page where you may add a broadcast template or simply create your own message for the official notification on the assessment.Communications
To send the message, click <SEND POST>. To customize the content before sending, click <EDIT> to edit the message.
The table below lists available presets of assessment topics. They include a pre-defined set of vulnerabilities on which the user is tested. The number of questions for the vulnerabilities in each preset is pre-defined and cannot be changed. You can set the number of questions when customizing your assessment and not selecting a preset.
Preset | Description | Vulnerabilities |
|---|---|---|
Basic | The most common vulnerabilities. |
|
OWASP Top 10 (Web) | OWASP stands for Open Web Application Security Project and outlines the top 10 most critical risks for web application security. Parts of applications that are related to authentication and session management are often implemented incorrectly, allowing attackers to compromise passwords, keys or session tokens. In addition, they may exploit other implementation flaws to assume other users’ identities temporarily or permanently. |
|
Mobile | Vulnerabilities encountered when developing mobile apps. |
|
C/C++ | Vulnerabilities encountered when developing applications using C/C++. |
|
Overall | All vulnerabilities |
|
Customize | Select the desired lessons on which to be tested. |
 |
Note
Assessments can be edited by admin users. In addition, authorized managers can edit assessments fo their teams.
To modify the time frame or your list of participating users, go to the desired assessment and click <EDIT>.
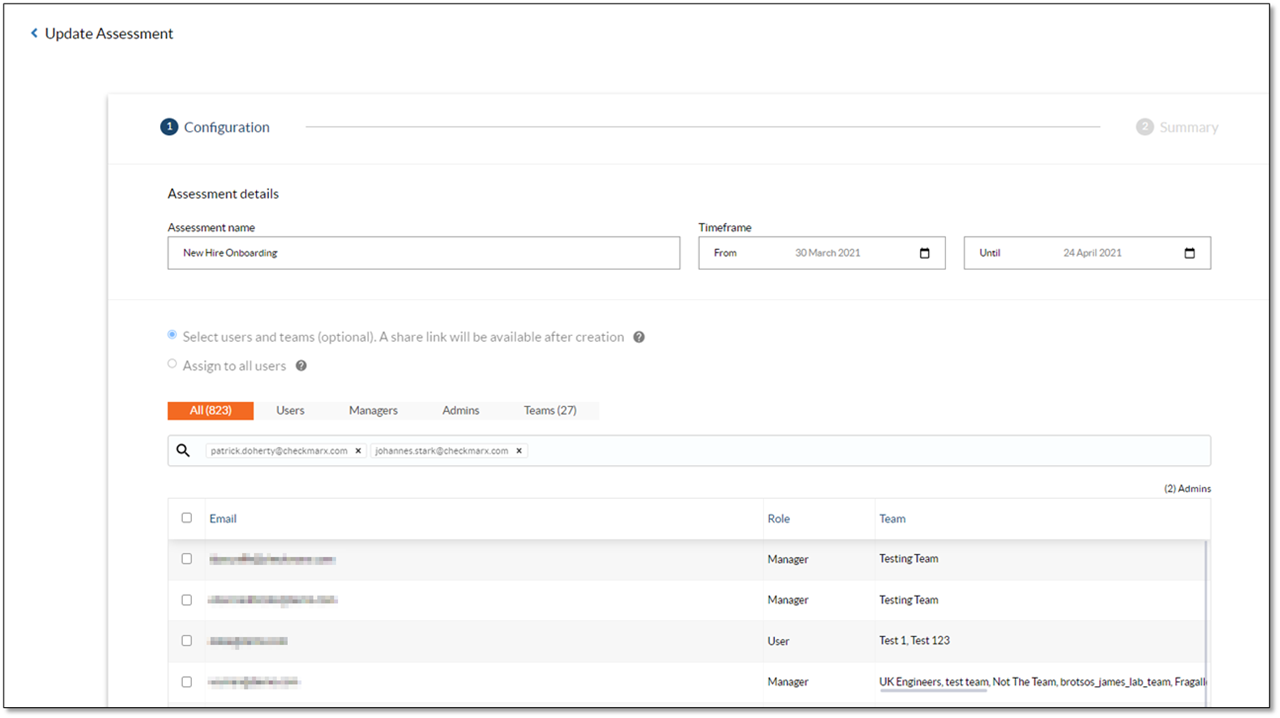
Select users or remove users from the user list and/or update the time frame for the assessment.
Click <CONTINUE> to view a summary and then click <UPDATE ASSESSMENT> to apply the changes.
In the list or the detailed view, click
 and then select Delete from the menu.
Confirm your request to delete the assessment.
