Installing ActiveMQ
Notice
When installing CxSAST 9.4 and higher, the database installs with ActiveMQ and not with CxManager anymore. Therefore, the first component to install is now ActiveMQ.
To install ActiveMQ:
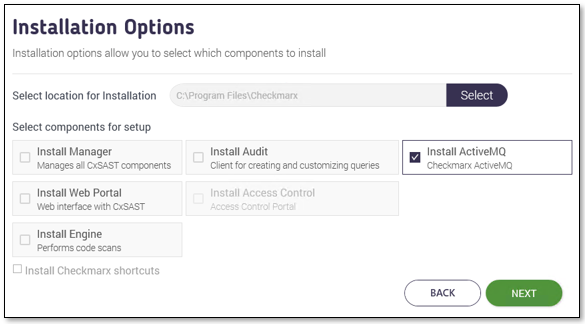
Select
 Install ActiveMQ only.
Click <NEXT> to continue. The Prerequisites Check window is displayed, showing the status of the required components to install ActiveMQ. For additional information and instructions on installing and preparing the required software, refer to Preparing to Install CxSAST.
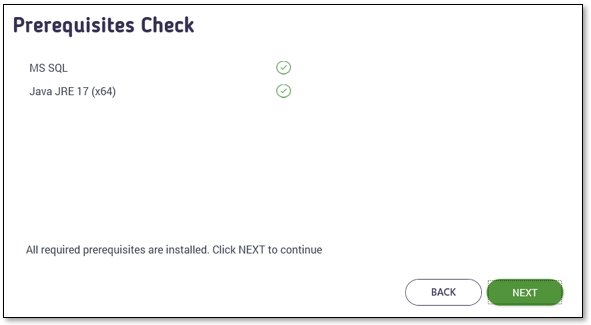
Once all components are indicated to be available
 , click <NEXT>. The CxSAST SQL Server Configuration window is displayed with default settings.
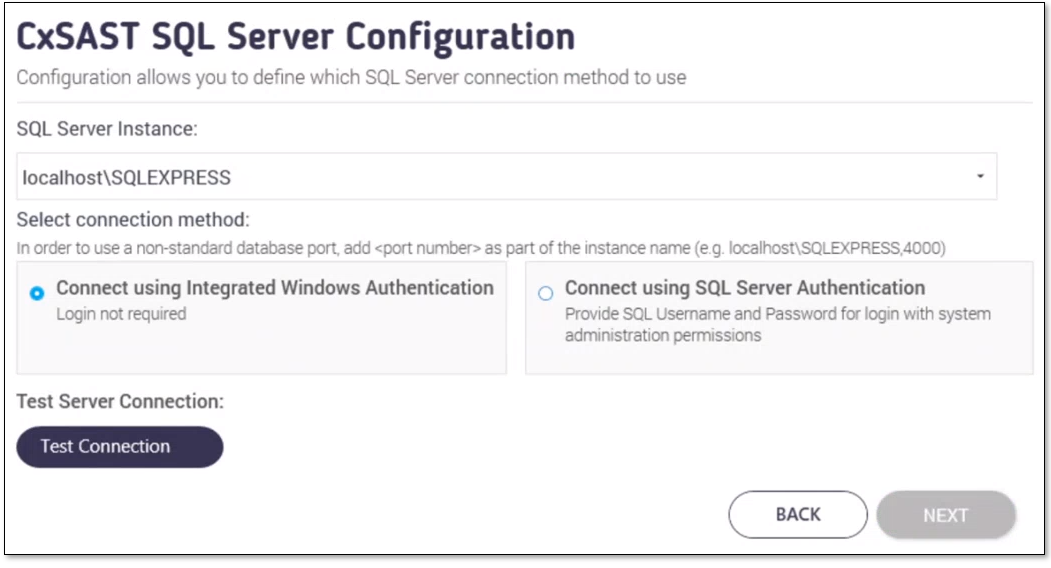
Select the server from the SQL Server Instance list or enter the IP address or hostname of your SQL database server.
If the SQL database resides on a different server, you have to replace localhost with the IP address or host name of the relevant database server. In this example, the SQL server is installed on the station with the IP address 10.32.147.16 .
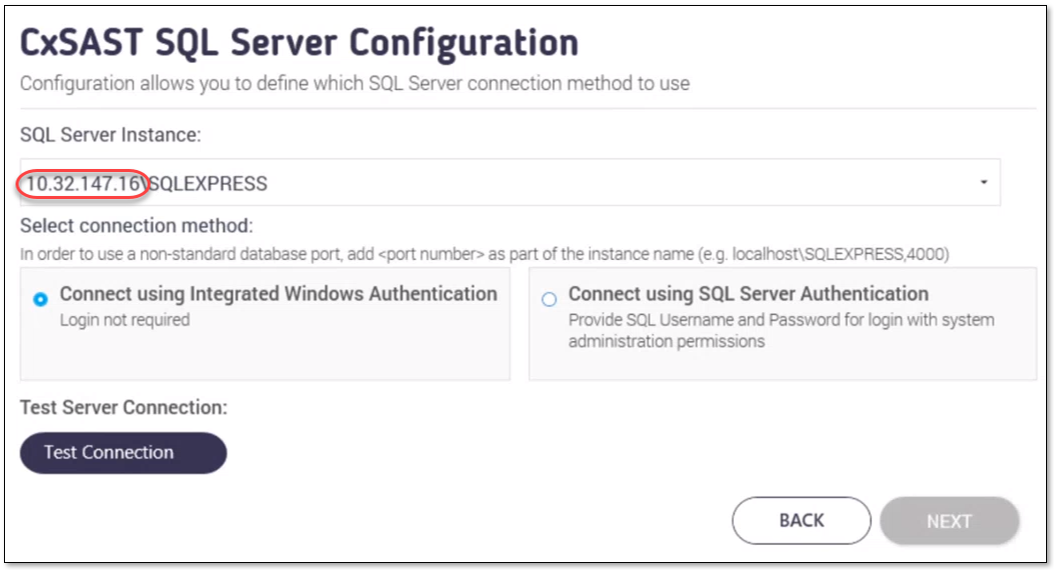
If using a non-standard database port, provide the server name with a comma followed by the port number, for example, port 25, which looks as follows: 10.32.147.16\SQLEXPRESS,25.
Notice
For upgrades, previously defined SQL server instance settings are loaded from the existing configuration and cannot be changed.
Define a connection to the installed SQL server or to any other SQL server on your network, by selecting one of the following:
Connect using Integrated Windows Authentication. This option does not require login credentials.
Connect using SQL Server Authentication. This option requires providing an SQL username and password for login with SA permissions.
Click <Test Connection>.
If the database was not in use, a message appears indicating that the connection was successful. <NEXT> turns green and you can continue the installation.
If a previously used database exists, a message appears indicating that a database has been detected. In this case, you may continue using the database or re-install it as explained in the message that appeared.
Notice
If the "SQL Connection Test Results" message indicates that the connecting to the SQL server has failed, verify:
Host, port and login credentials are correct.
The station is a member of a Windows domain. If it is not part of a Windows domain, either join the station to one and restart it or connect using SQL Server Authentication.
The SQL Server Browser Windows service is running. If it is not running, enable it and start it.
Click <NEXT>. The Message Broker Configuration window is displayed.
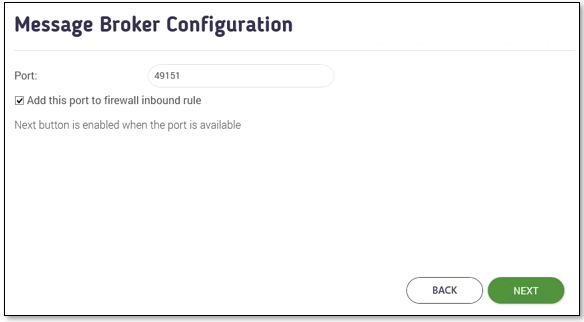
To add the displayed port to the firewall inbound rules, check Add This Port to Firewall Inbound Rules.
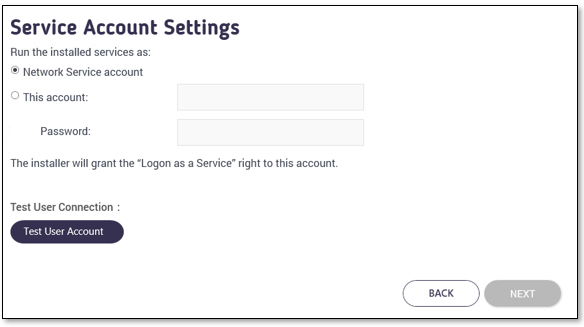
Click <NEXT>. You are asked to define your service account settings.
Notice
Version 9.4 introduces the possibility to select the service account with which the CxSAST-related services are going to run. In previous versions, these services have been running with the Network Service account by default.
The service account you select is going to be applied in both Windows Services and IIS Application Pools.
Select the service account on which the CxSAST-related services are going to run:
Network Service account (default)
This account: A dedicated account that you may have added to serve your CxSAST application. Enter the user credentials to enable CxSAST to access this account.
The example below illustrates the ActiveMQ service associated with the Network Service account.

Click <Test User Account> to verify and test this account. If successful, <NEXT> turns green and you can continue the installation.
Click <NEXT>. The setup summary appears.
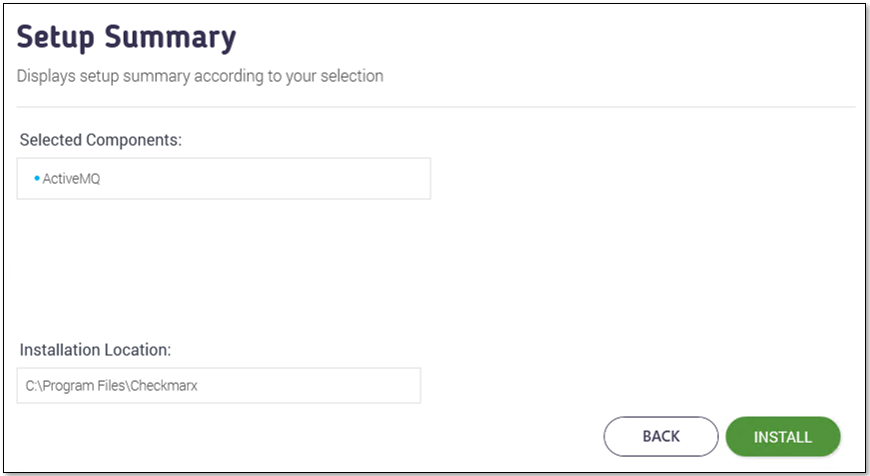
Perform one of the following:
Click <INSTALL> to continue. The Installation in Progress window is displayed and the installation proceeds, which may take a few minutes.
To return to the previous window, click <BACK>.
To exit, click <X>.
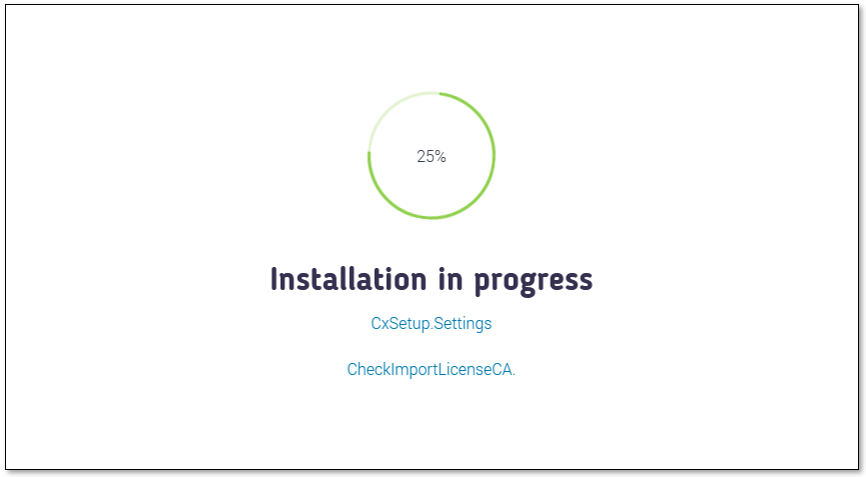
Once successfully installed, the installation Completed Successfully window is displayed.
After the installation is completed successfully, return to the CxManager Installation and complete the Access Control configuration by reloading and refreshing the parameter set.
Click <CLOSE> to complete the installation.