Integrating the Checkmarx Vulnerability Integration
Once configured, the integrations run automatically each day in two parallel, chained sequences (one for SAST and one for SCA). You can also execute them manually for on-demand updates. It is important to run the integrations for each scanner in their specific order to prevent data inconsistencies.
Integration Execution Steps
The following steps outline the manual process for executing each integration.
Navigate to Checkmarx Vulnerability Integration > Integrations . A list of all Checkmarx integration jobs is displayed.
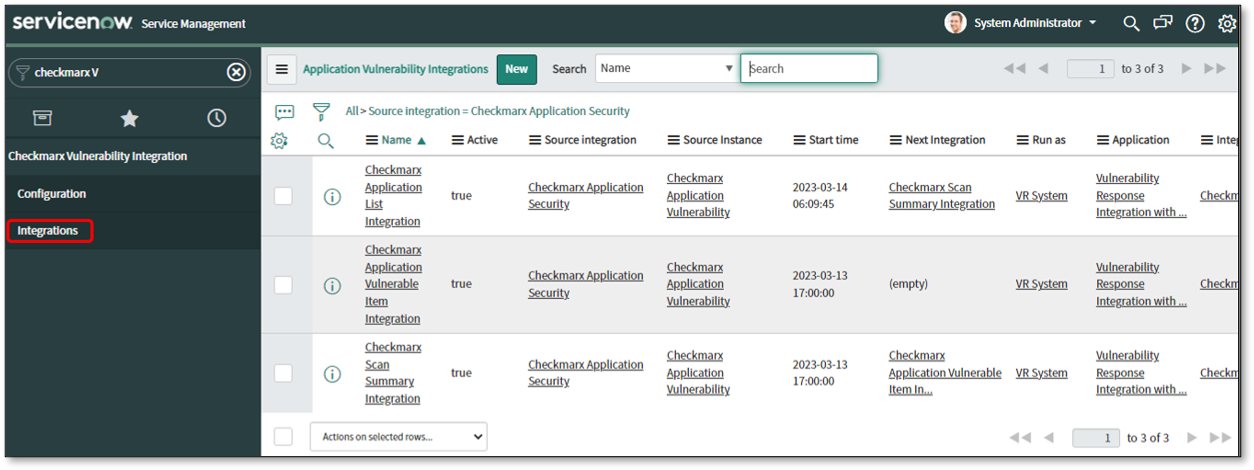
Click on the name of the integration you want to run (e.g., Checkmarx Application List Integration ).
To import data from a specific point in time, click the calendar icon next to Start time and select the desired date and time. The integration will only process items created or updated in Checkmarx after this time. For the initial run, it is recommended to set this to the earliest date you want to retrieve data from.
Click Execute Now in the top-right corner to start the integration run.
The Vulnerability Integration Runs tab will display the execution status. When the integration shows a State of "Complete" and a Substate of "Success", the job has completed successfully.
Integration Sequence
For the data to be imported correctly, the integrations must be run in the following sequence for each scanner.
SAST Integration Chain (Run in this order):
Checkmarx Application List Integration
Checkmarx Scan Summary Integration
Checkmarx Application Vulnerable Item Integration
Checkmarx SAST AVIT Closure Integration
SCA Integration Chain (Run in this order):
Checkmarx SCA Application List Integration
Checkmarx SCA Scan Summary Integration
Checkmarx SCA Application Vulnerable Item Integration
Checkmarx SCA AVIT Closure Integration
How Vulnerabilities (AVIs) are Closed
The final integration in each chain automatically closes Application Vulnerable Items (AVIs) in ServiceNow when they are no longer considered active in Checkmarx.
Fixed Findings: The closure integration identifies the single latest scan for each project. It then compares the findings in that scan against the open AVIs in ServiceNow for that project. Any AVI that is not found in the latest scan is considered fixed, and its state is set to Closed with a source remediation status of FIXED .
Findings from Deleted Projects: If the "Close AVITs of Deleted Project" option is enabled on the Configuration page, all open AVIs for a project that has been deleted in Checkmarx will be automatically updated to a state of Closed with a substate of Skipped .
Not Exploitable Findings (SAST): If a SAST finding is triaged and marked as "Not Exploitable" in Checkmarx SAST, the corresponding AVI in ServiceNow will be updated to a state of Closed during the next integration run.
Verifying the Property to Import Closed Vulnerabilities
The behavior for creating records for vulnerabilities that are already closed in Checkmarx is controlled by a ServiceNow system property.
Navigate to System Properties > All Properties (
sys_properties.list) in the Filter Navigator.Search for the property with the name
sn_vul.create_closed.Review its value:
If true : The integration will create new AVI records in ServiceNow even if the finding is already in a "Closed" state in Checkmarx.
If false : The integration will not create new records for findings that are already closed. It will only update existing, open AVIs to a "Closed" state.
Troubleshooting: Reverting Customized Scripts
If a script has been customized and is preventing the integration from running correctly after an update, you must revert it to its store version.
In the Application Navigator, search for and select Script Includes .
Search for the modified script (e.g.,
CheckmarxAppVulItemIntegration,CheckmarxScanSummaryIntegration,CheckmarxUtilBase).Open the script record and scroll down to the Versions related list.
Click on the link for the latest version, where the Source is "Store Application".
Click Revert to this version .