Risk Attribution
The new Attribution feature enables ASPM risks to be assigned to specific users and/or groups, in order to ensure that the responsible party is aware of the need for remediation. The assignment is done via the Application Risk Management screen. When attribution is assigned, each assignee receives an email notification about the attribution with a link to view the assigned vulnerabilities in the platform. Attribution is also shown in a new column that was added to the Risk Management screen.
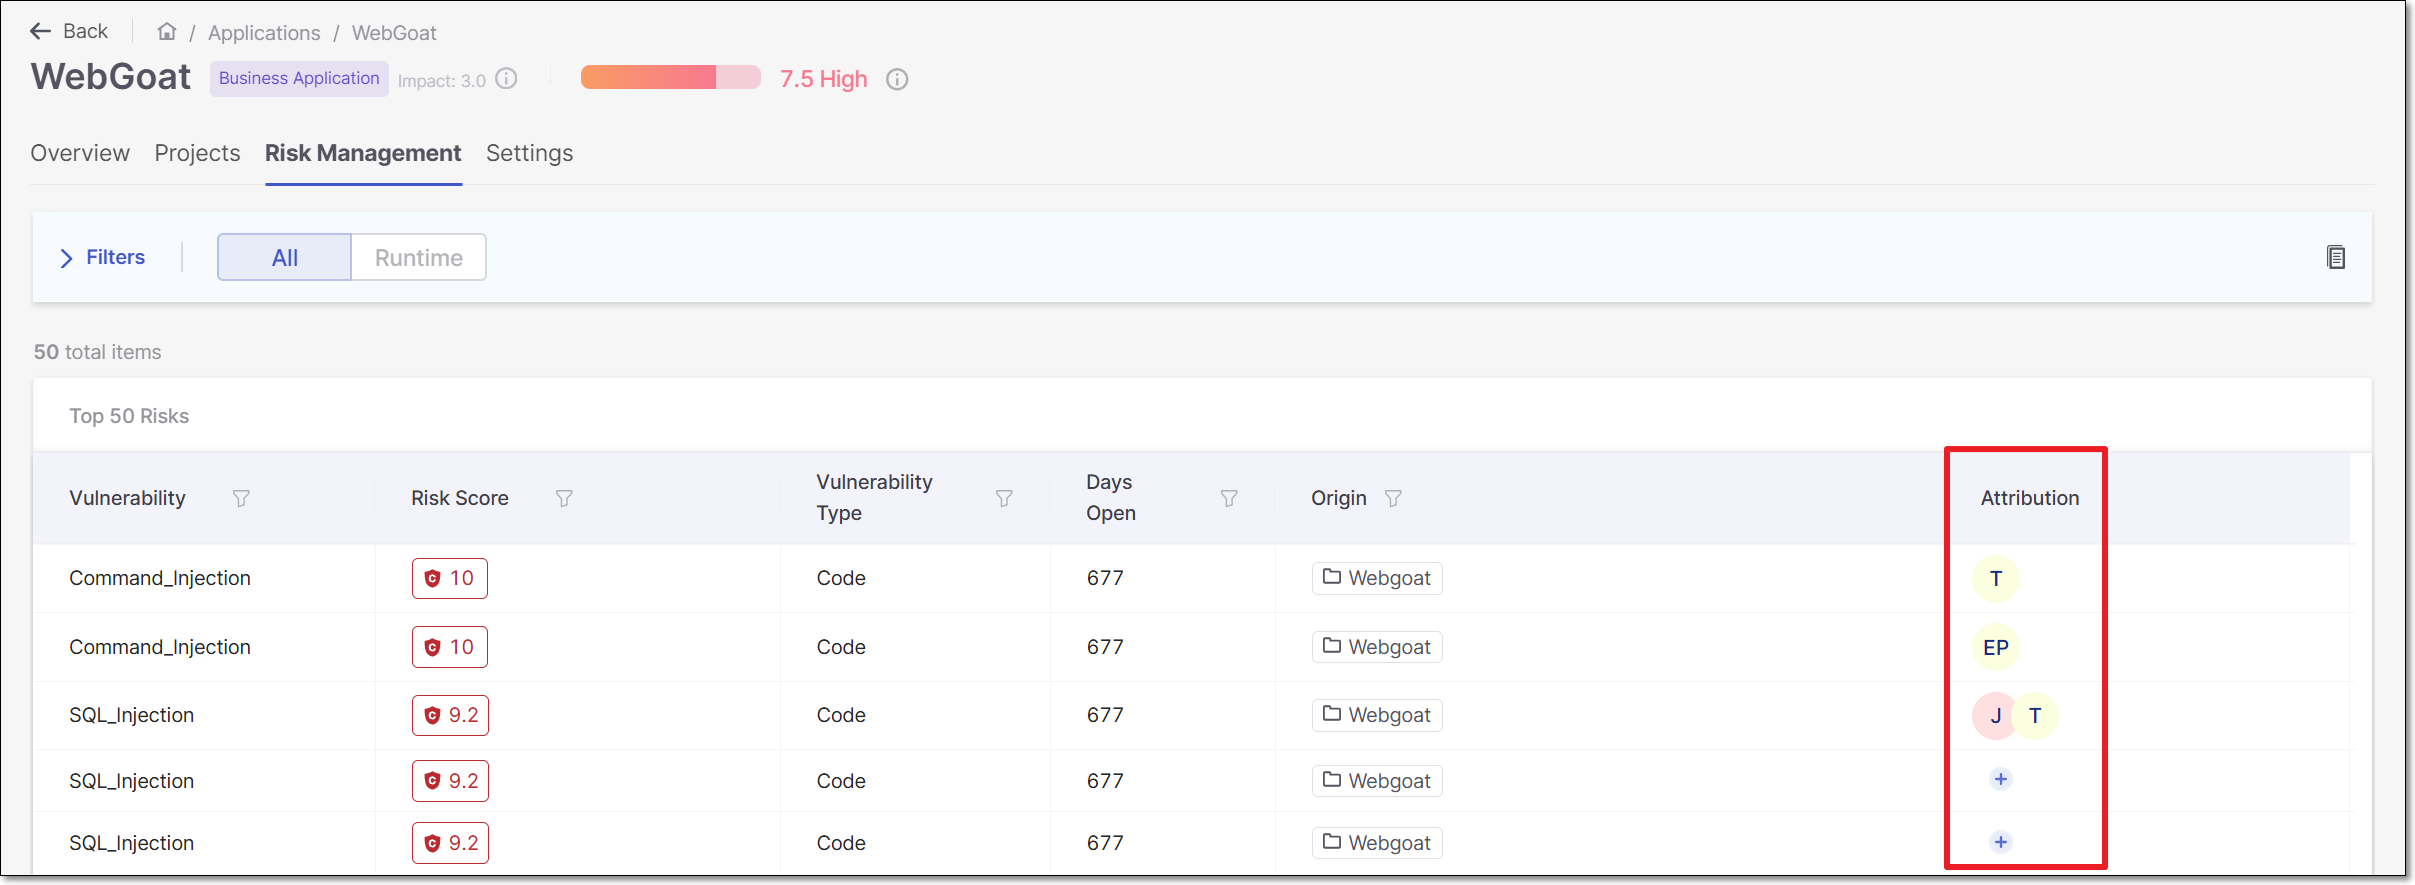 |
The  icon is shown in the Attribution column for risks that have not yet been attributed. For risks that have already been attributed, the icon is displayed when hovering over the attribution column of that row. Click on the icon to create or change an Attribution.
On the Applications Risk Management page, locate the vulnerability you want to assign and click the
icon in the Attribution column for that row.The Manage Assignees side panel is displayed.
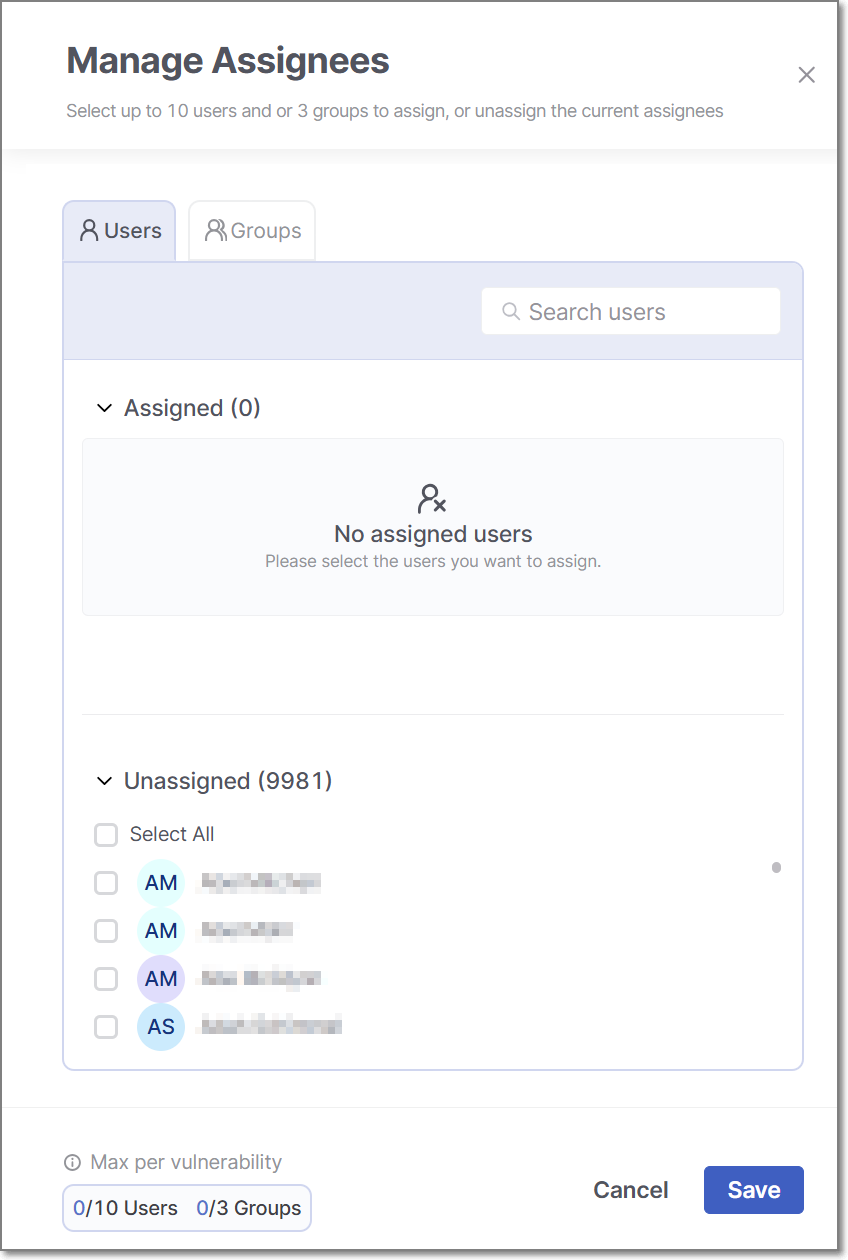
The panel includes two sections, Assigned and Unassigned. Both sections are collapsable to enable easier viewing.
From the Unassigned section, add users to the Assigned list:
To add an individual user, hover over a user and click the Assign button that appears next to their name.
To bulk-add a selection of users, select the checkboxes for the users you want to assign, then click the Assign button that appears at the top right of the list.
Note
The lists are searchable to enable you to find a specific user or group for attribution. A user that is not enabled or that does not have an active email will not appear on the list of unnasigned users available for attribution.
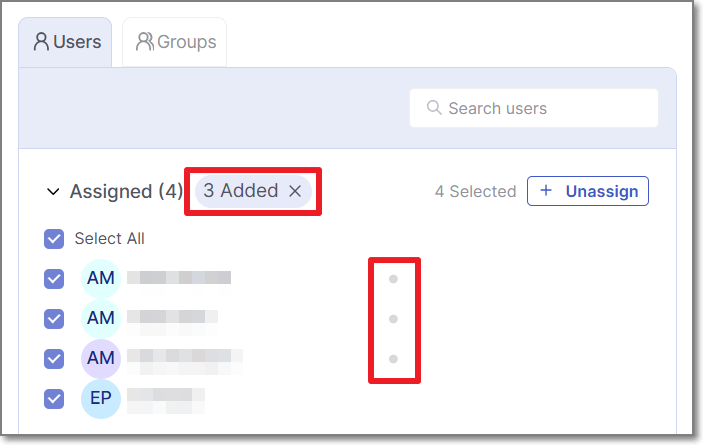
Users are now tentatively added to the Assigned list. New assignees will appear at the top of the list with a gray dot next to their name indicating that they have not yet been saved to the list. A corresponding gray text block appears at the top of the list with the number of pending assignees.
Note
Before saving, you can cancel the attribution of all new assignees by clicking on the X in the gray text block at the top of the list.
To assign groups. click on the Groups tab at the top left of the panel. You can add individual groups or bulk-add a selection of groups using the same procedure as was described for adding users in step 2.
Click Save.
The selected users and groups are now assigned and are displayed in the Attribution column of the vulnerability. Each assignee receives an email notification about the attribution with a link to view the assigned vulnerabilities in the platform.
Tip
The maximum number of users that can be assigned to a specific risk is ten. The maximum number of groups that can be assigned to a specific risk is three. When the maximum is reached, the Assign buttons will be grayed out and hovering over them displays a tooltip explaining that the maximum has been reached.
Identifying the Author (from git blame)
When the "Author" information is available (extracted via "git blame"), the Attribution column also shows the Author of the relevant code and the associated email. This information can be helpful for determining the appropriate attribution.
When present, the author icon appears first in the Attribution column, before the icons of the assignees. Hovering over it displays the author’s email.
Note
Author information is available only for SAST and IaC scan results.
The following API exposes this information through the author field: GET api/risk-management/{id}/results