Installation and Initial Setup
Initial Setup and Configuration
Prerequisites
You have a an API Key for authenticating with Developer Assist
For VS Code: supported for version 1.100.0 or above (supports both
settings.json(v1.100–1.101) andmcp.json( v1.102+))For VS Code: you must have GitHub Copilot installed
For Kiro: supported for version 0.6+ (latest version recommended)
Installing and Configuring the Plugin
The instructions below cover the general setup for all supported IDEs. For detailed, IDE-specific steps, open the collapsible section corresponding to your IDE.
Install the Checkmarx extension from the Marketplace.
Caution
There are other Checkmarx extensions available on marketplace ("Checkmarx Developer Assist" and "Checkmarx SAST 9.x"), make sure that you install the extension called Checkmarx.
In the IDE, open the extension, click on Log in, and enter your API Key.
Configure the Checkmarx Developer Assist MCP and verify that it is running.
Optionally, adjust Checkmarx Developer Assist settings.
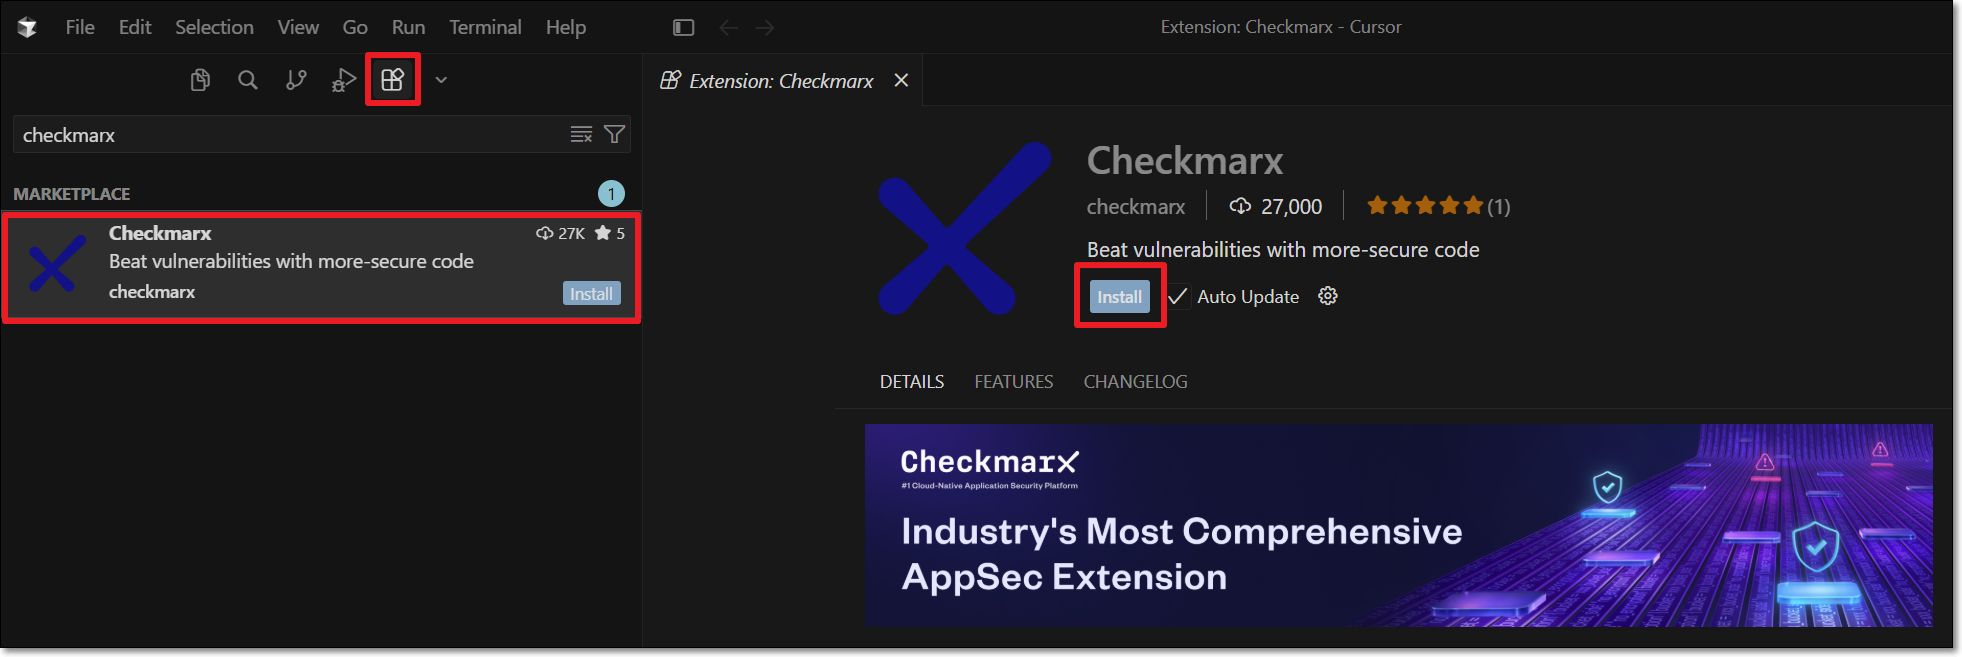
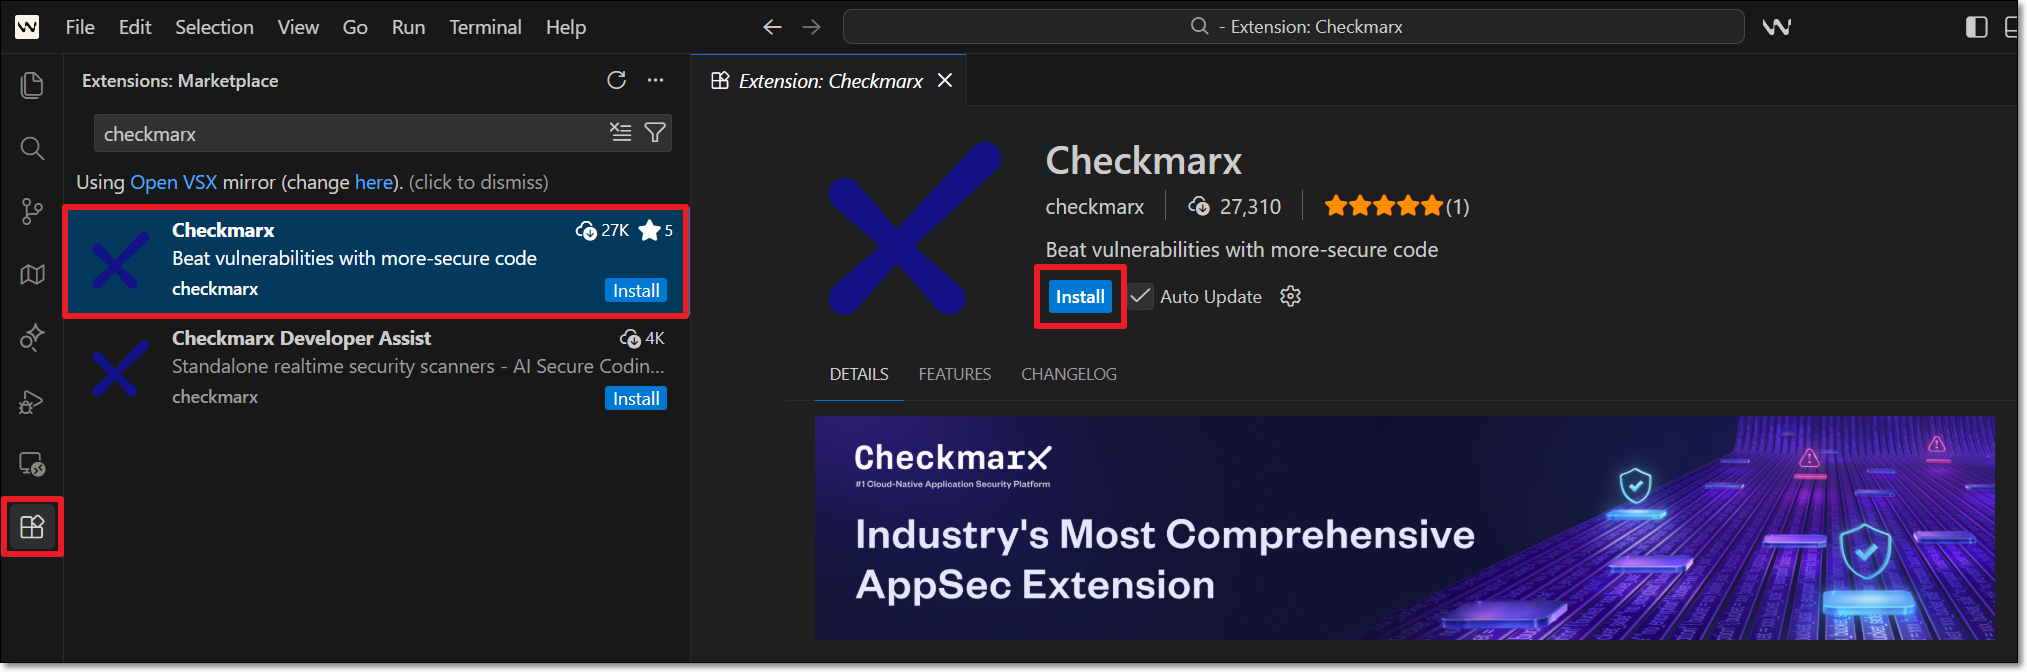
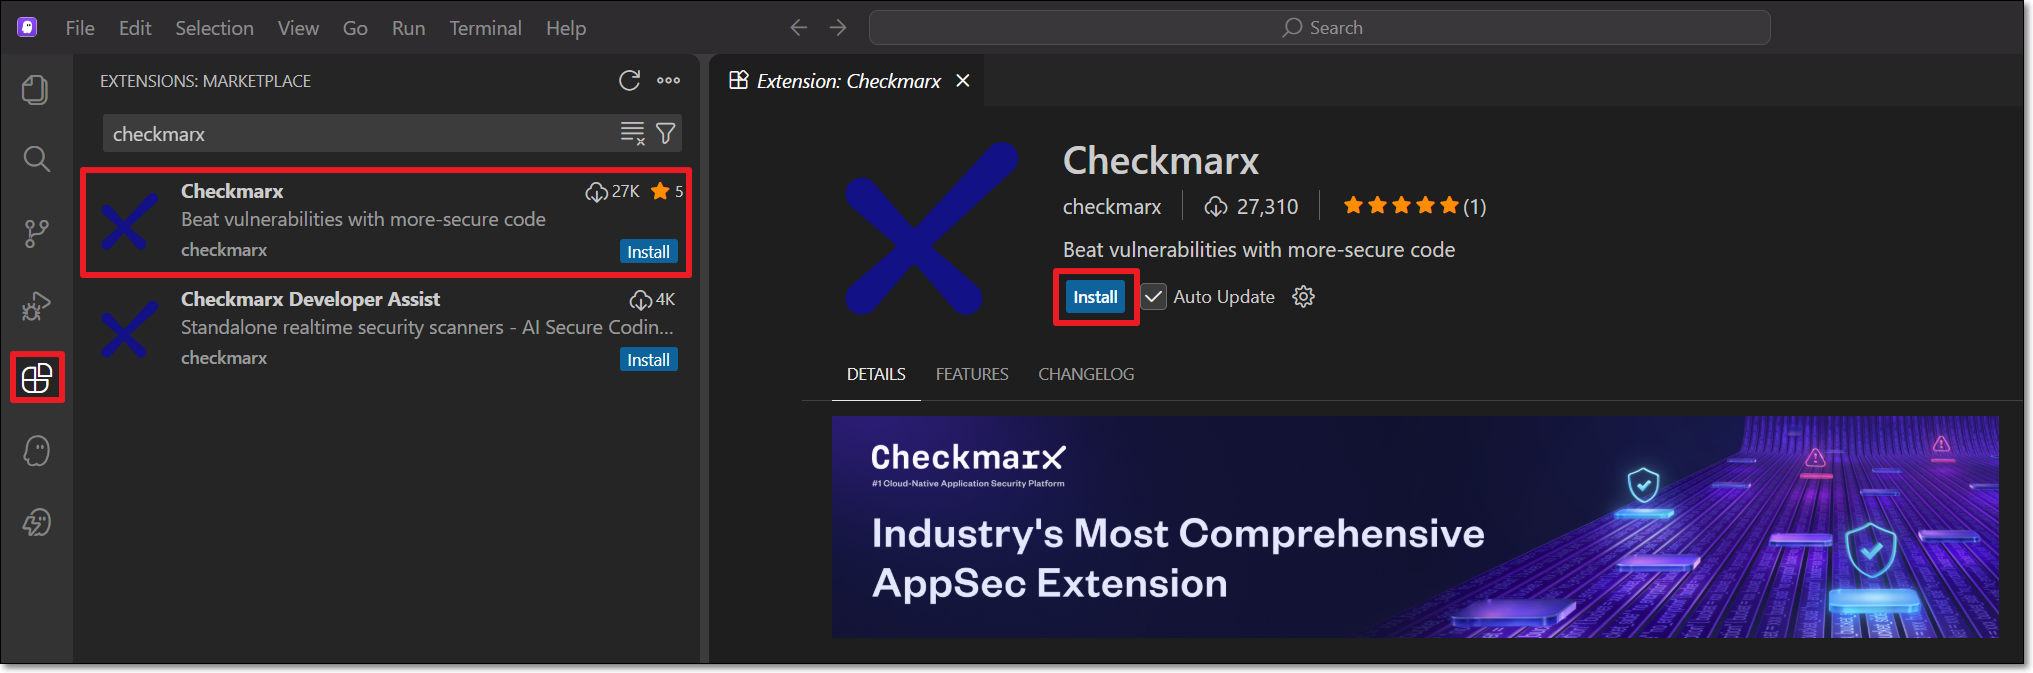
In the VS Code IDE main navigation, click on the Extensions icon.
Search for the Checkmarx extension, then click Install for that extension.
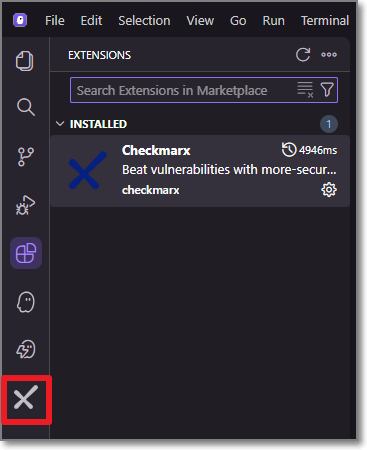
The Checkmarx extension is installed and the Checkmarx icon appears in the left-side navigation panel.
Click on the Checkmarx extension icon.
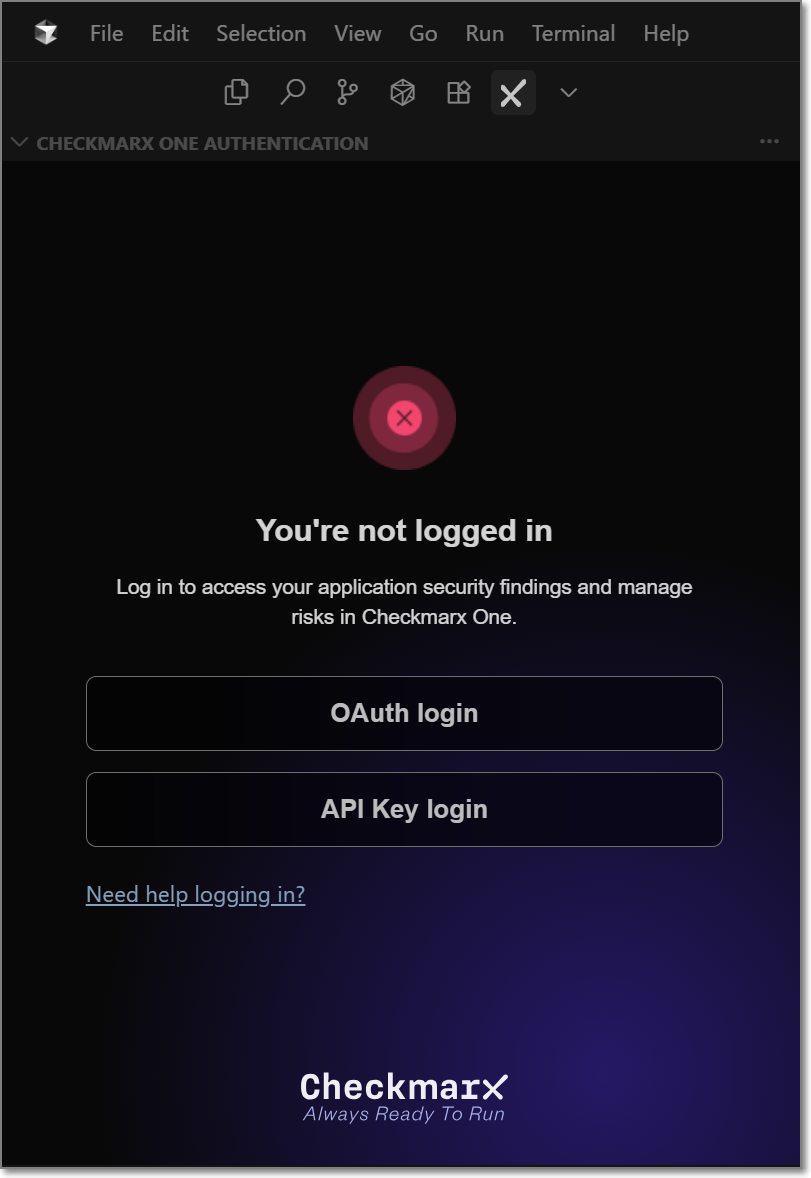
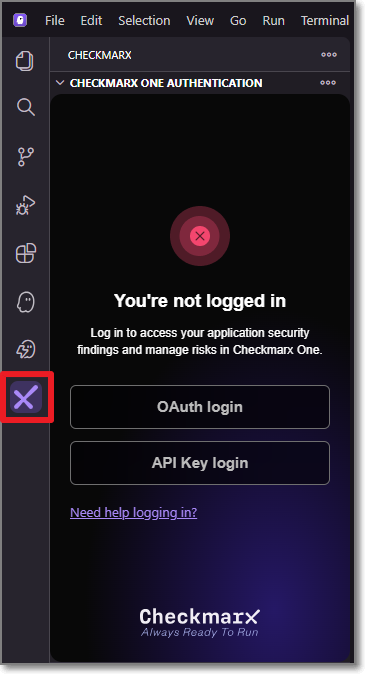
The Checkmarx One Authentication sidebar opens:
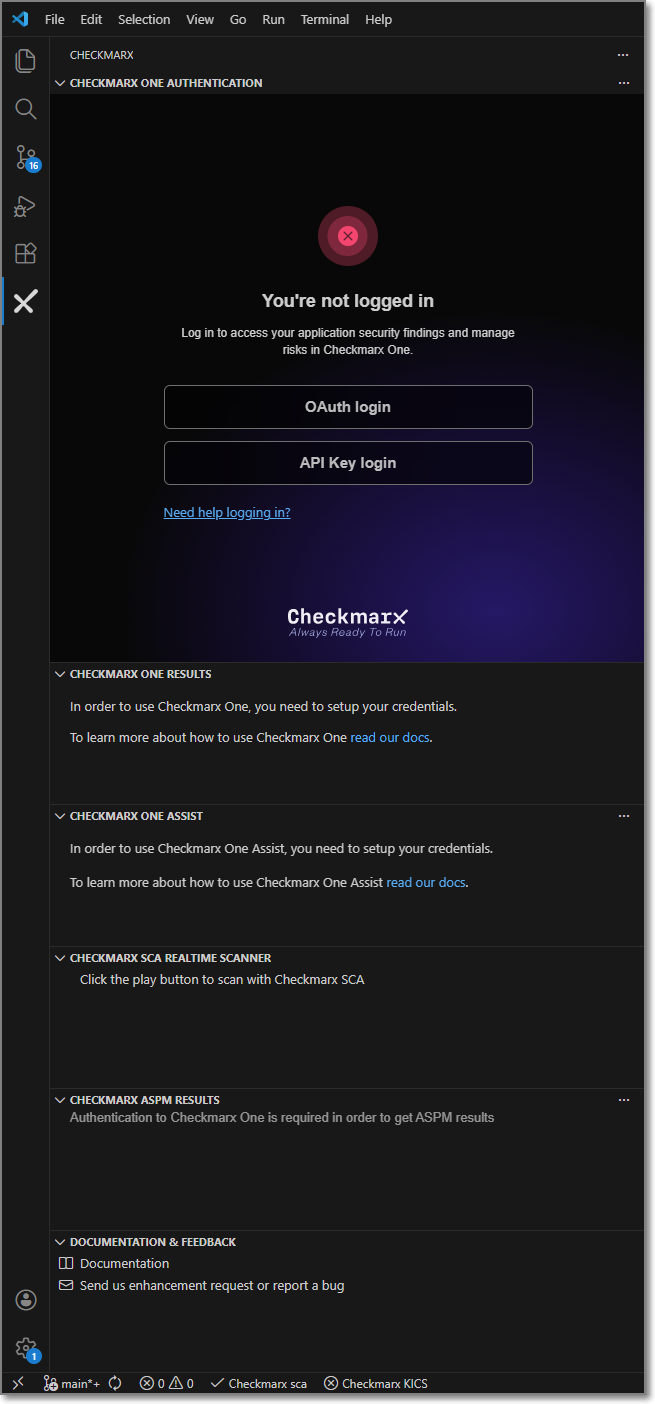
In the Checkmarx One Authentication sidebar, select the API Key login button.
The API Key Log in window opens.
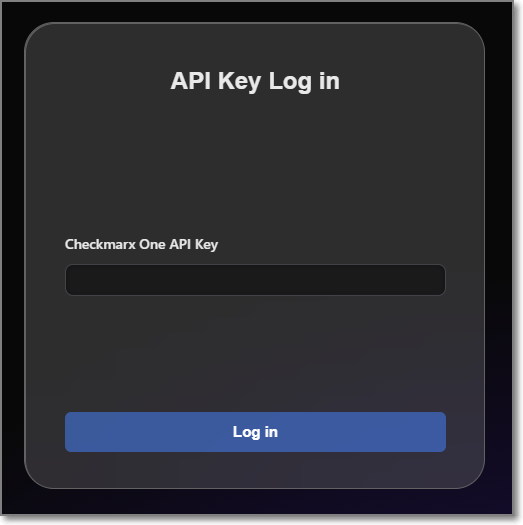
Enter your Checkmarx One API Key and click Log in.
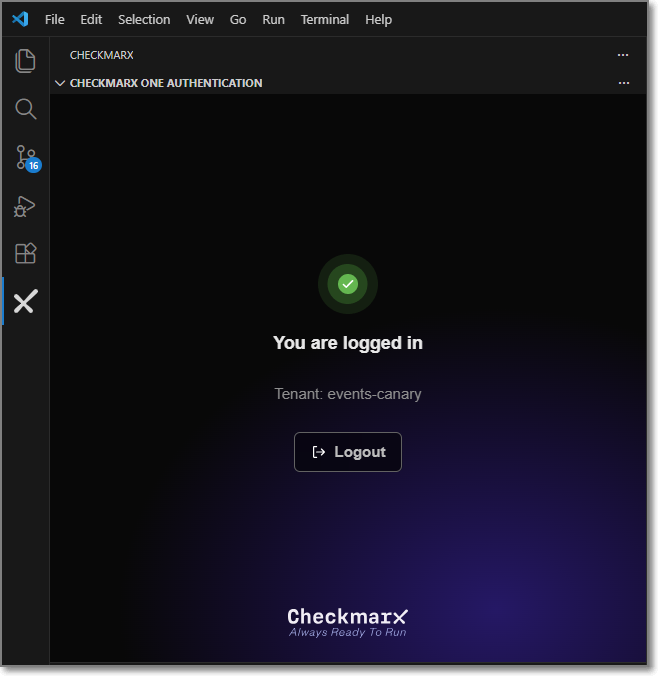
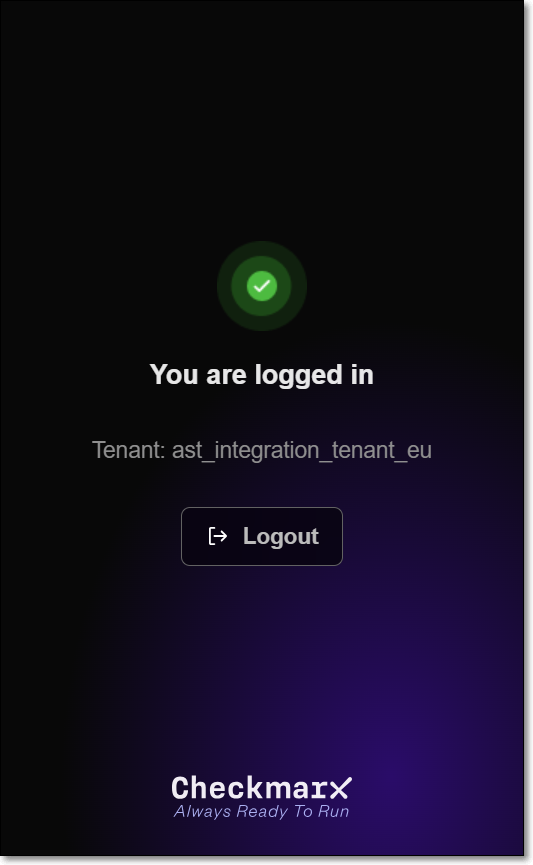
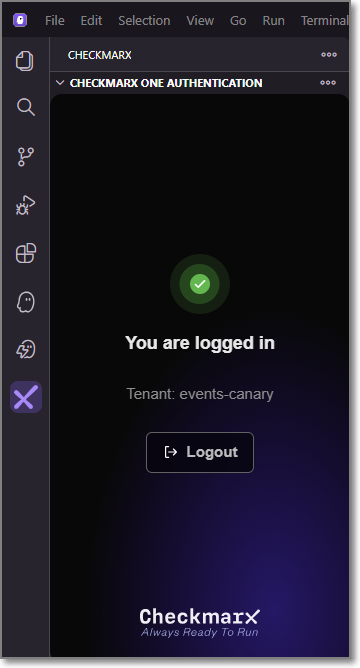
The Checkmarx One Authentication sidebar will now show that you are logged in.
A Checkmarx Developer Assist welcome page is displayed immediately after a successful login. Scroll down and click on Mark Done.
Configure the Checkmarx MCP:
Navigate to Checkmarx One Assist settings,
Scroll down to the MCP Authentication option and change it from OAuth to Token Based.
Under Checkmarx MCP click Install MCP.
Verify that the MCP server is running:
In the main menu, click on the Extensions icon.
Under MCP SERVERS verify that the Checkmarx MCP is connected.
You can optionally adjust the Checkmarx Developer Assist Settings as follows:
Add Additional Params to set up custom configuraitions, such as proxy servers or to run in debug mode.
Enable/disable specific realtime scanners. By default, all scanners are enabled.
For IaC realtime scanner you can change the container platform used, Docker (default) or Podman.
MCP Authentication – Select the authentication method used by the Checkmarx MCP server. For SAST On-Prem accounts, only Token Based authentication is supported.
Notice
After changing the authentication method, click Install MCP to update the
mcp.jsonconfiguration.OAuth (default) when the MCP server starts, a browser-based login session is initiated to authenticate with your Checkmarx One account.
Warning
OAuth is not supported for SAST On-Prem Accounts
Token Based uses the API key associated with your current Checkmarx One login and avoids browser authentication when starting the MCP server.
Warning
When this method is used, the API key is stored in the
mcp.jsonfile.
In the Cursor IDE, click on the Extensions icon.
Search for the Checkmarx extension, then click Install for that extension.
The Checkmarx extension is installed.
Click the arrow next to the Extensions icon to open the drop-down menu. Then click the pin icon beside the Checkmarx extension to add it to the top navigation bar.
Click on the Checkmarx extension icon.
The Checkmarx One Authentication sidebar opens:
In the Checkmarx One Authentication sidebar, select the API Key login button.
The API Key Log in window opens.
Enter your Checkmarx One API Key and click Log in.
The Checkmarx One Authentication sidebar will now show that you are logged in.
A Checkmarx Developer Assist welcome page is displayed immediately after a successful login. Scroll down and click on Mark Done.
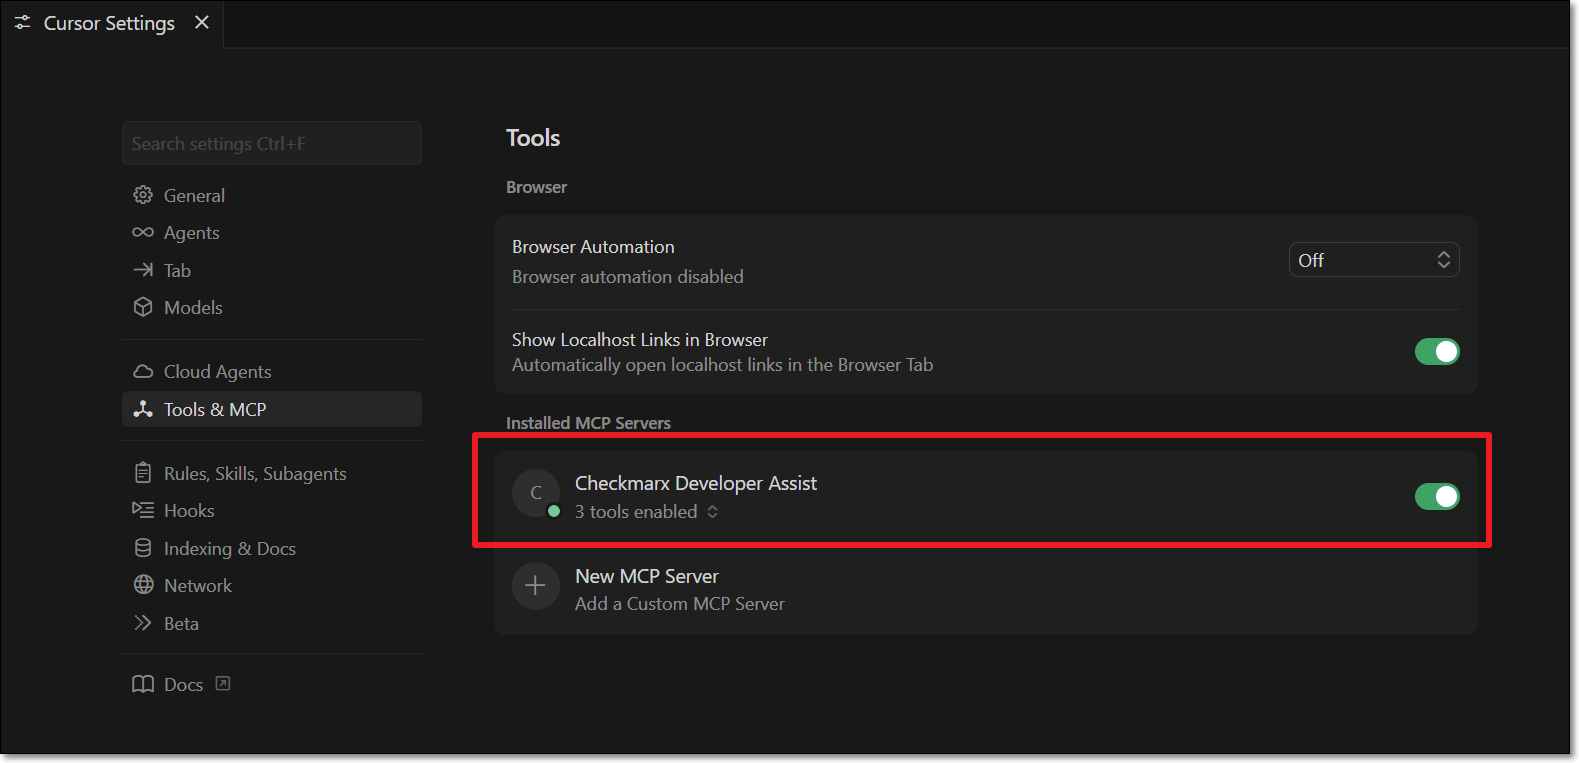
To verify that your MCP server is running:
In Cursor Settings under Tools & MCP > Installed MCP Servers, confirm that the Checkmarx Developer Assist toggle is enabled.
You can optionally adjust the Checkmarx Developer Assist Settings as follows:
Add Additional Params to set up custom configuraitions, such as proxy servers or to run in debug mode.
Enable/disable specific realtime scanners. By default, all scanners are enabled.
For IaC realtime scanner you can change the container platform used, Docker (default) or Podman.
MCP Authentication – Select the authentication method used by the Checkmarx MCP server. For SAST On-Prem accounts, only Token Based authentication is supported.
Notice
After changing the authentication method, click Install MCP to update the
mcp.jsonconfiguration.OAuth (default) when the MCP server starts, a browser-based login session is initiated to authenticate with your Checkmarx One account.
Warning
OAuth is not supported for SAST On-Prem Accounts
Token Based uses the API key associated with your current Checkmarx One login and avoids browser authentication when starting the MCP server.
Warning
When this method is used, the API key is stored in the
mcp.jsonfile.
In the Windsurf IDE main navigation, click on the Extensions icon.
Search for the Checkmarx extension, then click Install for that extension.
The Checkmarx extension is installed, and the Checkmarx icon appears on the left-side navigation panel.
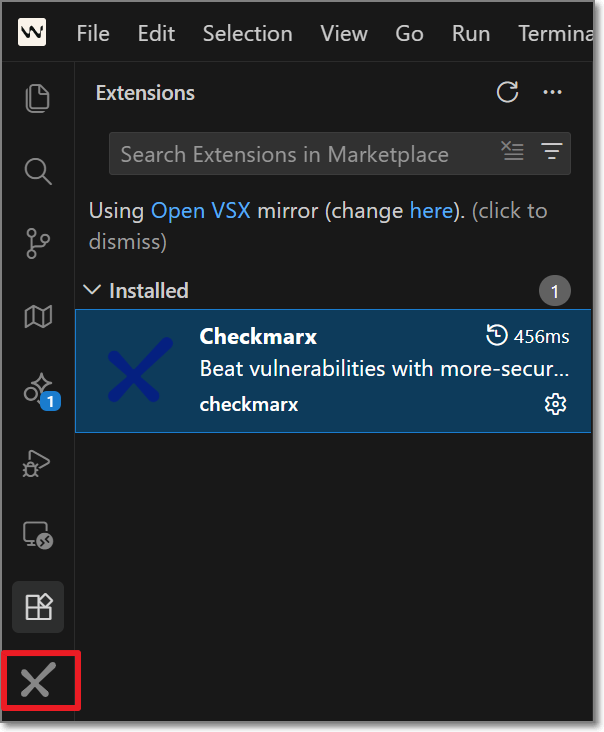
Click on the Checkmarx extension icon.
The Checkmarx One Authentication sidebar opens:
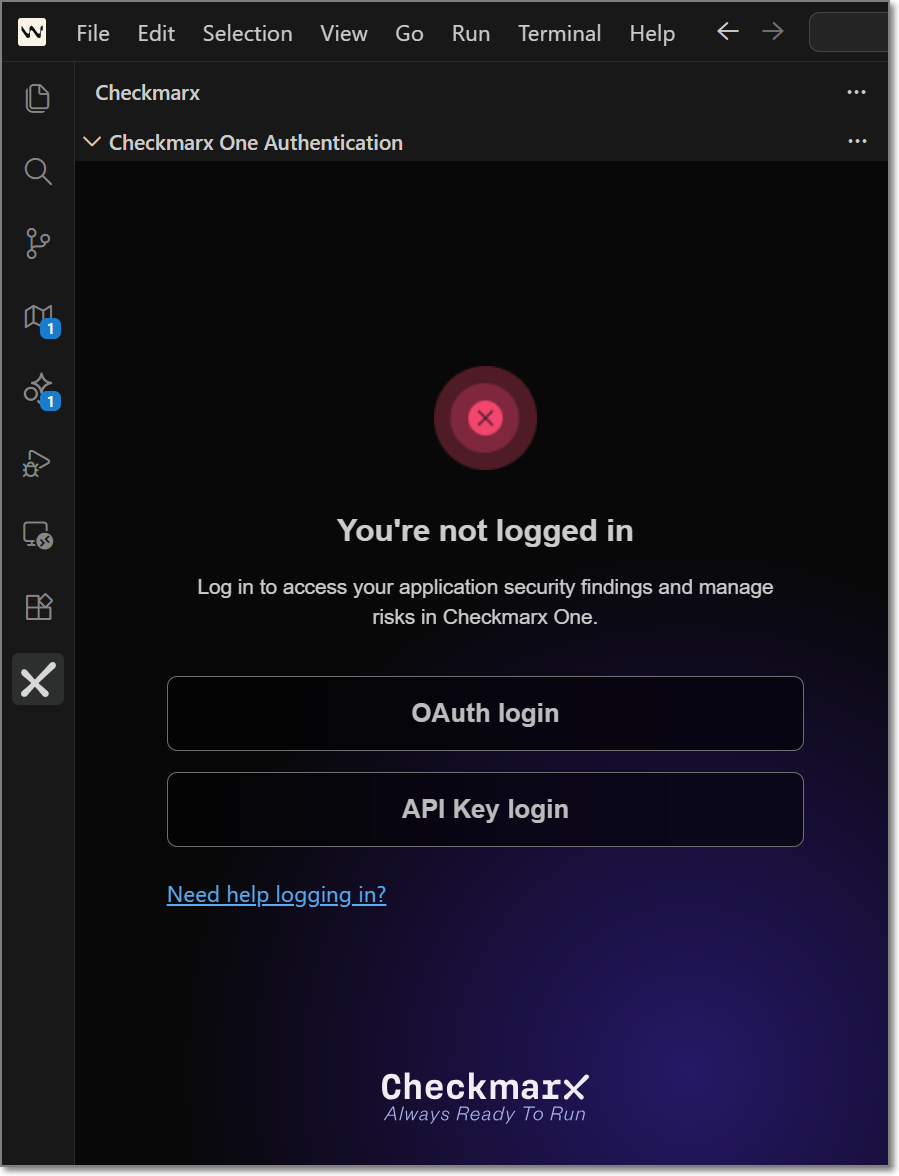
In the Checkmarx One Authentication sidebar, select the API Key login button.
The API Key Log in window opens.
Enter your Checkmarx One API Key and click Log in.
The Checkmarx One Authentication sidebar will now show that you are logged in.
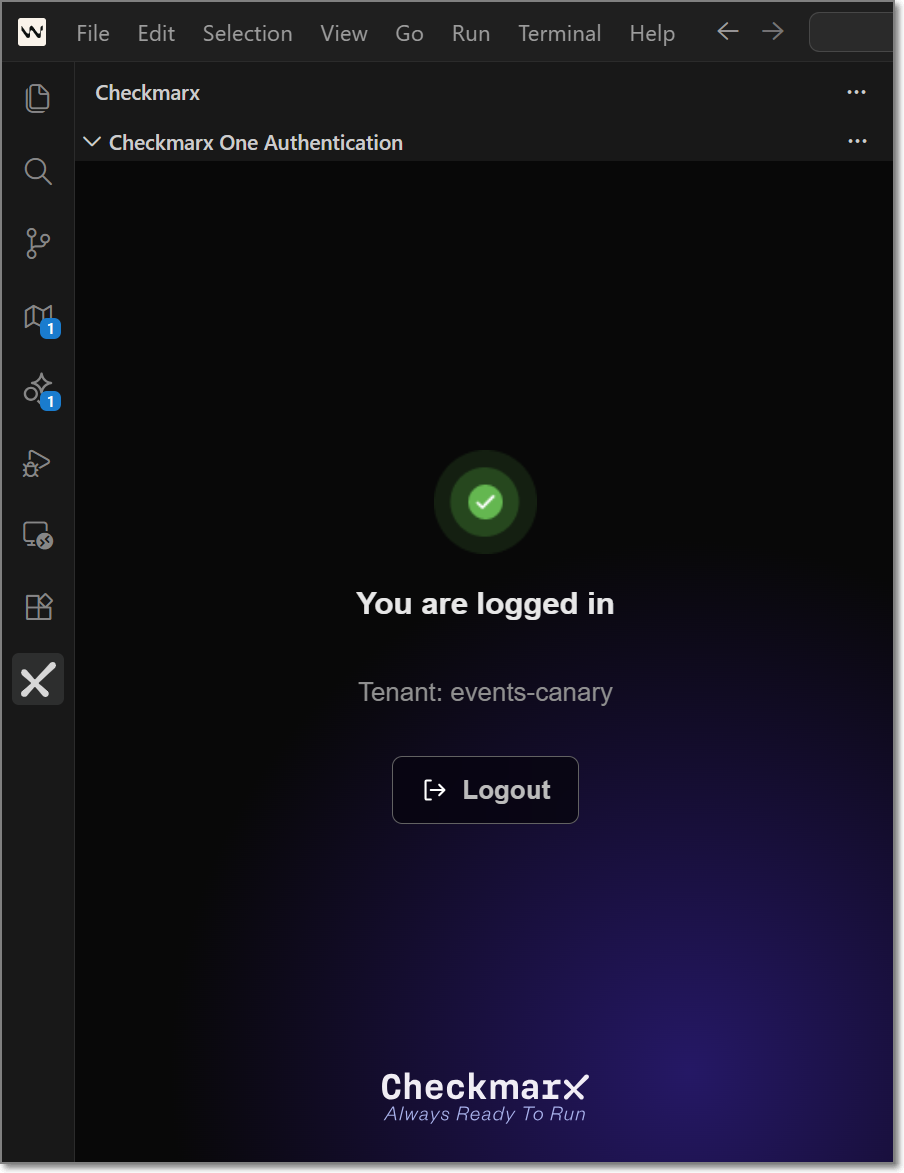
A Checkmarx Developer Assist welcome page is displayed immediately after a successful login. Scroll down and click on Mark Done.
To verify that your MCP server is running:
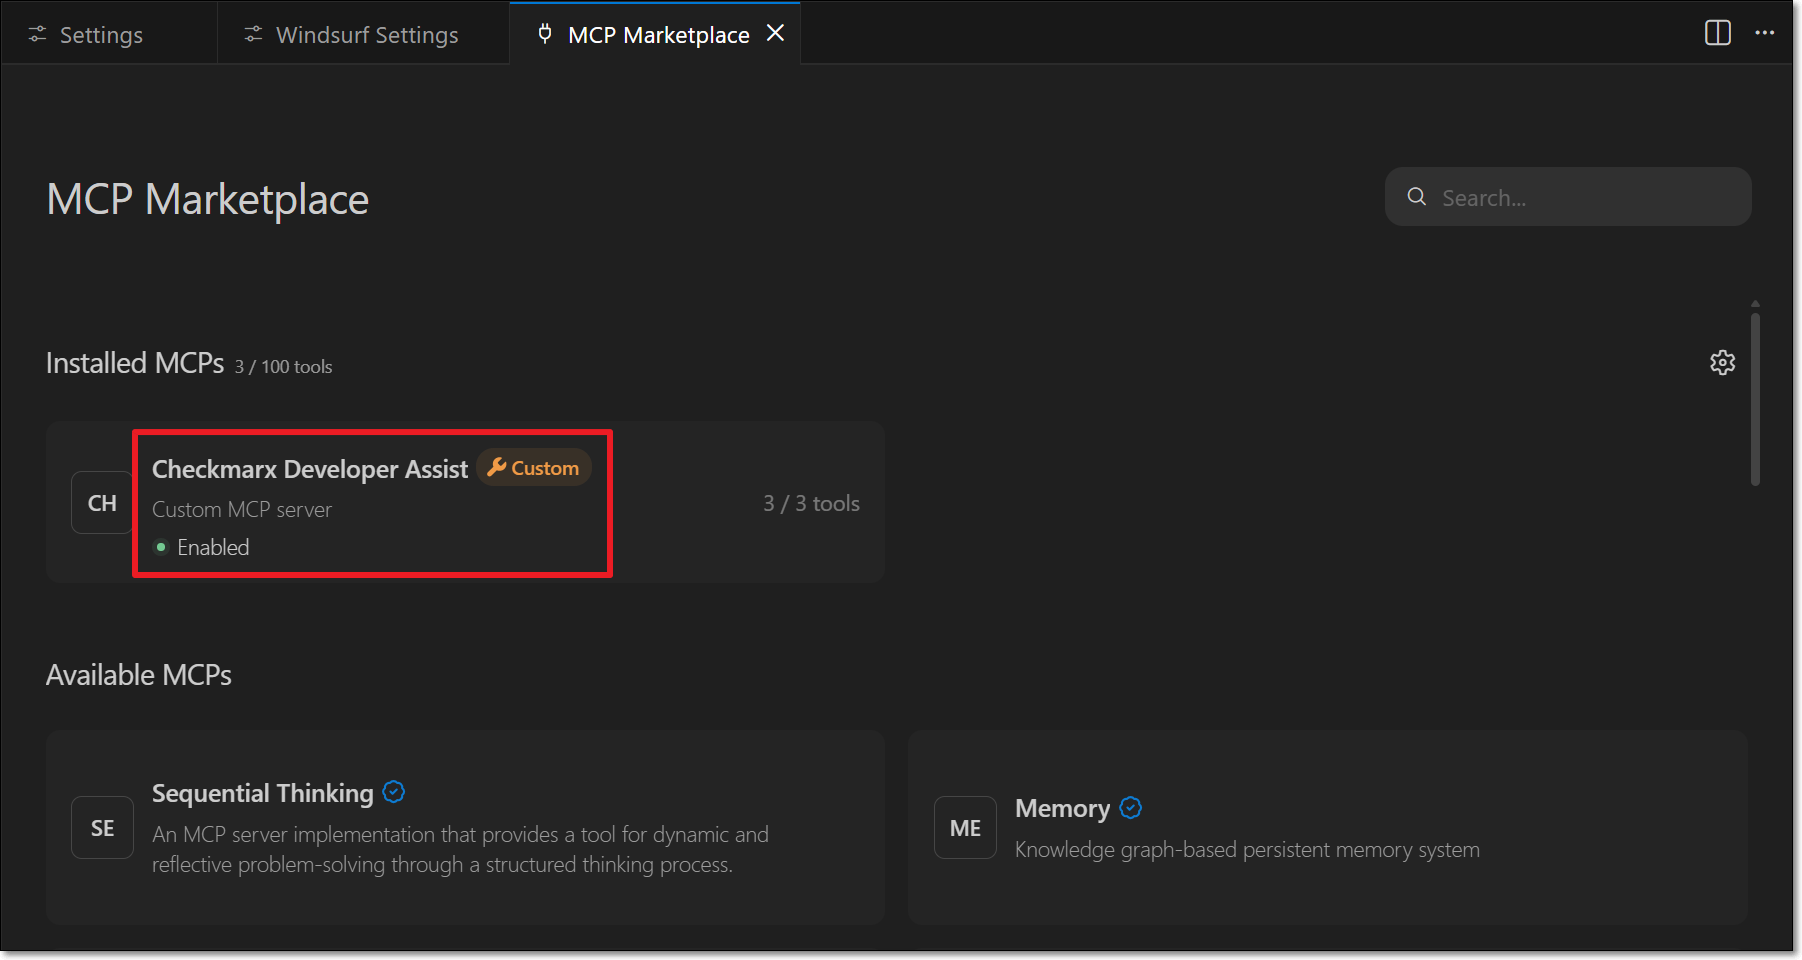
Go to Settings > Windsurf Settings.
Under Cascade, click Open MCP Marketplace, and make sure that the Checkmarx Developer Assist MCP is installed and enabled.
You can optionally adjust the Checkmarx Developer Assist Settings as follows:
Add Additional Params to set up custom configuraitions, such as proxy servers or to run in debug mode.
Enable/disable specific realtime scanners. By default, all scanners are enabled.
For IaC realtime scanner you can change the container platform used, Docker (default) or Podman.
MCP Authentication – Select the authentication method used by the Checkmarx MCP server. For SAST On-Prem accounts, only Token Based authentication is supported.
Notice
After changing the authentication method, click Install MCP to update the
mcp.jsonconfiguration.OAuth (default) when the MCP server starts, a browser-based login session is initiated to authenticate with your Checkmarx One account.
Warning
OAuth is not supported for SAST On-Prem Accounts
Token Based uses the API key associated with your current Checkmarx One login and avoids browser authentication when starting the MCP server.
Warning
When this method is used, the API key is stored in the
mcp.jsonfile.
In the Kiro IDE main navigation, click on the Extensions icon.
Search for the Checkmarx extension, then click Install for that extension.
Notice
Make sure to install version 2.44.0 or above, since older versions don't support Kiro.
The Checkmarx extension is installed, and the Checkmarx icon appears on the left-side navigation panel.
Click on the Checkmarx extension icon.
The Checkmarx One Authentication sidebar opens:
In the Checkmarx One Authentication sidebar, select the API Key login button.
The API Key Log in window opens.
Enter your Checkmarx One API Key and click Log in.
The Checkmarx One Authentication sidebar will now show that you are logged in.
A Checkmarx Developer Assist welcome page is displayed immediately after a successful login. Scroll down and click on Mark Done.
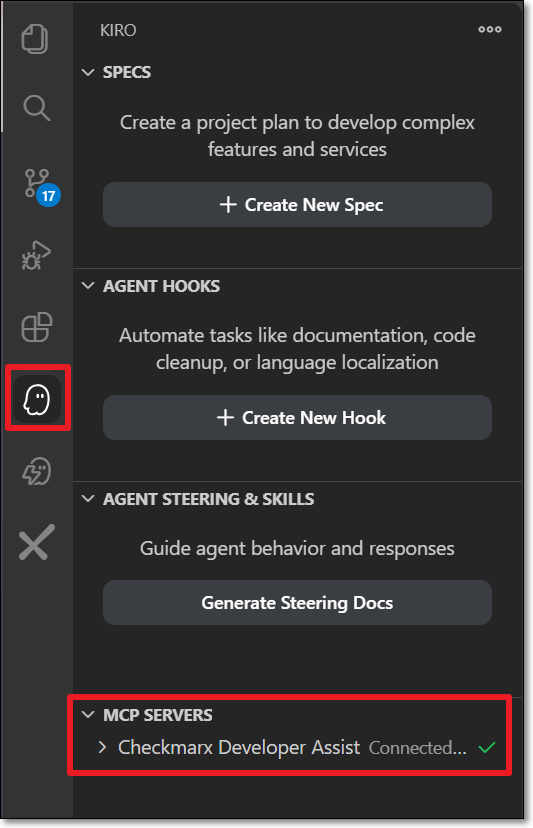
To verify that your MCP server is connected:
Select the Kiro icon in the left-side navigation panel.
Under MCP servers, confirm that Checkmarx Developer Assist is connected.
You can optionally adjust the Checkmarx Developer Assist Settings as follows:
Add Additional Params to set up custom configuraitions, such as proxy servers or to run in debug mode.
Enable/disable specific realtime scanners. By default, all scanners are enabled.
For IaC realtime scanner you can change the container platform used, Docker (default) or Podman.
MCP Authentication – Select the authentication method used by the Checkmarx MCP server. For SAST On-Prem accounts, only Token Based authentication is supported.
Notice
After changing the authentication method, click Install MCP to update the
mcp.jsonconfiguration.OAuth (default) when the MCP server starts, a browser-based login session is initiated to authenticate with your Checkmarx One account.
Warning
OAuth is not supported for SAST On-Prem Accounts
Token Based uses the API key associated with your current Checkmarx One login and avoids browser authentication when starting the MCP server.
Warning
When this method is used, the API key is stored in the
mcp.jsonfile.