Installation and Initial Setup
Warning
The Checkmarx Developer Assist JetBrains plugin provides Developer Assist capabilities as a standalone experience. Checkmarx One customers with a Checkmarx One Assist license should use the Checkmarx JetBrains Plugin, where Developer Assist is included as part of the Checkmarx One platform. The Checkmarx Developer Assist and Checkmarx JetBrains plugins are mutually exclusive. To use the Checkmarx Developer Assist plugin, ensure that the Checkmarx plugin is uninstalled before installation.
Prerequisites
You have a Checkmarx Developer Activation Key
You are running IntelliJ version 2022.2+
You must have GitHub Copilot Chat (AI Agent) version 1.5.62-243+ installed
Installing and Configuring the Plugin
The Checkmarx Developer Assist JetBrains Plugin is available on the JetBrains marketplace, and can be installed directly from your JetBrains IDE console.
To install the plugin from the marketplace:
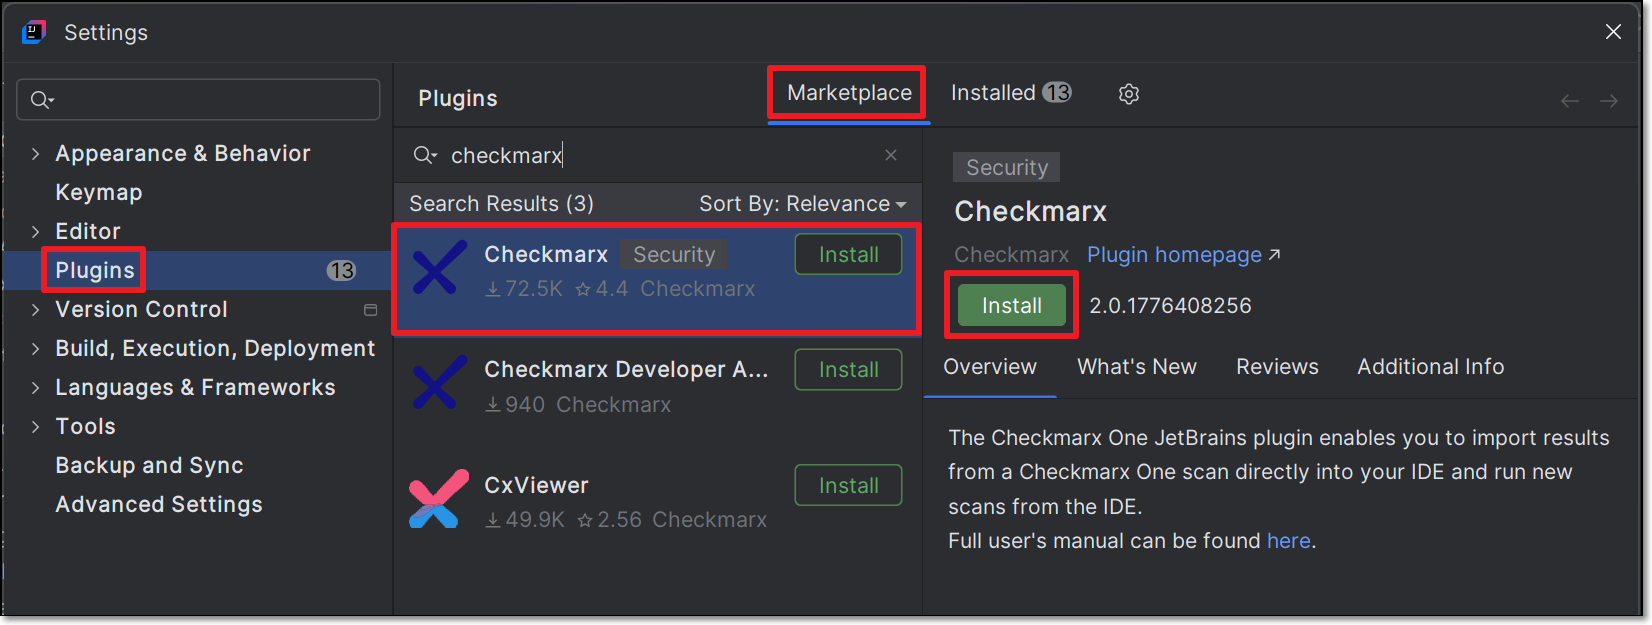
Open your JetBrains IDE console (e.g., IntelliJ IDEA).
Go to Plugins and click on the Marketplace tab.
Search for the Checkmarx plugin, then click Install for that plugin.
Caution
There are other Checkmarx extensions available on marketplace ("Checkmarx Developer Assist" and "CxViewer"), make sure that you install the extension called Checkmarx.
Follow the prompts to run the installation.
The plugin is installed.
To configure the plugin:
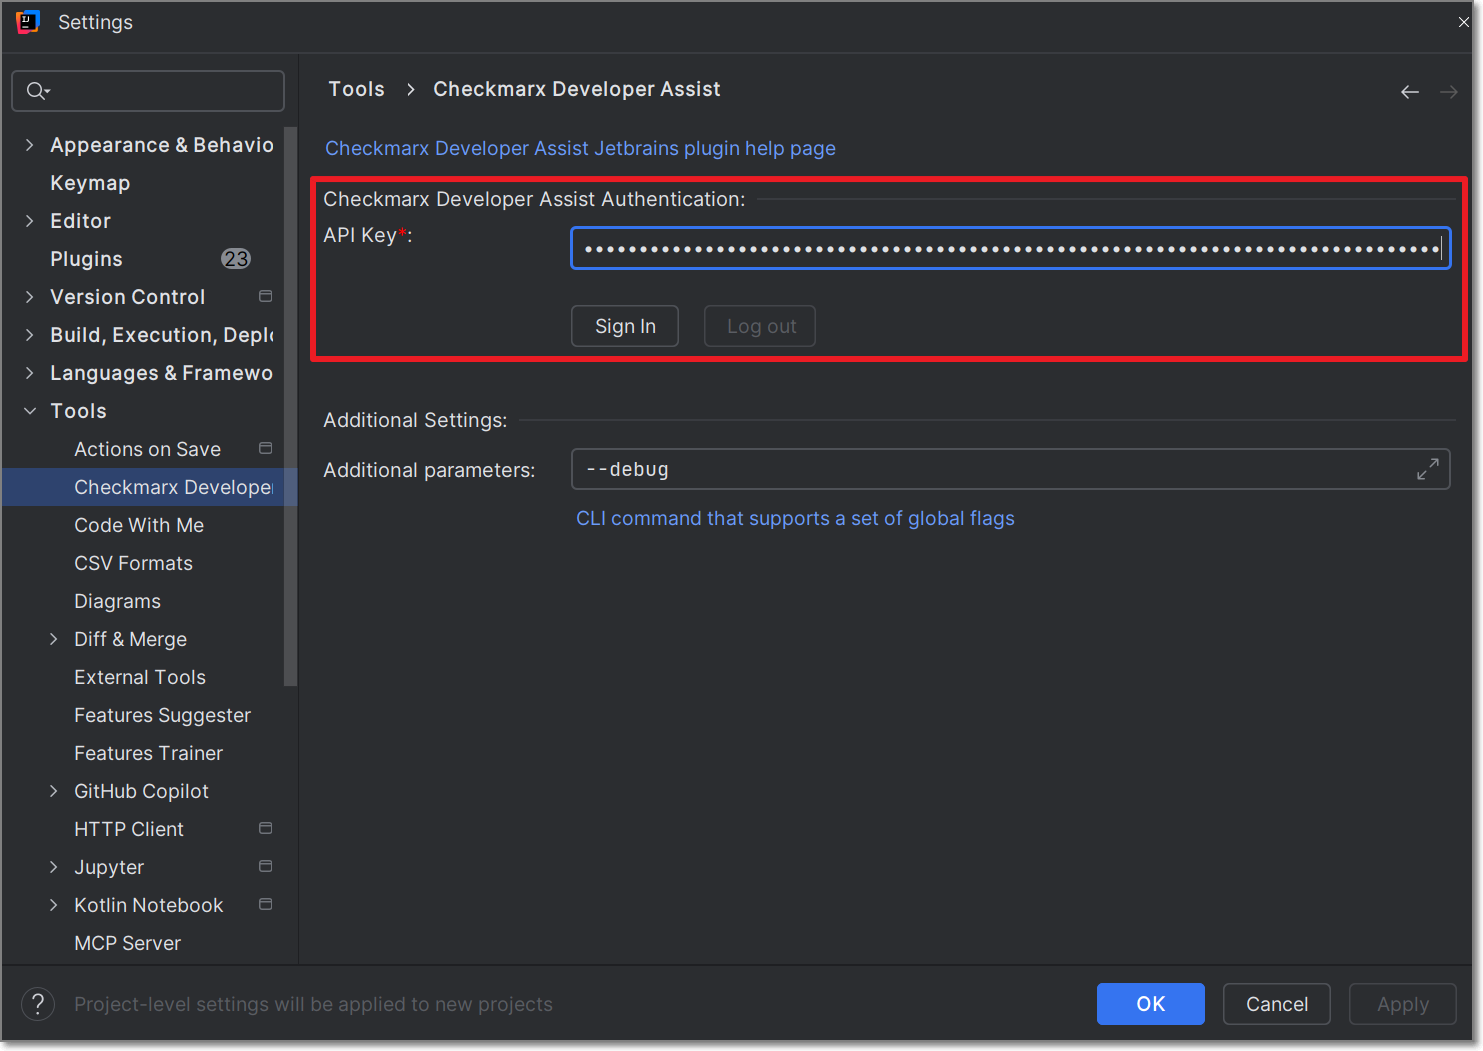
Open the IDE settings.
Drill down to tools > Checkmarx One.
Under Configurations, select the API Key radio button and enter your API key, and then click Sign in.
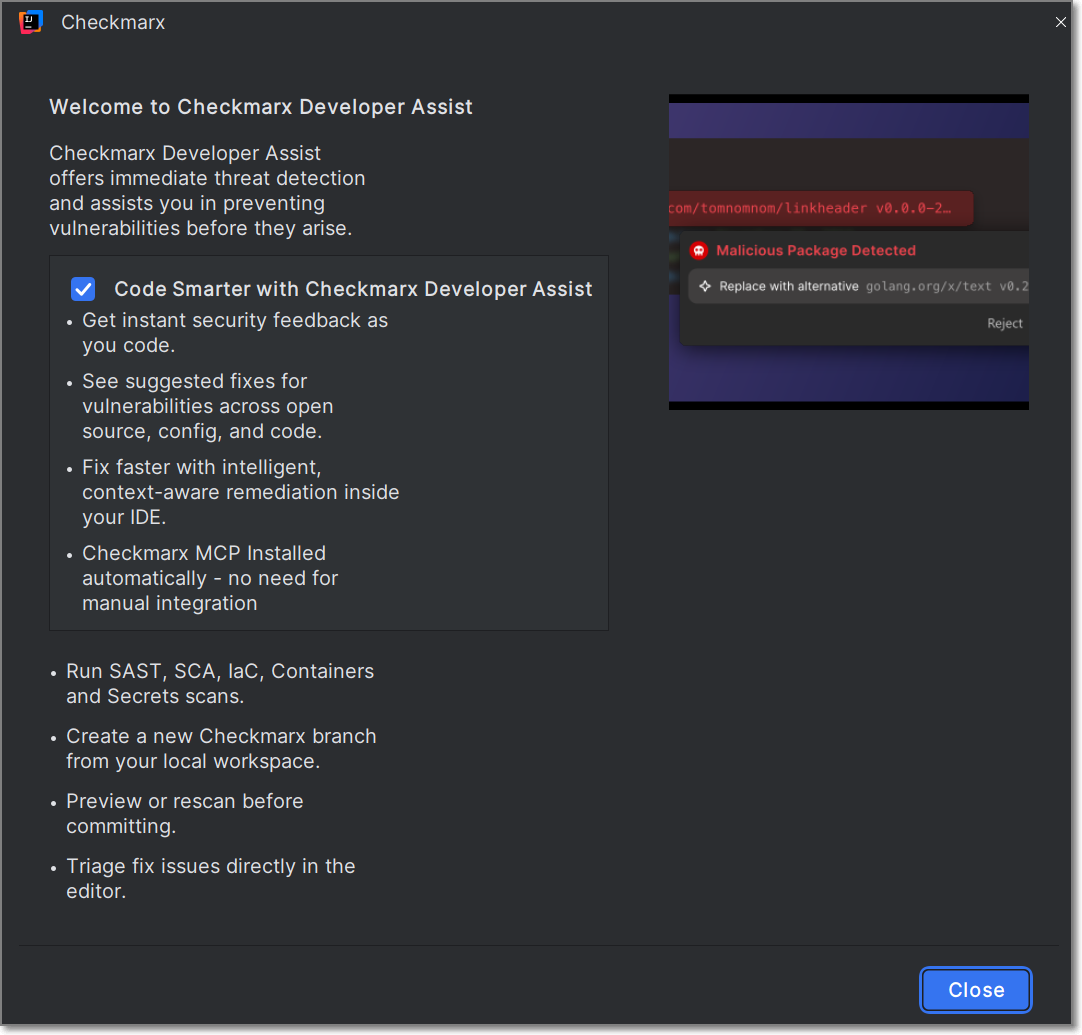
A Checkmarx Developer Assist welcome page is displayed immediately after a successful login. Close the window to proceed.
You can optionally add Additional Params to set up custom configurations, such as proxy servers or to run in debug mode.
Click on Go to Realtime Scanners and select Install MCP.
The Checkmarx MCP is added to your mcp.json file.
Notice
In some cases the MCP is installed automatically when you authenticate with Checkmarx. However, best practice is to click on Install MCP so that the MCP file opens and you can ensure that it starts running, as shown in the following step.
You can enable/disable specific realtime scanners. By default, all scanners are enabled.
For the IaC Realtime scanner, select the Containers Management Tool used in your environment. Options are docker or podman.
For Windows: Verify that the Container Management Tool selected is installed on your system.
For macOS and Linux: Verify that docker or podman is installed in
/usr/local/bin.If docker or podman are installed in a different location, you must create a symbolic link using the following procedure:
For docker:Check the installation path by running the following command (in terminal, not in InteliJ):
which docker.Create a symbolic link: run the following command:
sudo ln -s <PASTE_THE_PATH_HERE> /usr/local/bin/docker, replacing the placeholder with the full link returned in the previous step. For example: Ifwhich dockerreturned/opt/homebrew/bin/docker, runsudo ln -s /opt/homebrew/bin/docker /usr/local/bin/docker.Pull the required kics images using the following command:
docker pull checkmarx/kics:v2.1.29.Warning
The change will not register until you close and restart the IDE.
For podman:Check the installation path by running the following command(in terminal, not in IntelliJ):
which podman.Create a symbolic link: run the following command:
sudo ln -s <PASTE_THE_PATH_HERE> /usr/local/bin/podman, replacing the placeholder with the full link returned in the previous step. For example: Ifwhich podmanreturned/opt/homebrew/bin/podman, runsudo ln -s /opt/homebrew/bin/podman /usr/local/bin/podman.Pull the required kics images using the following command:
podman pull checkmarx/kics:v2.1.29.Warning
The change will not register until you close and restart the IDE.