Preparing the Environment
Once you understand the CxSAST System Architecture, before installing CxSAST, make sure server hosts conform to server requirements and ensure:
The Centralized or CxManager host name contains no non-alphanumeric characters such as "_". This is to avoid the issues described here.
Organizational firewalls allow:
HTTP (TCP port 80):
From client hosts to the Centralized or CxManager host
Between CxManager and CxEngine (in a distributed architecture)
SQL Server traffic (by default, TCP port 1433) from CxManager to SQL Server (If using SQL Server, in a distributed architecture)
SQL Browser (UDP port 1434) - this will allow machines (i.e., on installation wizard) to scan for SQL Servers on the network
NOTE 1: If an SQL Server is not displaying in the Installation window, you can try typing the machine name or IP address directly into the Wizard
NOTE 2: If an SQL Server uses a custom port, use a “,” between the machine name/IP and port number, e.g., “10.199.76.1,65391” or “SSMACHINE,65391”.
If using SQL Server for CxSAST, confirm SQL Server (for CxSAST) and SQL Server Browser are both running.
NOTE: SQL Express for POC can be installed by CxSAST installer, or use SQL Web/Standard/Enterprise 2016/2017/2019 for Production.
For Access Control, open the relevant port on the Manager for Engine-to-Manager communication using Active MQ:
For unencrypted TCP transfer, open port 49151.
For TLS encrypted transfer, open port 61617.
During the installation process, an excessive amount of disk read/write operations is performed. Any anti-virus software can significantly slow down these operations, and in some cases might even cause the installation process to fail. Therefore it is highly recommended to perform the following:
On server component hosts:
Stop the antivirus before installation, or prevent it from scanning the following:
Checkmarx folders:
C:\CxSrc, C:\ExtSrc, C:\CxReports
Checkmarx installation directory, for example:
C:\Program Files\Checkmarx\
Once installation is complete, restart the antivirus.
Install and configure Java.
NOTE 1: Locate the Java installation where permission fulfillment is possible (e.g., C:\Program Files) and not in personal users' folders such as the Desktop folder. The approved and recommended Java version is 1.8. The minimum version for Oracle is 8u241 and for AdoptOpenJdk, it is 8u242.
NOTE 2: In case Java JRE is automatically updated to a new version, you must manually update the JRE folder path in the CX_JAVA_HOME environment variable, otherwise, CxSAST stops operating.
Configure IIS (except on database-only component server in a distributed deployment):
Installing IIS 10 on Windows 10
Open Control Panel.
In Control Panel, click Programs and then click Turn Windows features on or off.
In the Windows Features dialog box, click Internet Information Services and then click OK.
Ensure the following role services are selected:
IIS Management Console
IIS Metabase Compatibility
ASP.NET
Static Content
Installing IIS 8 on Windows Server 2012
For additional information see: https://docs.microsoft.com/en-us/iis/get-started/whats-new-in-iis-8/installing-iis-8-on-windows-server-2012
Open the Server Manager > Manage menu > Add roles and features.
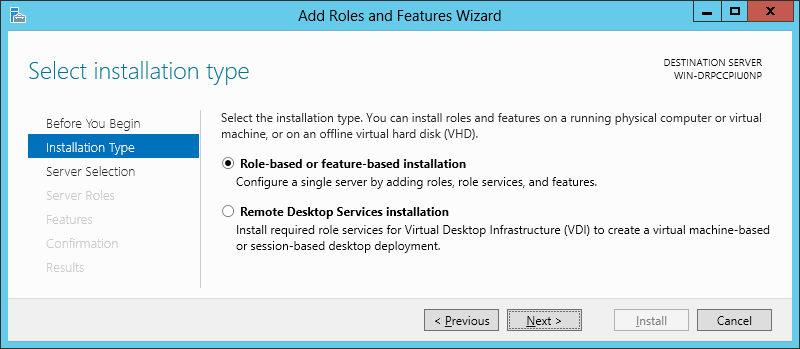
Select Installation Type > Role-based or feature-based Installation, and click Next.
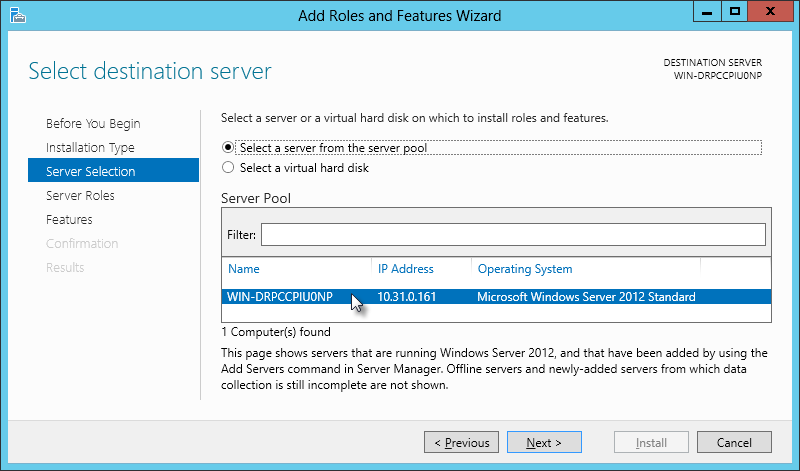
From the Select destination server window, select the appropriate server (local is selected by default), and click Next.
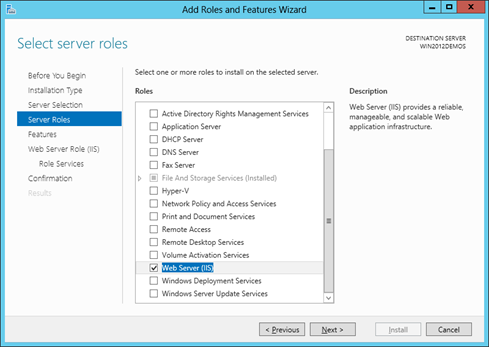
From the Select Server Roles window, select Web Server (IIS), and then click Next.
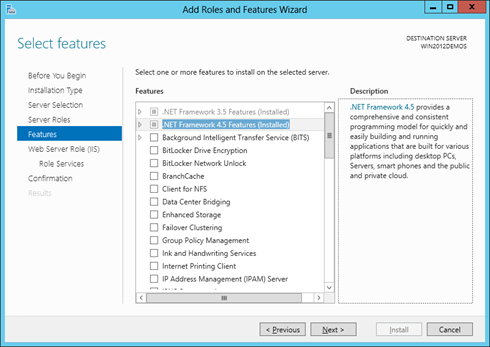
From the Select Features window, click Next.
Continue through the wizard until the Web Server Role (IIS) > Role Services page.
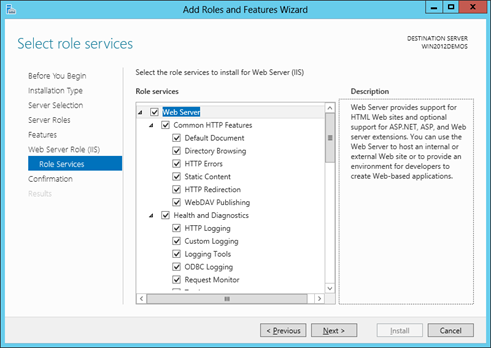
Select the following role services:
Common HTTP Features > Static Content
Application Development > ASP.NET 4.5
Management Tools > IIS Management Console
Management Tools > IIS 6 Management Compatibility > IIS 6 Metabase Compatibility
Click Next.
From Confirm installation selections window, review the selections. To edit selections, click Previous.
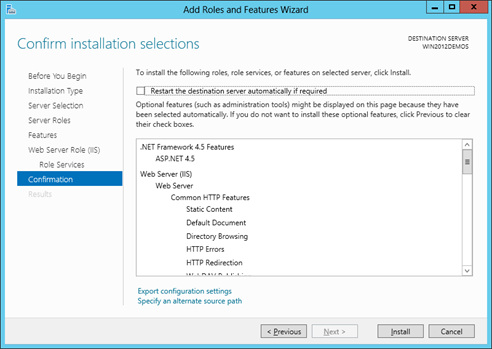
Click Install.
From the Installation progress window, view the installation progress.
Click Close.
Confirm that the Web server works by using http://localhost.
Installing IIS 8.5 on Windows Server 2012 R2
For IIS 8.5, Checkmarx provides a configuration file that can be used to automatically perform all necessary configurations. Alternatively, you can manually install IIS, in which case make sure to include IIS with:
IIS Management Console
Static Content
ASP.NET 4.5 with all dependencies
IIS 6 Metabase Compatibility
.Net Framework 4.5 Features -> WCF Services -> HTTP Activation
Notice
Installing IIS 8.5 on Windows Server 2012 R2
For additional information see: https://docs.microsoft.com/en-us/iis/install/installing-iis-85/installing-iis-85-on-windows-server-2012-r2
To configure IIS 8.5 using the Checkmarx configuration file:
Download CxIISConfig.xml.
Run Windows PowerShell as an Administrator.
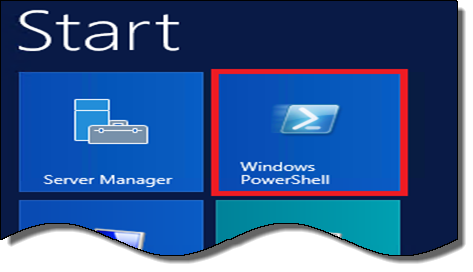
In Windows PowerShell, run the following:
Install-WindowsFeature –ConfigurationFilePath <path>\CxIISConfig.xml
where <path> is the path to the directory where you put the configuration file.

Installing IIS 10 on Windows Server 2016, 2019, and 2022
On your Server Manager Dashboard go to Manage > Add Roles and Features. The Add Roles and Features wizard opens.

On the Before you Begin page click Next.
On the Select Installation Type page, select Role-Based or feature-based installation, and then click Next.

On the Server Selection page, select the server to perform the installation, and then click Next.
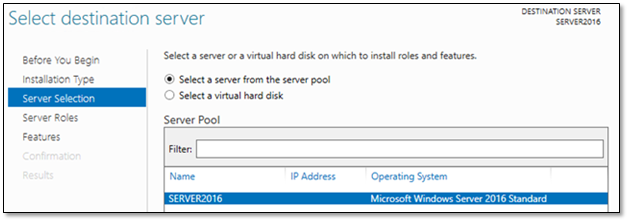
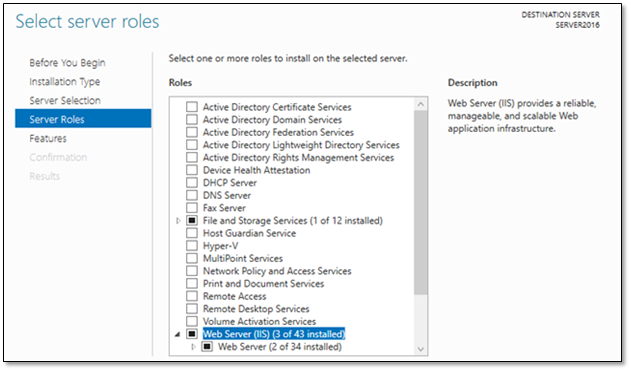
On the Server Roles page, select Web Server (IIS) and the following role services:
IIS Management Console
IIS Metabase Compatibility
ASP.NET
Static Content
Click Next.
On the Features Page click Next.
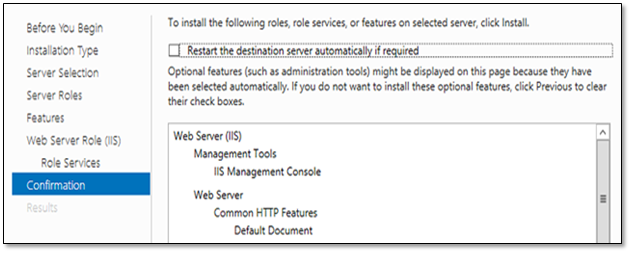
On the Confirmation page, review and then click Install to complete the IIS installation.
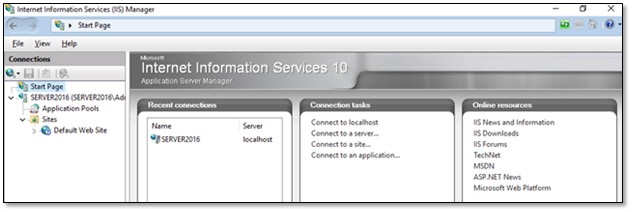
Once the Web Service Role (IIS) is installed, you can find the IIS Manager on the Start menu or by clicking Tools.

Now you can utilize the IIS manager to navigate and create your new website.
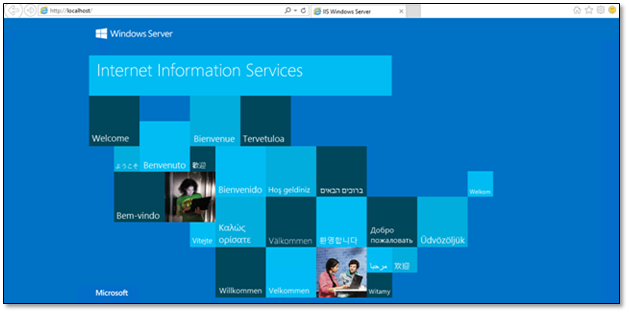
Confirm that the Web server works by using http://localhost.
Notice
The Checkmarx Server/CxAudit and the Database must be in the same time zone for correct synchronization.
Enabling Long Path Support in Windows 10 and Server 2016
The Windows operating system traditionally did not support paths or filenames with more than 260 characters. However, Windows 10 and Windows Server 2016 now support these long paths.
To enable long path names, perform the following:
In Windows 10/Server 2016, open the Run dialog (Start > Programs > Accessories > Run).
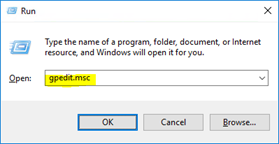
Open the Local Group Policy settings by entering gpedit.mscin the Run dialog. The Group Policy Editor is displayed.
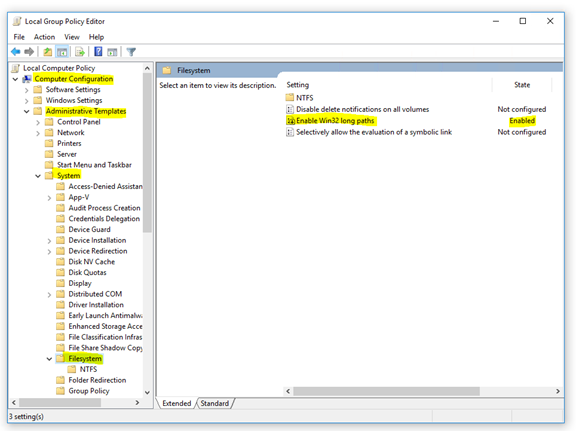
Navigate to: Local Computer Policy > Computer Configuration > Administrative Templates > System > Filesystem.
Enable the Enabling Win32 long paths key. The key updates instantly and no restart is required.
Notice
Long Path support in Windows 10 starts with Build 14352.