How to Create a Custom Scan Configuration
As described above, the Improved Scan Flow configuration scans one primary language using an optimized flow calculation algorithm. The Multi-language Scan configuration scans all languages using the older, slower flow calculation algorithm.
But what can you do if you want to scan all languages using the optimized flow calculation algorithm? The answer is to create a custom scan configuration option.
This topic describes how to create a custom configuration option using the follow steps:
Create a custom scan configuration option.
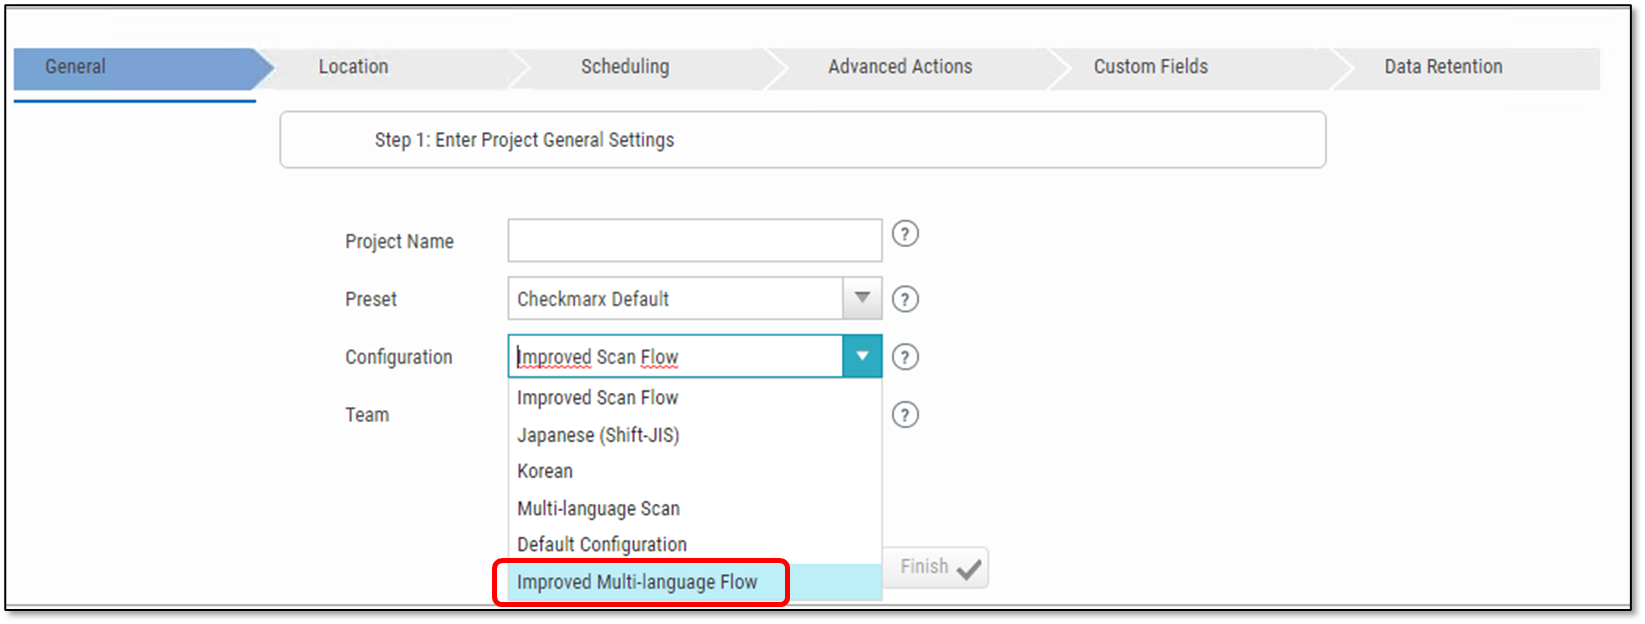
The name of this new custom scan configuration option will be displayed in the Configuration property drop-down list.
(In the SAST Web Portal user interface go to Project & Scans > Create New Project > General tab.)
Specify how the new custom scan configuration will function.
Before you begin
For information about configuring default scan configurations, see Configuring a Default Scan Configuration for All Projects and Scans.
For information about the CxDB Database, see CxDB Database Tables Relevant for Scan Configurations.
Creating a Custom Configuration Option
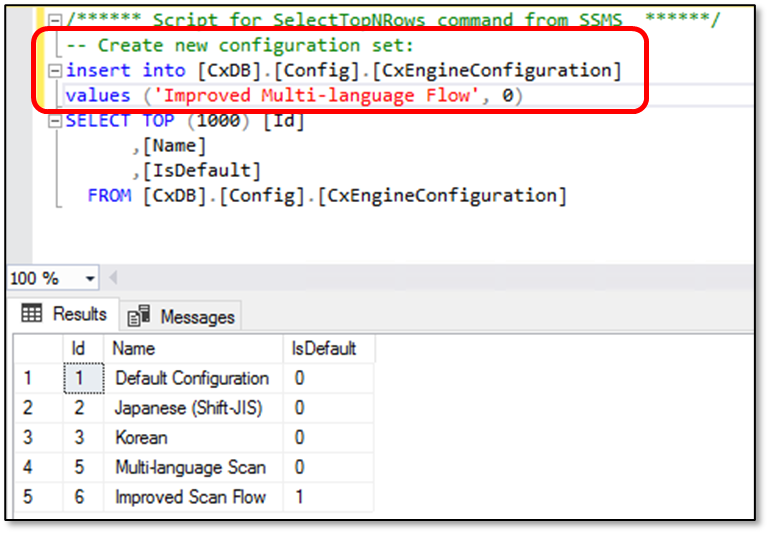
1 Decide on a name for the custom configuration option that will be displayed in the Configuration drop-down list. For this example, since we want to create a scan configuration that uses the new Improved Scan Flow algorithm and scans all the languages in the project, we will call our custom configuration “Improved Multi-language Flow”.
2 Open the CxDB database.
For instructions how to access the CxDB database, see Accessing the CxDB Database.
3 With the Tables folder expanded, scroll down and right-click on CxEngineConfiguration and select Top 1000 Rows.
3 In the top right panel, under Script for SelectTopNRows command from SSMS, enter the following SQL command:
insert into [CxDB].[Config].[CxEngineConfiguration]
values ('Improved Multi-language Flow', 0)
4 Click on Execute to run the SQL command.
Specifying the Scan Configuration for the Custom Option
1 If not already opened, open the CxDB database.
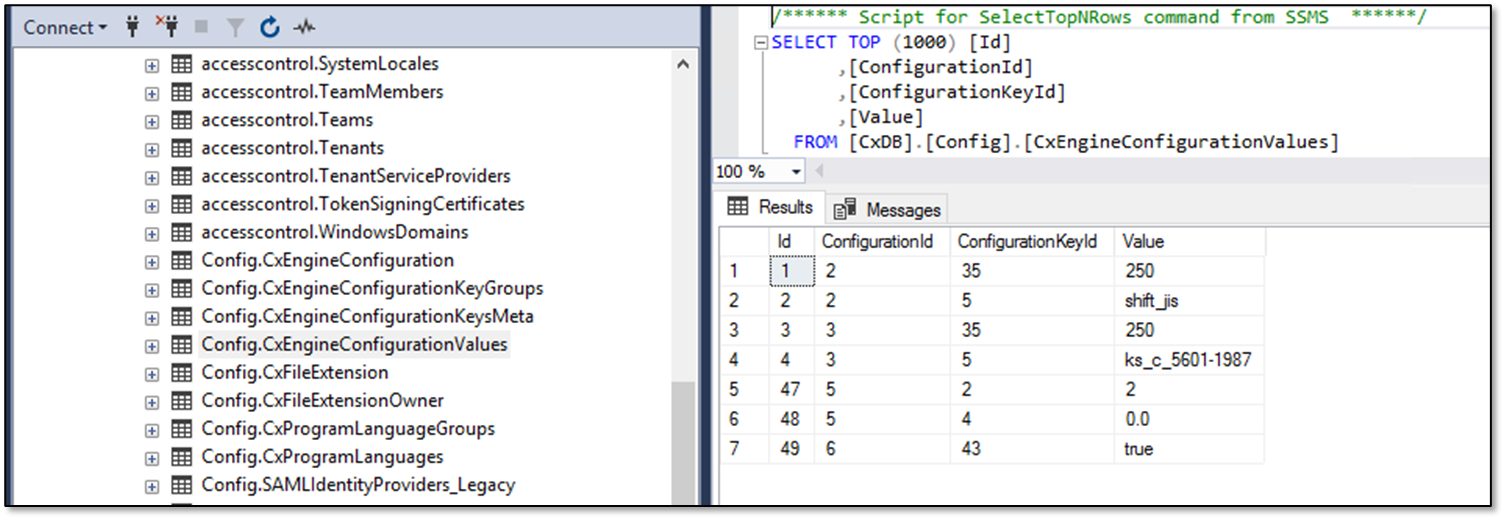
2 With the Tables folder expanded, scroll down and right-click on CxEngineConfigurationValues and select Top 1000 Rows.
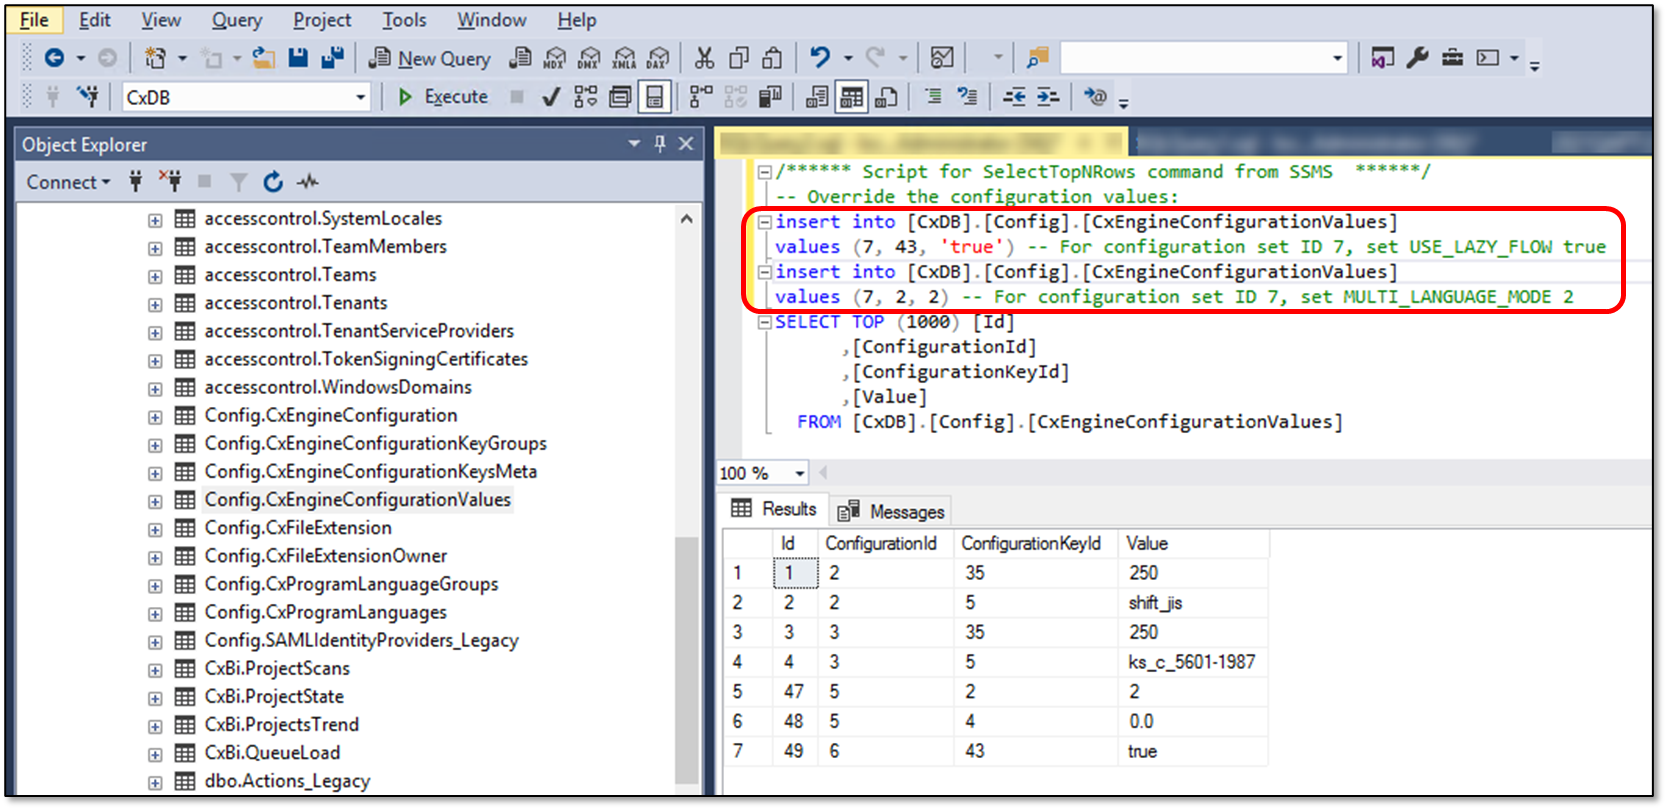
3 In the top right panel, under Script for SelectTopNRows command from SSMS, enter the following SQL commands:
insert into [CxDB].[Config].[CxEngineConfigurationValues]
values (7, 43, 'true')
insert into [CxDB].[Config].[CxEngineConfigurationValues]
values (7, 2, 2)
4 Click on Execute to run the SQL commands.
5 Verify that the new custom configuration option is available in the Configuration drop-down list.


