Installation and Configuration of MID Server for Vulnerability Response Integration with SAST
Create the MID Server user and grant mid_server access; follow the link to create a user in your Instance: Setup MID Server Role.
Download the suitable MID Server file on the host machine with access to SAST and follow the steps to download MID Server here: Download MID Server Files.
Once downloaded, add the instance URL, MID Server username, and password in the config file, then add the name of your MID Server and start it. Check this link for further details: Install MID Server on Windows.
Once MID Server is up and reflected in your instance, validate it. You can check this link for further details: Validate MID Server.
Configuration is done initially and is a one-time activity.
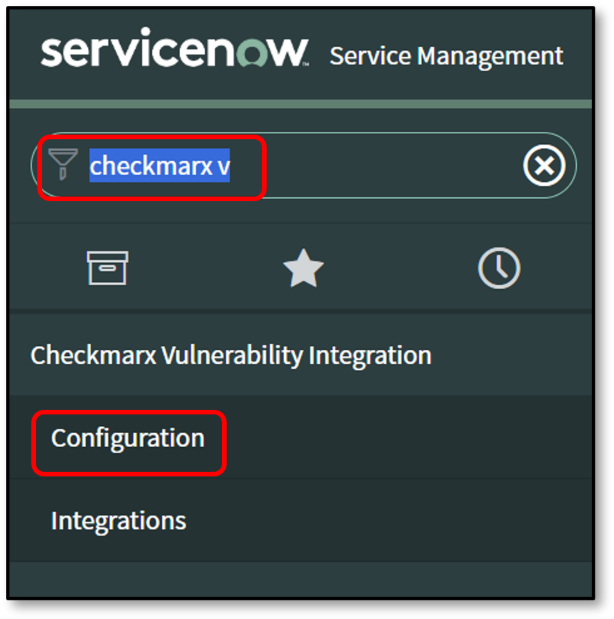
To Configure the Checkmarx Vulnerability Integration:
Navigate to your instance of ServiceNow and log in.
Search for Checkmarx Vulnerability Integration.
Click Configuration.
Provide the information required to complete the Checkmarx configuration.
Note
Mandatory fields are marked with


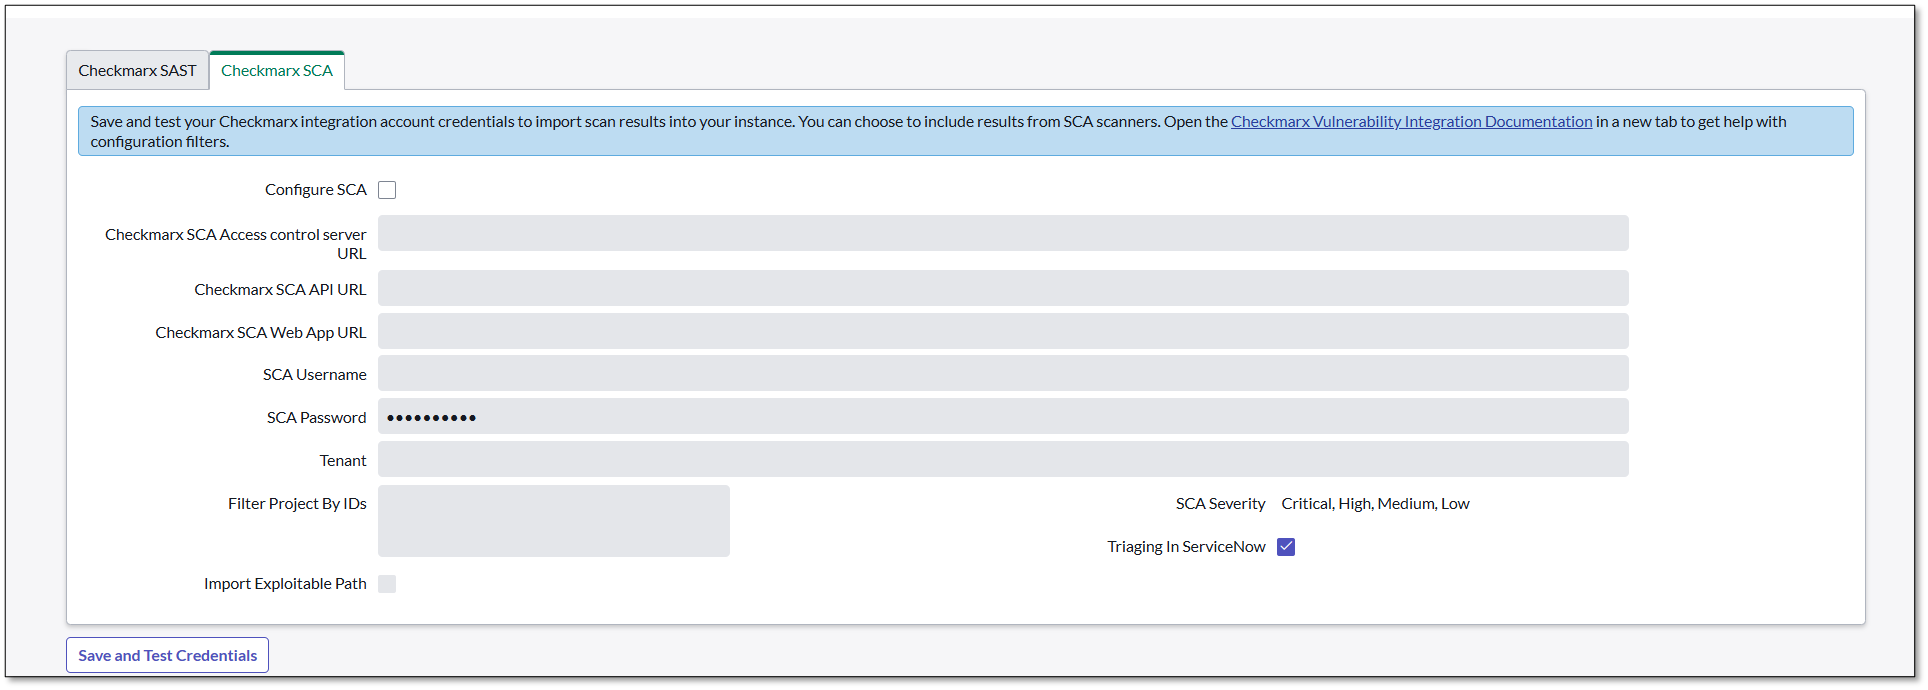
(L) SAST; (R) SCA
Click Save and Test Credentials.
The system tests the credentials and confirms if the validation is successful.
If the authentication is successful, continue to perform the Checkmarx Vulnerability Integration.
Warning
If you are getting any of these errors, follow the steps to solve them:
HttpException: Session contains no certificates – Untrusted
The Checkmarx Server URL is not on the trusted list. Please add it to the trusted list.
Open MID Security Policy in the ServiceNow UI, and disable cert checking for the Intranet zone.
The payload size of 24138679 bytes exceeded the maximum of 20000000 bytes
Go to MID Server > Properties
Verify if the property mid.eccq.max_payload_size exists
If the property exists, increase the size of the payload in bytes. If it doesn't exist, create a new one, and specify the payload size in bytes; the default is 20000000 bytes.
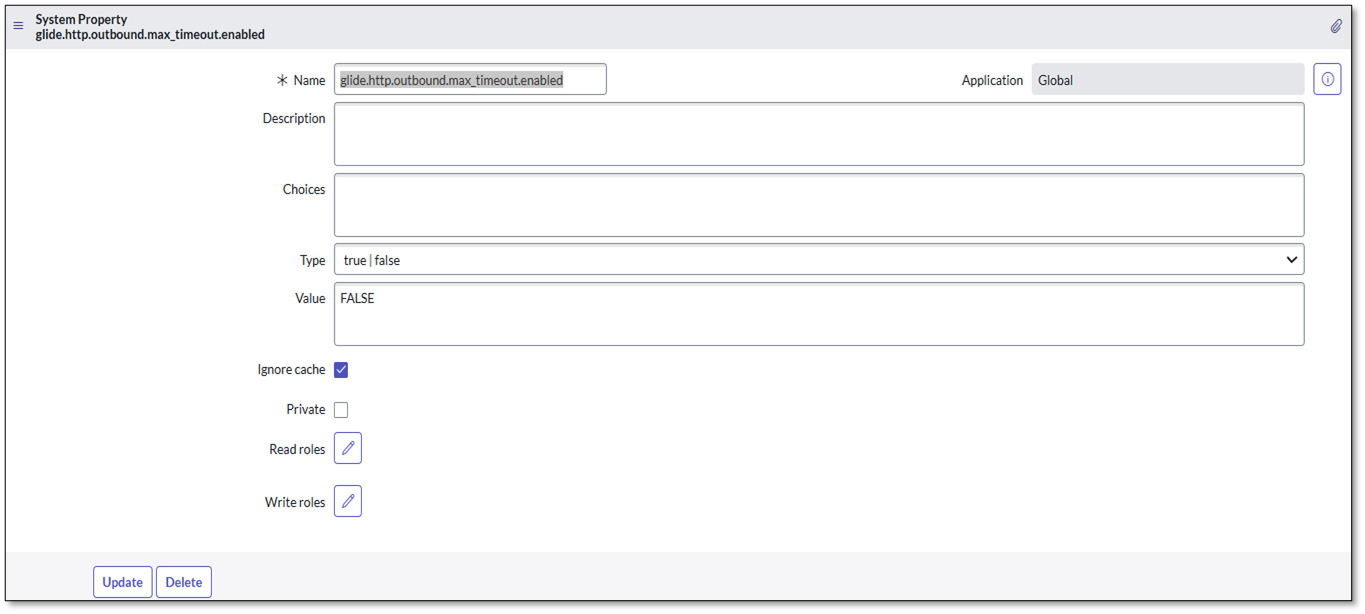
If the MidServer timeout exception occurs while running the integrations, follow these steps to add glide.http.outbound.max_timeout.enabled to the System Properties:
Navigate to ALL, find and select sys_properties.LIST.
Click on the NEW button.
Enter glide.http.outbound.max_timeout.enabled in the Name field.
Select TRUE|FALSE in the Type field.
Set FALSE as the value in the Value field.
Submit the form.
Caution
Ensure the Application scope is set to GLOBAL. If the property already exists but has a different scope, delete it and recreate it with the GLOBAL scope.
If a MidServer timeout exception occurs while running the integrations, follow these steps to add glide.http.outbound.max_timeout.enabled to the System Properties:
Navigate to ALL and find sys_properties.LIST
Click on the NEW button.
Enter glide.http.outbound.max_timeout.enabled in
the Name field.Select TRUE|FALSE in the Type field.
Set FALSE as the value in the Value field.
Submit the form.
Note
Ensure the Application scope is set to GLOBAL. If the property already exists but has a different scope, delete it and recreate it with the GLOBAL scope.