- Checkmarx Documentation
- SAST/SCA Integrations
- CI/CD Plugins
- SonarQube Plugin
- Configuring the SonarQube Plugin
- Configuring Quality Gates
Configuring Quality Gates
Quality Gates are the best way to enforce a quality policy and it is there to answer one simple question:
Can I deliver my project to production or not? In order to answer this question, you have to define a set of conditions based on measurement thresholds against which your projects are measured. The quality gate Sonar way is provided by SonarQube and activated by default. It is also possible to define and set a different quality gate as default, which can be applied to all projects. For an overview on all aspects of the SonarQube quality gates, refer to Quality Gates in the SonarQube documentation.
Defining a Quality Gate
A quality gate consists of a set of conditions that you can define for new code and existing (overall) code. This section explains how to define an existing quality gate using the menu.
Under Quality Gates, click <Create>. You are prompted to assign a name to it.
Assign a name to the new quality gate and then click <Save>.
Define the quality gate as explained below.
From the menu, select Quality Gates. The Quality Gates page appears.
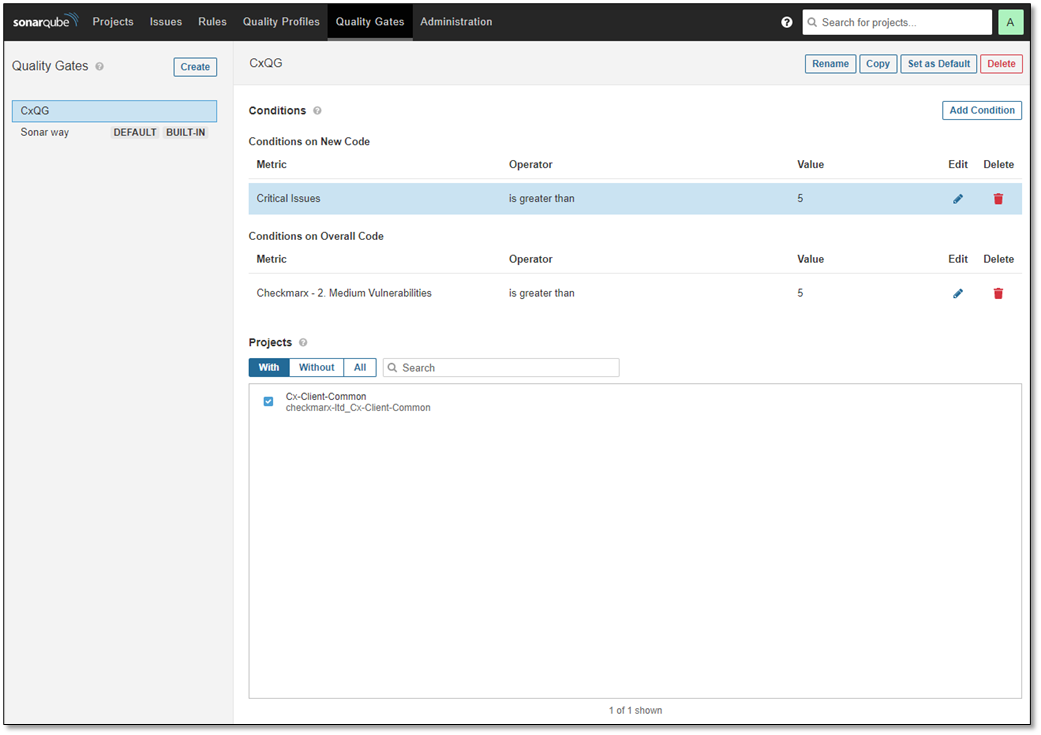
Select the desired quality gate, in this case "CxQG", as illustrated below

Conditions
Description
Metric
Measurement parameter, for example Checkmarx-1. High Vulnerabilities
Operator
Condition, for example is greater than...
Value
The threshold value, for example 5.
Edit
Click to adjust the threshold (Operator) value.
Delete
Click to delete the condition.
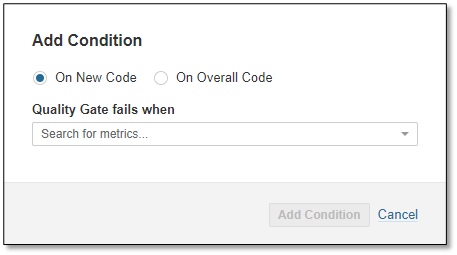
Click <Add Condition>. The Add Condition dialog appears.

Select, if you apply this condition on new code only or on all your code (
 Overall Code).
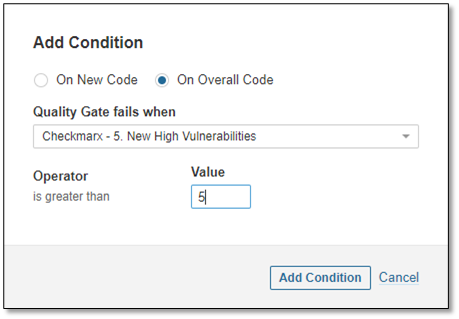
Under Quality Gate fails when, enter the desired metric (measurement parameter). You are asked to define the operator (condition).
Under Operator, define the threshold value above which the scanned code does not passs the quality gate. Once the value gets close to the threshold, a warning appears.
Click <Add Condition>. The condition is added to the list.

Select the desired quality gate in the Quality Gates list.
Under Projects, define the criteria as listed in the table below.
Notice
A project can only be linked to one quality gate at the time.
Criteria | Description |
|---|---|
With | Enter the name or part of of desired project into the Search field and then check it when it appears listed. Only one project can be included using the With option. |
Without | Enter the name or part of of desired project into the Search field and then check it when it appears listed. Only one project can be excluded using the Without option. |
All | Select this option to apply this quality gate to all projects. |
To rename the quality gate, select the desired quality gate , click <Rename> and follow the onscreen instructions.
To copy the quality gate, select the desired quality gate and click <Copy>. The Copy Quality Gate dialog appears with the name of the quality gate.
Change the name of the quality gate and then click <Copy>. The copy of the quality gate is listed in the list of quality gates with the same conditions set. The copy of the quality gate is not linked to the project(s) that the original one is linked to.
Select the desired quality from the list of quality gates and then click <Set as Default>. The selected quality gate is now labeled as the DEFAULT.
Notice
The Sonar way quality gate is built in and this status cannot be changed.
Select the desired quality from the list of quality gates and click <Delete>.
Confirm your request when asked.