Generate a ZAP Configuration File
In this section, we explain how a ZAP configuration file can be generated.
Install ZAP on your local machine. Download ZAP from the following link: https://www.zaproxy.org/download/
Open ZAP.
In the hierarchy under Contexts, double-click Default Context.
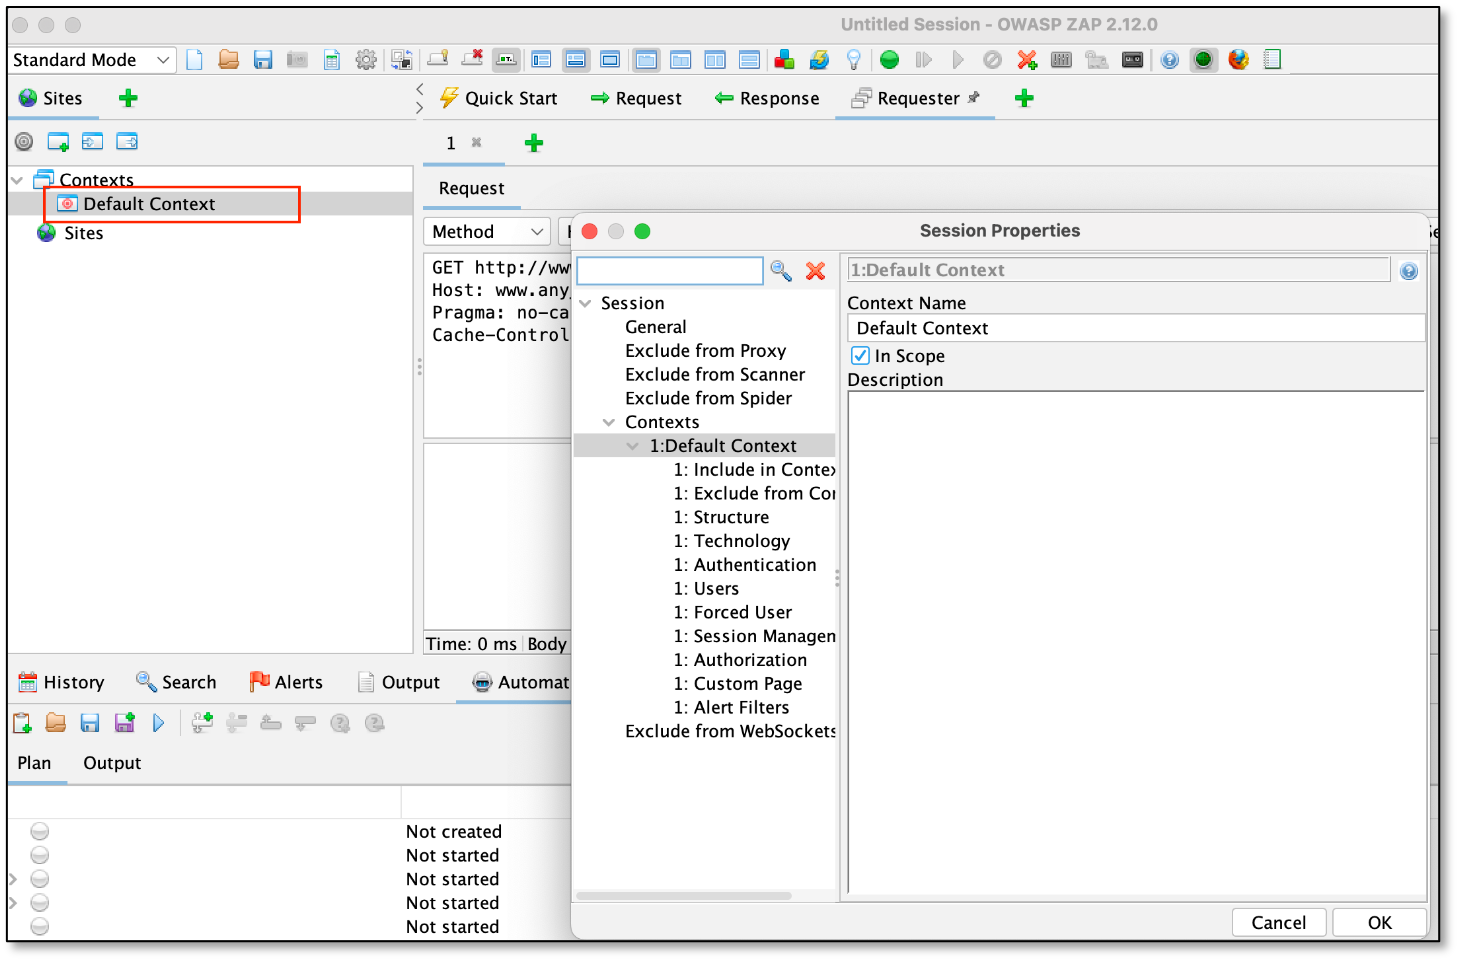
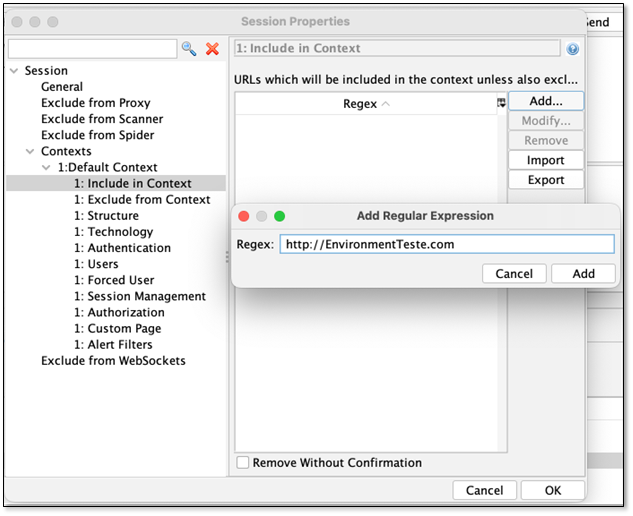
Define the URL to do the test. Select the Include in Context option, click Add, enter the URL, and click Add.
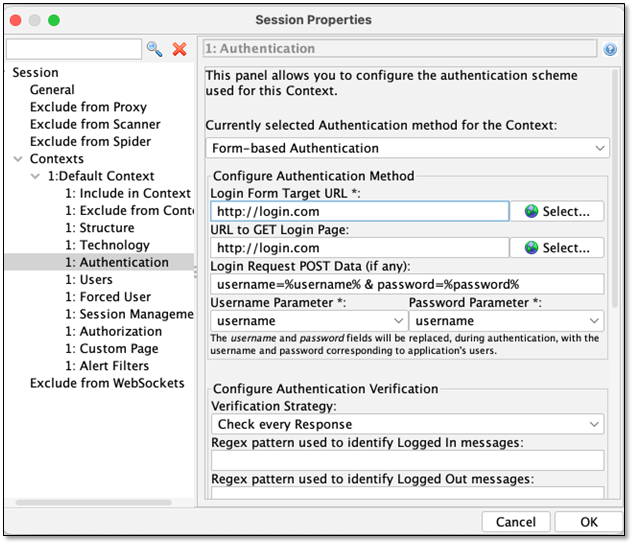
Select Authentication and choose the method matching your target's login flow. The supported options are HTTP/NTLM Authentication and Form-based Authentication. The example below shows Form-based Authentication; for HTTP/NTLM, ZAP prompts for the realm, hostname, and credentials instead of a login form URL.
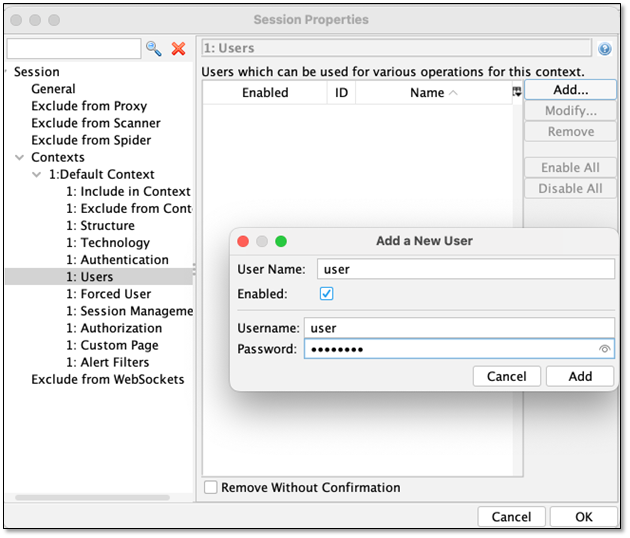
Create the user(s) you want to use on the scans.
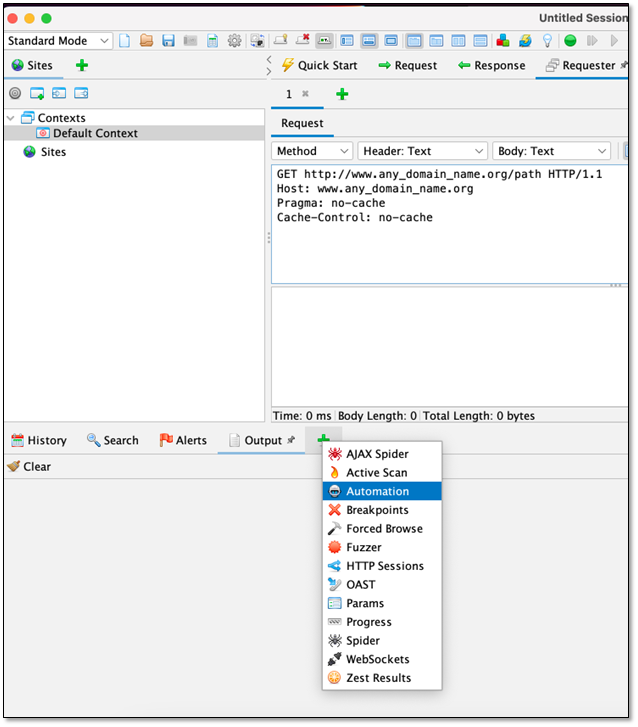
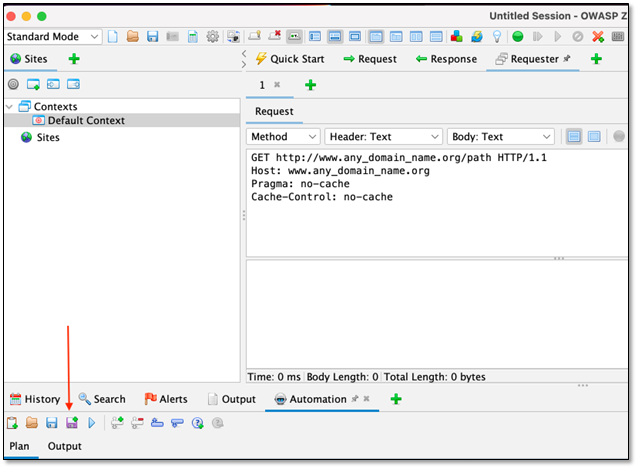
Click the + button at the bottom of the window and then click Automation.
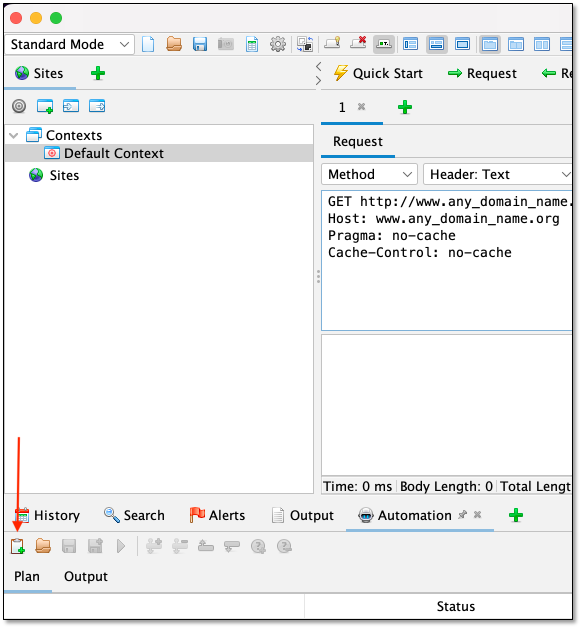
Click the New Plan button.
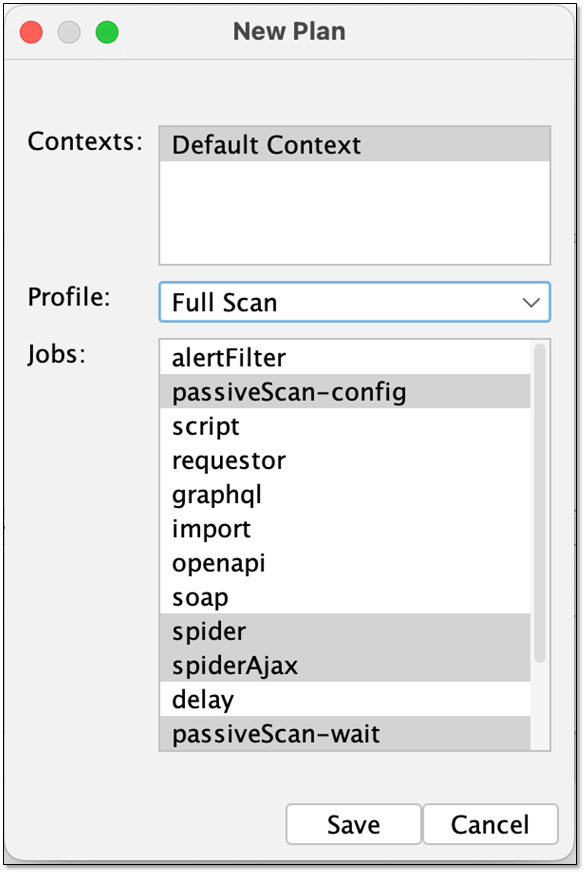
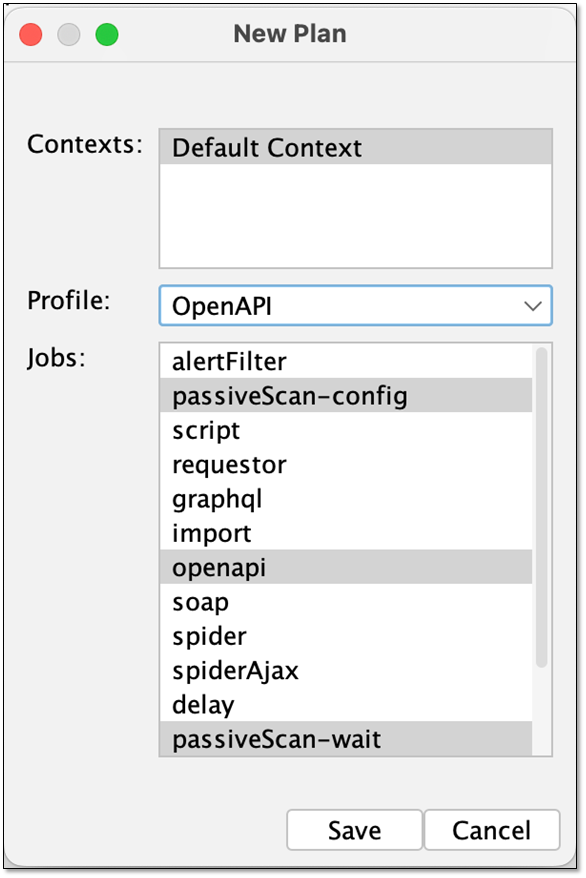
Select one of the following profiles:
Each job performs a specific task in the scan - for example, spider and spiderAjax crawl the target to discover URLs, openapi tests endpoints from an OpenAPI/Swagger spec, and report generates the results report. For the full list of supported jobs and what each configures, see Jobs Supported.
For a web scan, select the Full Scan profile.
For an API scan select the OpenAPI profile.
Notice
The type of jobs presented will depend on the add-ons installed. If some of the intended jobs don't appear go to the manage add-on option and install them.
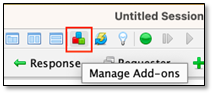
Click Save.
Double-click on each job if you want to change the context associate or in some cases (Spider Ajax for example) to determine the user to use in the job.
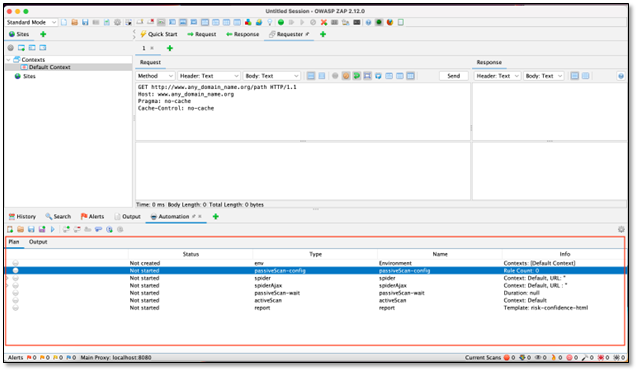
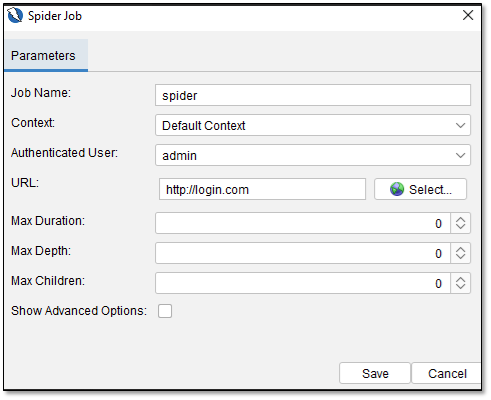
Example for the Spider JOB
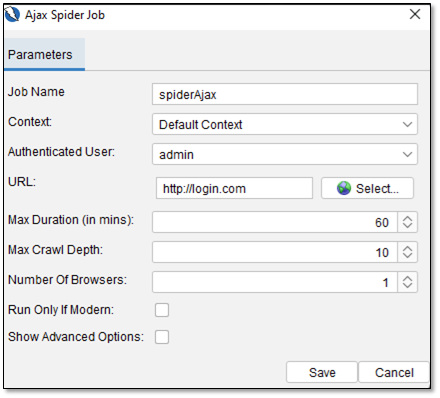
Example for the Ajax Spider JOB
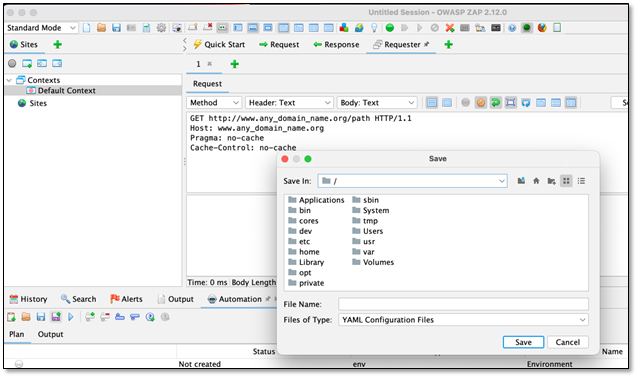
To save the plan, click the Save As button and then choose the folder.
Warning
Large scans can hit a size limit if the crawler follows static assets. Exclude paths like *.css, *.js, *.png, *.svg, *.woff to keep the scan efficient.
Tip
When running via the Checkmarx platform, start with 2–4 for numberOfBrowsers/threadPerHost/threadCount rather than higher values.
Here are two examples of configuration files. One for a web scan and the second for an API scan. They are viewable in a text editor like Notepad.
After saving the plan, this file is ready to use. To run a scan with it, see Running a Scan: when creating a new scan for a Web environment, upload this file in the Upload Configuration file section (for an API environment, you'll also need to select a Swagger/Postman file).
Tip
You can also download the sample Web/API configuration files above and edit them directly instead of building a plan from scratch in the ZAP GUI.