Creating and Mapping User Attributes in OKTA
Although some user attributes are already defined in OKTA, additional user attributes will need to be created. First Name, Last Name. Email and Team are mandatory attributes. These user attributes may already be defined, but not mapped in OKTA.
Creating User Attributes in OKTA
To create user attributes in OKTA, do the following:
Click Directory and select
 Profile Editor. The OKTA Profile Editor screen is displayed.
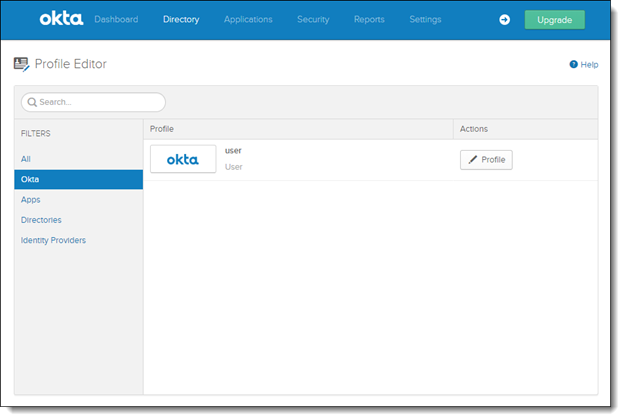
Click <
 Profile> to edit the OKTA User. The OKTA Profile screen is displayed.
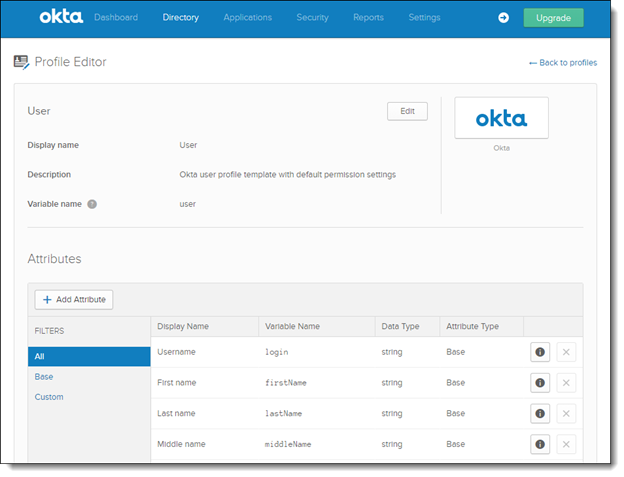
Confirm that the following user attributes are available:
Notice
For manual changes that need to be performed within the SAML Identity Provider, for User and Team Attributes, when upgrading to CxSAST v9.x from v8.8\8.9, refer to Adapting the SAML Identity Provider Attributes when Upgrading CxSAST V8.8 or v8.9 to v9.0 or v9.2
Display Name
Variable Name
Data Type
Mandatory?
First name
firstName
String
Yes
Last name
lastName
String
Yes
Primary email
email
String
Yes
Job
job
String
No
Primary phone
primaryPhone
String
No
Mobile phone
mobilePhone
String
No
Language
Language
String
No
Team (previously Organization_Tree)
Team
String Array
Yes
required for IdP Authorization only
Role
Role
String Array
No
required for IdP Authorization only
For those user attributes that haven’t yet been defined, click Add Attribute. The Add Attribute screen is displayed.
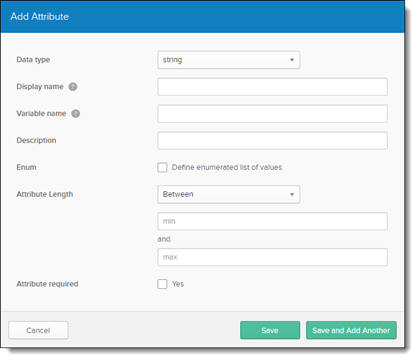
Define each user attribute according to the attribute definition table, above.
Click the Save and Add Another option to add other user attribute accordingly.
Mapping User Attributes to the SAML Service Provider (Access Control)
To map user attributes to the SAML service provider, doe the following:
Click Applications. The Application screen is displayed.
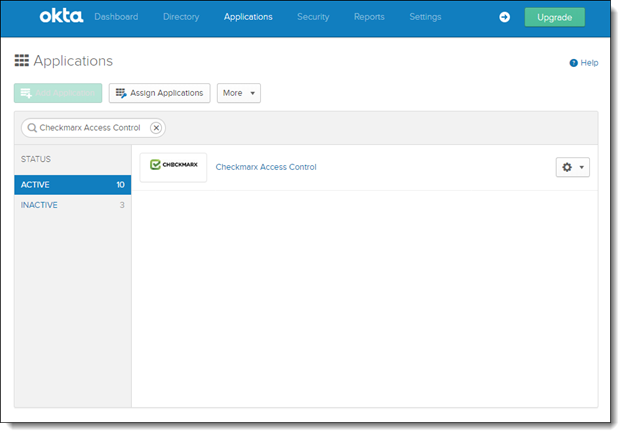
Select on the Application that you created and click the General tab. The General screen is displayed.
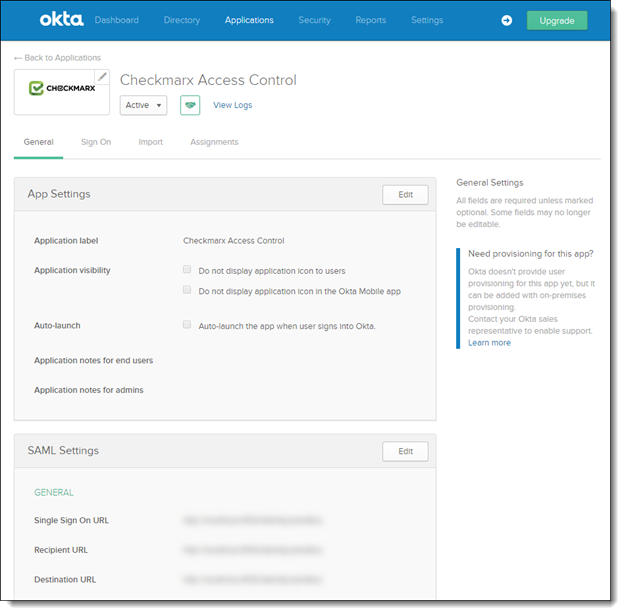
In the SAML Settings section, click <Edit>. The SAML Integration - General Settings screen is displayed.
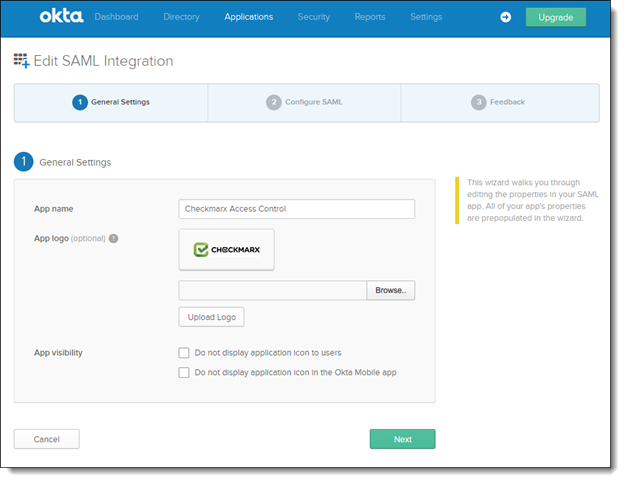
Click <Next>. The SAML Integration - SAML Settings screen is displayed.
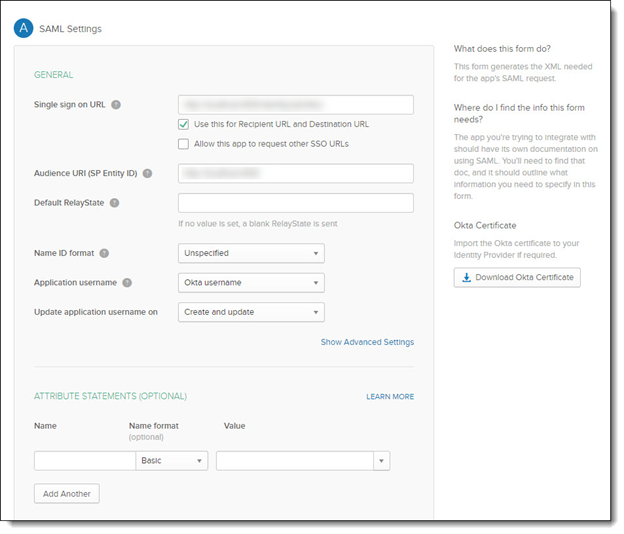
From the Attribute Statements (optional) section, define and add the user attributes outlined in the table below.
Once completed, click <Next>, select I’m a Software Vendor. I’d like to integrate my App with OKTA and then click <Finish>. To add additional user attribute fields, click <Add Another>.
Name | Name Format | Value | Authentication Method |
|---|---|---|---|
First_Name* | Basic | user.firstName | Manual and IdP Authentication |
Last_Name* | Basic | user.lastName | Manual and IdP Authentication |
Email* | Basic | user.email | Manual and IdP Authentication |
Job | Basic | user.job | Manual and IdP Authentication |
Phone | Basic | user.primaryPhone | Manual and IdP Authentication |
Cell_Phone | Basic | user.mobilePhone | Manual and IdP Authentication |
Language | Basic | user.language | Manual and IdP Authentication |
Team* (previously Organization_Tree) | Basic | user.Team | IdP Authentication only |
Role | Basic | user.Role | IdP Authentication only |
*First_Name, Last_Name, Email and Team attributes are mandatory. The remaining user attributes are optional.
Notice
For manual changes that need to be performed within the SAML Identity Provider, for User and Team Attributes, when upgrading to CxSAST v9.x from v8.8\8.9, refer to Adapting the SAML Identity Provider Attributes when Upgrading CxSAST V8.8 or v8.9 to v9.0 or v9.2.
Adding User Attributes to a Specific User
To add user attibutes to a specific user, do the following:
Click Directory and select People. The People screen is displayed.
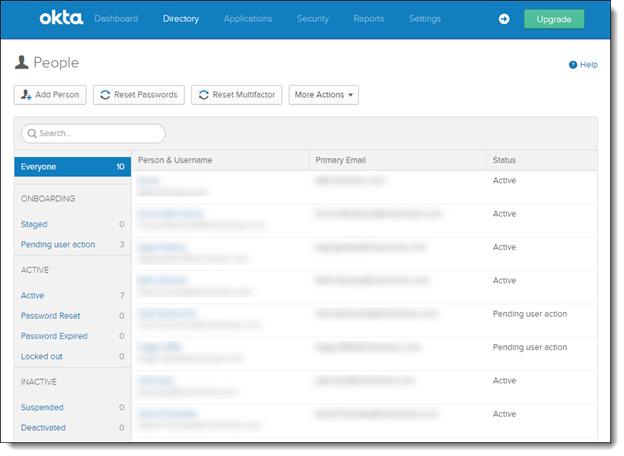
Click Person & User Name. The selected User’s Profile screen is displayed.
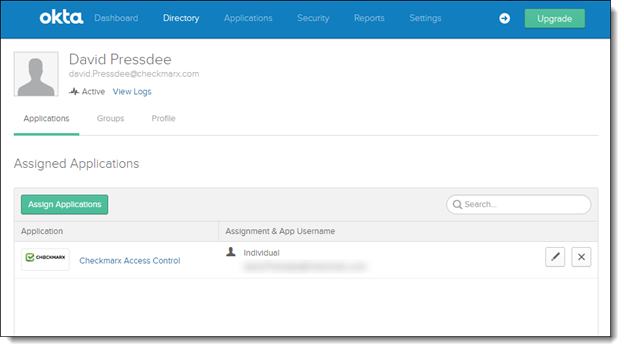
Click the Profile tab. The Profile screen is displayed.
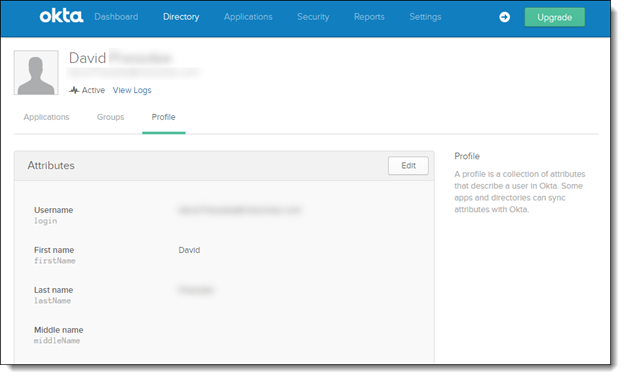
Click <Edit>.
Once the Attribute fields become available for editing, enter description information for each of the user attributes outlined in the table below.
Once completed, click <Save> to save the changes.
Attributes | Description |
|---|---|
First name | User’s first name (e.g., David) |
Last name | User’s family name (e.g., Press) |
Primary email | Primary email (e.g., david.press@check.com) |
Job | Job title (e.g., Software Engineer) |
Primary phone | Primary contact telephone number (e.g., 77523632562) |
Mobile phone | Contact mobile number (e.g., 052563256214) |
Language | User’s preferred language:
|
Team (previously Organization_Tree) | User's team(s). Each user can be assigned to multiple teams. A ‘String Array’ type should be defined for Team attribute. Each team assignment requires an additional sub-attribute: Team=/CxServer/Team1 /CxServer/Team2 /CxServer/Team3 |
Role | User's roles(s). Each user can be assigned to multiple roles. A ‘String Array’ type must be defined for the Role attribute. Each role assignment requires an additional sub-attribute: Role=Scanner Reviewer User Manager |
Notice
For manual changes that need to be performed within the SAML Identity Provider, for User and Team Attributes, when upgrading to CxSAST v9.x from v8.8\8.9, refer to Adapting the SAML Identity Provider Attributes when Upgrading CxSAST V8.8 or v8.9 to v9.0 or v9.2.