Setting Up SSO with ADFS and SAML
Codebashing supports single sign-on using SAML 2.0 with ADFS as an identity provider. ADFS, or Active Directory Federation Services, is a service provided by Microsoft which enables web login using existing Active Directory credentials.
This document provides a step-by-step guide for configuring single sign-on using Active Directory with ADFS and SAML 2.0.
Prerequisites
To set up ADFS to log in to the Codebashing platform, you need:
The free or fully paid version of a Codebashing instance.
Microsoft Windows Server 2008 or 2012.
ADFS installed and configured on the same host as Microsoft Windows Server.
Adding a Relying Party Trust
To connect ADFS to Codebashing you must use a Relying Party Trust (RPT). Before you can add an RPT, you have to verify ADFS is installed. If installed, it is listed as ADFS: AD FS under All Servers in the Server Manager list.
If ADFS is not installed, you have to install it as a new Windows feature from Windows PowerShell on the Windows server.
Adding an RPT to ADFS:
Select the Relying Party Trusts folder from ADFS Management and add a new Standard Relying Party Trust. This starts the configuration wizard for a new trust.
Click <Start>. The Select Data Source dialog appears.
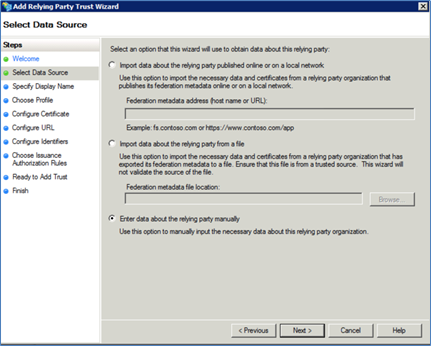
Select the last option Enter Data About the Party Manually and click <Next>.
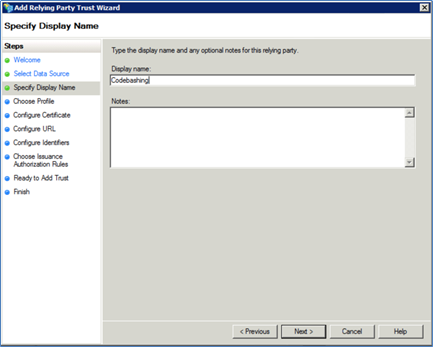
Enter Codebashing as Display Name.
Enter notes (optional).
Click <Next>. The Choose Profile dialog appears.
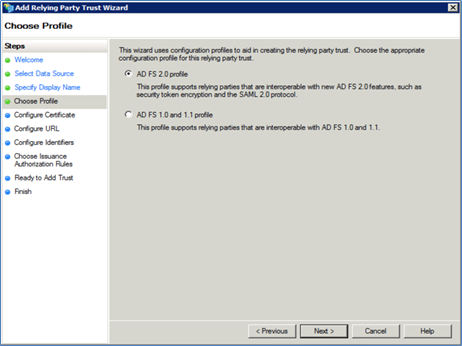
Select the ADFS 2.0 profile option and click <Next>.
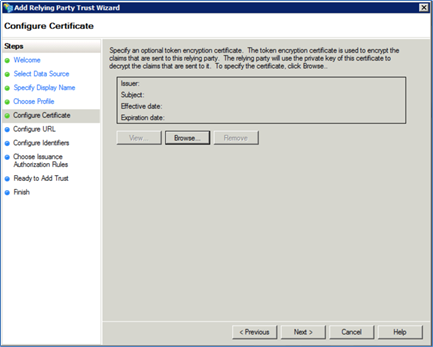
Leave the default setting and click <Next>. The Configure URL dialog appears.
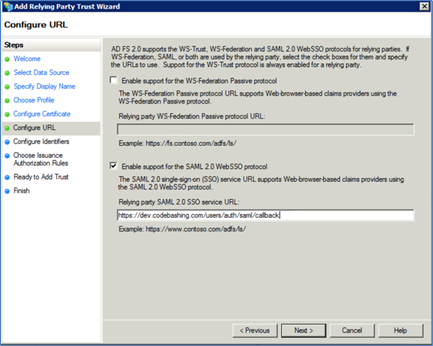
Select Enable Support for the SAML 2.0 WebSSO protocol.
Enter https://<yourinstance>.codebashing.com/users/auth/saml/callback in the Relaying party SAML 2.0 SSO service URL field.
Replace the subdomain 'dev' in the URL with your platform instance name.
Click <Next>.
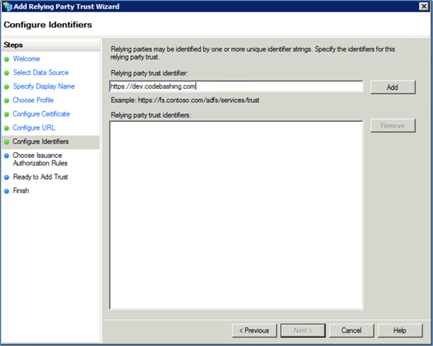
Enter https://<yourinstance>.codebashing.com in the Relaying party identifier field and click <Add>.
Replace the subdomain 'dev' in the URL with your platform instance name.
Click <Next>. The Configure Multifactor dialog appears.
In the Configure Multifactor Authentication dialog, keep the default setting and click <Next>. The Issuance Authorization Rules dialog appears.
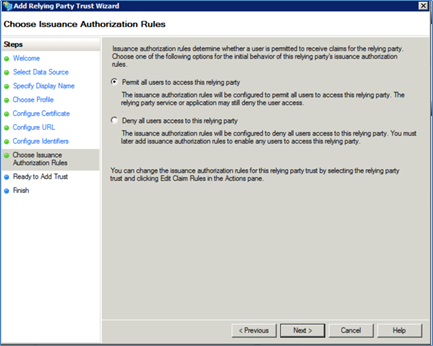
Select Permit all users to access the relying party.
Click <Next>. The Ready to Add Trust dialog is displayed. This dialog provides a summary of your settings.
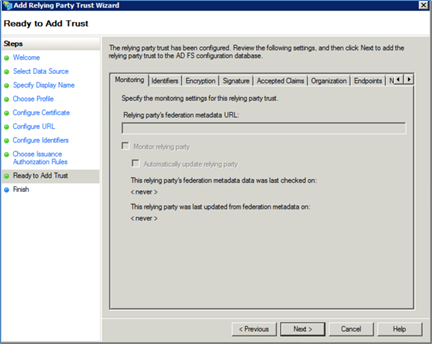
Click <Next>. The Finish dialog appears.
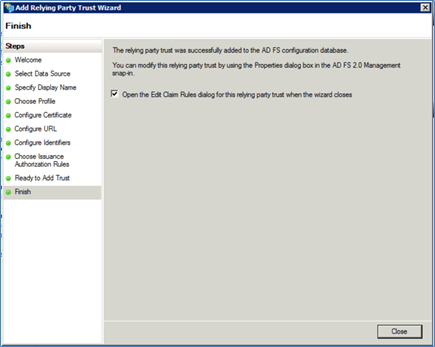
Leave the default settings and click <Close> to exit. The Claim Rules editor appears.
Creating Claim Rules
By default, the Claim Rule Editor opens once you created the relying party trust.
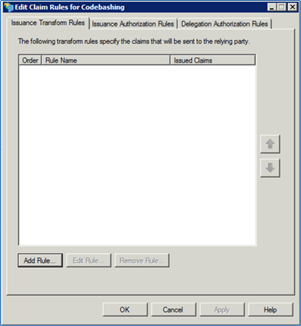
Creating a New Rule:
Click <Add Rule>. The Select Rule Template dialog appears.
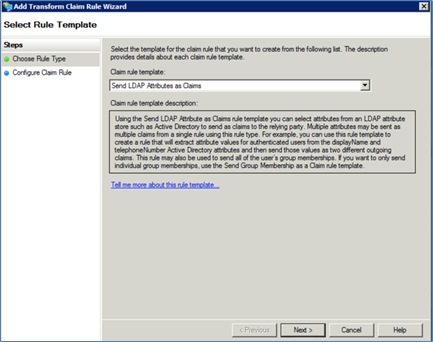
Select Send LDAP Attributes as Claims from the Claim rule template drop-down list. The Edit Rule dialog is displayed.
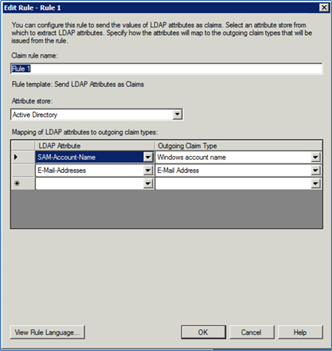
Enter a Claim rule name, for example, Rule 1.
Select Active Directory from the Attribute Store dropdown list.
Map the following attributes to the rule:
From the first LDAP Attribute column, select SAM-Account-Name.
From the first Outgoing Claim Type, select Windows Account Name.
From the second LDAP Attribute column, select E-Mail Address.
From the second Outgoing Claim Type, select E-Mail Address
Click <OK> to save the new rule.
In the Claim Rule Editor, click <Add Rule> to add another rule. The Select Rule Template dialog appears.
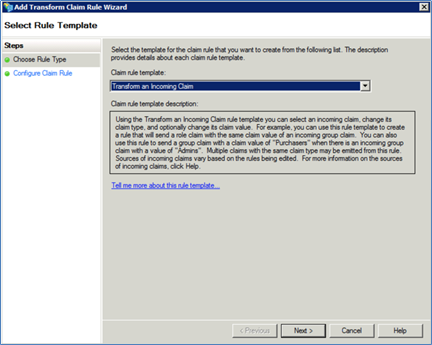
Select Transform an Incoming Claim from the Claim Rule Template drop-down list. The Configure Rule dialog appears.
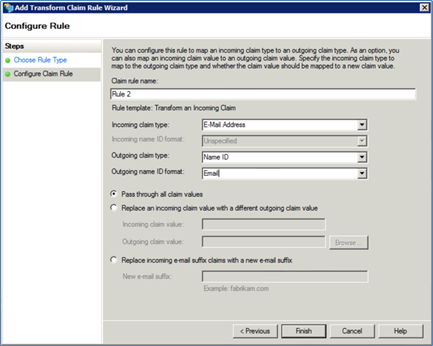
Enter a Claim rule name, for example, Rule 2.
Select Active Directory from the Attribute Store drop-down list.
Define the following attributes of the rule:
From the Incoming claim type drop-down, select E-Mail Address.
From the Outgoing claim type drop-down, select Name ID.
From the Outgoing name ID format drop-down, select Email.
Keep Pass through all claim values selected.
Click <Finish> to save the new rule. The rule order should look similar to the following example.
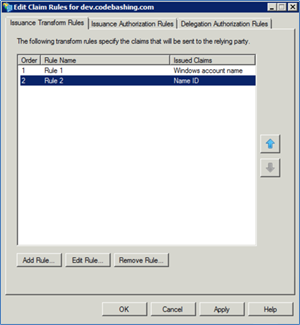
Click <OK> to complete creating the new rule.
Testing Single Sign-On With ADFS
To test single sign-on with ADFS:
Access https://<yourinstance>.codebashing.com and click SSO Login. You are redirected to your organization's ADFS login page (when accessing the platform externally) or to a login popup (when accessing internally).
Enter your active directory credentials to access the platform.