- Checkmarx Documentation
- Checkmarx SCA
- Checkmarx SCA - User Guide
- Creating and Configuring Projects
- Creating a Project - Project Types
- Creating a GitHub Project
Creating a GitHub Project
If your source code is hosted on a private GitHub repository, then you should create a GitHub Project, as described below. If it is on a public GitHub repository then you can create a General Project.
Note
Prerequisites:
Before creating a GitHub project, you need to create an Access Token to enable the engine to scan the source code. For details about how to create an Access Token, see Creating an Access Token for GitHub Projects.
To create a private GitHub Project:
On the Dashboard, click the Create New Project button.
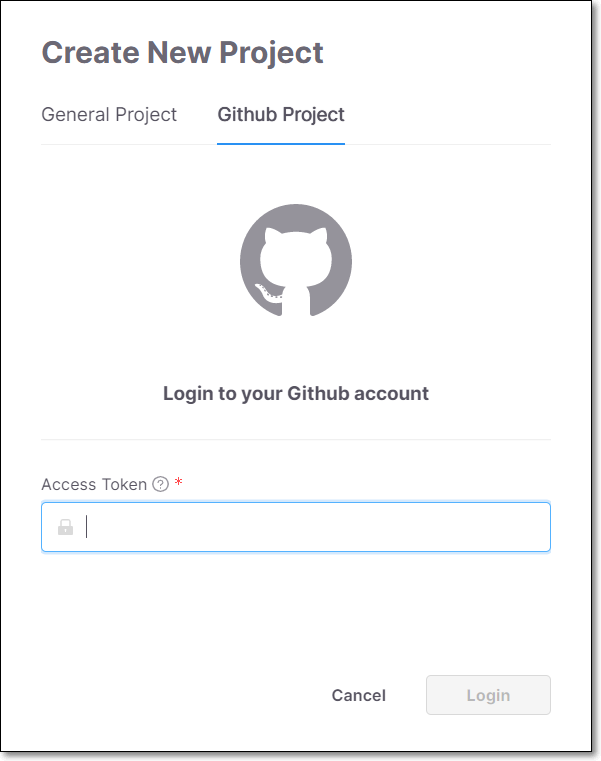
The Create New Project window opens.
Select the GitHub Project tab.

In the Access Token field, enter your personal access token.
Click Login.
A list of your projects stored in GitHub is displayed.
Select a project from the displayed list of projects.
You can enable the Exploitable Path feature, which analyzes whether your source code provides a path that can be exploited by a specific vulnerability. To activate this feature toggle the Enable Exploitable Path switch to the right. For more information see Exploitable Path.
Click Next. The Assign Teams option is displayed in the dialog.
Under Assign Teams, do one of the following:
Select All users if you would like to allow all users to have access to this Project.
Select Teams if you would only like specific teams to have access to this Project.
If you selected Teams, select the checkbox next to each Team and sub-Team that you would like to allow to access this Project.
Notice
You can select a sub-Team without selecting its parent Team. Members of the parent Team can view Projects assigned to the child Team but not the reverse.
Click Create and Scan.
Your new Project is created with a name identical to the name of the selected repository and appears at the top of the Projects section on the Dashboard.
Notice
As the Project is scanned, the Last Scanned column on the Projects tab will show Scanning… When the status shows a relative time (e.g., a few seconds ago), the scan is completed and you can view the results.
Note
After creating a Project, there are additional settings that can be configured, these settings can be accessed by clicking on the context menu for the Project and selecting Project Settings, see Editing Project Settings - Activating Notifications.
Creating an Access Token for GitHub Projects
You can create an access token in GitHub to enable your Checkmarx SCA GitHub Projects to run scans on the source code in your private GitHub repository. This is a prerequisite for creating a Checkmarx SCA GitHub Project, as described in Creating a GitHub Project. An access token can be used for multiple SCA Projects.
To create an access token in GitHub:
In your GitHub account, go to Settings.
Click on Developer Settings.
Select the Personal access tokens tab and click Generate new token.
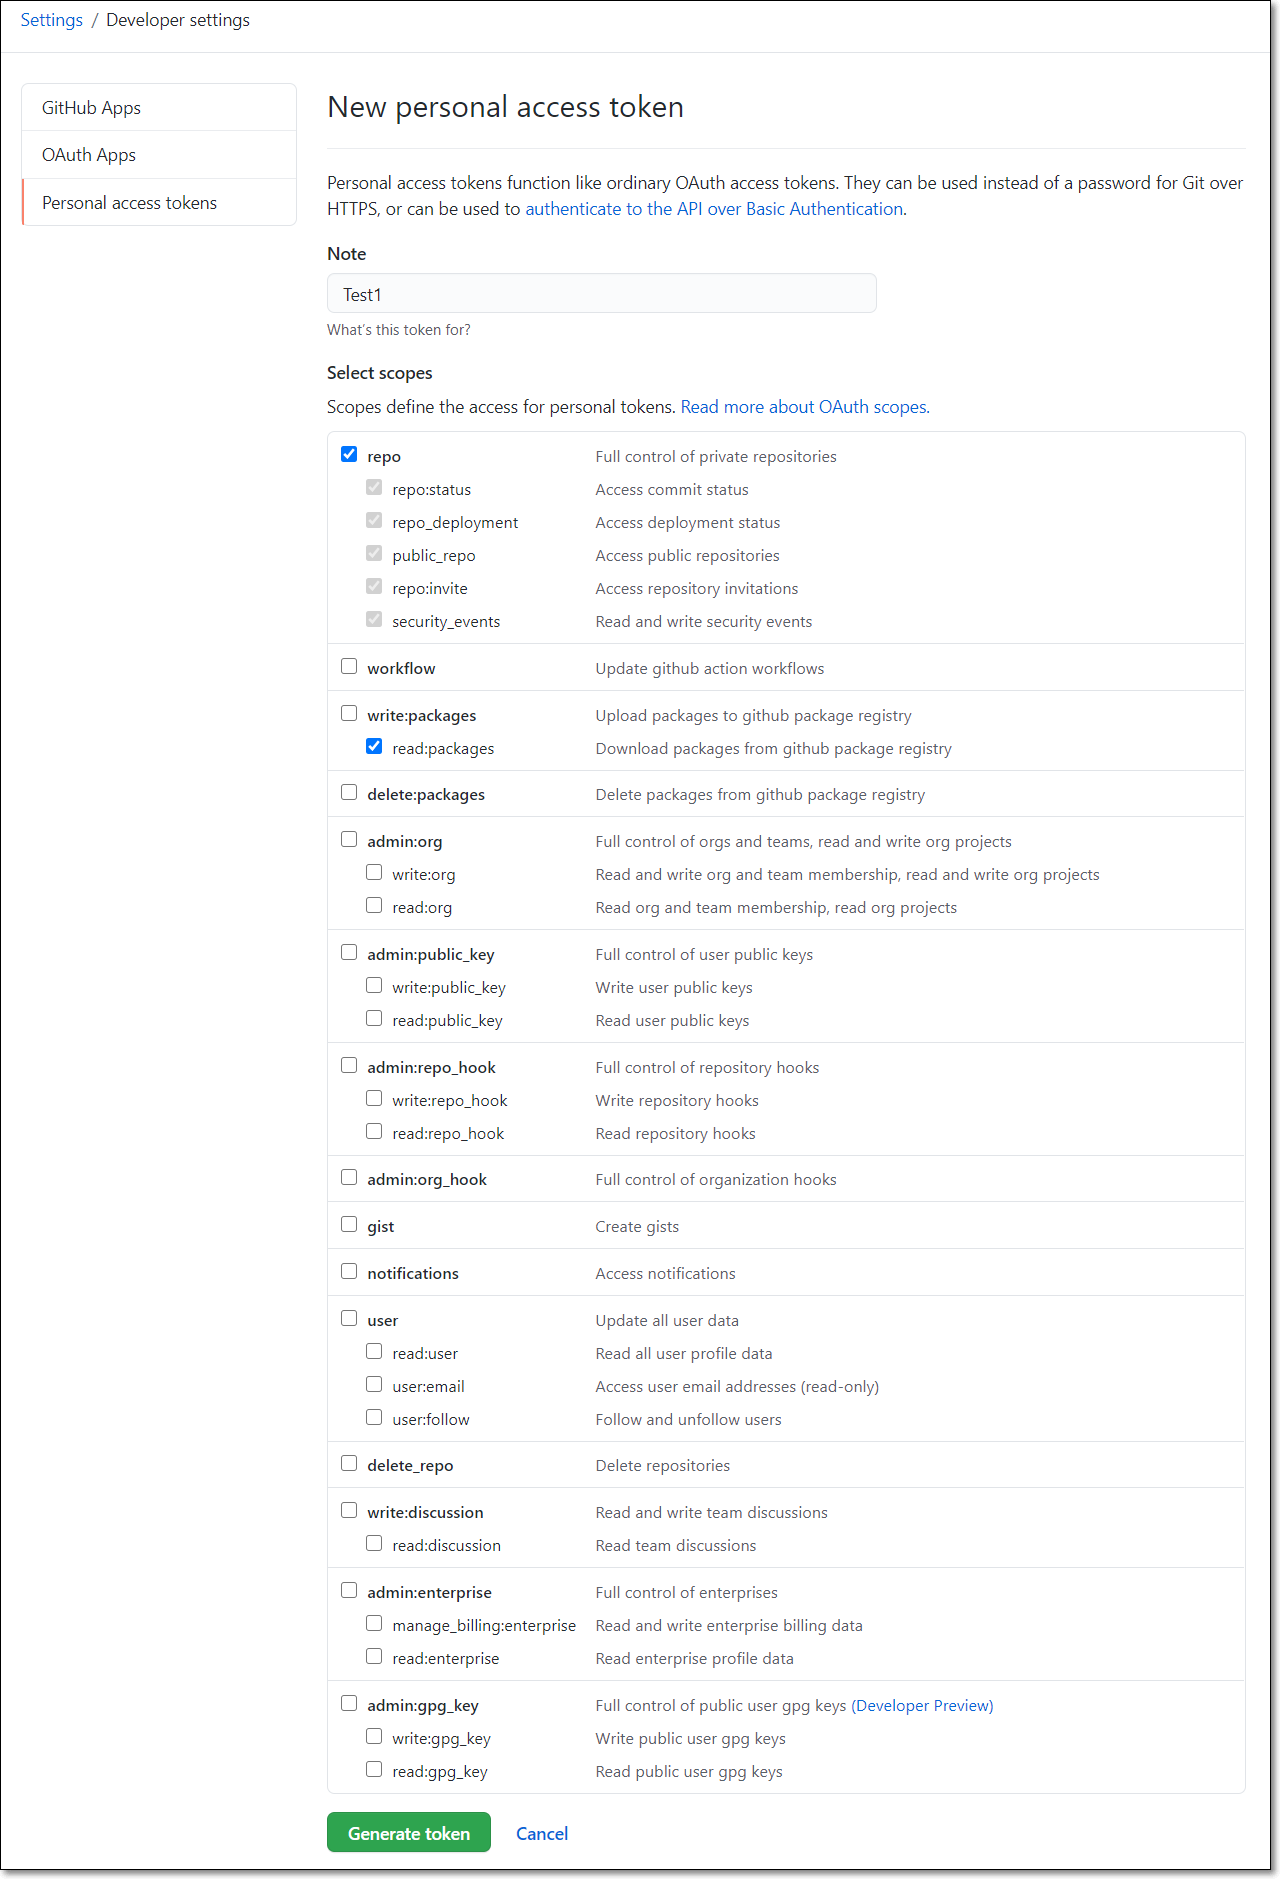
The New personal access token page opens.

In the Note field, enter a note explaining that the token will be used for running Checkmarx SCA scans.
Notice
This note, which is associated with the permissions that you will select in the next step, remains in the list on the Personal access tokens page, even after the temporary generated token expires or is deleted. After the token has expired, you can quickly create a new access token for scanning, by selecting this note and clicking Regenerate token.)
Select the repo and read:packages permissions. These permissions allow Checkmarx SCA to access the repositories and packages in your project for scanning.
Click Generate token. Your new access token appears at the top of the list on the Personal access tokens page.
Copy the access token, so that you can paste it into the Access Token field in your GitHub Project configuration. The Procedure for creating a GitHub Project is described in Creating a GitHub Project.