Bitbucket Cloud Procedure
Setting up the Integration and Initiating a Scan
To integrate your Bitbucket organization with Checkmarx One, perform the following:
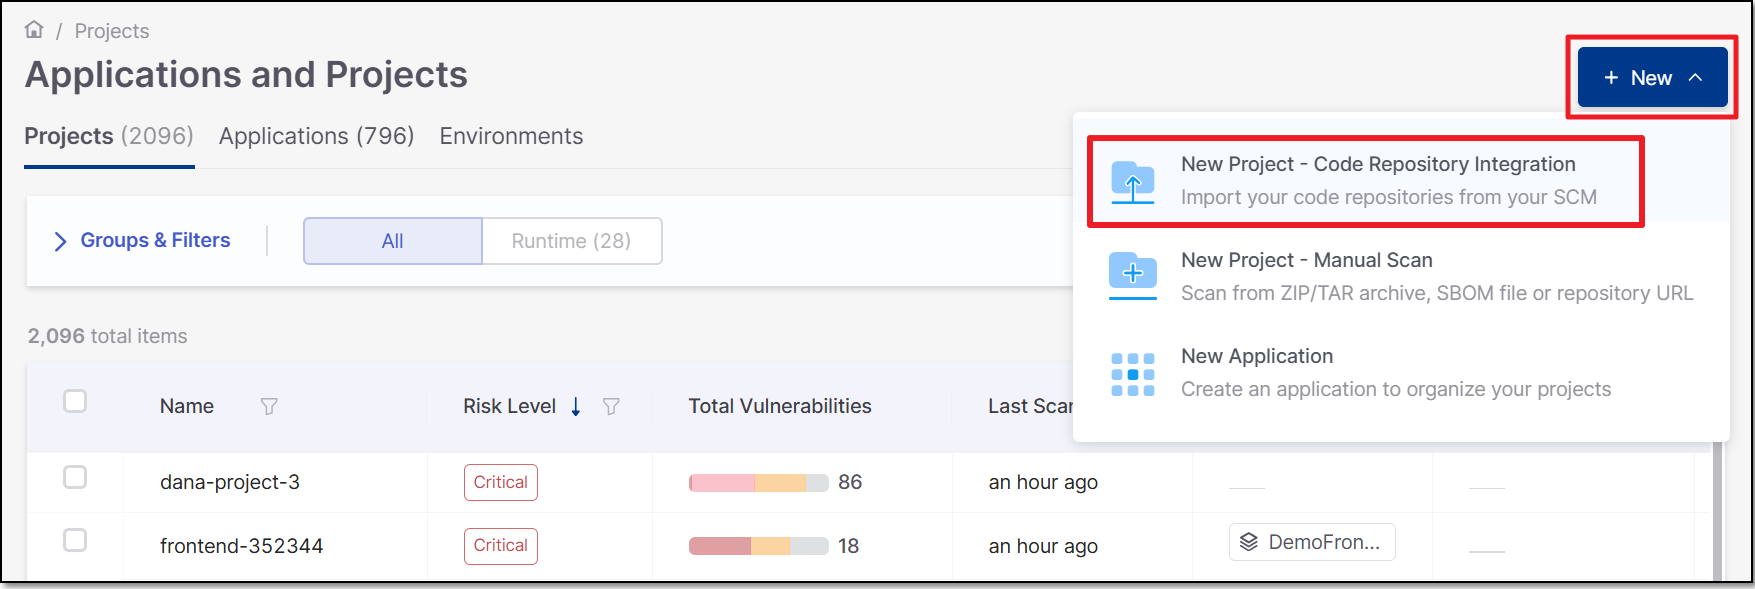
In the Applications and Projects home page, click on New > New Project - Code Repository Integration.
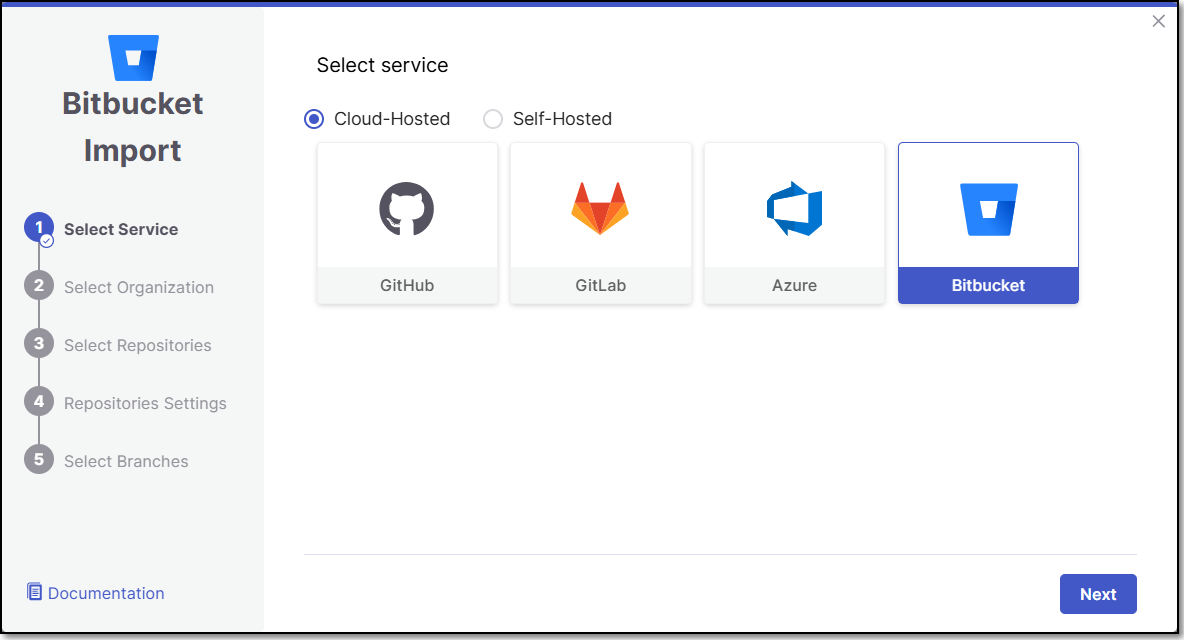
The Import From window opens.
Select Cloud-hosted >Bitbucket >Next.
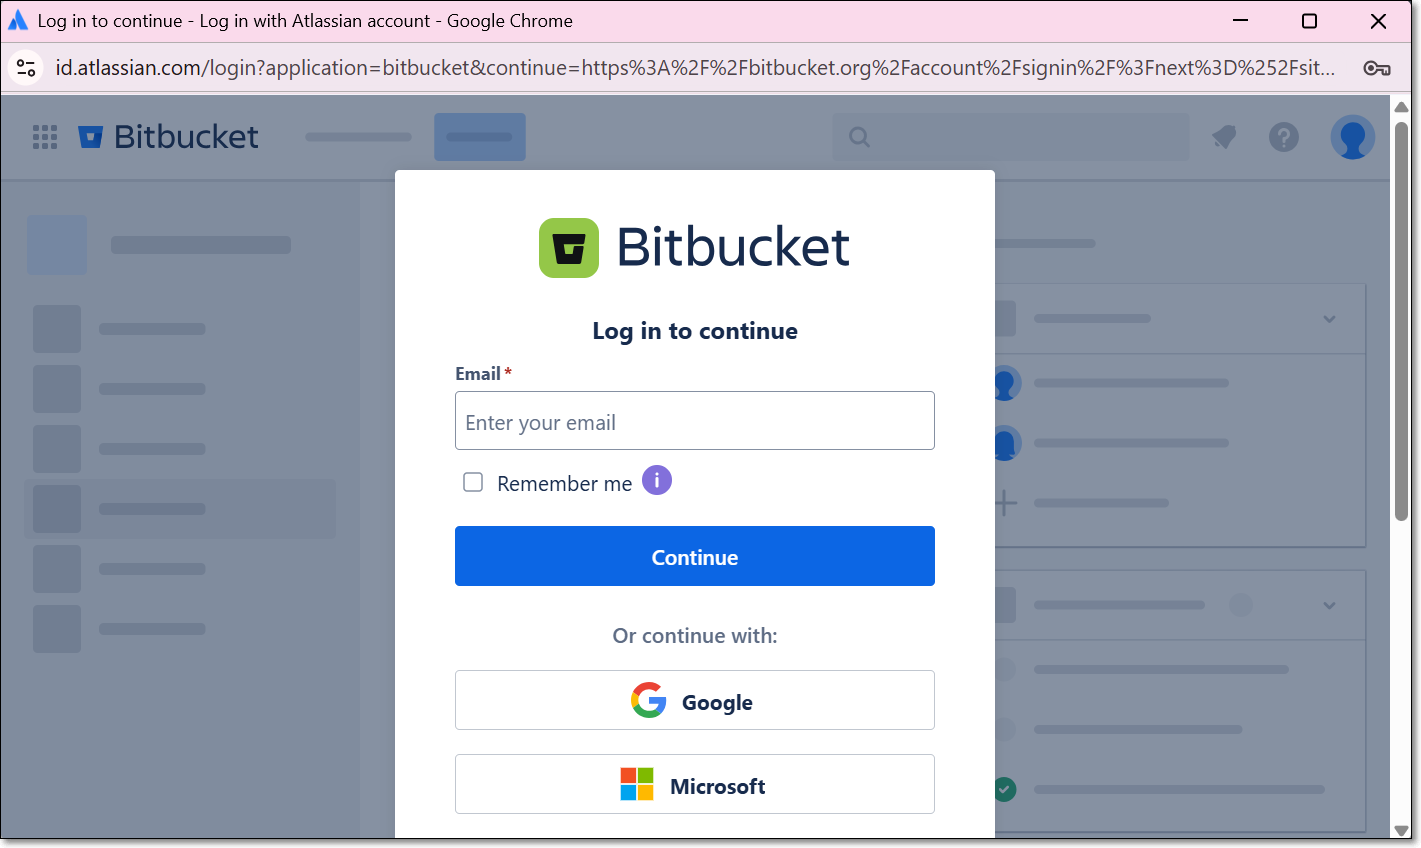
For first-time use, you will be prompted to log in to your Bitbucket account.
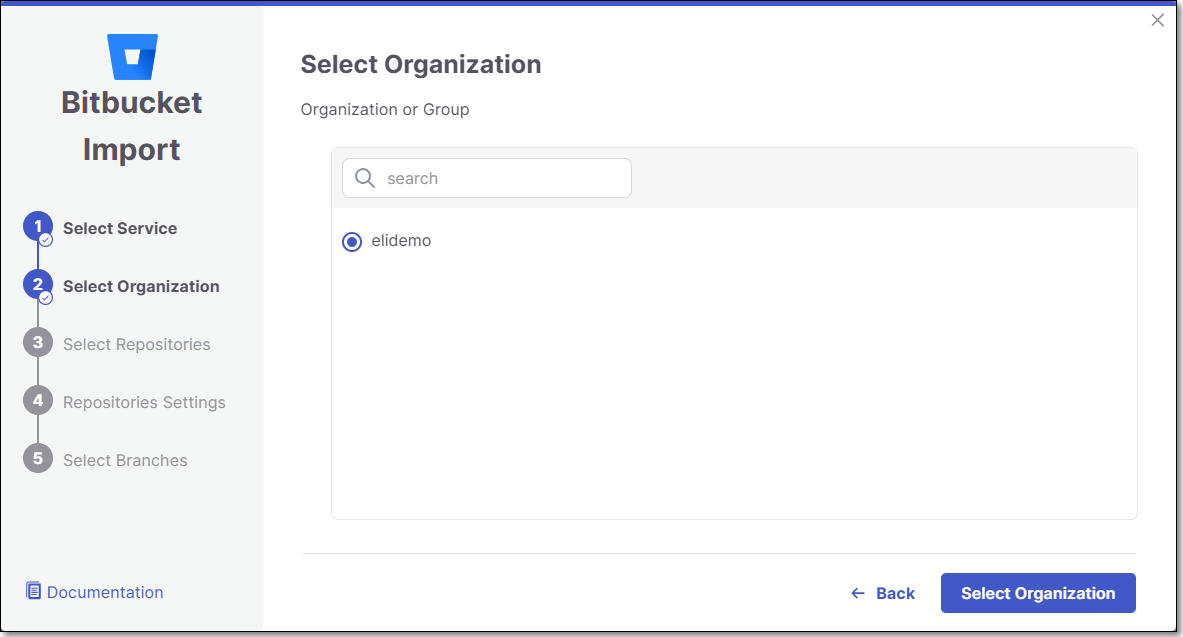
Select the Bitbucket Organization or Group (for the requested repository) and click Select Organization.
The screen contains the following functionalities:
Search bar - Auto-complete is implemented. The search is not case sensitive.
Infinite scroll - For enterprises with a large amount of organizations.
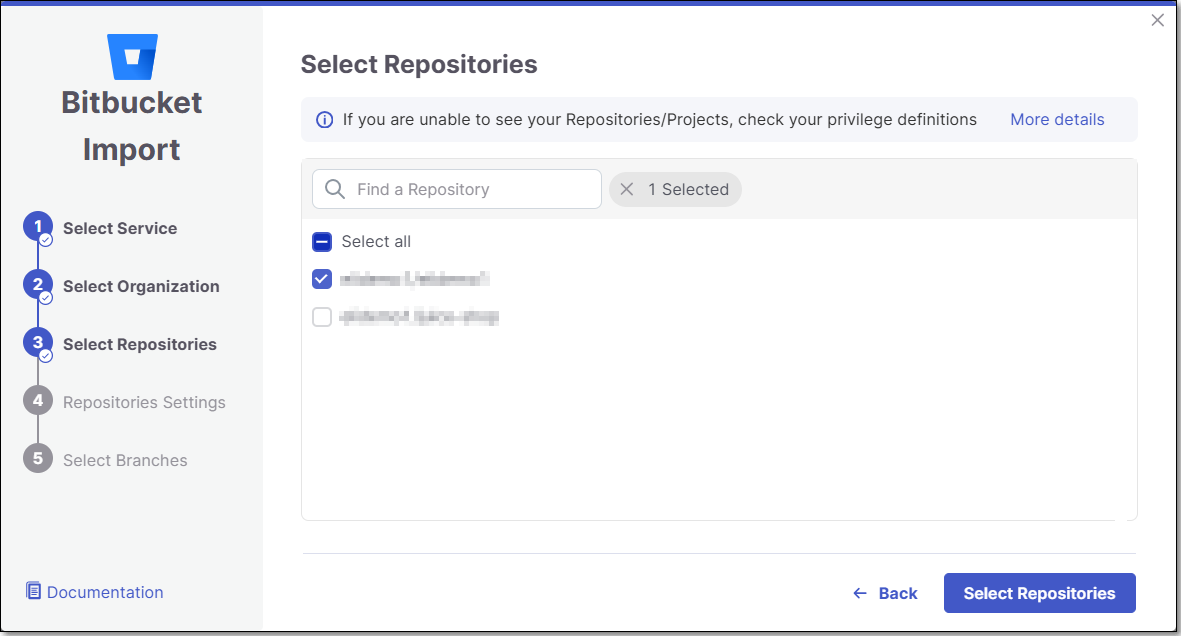
Select Repositories inside the Bitbucket organization and click Select Repositories.
If the organization contains active repositories, suggested repos will be presented and selected automatically. For additional information see Suggested Repositories.
Note
A separate Checkmarx One Project will be created for each repo that you import.
There can’t be more than one Checkmarx One Project per repo. Therefore, once a Project has been created for a repo, that repo is greyed out in the Import dialog.
In the Repositories Settings step, you can optionally adjust the settings as follows:
If the project has multiple repositories, click All Repositories Settings to adjust the settings for all repositories, or select a specific repository, to adjust the settings for that repository.
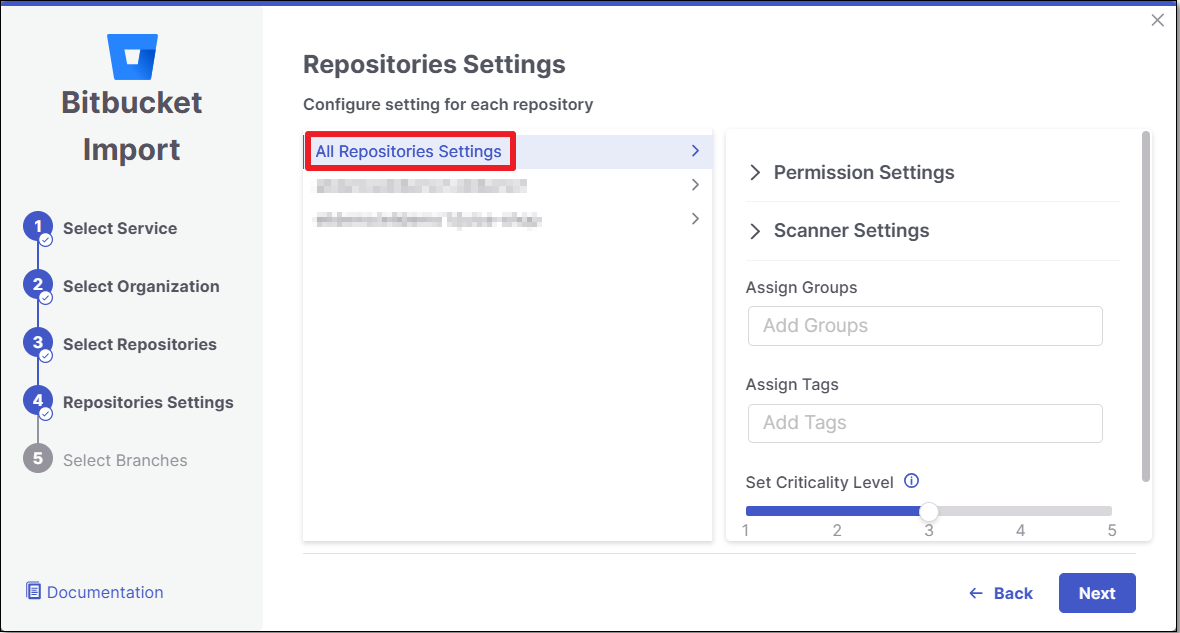
Expand the Permissions Settings and adjust the following settings:
Scan Trigger: Push, Pull request - Automatically trigger a scan when a push event or pull request is done in your SCM. (Default: On)
Pull Request Decoration - Automatically send the scan results summary to the SCM. (Default: On)
SCA Auto Pull Request - Automatically send PRs to your SCM with recommended changes in the manifest file, in order to replace the vulnerable package versions. (Default: Off)
Expand the Scanner Settings and enable the toggle for each scanner you want to use (SAST, SCA, IaC Security, Container Security, API Security, OSSF Scorecard, Secret Detection) for your repositories. At least 1 scanner must be selected for each repository.
Protected Branches (when a specific repository is selected): Select which Protected Branches to scan for each repository.
Note
For additional information about Protected Branches see About Protected Branches
Add SSH key (when a specific repository is selected).
Assign Tags: Add Tags to the Project. Tags can be added as a simple strings or as key:value pairs.
Set Criticality Level: Manually set the project's criticality level.
Click Next.
In the Protected Branches screen you can decide whether to enable the "Scan the default Branch upon the creation of the project" feature.
Next, Select which Protected Branches you want to scan for each Repository and click Create Project.
Note
For additional information about Protected Branches see About Protected Branches
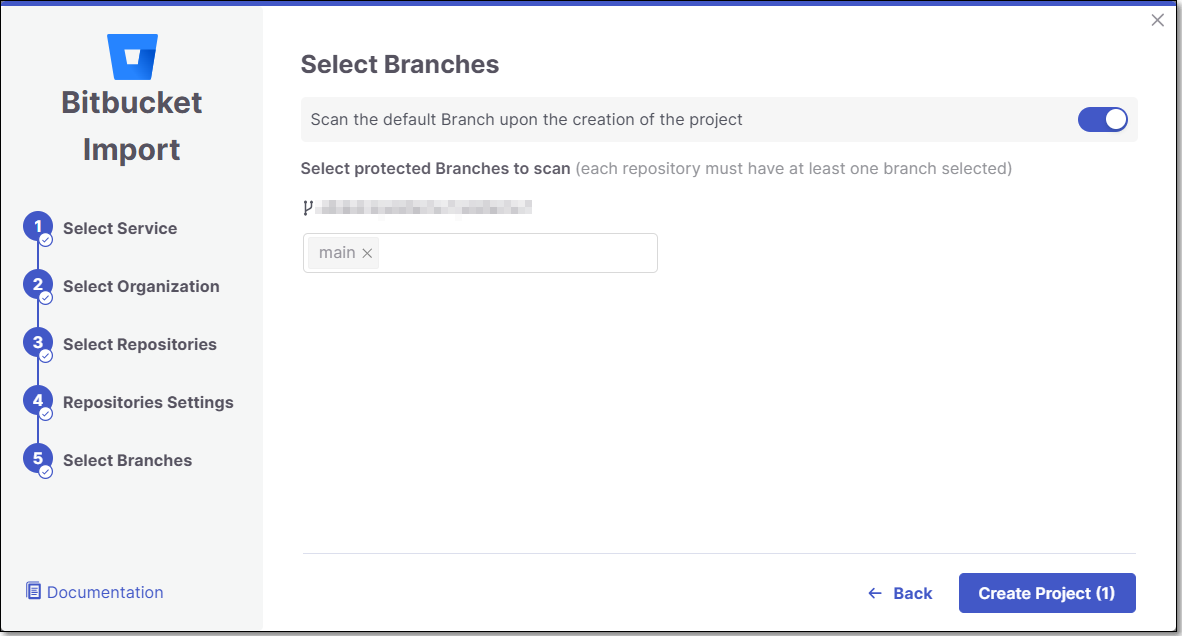
A Project is created for each repository and a scan is initiated for each project. The new projects are displayed on the Projects page,

Note
In order to update the scanners see Imported Project Settings