Managing Scheduler Entries
Using the Scheduler screen, you can manage entries by:
Creating a new scheduler entry
Editing a scheduler entry
Enabling and disabling a scheduler entry
Deleting a scheduler entry
Scheduling a Template
To schedule reports of a specific template, click on the Schedule Report
 button available at the top right corner of the Scheduler screen.
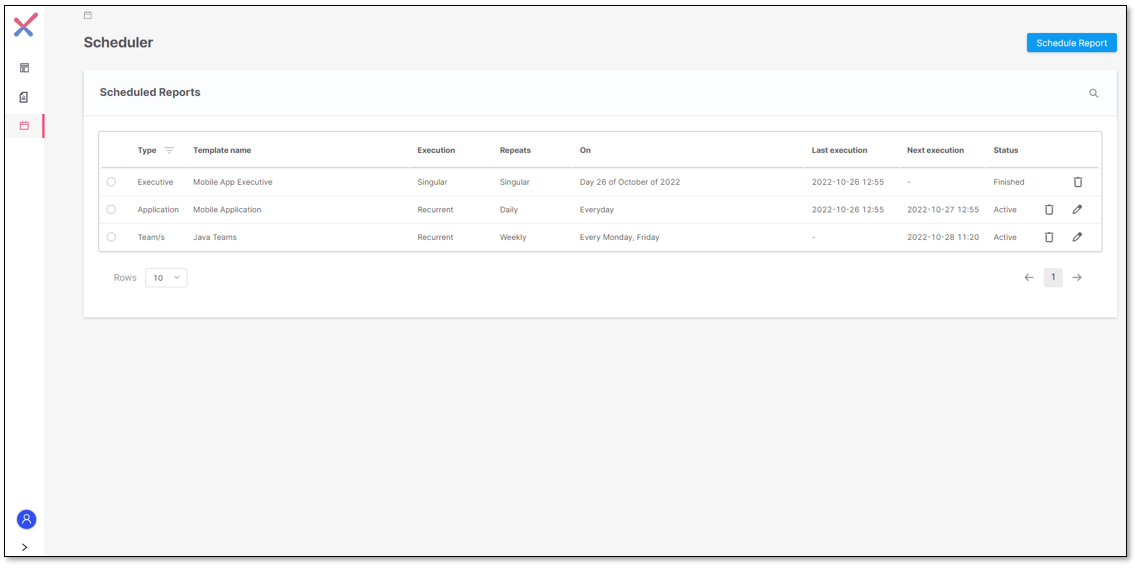
Select a template type by clicking the drop-down arrow.
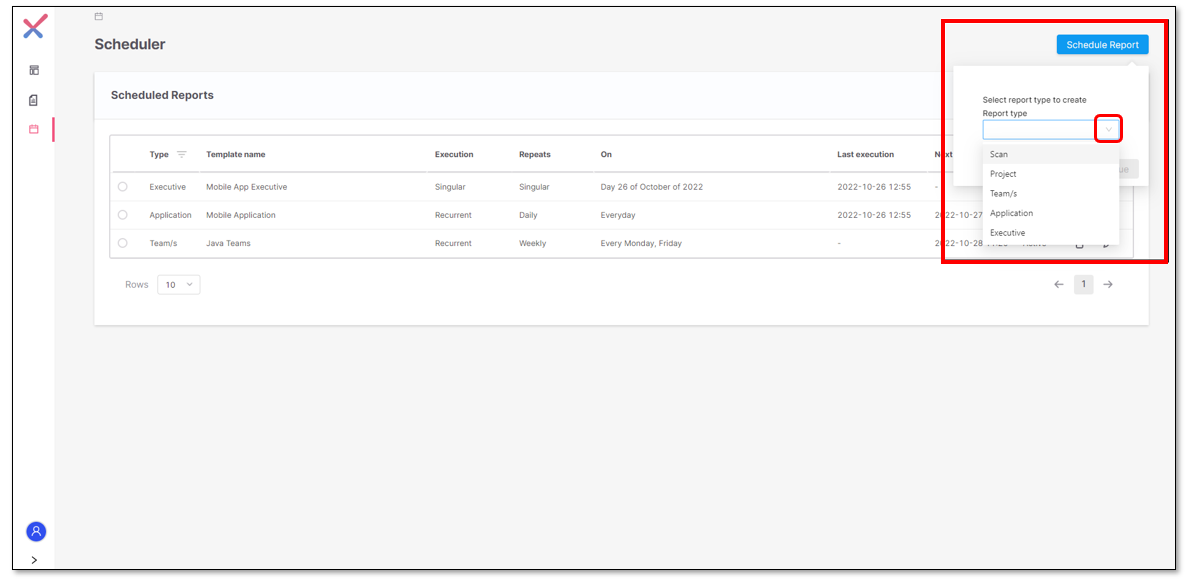
From the expanded drop-down list, select one of the following template types:
Scan
Project
Team/s
Application
Executive
Click Continue. The Create New Scheduler screen is displayed.
Enter the required information according to the instructions in the following sections.
Scheduling Types
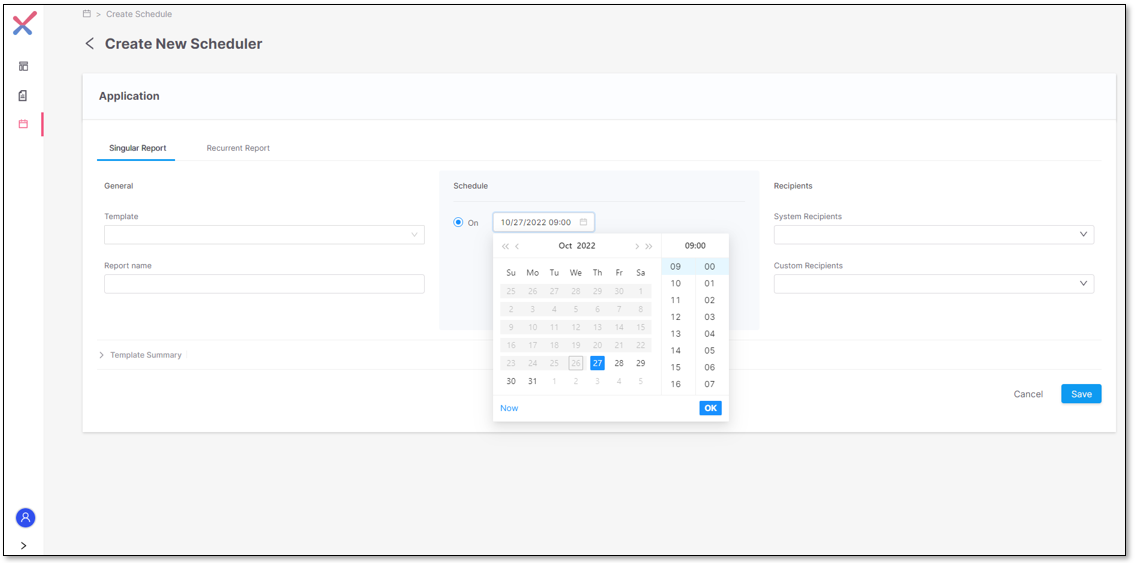
Singular Report
To schedule a one-time report execution, configure your scheduler entry as Singular. The report will be triggered on the defined date and the entry status will change to Finished status, indicating that no more reports will be triggered.
To define the report execution date, click on the calendar icon  available under the Schedule section:
 |
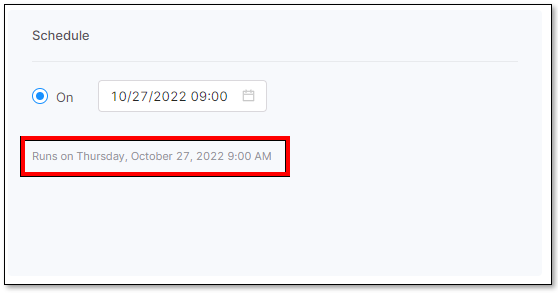
After the On execution date is defined, a message with the scheduling date is displayed, similar to the following:
 |
Recurrent Report
To schedule a report to be executed periodically, define it as a Recurrent Report.
When defining a recurrent report the following parameters must be specified:
Start: the date when the first periodic report will be executed.
Repeat: recurrence pattern to be applied between the interval start and end dates.
End: the date when the last report will be executed.
Never: The report will be generated on all the days that fit the pattern definitions after the defined start date.
End Date: The date when the reports will stop being generated.
Note that it can occur that the last occurrence is not executed if it does not fit the recurrence pattern.
Example with the following configuration:
Weekly on Wednesday and Friday
The end Date is 27 October 2022
The execution on Friday (28 October 2022) will not be executed
End After: The scheduler entry ends after the defined number of occurrences. The number of occurrences is a positive integer.
Available Recurrent Patterns
Daily
The daily scheduling triggers the report generation according to the defined number of days between each occurrence.
The daily recurrence is composed of the following parameter:
Every <number of days> day(s): Number of days between each report generation.
 |
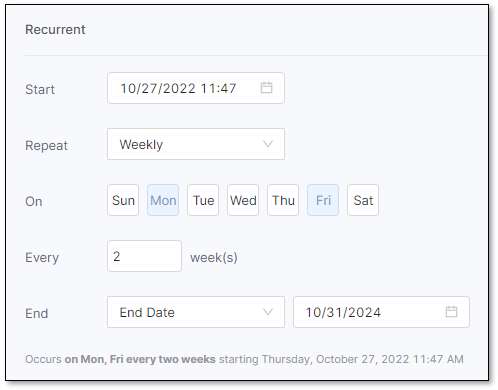
Weekly
The weekly scheduling triggers the report generation on the same day(s) of the week, according to the defined number of weeks between each occurrence.
The weekly recurrence is composed of the following parameters:
On: Day(s) of the week where the report must be generated.
Every <number of weeks> week(s): Number of weeks between each report generation.
 |
Monthly
The monthly scheduling can be configured to trigger the reports of one of the following:
On the same day(s) of the month, according to the defined number of months between each occurrence.
On the same day of the week in the month, according to the defined number of months between each occurrence.
The monthly recurrence is composed of the following parameters:
Every <number of months> month(s): Number of months between each report generation.
On: Day of the month when the report must be generated.
On: Weekday of a specific week when the report will be triggered. Allowed values for the week are First, Second, Third, Fourth, or Last.
Example 1
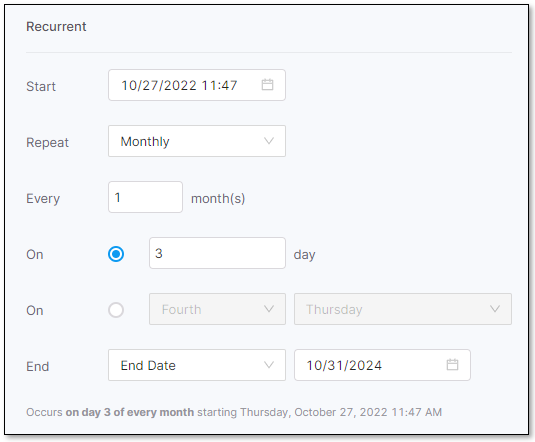 |
In this example, the report is triggered every month, on the 3rd, between October 27, 2022, and October 31, 2024.
Example 2
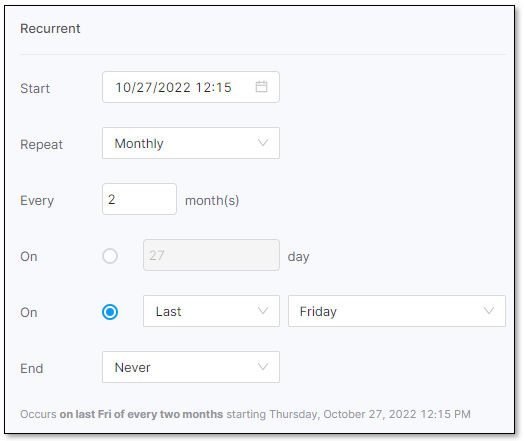 |
In this example, the report is triggered every 2 months, on the Last Friday of the month, starting on October 27, 2022. No end date is defined.
Yearly
The yearly scheduling can be configured to trigger the reports of one of the following:
At the same month and day of the year, according to the defined number of years between each occurrence.
On the same day of the week in the month, according to the defined number of years between each occurrence.
The yearly recurrence is composed of the following parameters:
Every <number of years> year(s): Number of years between each report generation.
Month: The month where the report must be generated.
On: Day of the month where the report must be generated.
On: Weekday of a specific week of the month where the report should be triggered. Allowed values for the week are First, Second, Third, Fourth, or Last.
Example 1
 |
In this example, the report is generated every year, on June 1st, starting from January 1, 2023, and ending after 3 occurrences (the last execution is on June 1, 2025).
Example 2
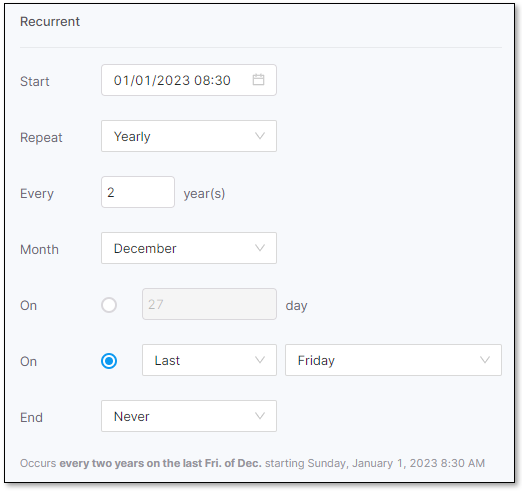 |
In this example, the report is generated every 2 years, on the Last Friday of December, starting from January 1, 2023.
Calendar View
To define the Start Date and the End Date, there is a calendar available allowing you to select the day, month, year, and time (hours and minutes). The time selection is only available for the start date.
To open the calendar view, click on the icon . Select the date, hour, and minute, and then click OK.
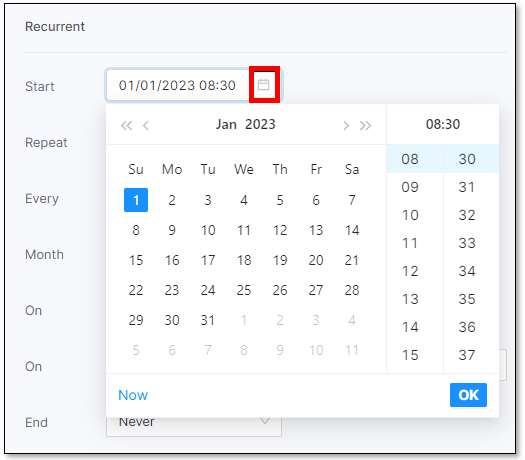 |
Navigation
Click < to navigate to the previous month.
Click > to navigate to the next month.
Click << to navigate to the previous year.
Click >> to navigate to the next year.
Time Selection
To select the hour, use the mouse scroll and click on the desired hour. The same procedure is applicable to define minutes.
Now
By clicking Now, the date is defined based on the current date and time.
General
Template
The template field is mandatory and allows you to select the template for which you want to schedule reports. A template that already has a scheduler not finished, will not appear on this list.
The drop-down list shows the list of all the templates, except the system ones, filtered by the selected type defined in Step 3. Once you select a template, the Template Summary section is automatically populated according to the selected template.
Report Name
This field is optional and allows you to define the name of the report to be generated. If not defined, the report name will be based on the template name concatenated with an internal identifier generated by the service.
Recipients
Under the Recipients section, you can define the list of recipients that should receive the generated report in their email inbox.
System Recipients
The system recipients are based on emails of the Access Control users. As a user can belong to multiple teams, users are listed in a flat list and not in a nested team hierarchy.
Add Recipient
To select the user that must receive the report in their inbox:
Expand the drop-down list.
Use the text area to search for a specific user.
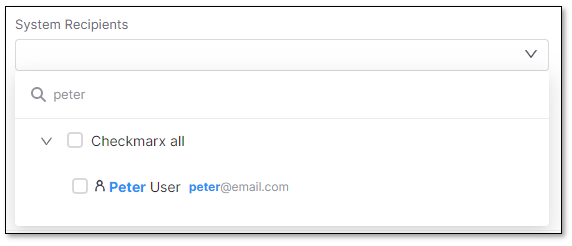
Select the user(s) by ticking the box.
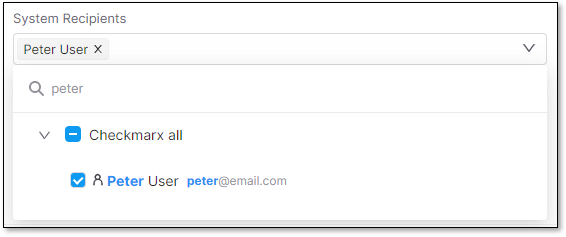
User is now defined.

Remove Recipient
To remove the user(s) from the list, perform one of the following:
Click on the X button.
Expand the list and un-select the user.
Custom Recipients
In addition to the system recipients, you can add custom emails for users who are not configured in Access Control.
Add Recipient
Expand the Custom Recipients list.
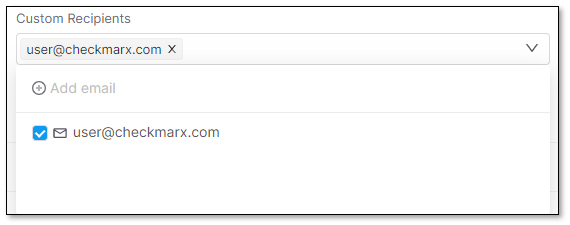
Type the email address in the text area and press Enter.
User is defined and it is available in the list of users.
Add as many email addresses as needed.
The list of emails is now defined.

Notice
If you add an email address that is not added to the final list of recipients, it will not be available when editing the scheduler entry.
Add an Email List
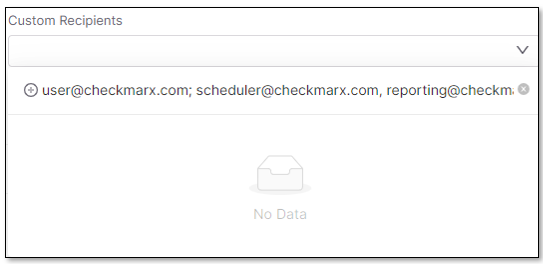
To add an email list, containing individual emails separated by commas (,) or semi-colons (;), copy the list directly to the Add email text area and press Enter.
Example: Emailing list is “user@checkmarx.com; scheduler@checkmarx.com, reporting@checkmarx.com”.
Custom Recipients panel after Copying the list and pressing enter:
 |
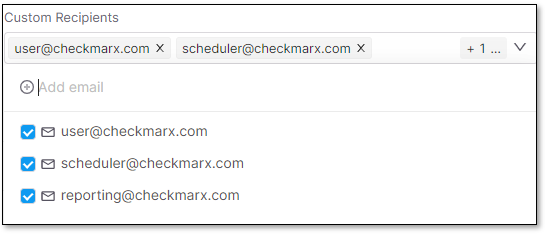
Custom Recipients panel with a defined list of emails:
 |
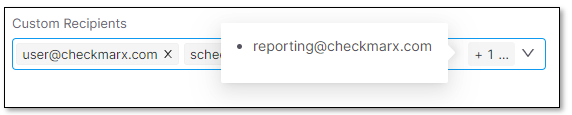
By hovering over +1 you can view the email address not visible in the Custom Recipients text area.
 |
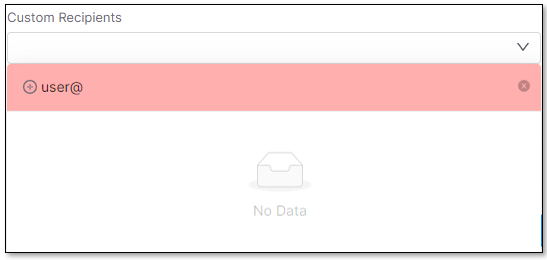
Email Validation
Invalid emails are validated and not accepted as custom recipients.
 |
When adding an email that is already defined as a custom recipient, the email is auto-selected and it is not duplicated in the recipients list.
Remove Recipient
To remove an email from the list, perform one of the following:
Click on the X button.
Expand the list and un-select the email address.
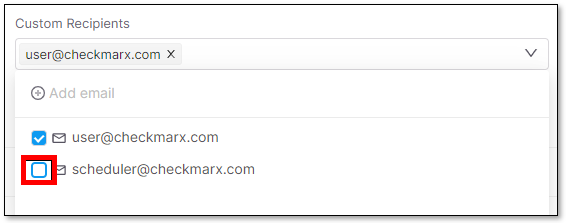 |
SMTP Server
The system uses SAST SMTP settings to send emails. These settings can be configured in the SAST Portal under Settings / Application Settings / General.
Template Summary
When the template to schedule is selected, the Template Summary section is automatically filled in. The section can be expanded by clicking on the  button.
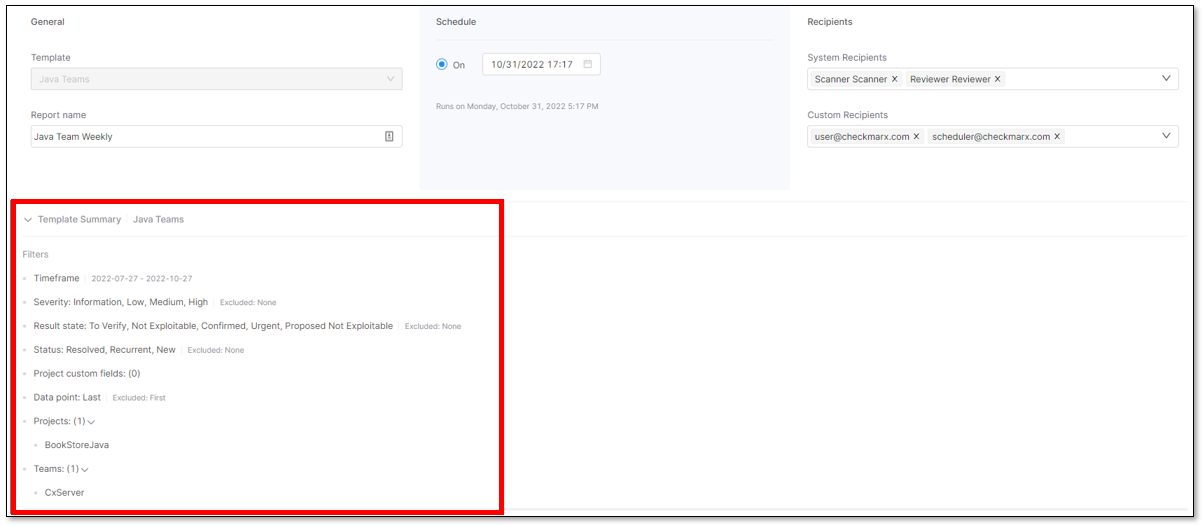 |
Editing a Scheduled Template
To edit a scheduled template, click on the Edit  button available for each row in the Scheduled Reports table.
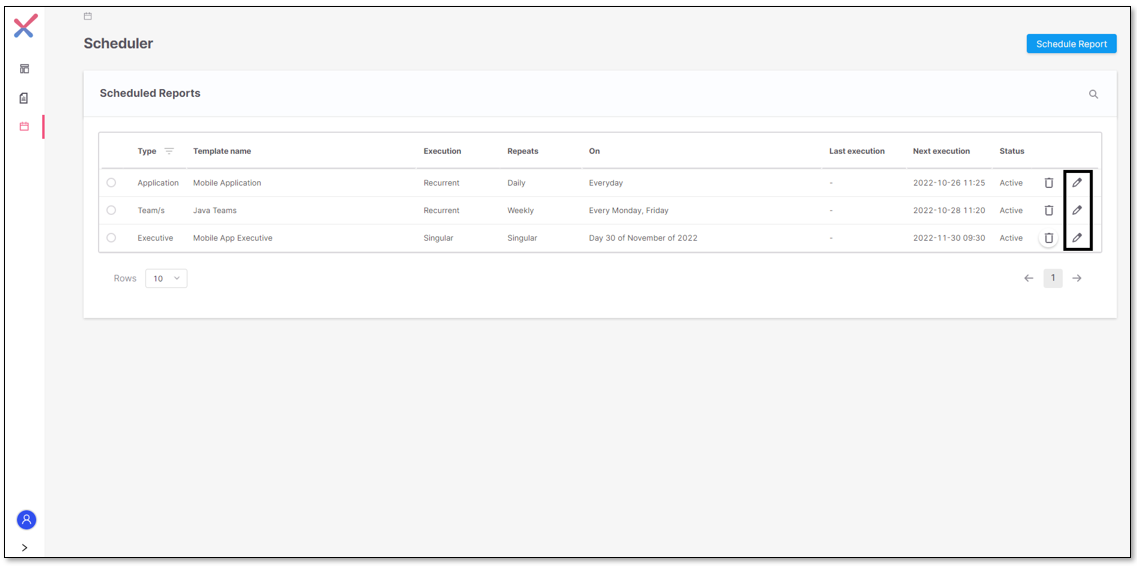 |
The scheduler entry is displayed in edit mode. You can change the definitions, as shown in the following image:
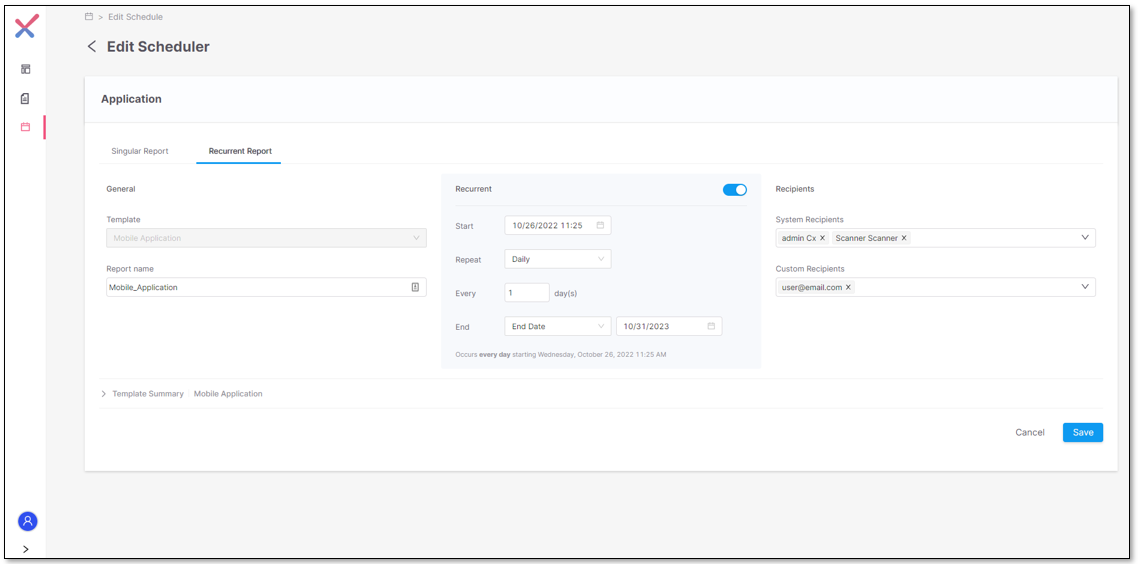 |
Once you finish editing the desired fields, click one of the following:
Save to save the changes.
Cancel to cancel the changes and keep the previous values.
Enabling and Disabling Scheduling
When editing a scheduled template it is possible to enable or disable the recurrence.
Disabling the recurrence
To disable an Active scheduled template:
Click on the Edit
button available for each row in the Scheduled Reports table.Under the section Recurrent, set the toggle Off.
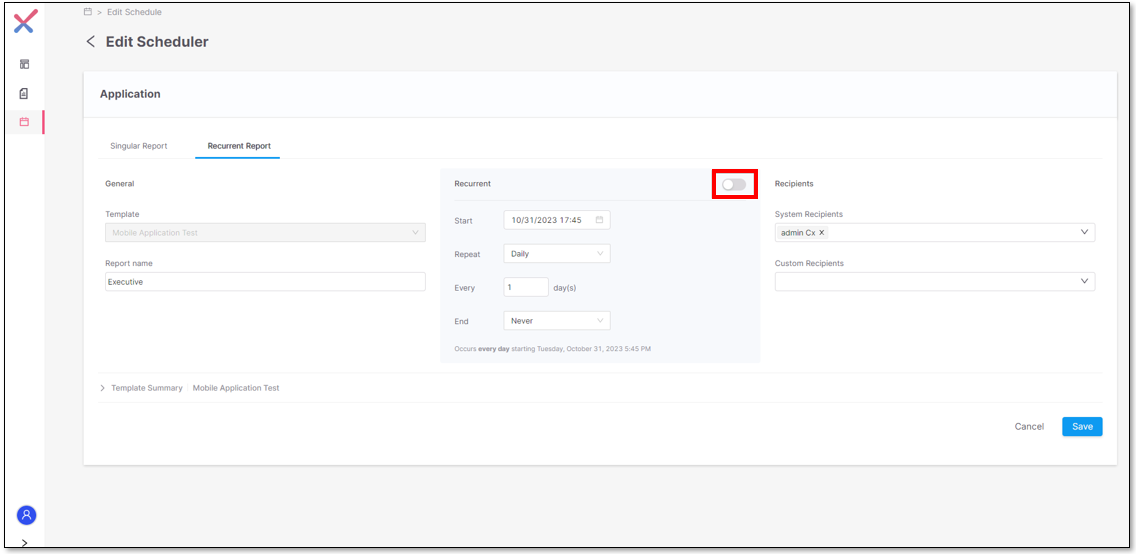
Press Save to save the definitions or Cancel to ignore the changes.
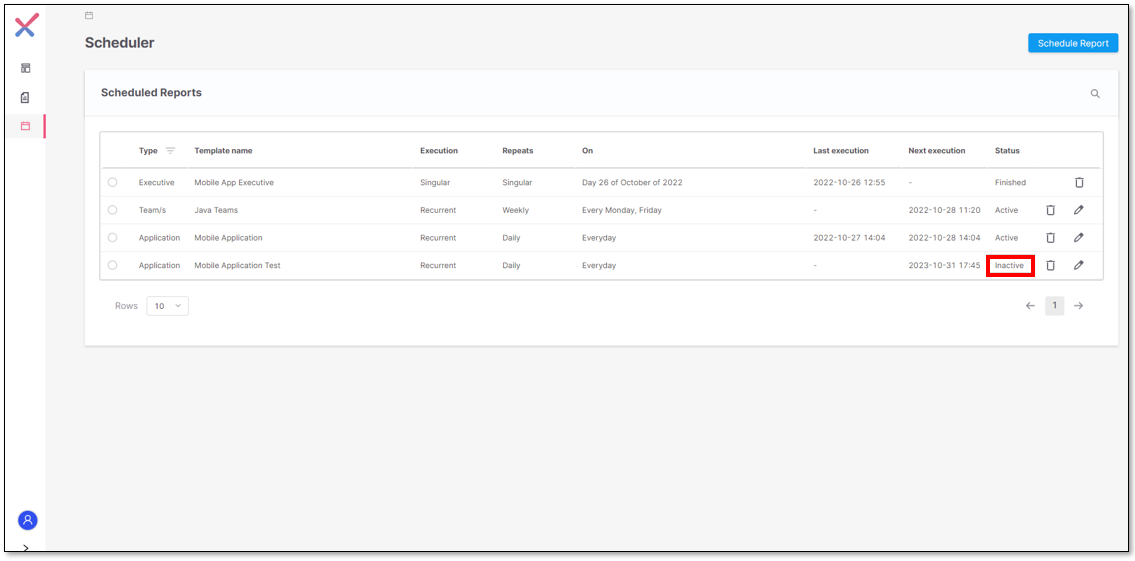
If you click Save, the scheduled template appears as Inactive in the list.
Enabling the recurrence
To enable an Inactive scheduled template:
Click on the Edit
button available for each row in the Scheduled Reports table.Under the section Recurrent, set the toggle On.
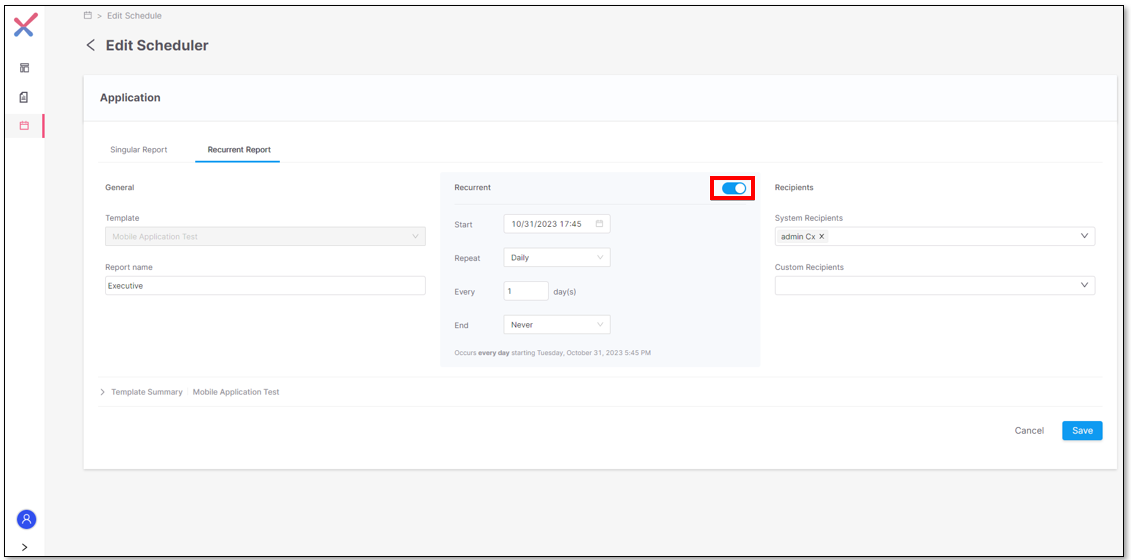
Press Save to save the definitions or Cancel to ignore the changes.
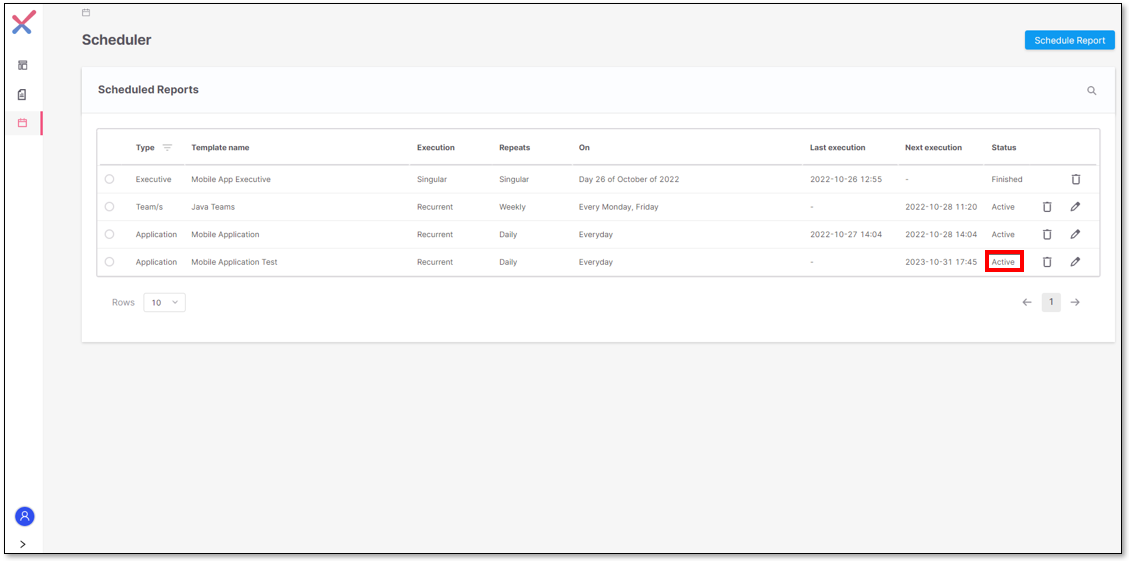
If you click Save, the scheduled template appears as Active in the list.
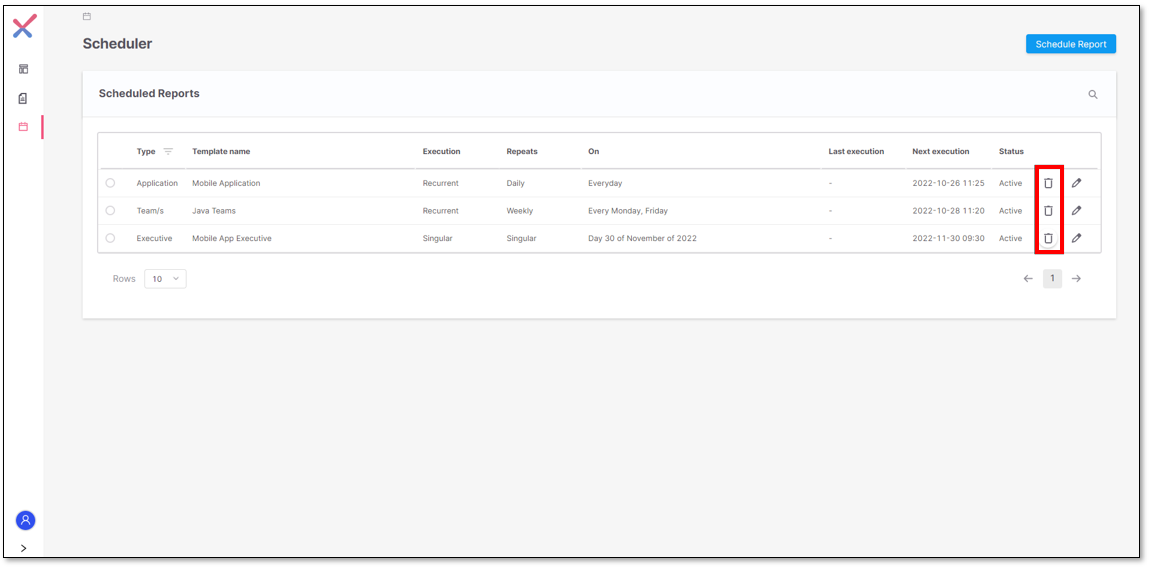
Deleting a Scheduled Template
To delete a scheduled template, click on the Delete button  available for each row in the Scheduled Reports table.
 |
Once you click the Delete button, a confirmation message will be displayed:
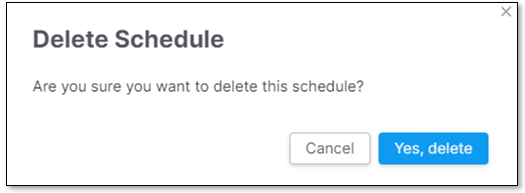 |
Click Yes, delete to confirm the removal. Once the scheduler entry is deleted, it will be removed from the Scheduled Reports list and it will no longer be available.
To Cancel the template removal, click Cancel.
To exit the modal window, click on the X button. In this case, the template will not be deleted.
Scheduling Status
There are three different types of statuses for the scheduled templates:
Active - Once a template is scheduled and saved, its status is Active until the End Date or End After is reached.
Active entries can be disabled by editing the scheduler entry.
Inactive - When an Active scheduler entry is disabled, its status become Inactive.
Inactive entries can be enabled by editing the scheduler entry.
Finished - varies according to the following options:
Singular scheduler entries become Finished after being executed.
Recurrent scheduler entries change to Finished when the End Date or End After is reached.
To start one finished schedule again, just choose to create a new scheduler and follow the creation steps to replace this finished scheduler with the new one.
For further details about recurrence types, see the Recurrent Report page.