Custom States
Notice
This feature can only be activated for accounts that have Phase 1 of the new Access Management. Custom states is currently supported for risks identified by SAST, SCA, IaC Security and Container Security scanners. It is also supported for DAST.
Custom states allow more flexibility in triaging your scan results within your tenant account. This is especially relevant if you have CxSAST on-prem and are migrating to Checkmarx One or a tailored triage process that needs to integrate seamlessly with your existing workflows. Once created, custom states can be applied to risks identified in your projects in addition to the predefined states in Checkmarx One. Custom states can be created either via the web application (UI) as described below, or by REST API, and requires tenant admin permission. Once created, custom states can be applied to specific risks via the Checkmarx One web application (UI), CLI and plugins, see Managing (Triaging) Vulnerabilities.
When a custom state is created, the tenant admin who created it automatically receives the dynamic permission to edit its result. Specific users must be assigned permissions manually in Access Management. Deleting a custom state removes its permission, but existing results with the state will still display it.
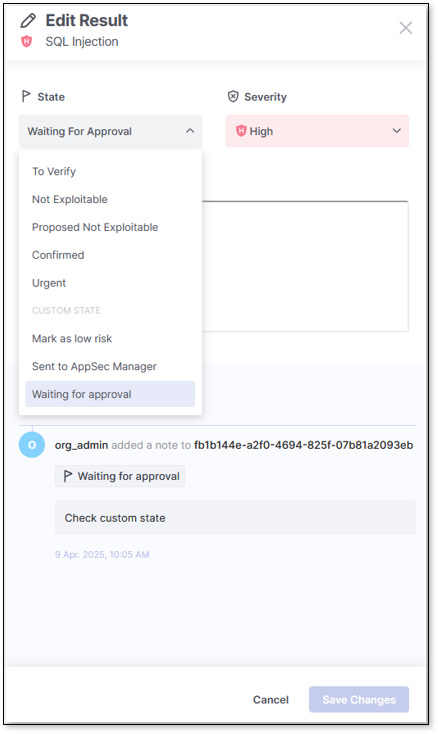
When editing a result in the results viewers, the five predefined states will always appear at the top, separated by a divider from the custom states listed alphabetically. If the list exceeds 10 states, an auto-complete search field will appear for easier navigation.
 |
In addition to being shown in all relevant places in the Checkmarx One web application (e.g., viewing and triaging risks), custom states are also supported in the context of:
Analytics Dashboards
Reports
Feedback Apps
CLI tool (from version 2.3.16 and above)
IDE plugins (recent versions)
Migration from CxSAST on-prem to Checkmarx One
Creating Custom States
Custom states can be created either via API or the UI.
To create custom states via API, see the documentation for POST /custom-states.
Important
Creating a new custom state requires the permission create-result-custom-state and deleting a custom state requires the permission delete-result-custom-state.
Caution
After creating a new custom state, a new dynamic permission is created for allowing users to change results to that state. You need to assign that permission to each relevant user.
Adding Custom States via the UI
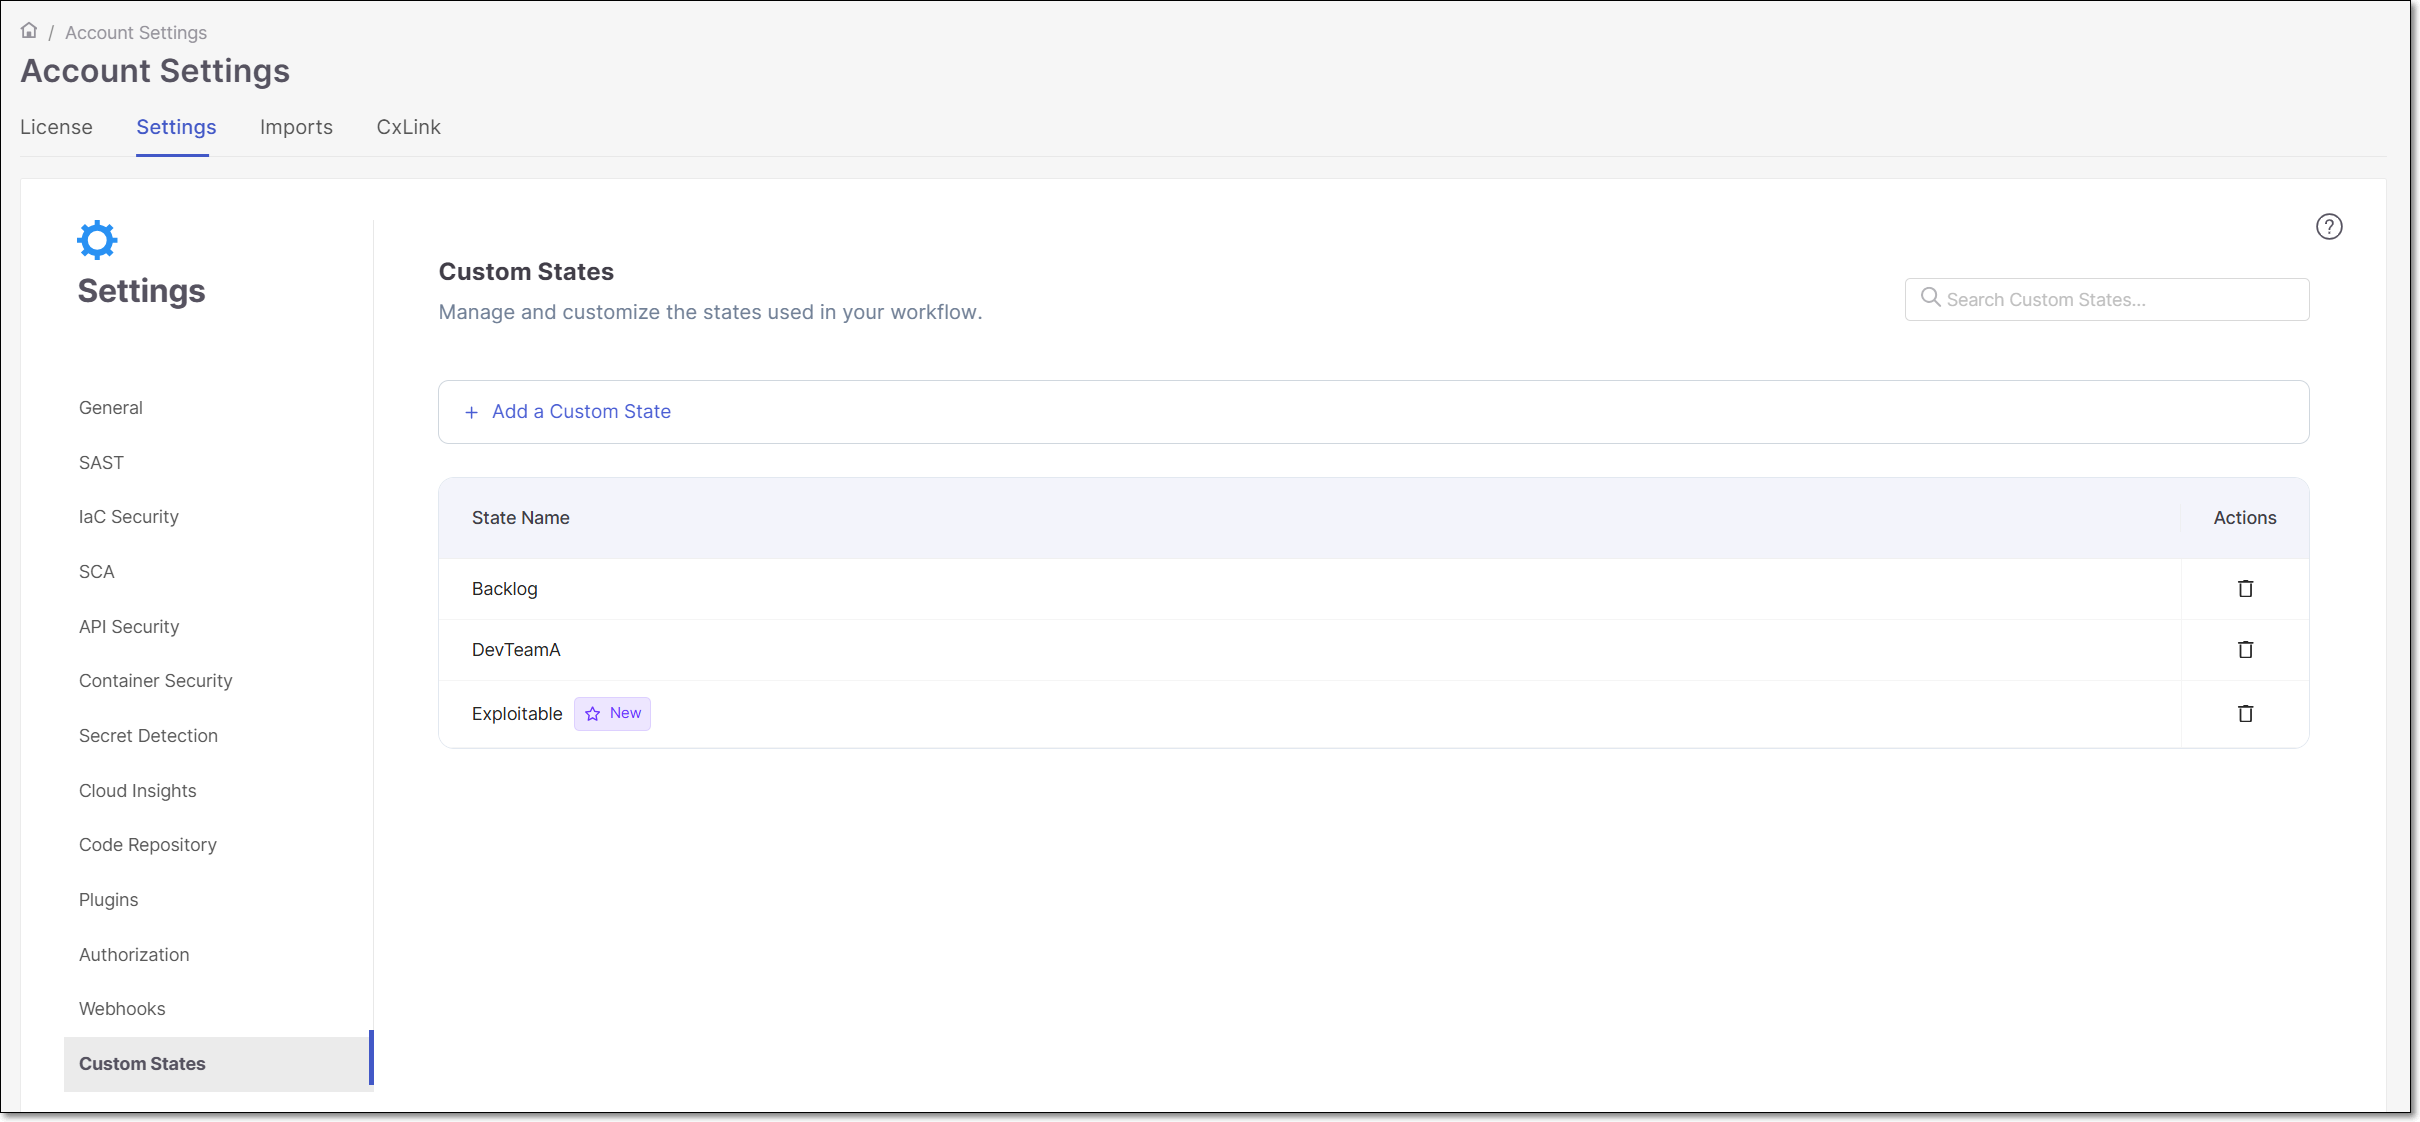
The Custom States Settings screen shows a list of all custom states that exist in your tenant, and enables you to add or delete custom states. Once a custom state is created in your account, it is available for use by all users accross your entire account.
This screen is accessed by navigating to Settings  > Global Settings > Custom States.
 |
Click on the
 link.
link.Name the new custom state, following these rules:
Allowed characters: English letters,
-,_Prohibited characters:
<,>,&Max 200 characters
Must be unique and not a predefined state
No leading/trailing spaces
After entering a name, click Add.
The new custom state is now displayed in the list with a New icon next to the name.
Granting Access to Custom States
In order to assign a custom state to a result, the user must have both the general permission update-result-custom-state and also the specific permission for assigning that particular custom state. The specific permissions are generated automatically when a new custom state is created. The new permission follows the format update-custom-state-<custom-state-name>. For example if a new custom state is named "my custom state 1", the associated permission will be update-custom-state-my-custom-state-1.
To enable a user or group to assing a custom state:
Go to Setting > Identity and Access Management.
Open the Groups or Users tab, select the relevant group or user.
Click on Edit.
Under Roles Mappings > CxOne roles, search for the relevant permission and click Add.