CxSAST Reporting Schedule Installation (as a Windows Service)
Notice
Dependency Requirements:
The Scheduler can be installed as a Windows service and CxSASTReporting Client deployed on IIS. It requires the dependencies described at CxSAST Reporting Windows Prerequisites
The Authorization Setup Script must be executed prior to the Client API Installation. The script and guide can be found at CxSAST Reporting Authorization Setup.
Installation
Notice
For best results, use the exact path and folder names indicated in the instructions.
Download the latest artifacts for CxSASTReportingScheduler.
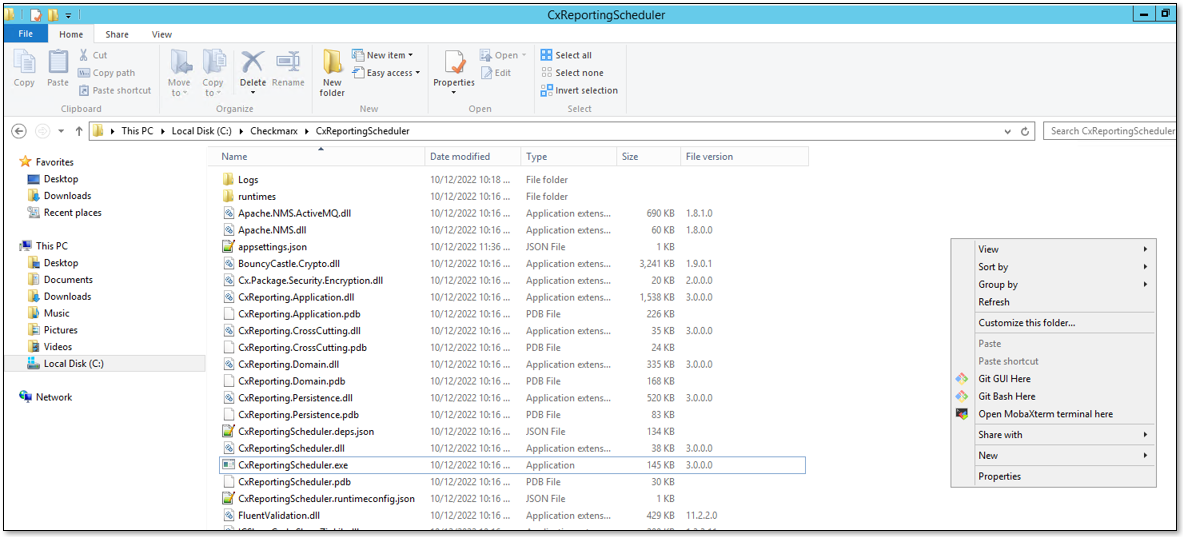
Extract zip contents of CxSASTReportingScheduler to
C:\Checkmarx\CxReportingScheduler.Give binaries folder and exported scans source code folder permissions.
Right-click the CxSASTReportingScheduler folder and select the Properties option.

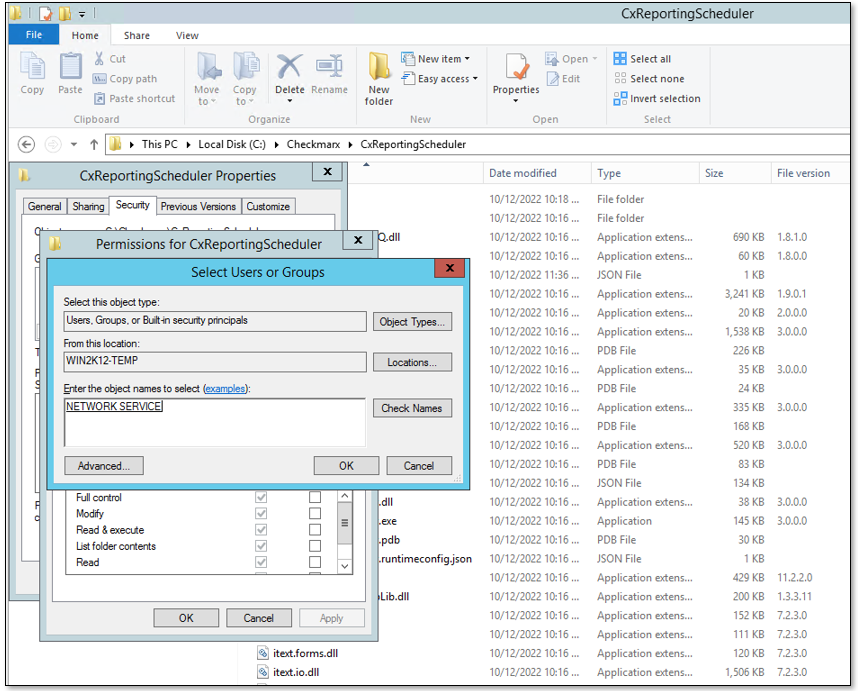
Click the Security tab, click Edit and Add. Click the Advanced option, Find Now and from the search results choose the same user as applied to CxSAST services and CxSASTReportingScheduler Windows Service.

Click OK and give it full permissions by selecting the Full control checkbox, click Apply and OK.
Check the appsettings.json file for the required settings, especially the database connection and reports configuration, as shown in the following code:
{
  "Database": {
    "CxDBClient": {
      "ConnectionString": "Data Source= ;Initial Catalog=CxDB;Integrated Security=False;User ID= ;Password= ;Pooling=True;", // ConnectionString for the CxSAST DB instance to export
      "EncryptionKey": "",
      "EncryptionVector": ""
    }
  }
}
Example:
{
  "Database": {
    "CxDBClient": {
      "ConnectionString": "Data Source=10.35.26.165;Initial Catalog=CxDB;Integrated Security=False;User ID=test;Password=xxxxxxxxxx;Pooling=True",
      "EncryptionKey": "",
      "EncryptionVector": ""
    }
  }
}
Validate the updated appsettings.json file. The connection string parameter must have valid user credentials with access to the CxDB, otherwise the CxReportingScheduler will not run.
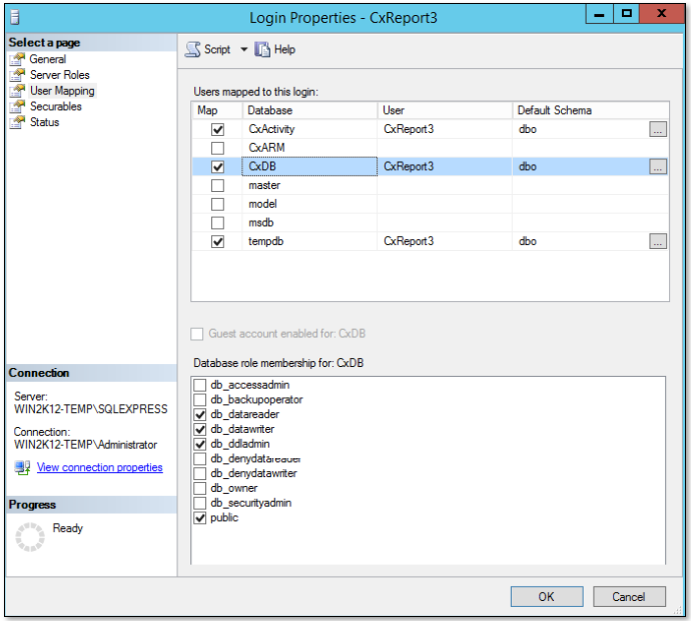
Since the CxSASTReportingScheduler accesses the CxSAST database, the database user requires the following permissions:
Default Database: CxDB
CxActivity membership: db_ddladmin role in addition to db_datareader. DefaultSchema dbo
CxBD membership: db_ddladmin role in addition to db_datareader and db_datawriter roles. DefaultSchema dbo
tempdb membership: db_ddladmin role in addition to db_datareader and db_datawriter roles. DefaultSchema dbo

Create the Windows service, by running the following commands in a CMD command line with Administrator privileges:
## Create windows service
# binPath should point to actual CxReportingScheduler.dll in case you chose a different installation path for your CxReportingScheduler folder
sc create CxReportingScheduler start= delayed-auto binpath= "C:\Program Files\dotnet\dotnet.exe \"C:\Checkmarx\CxReportingScheduler\CxReportingScheduler.dll\" --urls "http://localhost:5200" --run-as-winservice" displayname=CxReportingScheduler

## Add the description to the win service
sc description CxReportingScheduler "Checkmarx Reporting Scheduler"
Or, by executing the following command in PowerShell (also having Administrator privileges):
New-Service -Name "CxReportingScheduler" `
  -BinaryPathName '"C:\Program Files\dotnet\dotnet.exe" "C:\Checkmarx\CxReportingScheduler\CxReportingScheduler.dll" --urls "http://localhost:5200" --run-as-winservice' `
  -Description "Checkmarx Reporting Scheduler"
Caution
This service must be configured to run on a port different from the default, otherwise, it will conflict with CxReportingService. The command above creates the service on localhost:5200 avoiding this conflict. This configuration can be changed if necessary.
Keep in mind that the dotnet installation path might vary. Confirm the full path by running the following command:
get-command dotnet | select -expandproperty PathIf the path differs from
C:\Program Files\dotnet\dotnet.exe, please contact Checkmarx support.If you are running other Cx services on top of CxSAST, you might run into conflicts related to the service execution port.
Once your CxSASTReportingScheduler Windows service is created you need to validate or modify the Log On account to a user that has permissions to the CxSAST databases, binaries and sources folder path. For this you will need to access the Windows “Services“ view.

Right click in the service and choose Properties.
On the Log On tab, click This account and Browse.
Click the Advanced option, Find Now and from the search results choose the same user applied to your CxSAST services. (In our case it was Network Service user.)
After that click OK.
When all configs are set, click Start the Service.