Vulnerability Exploitability eXchange (VEX)
Vulnerability Exploitability eXchange (VEX) enables you to triage vulnerabilities in open-source dependencies using a standardized, machine-readable format that communicates whether a known vulnerability, such as a CVE, actually affects your software. In many cases, a product may include a component that is technically vulnerable while the vulnerability itself is not exploitable within the specific product context. VEX allows vendors and stakeholders to clarify real exploitability status, reducing alert noise and improving risk prioritization.
After completing VEX triage, the associated information can be exported within SBOMs and other reports. Reports generated in XML, JSON, or CSV formats automatically include VEX data. In contrast, when exporting an SBOM, VEX information is not included unless explicitly selected during export. VEX is supported for CycloneDX SBOMs only; not supported for SPDX format.
Notice
This capability complements existing triage workflows. All current triaging methods remain fully supported.
VEX Triage Model
Below are tables describing the various VEX fields that define the exploitability assessment:
Field | Required | Description |
|---|---|---|
State | Yes | Defines exploitability status |
Justification | Required when | Explains why vulnerability does not affect product |
Response | Optional | Action to be taken (Cannot fix, Update, etc.) |
Detail | Optional | Free-text notes |
State Options
State | Description |
|---|---|
Resolved | Vulnerability has been remediated. |
Resolved with pedigree | Vulnerability has been remediated and evidence of the changes are provided in the affected components pedigree, containing verifiable commit history and/or diff(s). |
Exploitable | Vulnerability may be directly or indirectly exploitable. |
In triage | Vulnerability is being investigated. |
False positive | Vulnerability is not specific to the component or service and was falsely identified or associated. |
Not affected | Vulnerability does not affect the component or service. |
Justification Options
Justification | Description |
|---|---|
Code not present | Code has been removed. |
Code not reachable | Vulnerable code is not invoked at runtime. |
Requires configuration | Exploitability requires a configurable option to be set/unset. |
Requires dependency | Exploitability requires a dependency that is not present. |
Requires environment | Exploitability requires a certain environment that is not present. |
Protected by compiler | Exploitability requires a compiler flag to be set/unset. |
Protected at runtime | Exploits are prevented at runtime. |
Protected at perimeter | Attacks are blocked at physical, logical, or network perimeter. |
Protected by mitigating control | Preventative measures have been implemented that reduce the likelihood and/or impact of the vulnerability. |
Perform VEX Triage and Export in SBOM
After running an SCA scan and reviewing results, use the following procedure to perform VEX triage and export an SBOM:
Navigate to the Workspace
 > Projects page.
Hover over the
 button for the desired project and select SCA.
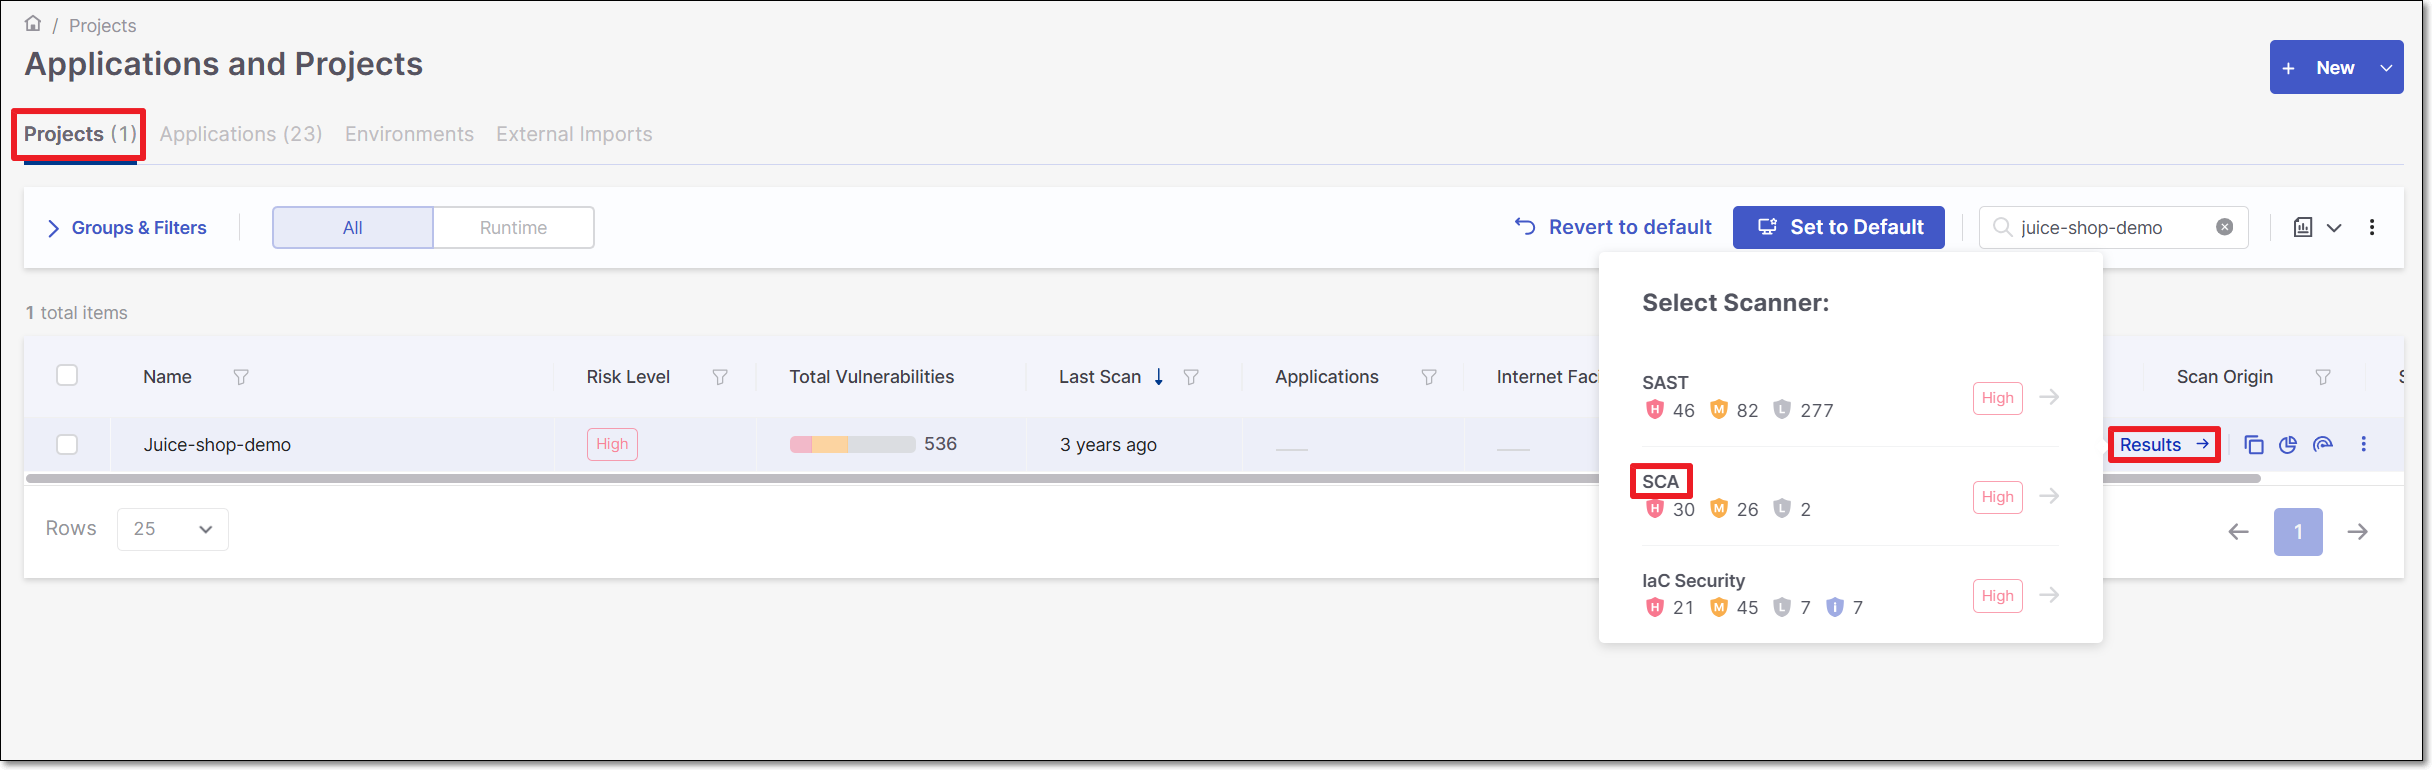
On the Scan Results page, click on the Risks tab. The All Risks sub-tab is displayed.
Click on a risk to open the Risk Details page for that risk.
Click on the Edit button.

The Management of Risk panel opens.
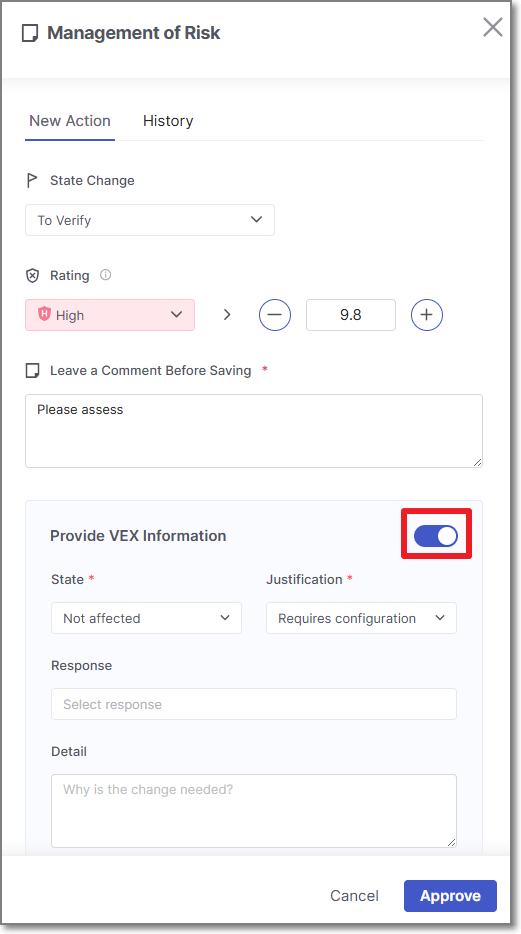
Follow the regular triage workflow by updating state, rating and adding a comment.
Warning
Even if you do not want to change the state and rating, you must add a comment. If you do not add a comment, the Approve button will be greyed out.
Use the toggle to enable the VEX options.
Configure the various VEX fields. When state is set to
Not affected, the Justification field will appear to its right.Notice
The default VEX state is mapped from the risk state set in the regular triage workflow as follows:
If the risk state =
To Verify, the VEX state will default toIn triage.If the risk state =
Not Exploitable, the VEX state will default toNot affected.If the risk state =
Confirmed, the VEX state will default toExploitable.
Click Approve.
The vulnerability is updated and the new state is displayed in the results viewer.
On the Scan Results page, hover over the
 icon, and select Software Bill of Materials.
The SBOM scan report window is displayed.
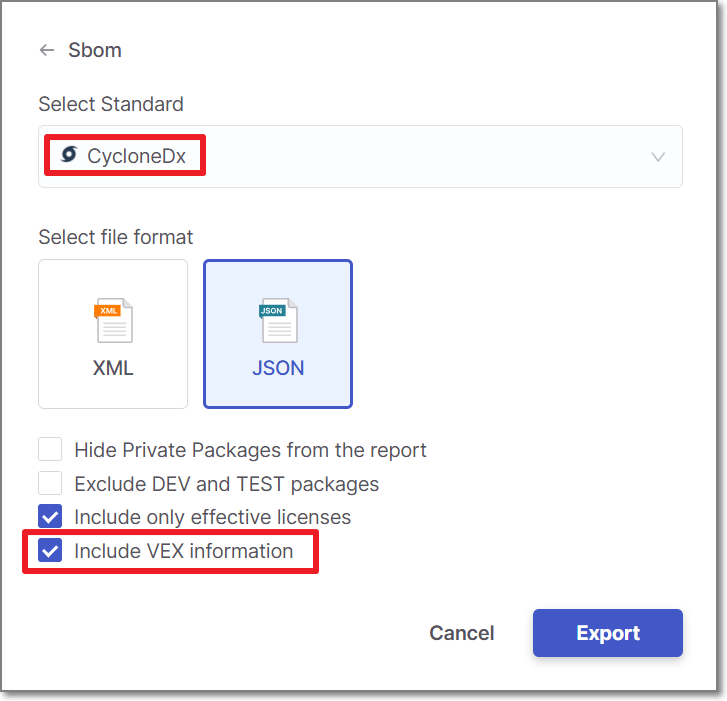
Select CycloneDX, choose a format (XML or JSON), and check the box next to Include VEX Information.
Click Export.
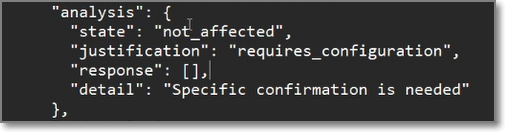
The SBOM is downloaded. The VEX information is documented in the SBOM under the analysis element.
 |