Developer Assist for Checkmarx One
Initial Setup and Configuration
Prerequisites
A Checkmarx One account with a Checkmarx One Assist license. The Checkmarx MCP must be activated for your tenant account in the Checkmarx One UI under Settings > Plugins page. This must be done by an account admin.
Checkmarx One users will need to provide:
an API Key (see Generating an API Key), OR
login credentials (Base URL, Tenant name, Username and Password)
For VS Code: supported for
For VS Code, you are running version 1.100.0 or above (supports both
settings.json(v1.100–1.101) andmcp.json( v1.102+) and have GitHub Copilot or Claude Code installedFor JetBrains, you are running IntelliJ version 2024.3+ and have GitHub Copilot Chat (AI Agent) version 1.5.62-243+ installed
Installing and Configuring the Plugin
Install and setup the Checkmarx extension in your IDE, as described in the following articles. The Checkmarx extension includes the Checkmarx One Assist feature as part of the Checkmarx One platform experience and should be used by Checkmarx One customers.
Warning
There is a separate extension - Checkmarx Developer Assist - which is intended for Developer Assist standalone users. These extensions are mutually exclusive, so you must ensure that the Checkmarx Developer Assist extension is uninstalled before installing the Checkmarx extension.
Notice
Make sure that you install version 2.35.0 or above.
AI Remediation
How to Remediate Risks Using AI
The following procedure explains how to remediate risks by clicking on the Fix button for a particular risk. Alternatively, you can request remediation via chat with your AI Agent, as described below.
Note
As of May 31, 2026, Dev Assist remediation can be triggered via natural language chat in your AI Assistant. For more information, see Remediation Via Chat.
When Checkmarx realtime scanners identify a risk, it is flagged as a Problem, which is marked in the code with a squiggly underline and annotated in the margin with an icon that indicates the type of risk.
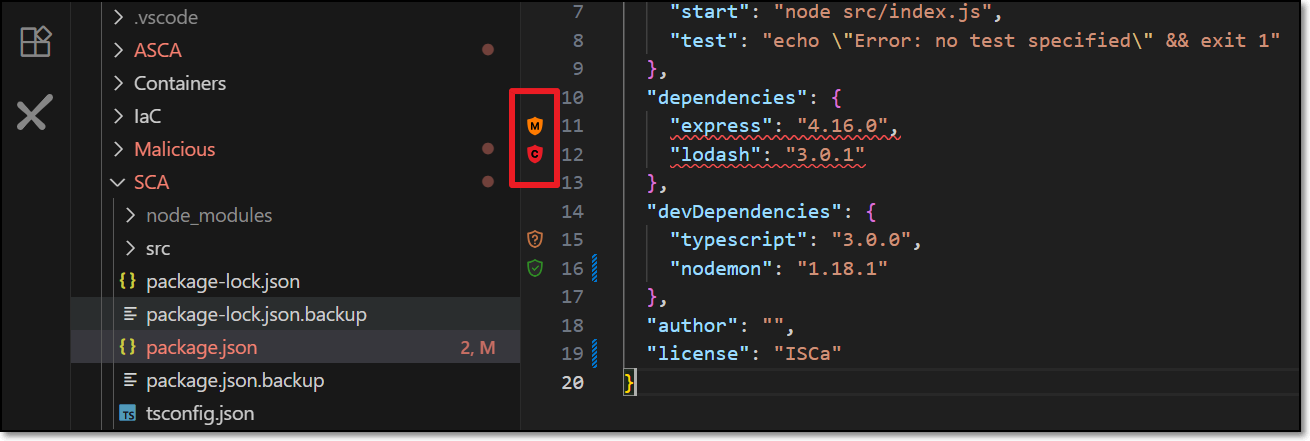
Hover over the vulnerable line of code.
The Checkmarx dialog opens.
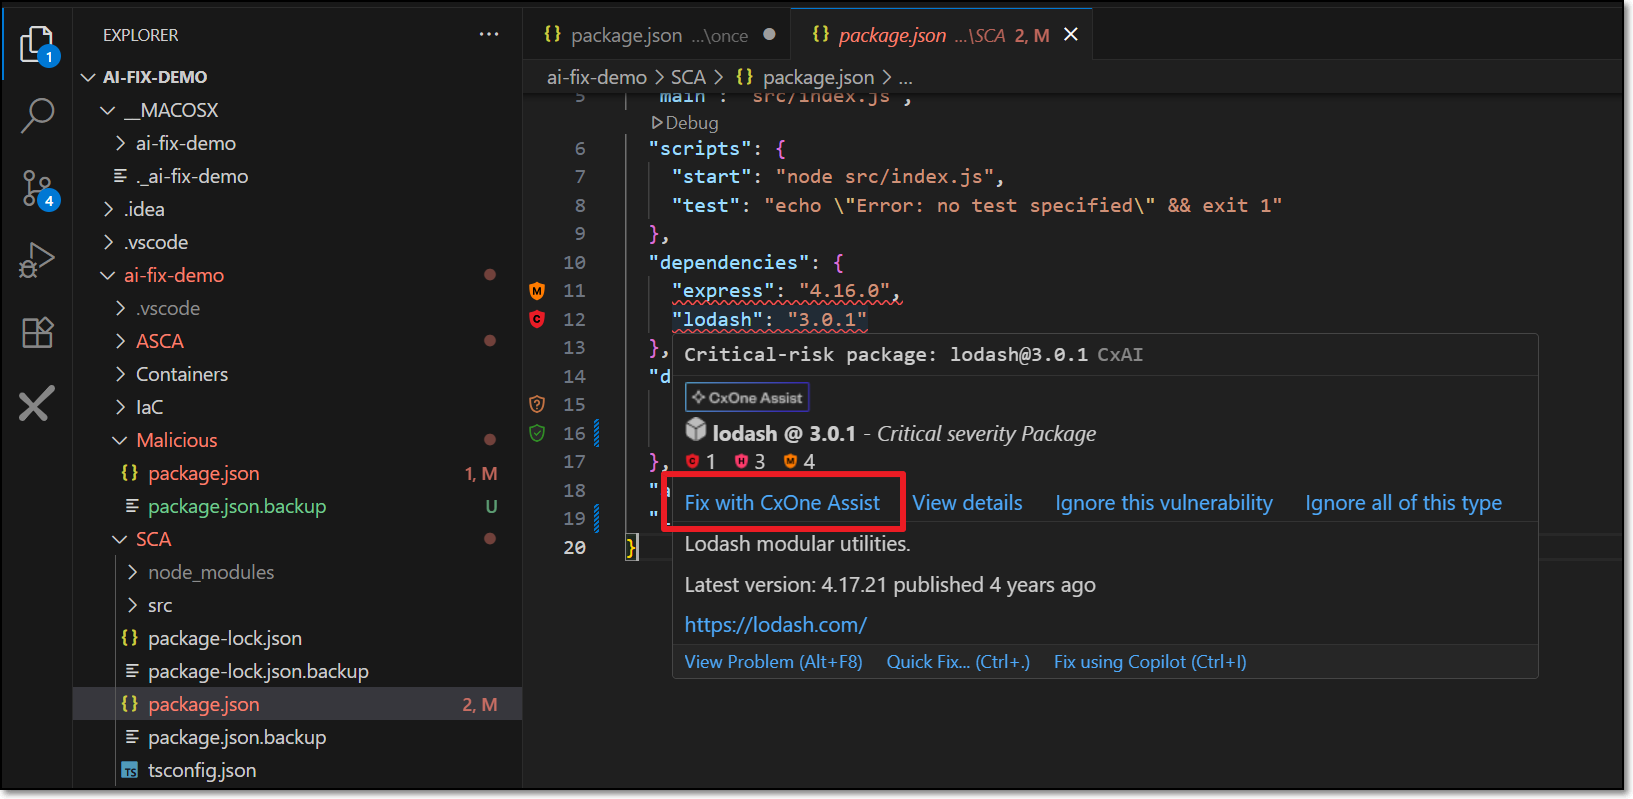
Click on Fix with CxOne Assist.
A Copilot session opens in the side panel and all relevant info is sent for analysis.
Notice
Depending on your IDE configuration, you may need to click Continue several times in order to complete the process.
Copilot automatically makes the necessary changes in the code in order to remediate the risk.
If you approve the change, click Accept.
The change is made and the code is rescanned to verify that the risk is no longer present.
If you want to improve on the suggestion, click Undo. You can then chat with Copilot to determine the best way of remediating the code.
Remediation via Chat
You can submit a request for CxOne Dev Assist remediation via natural language chat with your AI Agent. Just say that you want to fix a security risk and indicate which risk or risks you want to fix. Your AI will automatically route the request to the Checkmarx MCP and send all relevant data for analysis in order to generate the suggested remediation. The following are some examples of valid requests:
"Fix the vulnerability in line 26"
"Fix all critical vulnerabilities"
"Fix all SQL Injection risks"
"Remediate all vulnerable packages"
"Correct all critical issues in my JavaFile.java"
Things to Know About Dev Assist Chat
No need to mention "Checkmarx" explicitly; once Dev Assist is installed and running all remediation requests are handled via Checkmarx MCP
Support for multi-language prompts
Effective in single message context. Improved accuracy in context of an existing thread or finding.
By default, requests are interpreted in the context of the current open file (e.g., line 26 of the open file). You can specify a different file in your workspace.
How to Understand Risks Using AI
When Checkmarx realtime scanners identify a risk, it is flagged as a Problem, which is marked in the code with a squiggly underline and annotated in the margin with an icon that indicates the type of risk.
Hover over the vulnerable line of code.
The Checkmarx dialog opens.
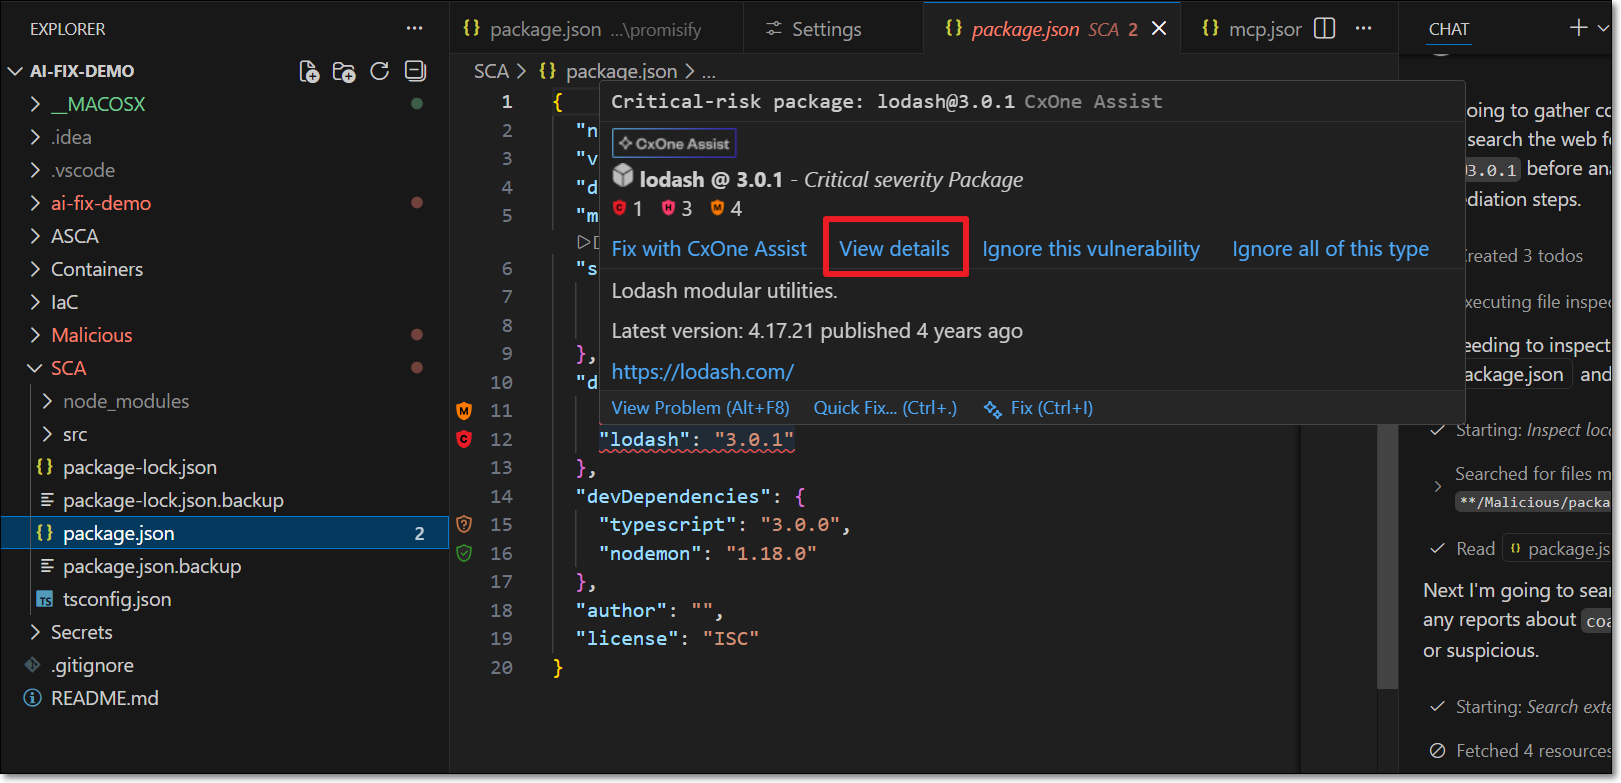
Click on View details.
A Copilot session opens in the side panel and all relevant info is sent for analysis.
Notice
Depending on your IDE configuration, you may need to click Continue several times in order to complete the process.
Copilot explains the precise nature of the risk in the context of your code. You can chat with Copilot to ask for further clarification.
Ignoring Risks
In order to help you focus on actionable risks, Checkmarx Dev Assist enables marking risks as Ignore, so that the risks will no longer be shown in your IDE. You can Revive a risk at any time to resume showing that risk. This can be applied to a specific instance of a risk or it can be applied to all instances of that risk in your project. You can revive the risk at any time to resume showing risks for that package.
Notice
For risks identified in open source packages, a risk instance refers to the entire package that the vulnerability is associated with.
To Ignore a risk
When Checkmarx realtime scanners identify a risk, it is flagged as a Problem, which is marked in the code with a squiggly underline and annotated in the margin with an icon that indicates the type of risk.
Hover over the vulnerable line of code.
The Checkmarx dialog opens.
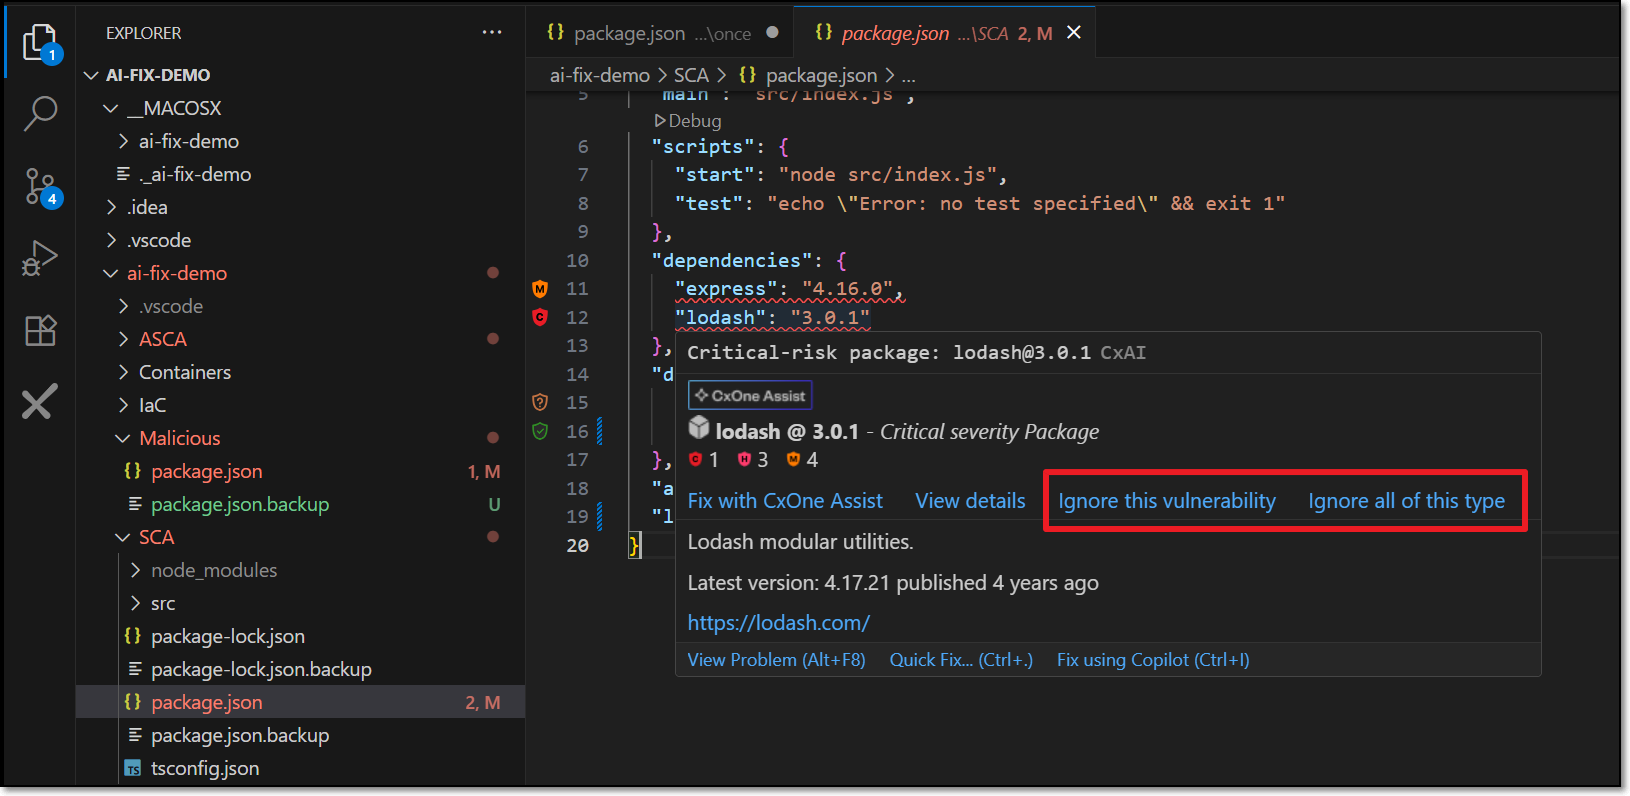
To ignore the risk in this particular instance, click on Ignore this vulnerability.
To ignore all instances of the risk, click on Ignore all of this type.
To revive a package:
Click on the Ignore icon in the bottom bar.
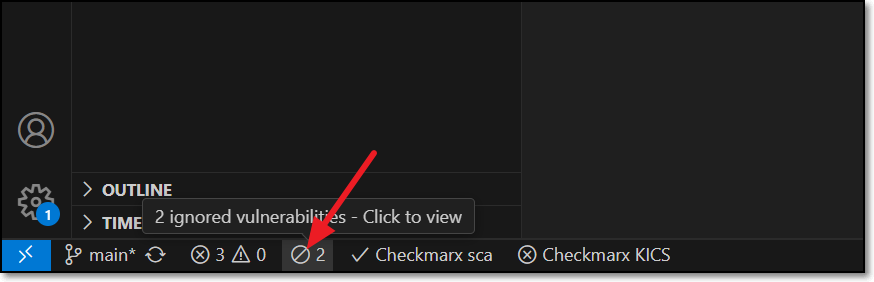
The Ignored Vulnerabilities tab opens.
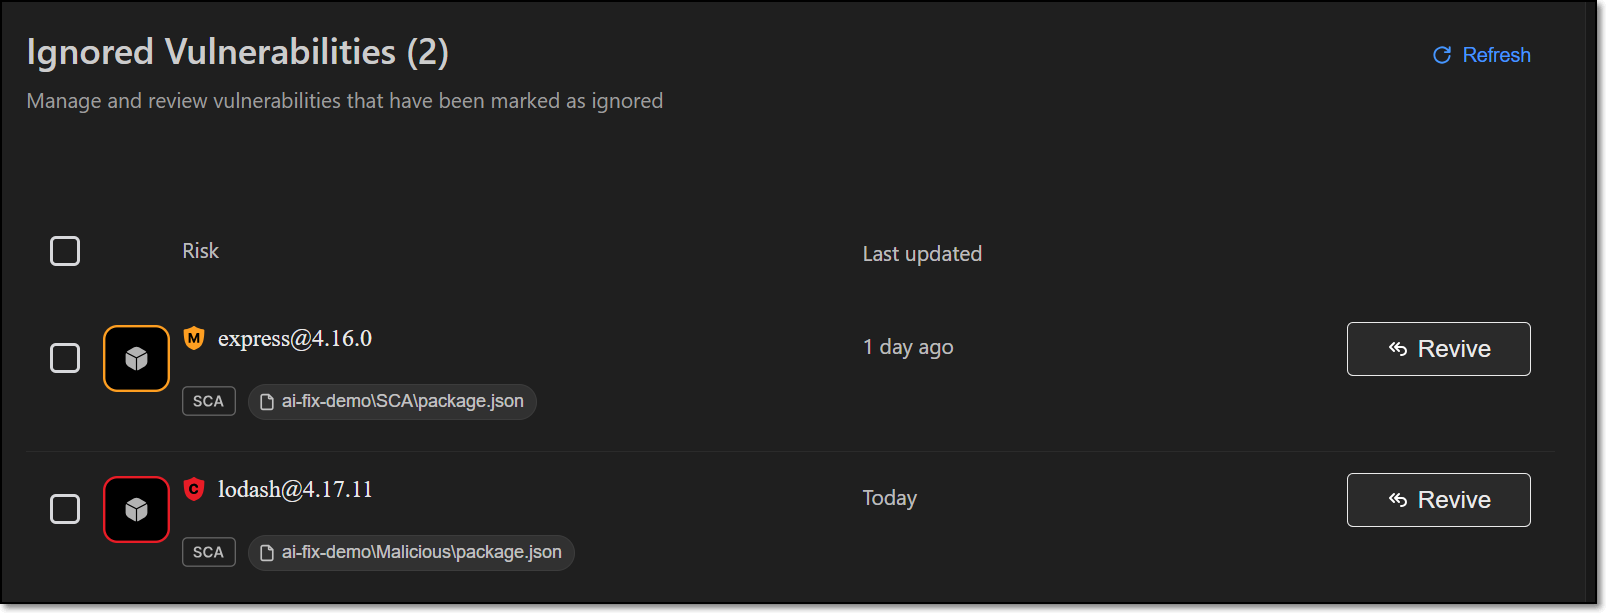
For the desired vulnerability click on the Revive button.
Notice
This can also be done as a bulk action for all selected items.
Troubleshooting - Manually Configuring the MCP Server
In case the automatic procedure fails. You can manually configure access to the Checkmarx MCP server using the appropriate procedure below, according to your IDE.
Installing MCP in VS Code
In case the automatic installation procedure fails. You can manually configure access to the Checkmarx MCP server using the following procedure.
If it does not already exist, create an mcp.json file at the following location:
${homeDir}\AppData\Roaming\Code\User\mcp.jsonAdd the "checkmarx" mcp using the following snippet, replacing the placeholders as follows:
Checkmarx_one_base_url - The base URL of your Checkmarx One environment.
Checkmarx_one_API_key - An API Key for your Checkmarx One account.
{
   "servers":{
      "checkmarx":{
         "url":"<Checkmarx_one_base_url>/api/security-mcp/mcp",
         "headers":{
            "cx-origin":"VSCode",
            "Authorization":"<Checkmarx_one_API_key>"
         }
   }
}
Start running the MCP server as follows:
For the IaC Realtime scanner, select the Containers Management Tool used in your environment. Options are docker or podman.
Click View > Command Pallete and enter MCP:List Servers.
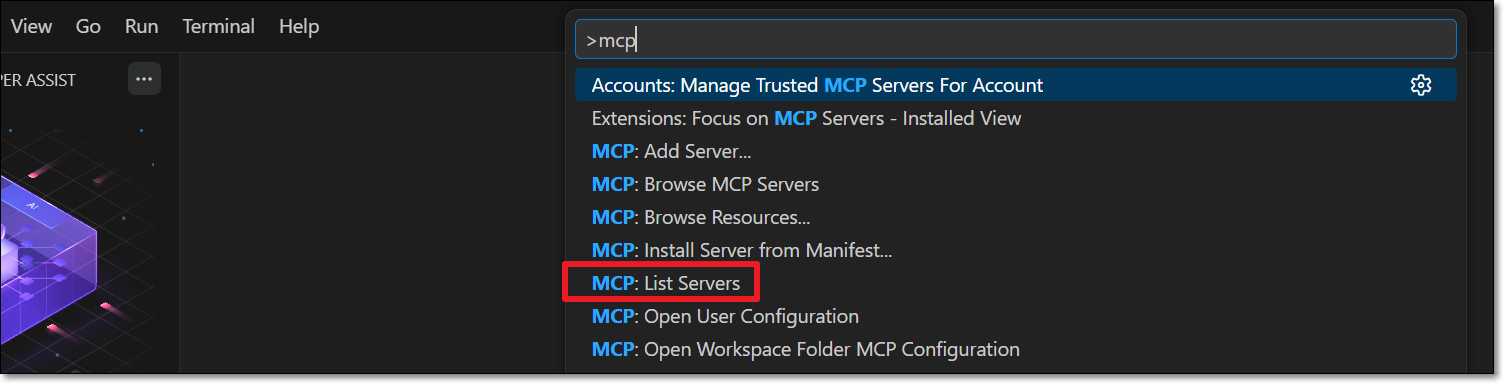
In the MCP servers list, select Checkmarx.
Click on Start Server.
Installing MCP in Cursor
In case the automatic installation procedure fails. You can manually configure access to the Checkmarx MCP server using the following procedure.
If it does not already exist, create an mcp.json file at the following location:
${homeDir}\.cursor\mcp.jsonAdd the "checkmarx" mcp using the following snippet, replacing the placeholders as follows:
Checkmarx_one_base_url - The base URL of your Checkmarx One environment.
Checkmarx_one_API_key - An API Key for your Checkmarx One account.
{
   "mcpServers":{
      "checkmarx":{
         "url":"<Checkmarx_one_base_url>/api/security-mcp/mcp",
         "headers":{
            "cx-origin":"Cursor",
            "Authorization":"<Checkmarx_one_API_key>"
         }
      }
   }
}
Verify that your MCP server is running by opening Cursor Settings and under Tools & MCP > Installed MCP Servers, confirm that the Checkmarx toggle is enabled.
Installing MCP in Windsurf
In case the automatic installation procedure fails. You can manually configure access to the Checkmarx MCP server using the following procedure.
If it does not already exist, create an mcp_config.json file at the following location:
${homeDir}\.codeium\windsurf\mcp_config.jsonNotice
If you are using windsurf-next, then the file location should be
${homeDir}\.codeium\windsurf-next\mcp_config.jsonAdd the "checkmarx" mcp using the following snippet, replacing the placeholders as follows:
Checkmarx_one_base_url - The base URL of your Checkmarx One environment.
Checkmarx_one_API_key - An API Key for your Checkmarx One account.
{
   "mcpServers":{
      "checkmarx":{
         "url":"<Checkmarx_one_base_url>/api/security-mcp/mcp",
         "headers":{
            "cx-origin":"Windsurf",
            "Authorization":"<Checkmarx_one_API_key>"
         }
      }
   }
}
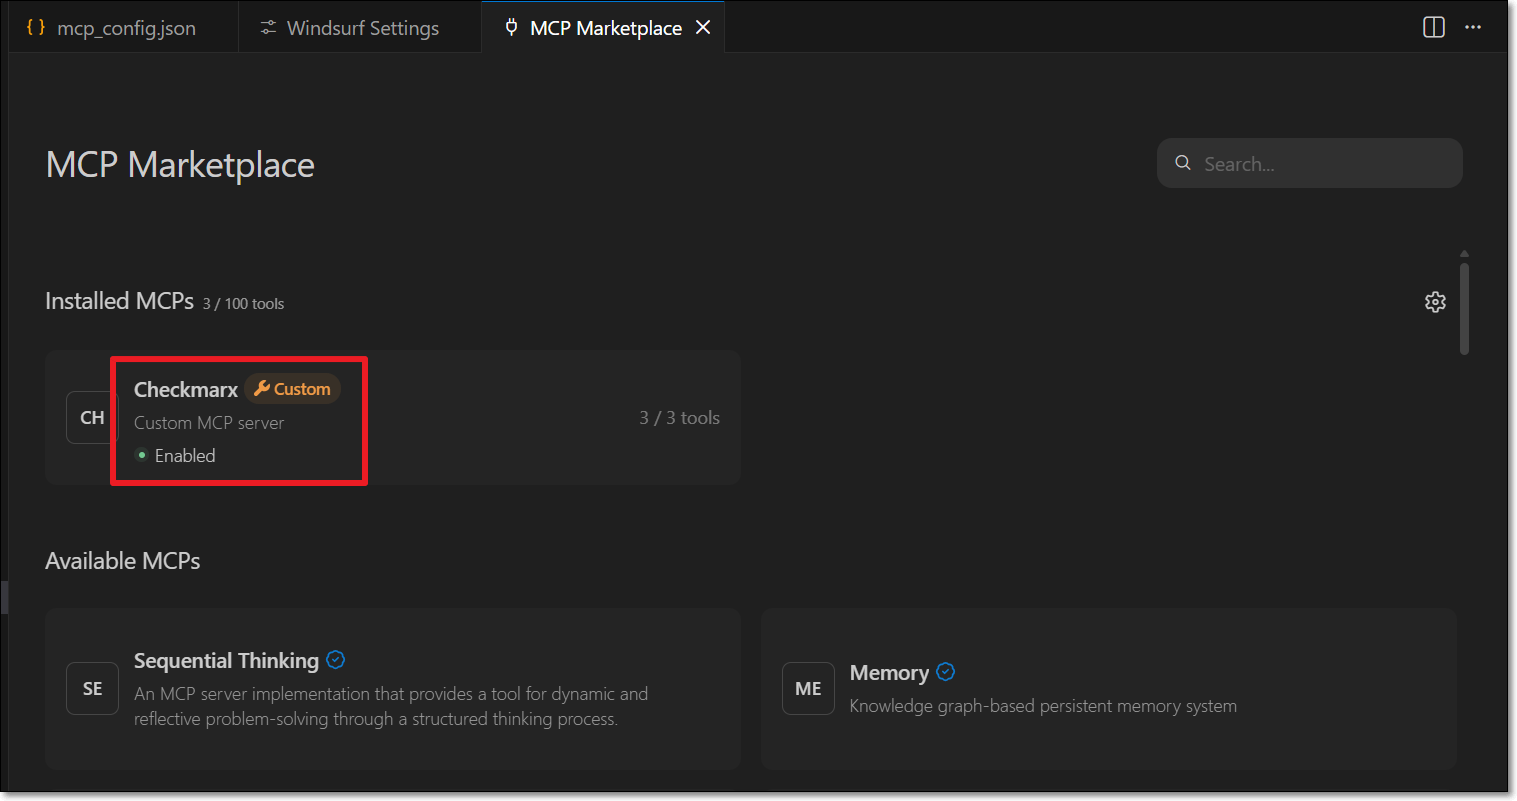
Go to Settings > Windsurf Settings, and under Cascade, click Open MCP Marketplace. Make sure that the Checkmarx MCP is installed and enabled.
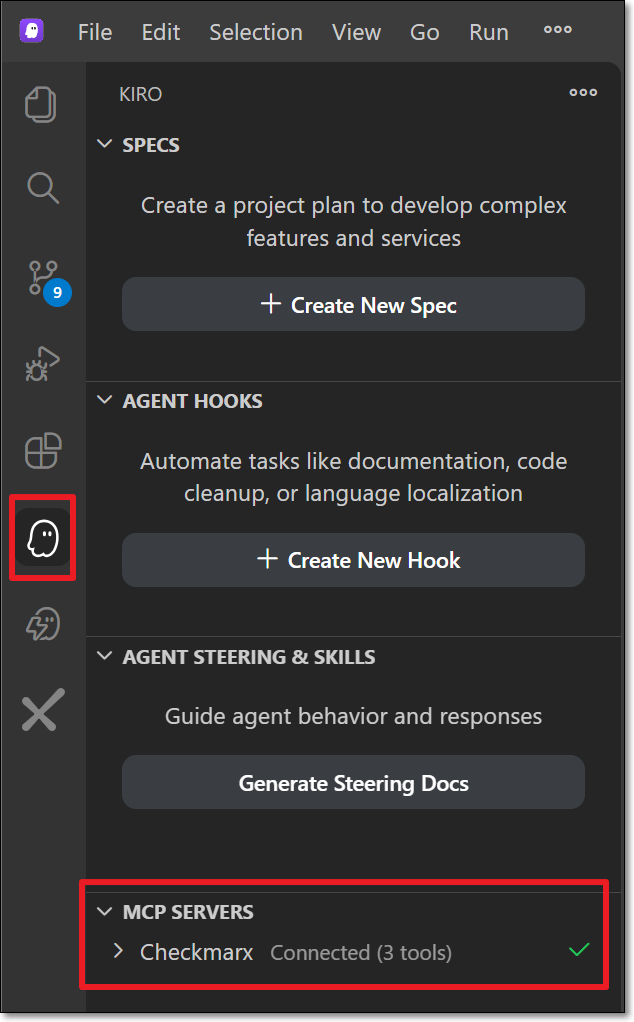
Installing MCP in Kiro
In case the automatic installation procedure fails. You can manually configure access to the Checkmarx MCP server using the following procedure.
If it does not already exist, create an mcp.json file at the following location:
${homeDir}\.kiro\settings\mcp.jsonAdd the "checkmarx" mcp using the following snippet, replacing the placeholders as follows:
Checkmarx_one_base_url - The base URL of your Checkmarx One environment.
Checkmarx_one_API_key - An API Key for your Checkmarx One account.
{
   "mcpServers":{
      "checkmarx":{
         "url":"<Checkmarx_one_base_url>/api/security-mcp/mcp",
         "headers":{
            "cx-origin":"Kiro",
            "Authorization":"<Checkmarx_one_API_key>"
         }
      }
   }
}
Click on theKiro icon in the left-side navigation, and under MCP servers, confirm that Checkmarx is connected.
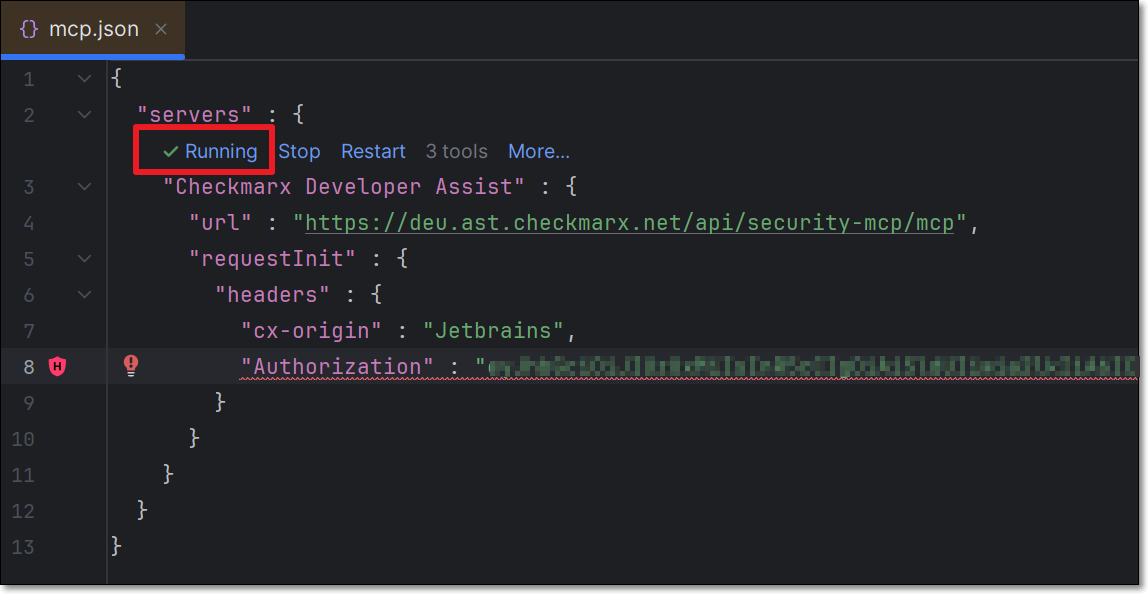
Installing MCP in JetBrains
In case the automatic installation procedure fails. You can manually configure access to the Checkmarx MCP server using the following procedure.
If it does not already exist, create an mcp.json file at the following location:
${homeDir}\AppData\Local\github-copilot\intellij\mcp.jsonAdd the "checkmarx" mcp using the following snippet, replacing the placeholders as follows:
Checkmarx_one_base_url - The base URL of your Checkmarx One environment.
Checkmarx_one_API_key - An API Key for your Checkmarx One account.
{
   "servers":{
      "Checkmarx":{
         "url":"<Checkmarx_one_base_url>/api/security-mcp/mcp",
         "requestInit":{
            "headers":{
               "cx-origin":"Jetbrains",
               "Authorization":"<Checkmarx_one_API_key>"
            }
         }
      }
   }
}
Confirm that the MCP is Running.
Installing MCP in Visual Studio
In case the automatic installation procedure fails. You can manually configure access to the Checkmarx MCP server using the following procedure.
If it does not already exist, create an mcp.json file at the following location:
${homeDir}\.mcp.jsonAdd the "checkmarx" mcp using the following snippet, replacing the placeholders as follows:
Checkmarx_one_base_url - The base URL of your Checkmarx One environment.
Checkmarx_one_API_key - An API Key for your Checkmarx One account.
{
  "inputs": [],
  "servers": {
    "Checkmarx": {
      "command": "npx",
      "args": [
        "mcp-remote",
        "<Checkmarx_one_base_url>/api/security-mcp/mcp",
        "--transport",
        "http-first",
        "--header",
        "Authorization:<Checkmarx_one_API_key>",
        "--header",
        "cx-origin:VisualStudio",
        "--verbose"
      ]
    }
  }
}