Installing and Setting up the Checkmarx Kiro Extension
Installing the Extension
The Kiro extension is available on the Open VSX Registry. You can initiate the installation directly from within Kiro.
Notice
Although there is no dedicated Checkmarx plugin for Kiro, the plugin for VS Code version 2.44.0 and above has been tested and is effective for use in Kiro.
Warning
The Checkmarx VS Code extension includes the Checkmarx One Assist feature as part of the Checkmarx One platform experience and should be used by Checkmarx One customers with a Checkmarx One Assist license. The Checkmarx and Checkmarx Developer Assist VS Code extensions are mutually exclusive. To use the Checkmarx extension, ensure that the Checkmarx Developer Assist extension is uninstalled before installation. If you are not a Checkmarx One customer and are trying to install the Checkmarx Developer Assist VS Code extension, see Initial Setup and Configuration.
To install the extension:
Open Kiro.
In the main menu, click on the Extensions icon.
Search for the Checkmarx extension, then click Install for that extension.
Notice
Make sure to install version 2.44.0 or above, since older versions don't support Kiro.
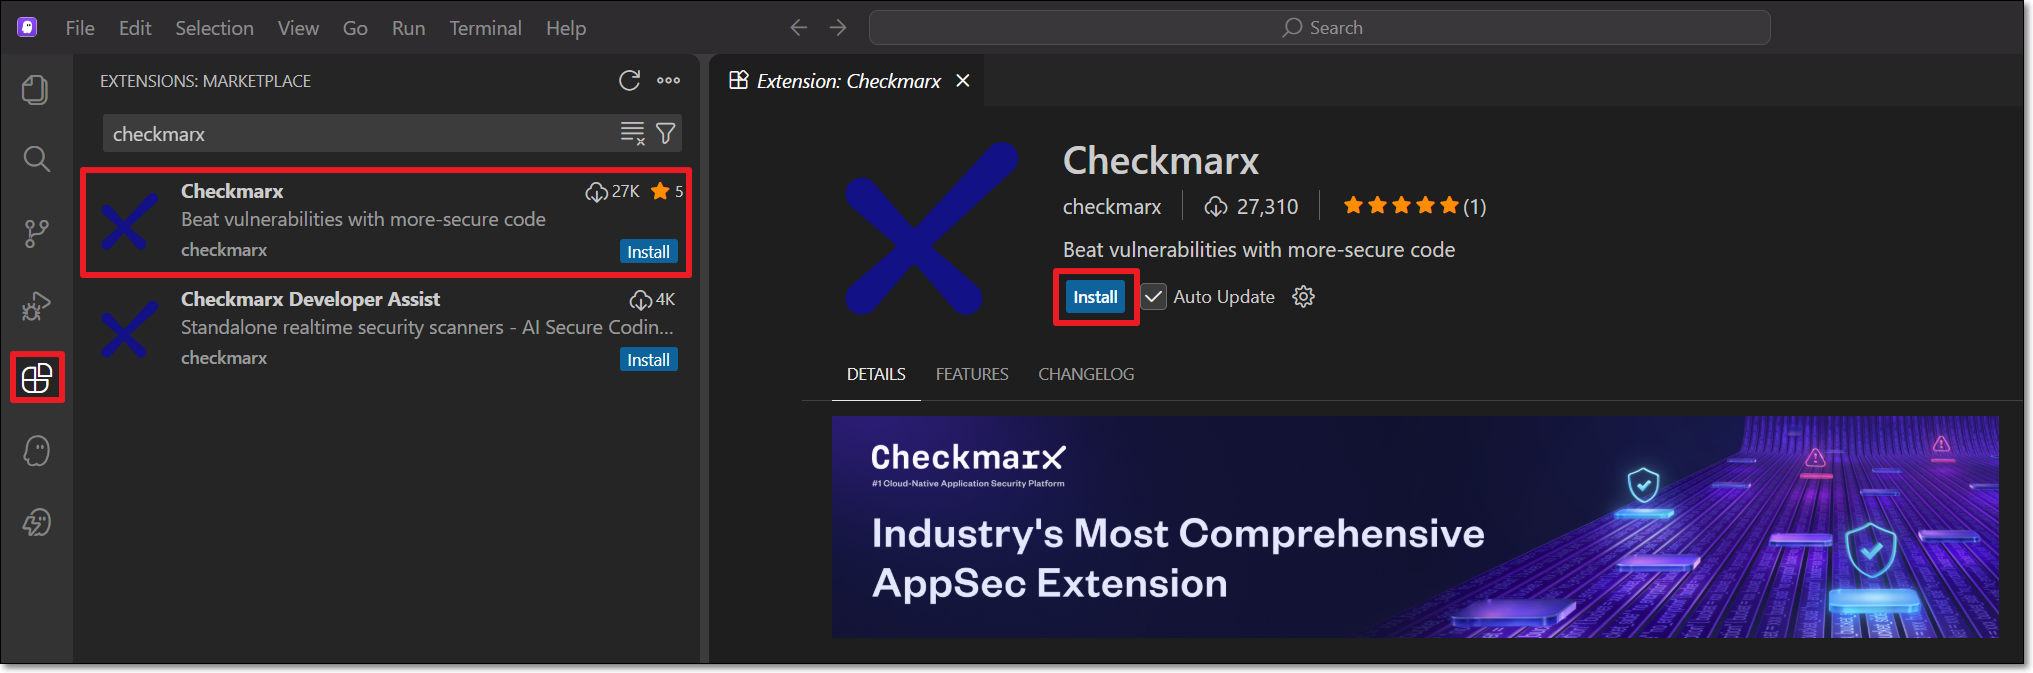
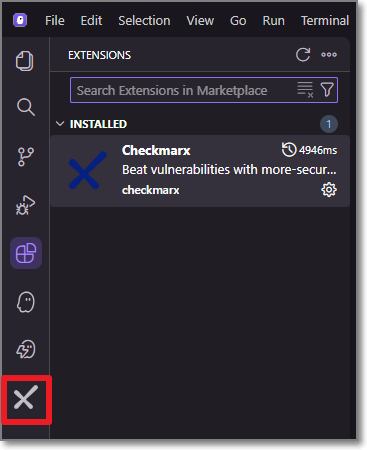
The Checkmarx extension is installed, and the Checkmarx icon appears on the left-side navigation panel.
Setting up the Extension
After installing the plugin, in order to use the Checkmarx One tool you need to configure access to your Checkmarx One account, as described below.
Notice
If you are only using the free KICS Auto Scanning tool and/or the SCA Realtime Scanning tool, then this setup procedure is not relevant. However, for SCA Realtime Scanning tool, if your environment doesn't have access to the internet, then you will need to configure a proxy server in the Settings, under Checkmarx One: Additional Params.
In the Kiro console, in the left-side panel, click the Checkmarx icon.
The Checkmarx One Authentication sidebar opens.
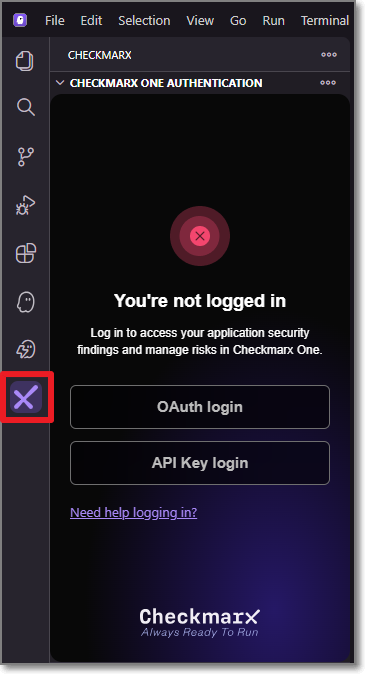
In the Checkmarx One Authentication sidebar, connect to Checkmarx One either using an API Key or login credentials.
Important
In order to use this integration for running an end-to-end flow of scanning a project and viewing results with the minimum required permissions, the API Key or user account should have the Checkmarx One
plugin-scannerrole and the IAMdefault-roles<tenant>role.The permissions included in
plugin-scannerare shown here. If you would like to create a custom role with more granular permissions, you should refer to this list of permissions in order to determine which permissions you will need to assign.Login Credentials
Select the OAuth login button.
The OAuth Log in window opens.
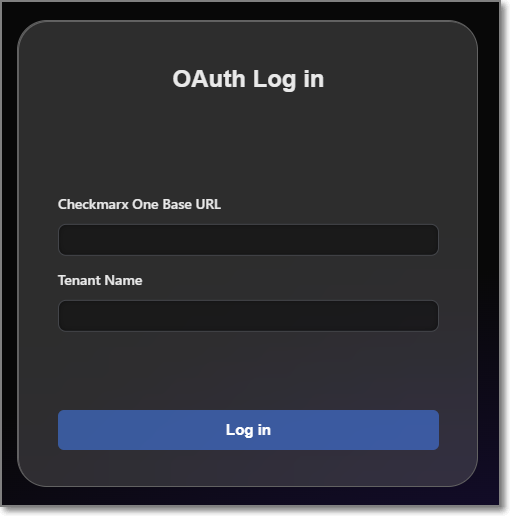
Enter the Base URL of your Checkmarx One environment and the name of your tenant account, then click Log in.
Notice
Once you have submitted a base URL and tenant name, it is saved in cache and can be selected for future use (saves up to 10 accounts).
A confirmation dialog asks for permission to open an external website.
Click on Open to proceed.
Notice
If you would like to prevent this dialog from opening in the future, click on Configure Trusted Domains and then in the Command Pallete click on Trust....
If you are logged in to your account, the system connects automatically. If you are not logged in, your account's login page opens in your browser. Enter your Username and Password, and then your One-Time Password (2FA) to log in.
API Key (see Generating an API Key)
Select the API Key login button.
The API Key Log in window opens.
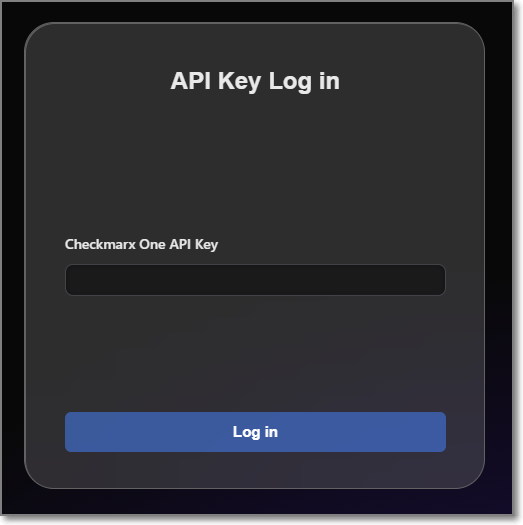
Enter your Checkmarx One API Key and click Log in.
A Checkmarx welcome page is displayed immediately after a successful login. This page provides a selection box to enable Checkmarx One Assist realtime scanners. If you would like to enable this feature, mark the selection box. Either way, close the window and proceed to the next step.
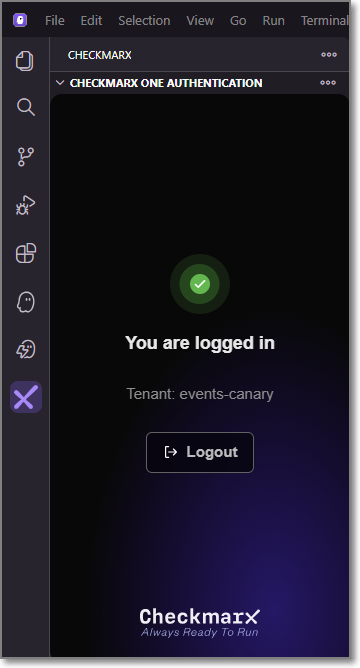
The Checkmarx One Authentication sidebar will now show that you are logged in.
In the Checkmarx One Results sidebar, click on the more options icon in the top right and select Settings.

In the Additional Params field, you can submit additional CLI params. This can be used to manually submit the base url and tenant name if there is a problem extracting them from the API Key. It can also be used to add global params such as
--debugor--proxy. To learn more about CLI global params, see Global Flags.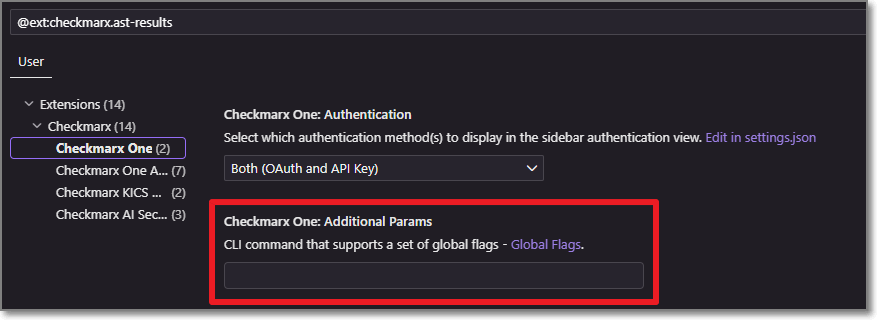
Configuring Checkmarx Developer Assist
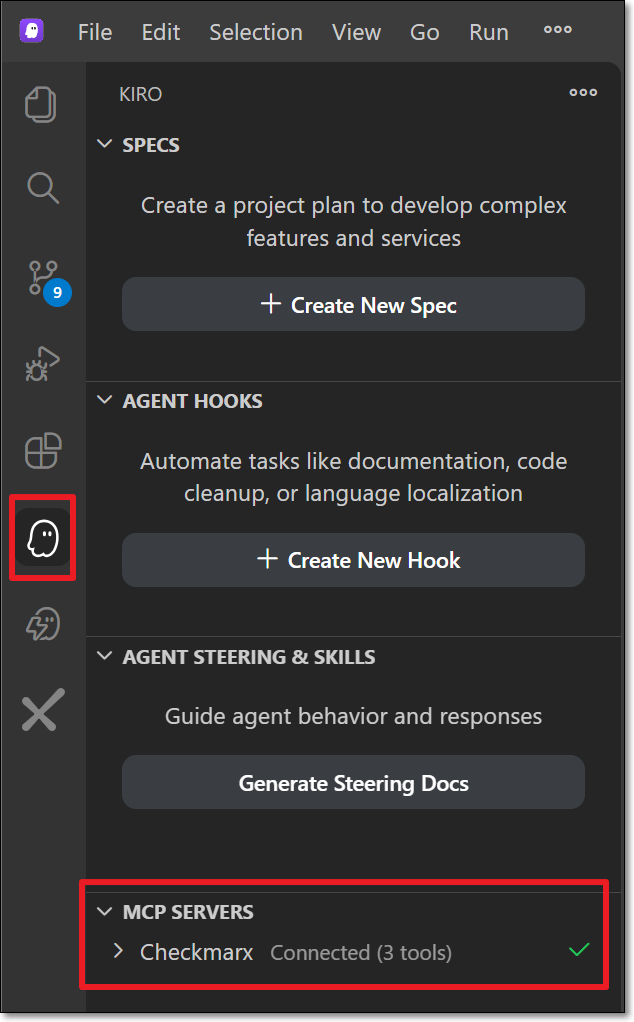
Verify that your MCP server is connected, as follows:
Select the Kiro icon in the left-side navigation panel.
Under MCP servers, confirm that Checkmarx is connected.
You can optionally adjust the Checkmarx Developer Assist Settings as follows:
Add Additional Params to set up custom configuraitions, such as proxy servers or to run in debug mode.
Enable/disable specific realtime scanners. By default, all scanners are enabled.
For IaC realtime scanner you can change the container platform used, Docker (default) or Podman.
The IDE’s built-in AI assistant is enabled by default, and the selected AI Assistant is ignored. To use a different AI Assistant:
Disable Prefer Native AI Assistant.
Select the AI Assistant to use for remediation. Options are Copilot (default) or Claude.
Troubleshooting MCP Installation
In case the automatic installation procedure fails. You can manually configure access to the Checkmarx MCP server using the following procedure.
If it does not already exist, create an mcp.json file at the following location:
${homeDir}\.kiro\settings\mcp.jsonAdd the "checkmarx" mcp using the following snippet, replacing the placeholders as follows:
Checkmarx_one_base_url - The base URL of your Checkmarx One environment.
Checkmarx_one_API_key - An API Key for your Checkmarx One account.
{
   "mcpServers":{
      "checkmarx":{
         "url":"<Checkmarx_one_base_url>/api/security-mcp/mcp",
         "headers":{
            "cx-origin":"Kiro",
            "Authorization":"<Checkmarx_one_API_key>"
         }
      }
   }
}
Click on theKiro icon in the left-side navigation, and under MCP servers, confirm that Checkmarx is connected.
Configuring AI Security Champion
AI Security Champion can be used with the Checkmarx One tool as well as with the KICS Realtime Scanning tool. In order to use AI Security Champion you need to integrate the Kiro extension with your OpenAI account.
Notice
If the Global Settings for your account have been configured to use Azure AI instead of OpenAI, then the credentials are submitted on the account level and it is not possible to submit credentials in your IDE for an alternative AI model.
To set up the integration with your OpenAI account:
Go to the Checkmarx extension Settings and select Checkmarx AI Security Champion.
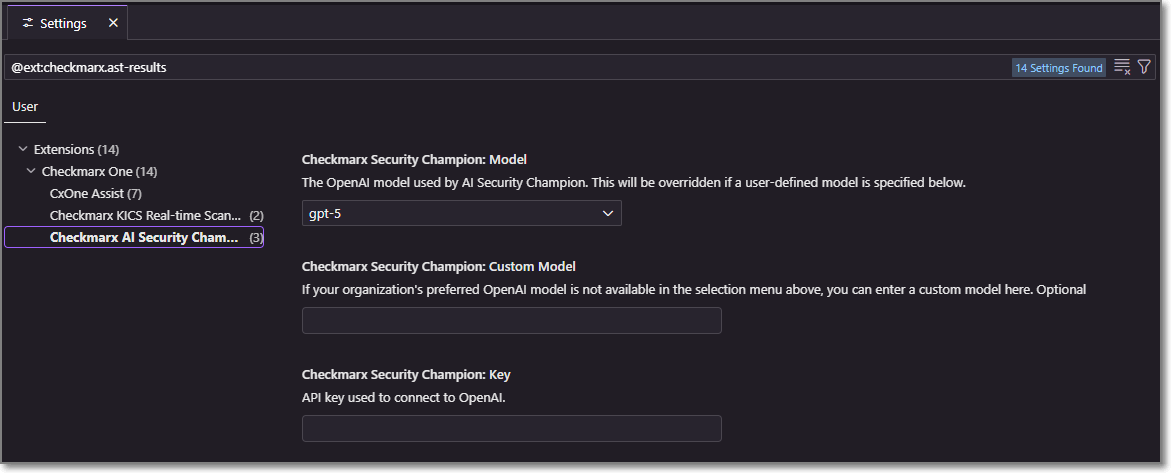
In the Model field, select from the drop-down list the model of the GPT account that you are using.
In the Key field, enter the API key for your OpenAI account.
Notice
Follow this link to generate an API key.
The configuration is saved automatically.
Configuring the KICS Realtime Scanning Tool (Optional)
This tool is activated automatically upon installation and no configuration is required.
Notice
It is not necessary to configure the Checkmarx One Authentication settings in order to use the KICS Realtime Scanning feature.
If you would like to customize the scan settings, you can use the following procedure:
In the VS Code console, go to Settings > Extensions > Checkmarx > Checkmarx KICS Auto Scanning.
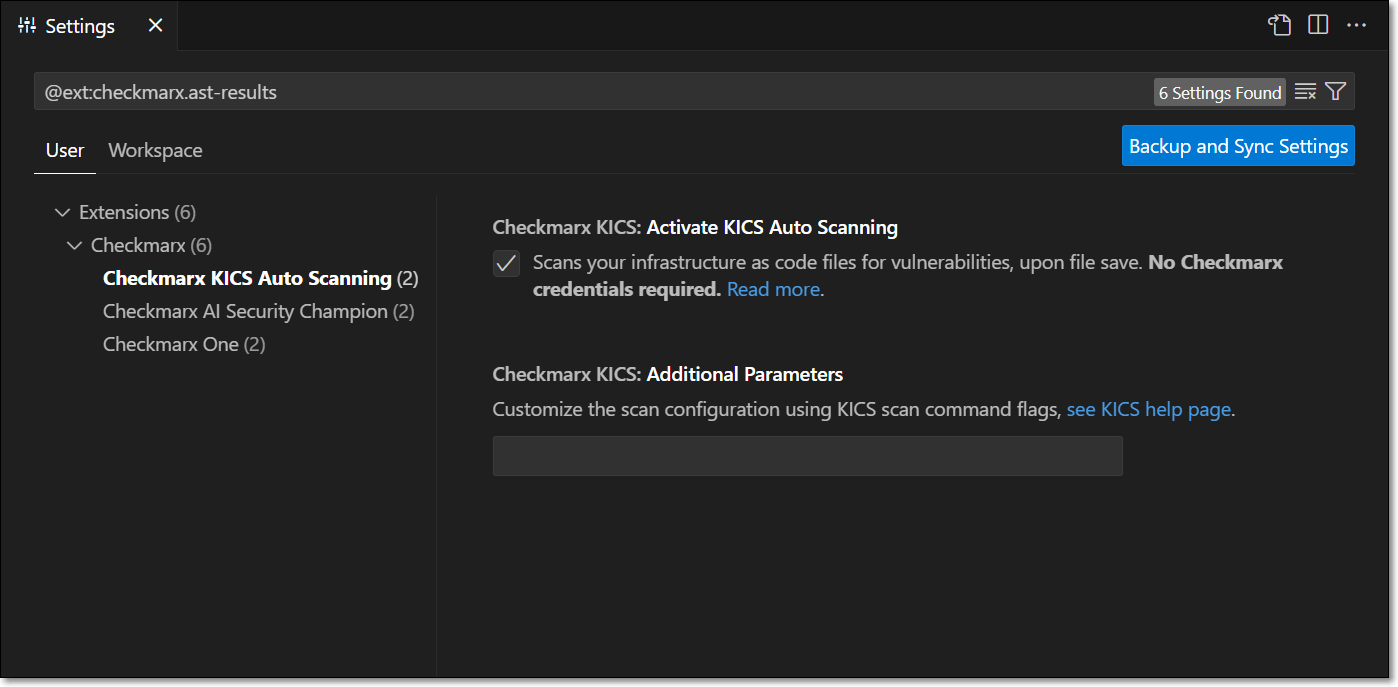
By default the extension is configured to run a KICS scan whenever an infrastructure file of a supported type is opened or saved. If you would like to disable automatic scanning, deselect the Activate KICS Auto Scanning checkbox.
Notice
In this case, you will still be able to trigger scans manually from the command palette.
If you would like to customize the scan parameters, enter the desired flags in the Additional Parameters field. For a list of available options, see Scan Command Options.