Installing and Setting up the Checkmarx Cursor Extension
Installing the Extension
The Cursor Extension is available on the VS Code plugin releases page. For the latest version, click here.
Notice
Although there is no dedicated Checkmarx One plugin for Cursor, the plugin for VS Code has been tested and is effective for use in Cursor.
To install the extension:
Download the .vsix file for your version from the VS Code plugin releases page.
Open Cursor.
In the top navigation click View > Command Palette... or press Cmd + Shift + P (on Mac) or Ctrl + Shift + P (on Windows/Linux).

Type and select Extensions: Install from VSIX...

Select the downloaded .vsix file and click Install.
The Checkmarx One extension is installed, and the scanner options appear on the bottom status bar.
Automatic Updates - Releases Versions and Pre-Release Versions
Once you have installed the Checkmarx extension, it is automatically updated to the latest version whenever we create a new release.
Whenever new code is merged in between full releases, we create nightly pre-release versions. You can choose to install a pre-release version. Once you have installed a pre-release version, you will continue to get automatic updates whenever a new pre-release (or release) is created.
To start getting pre-release versions:
In the main menu, click on the Extensions icon.
Search for the Checkmarx extension, then click Switch to Pre-Release Version.
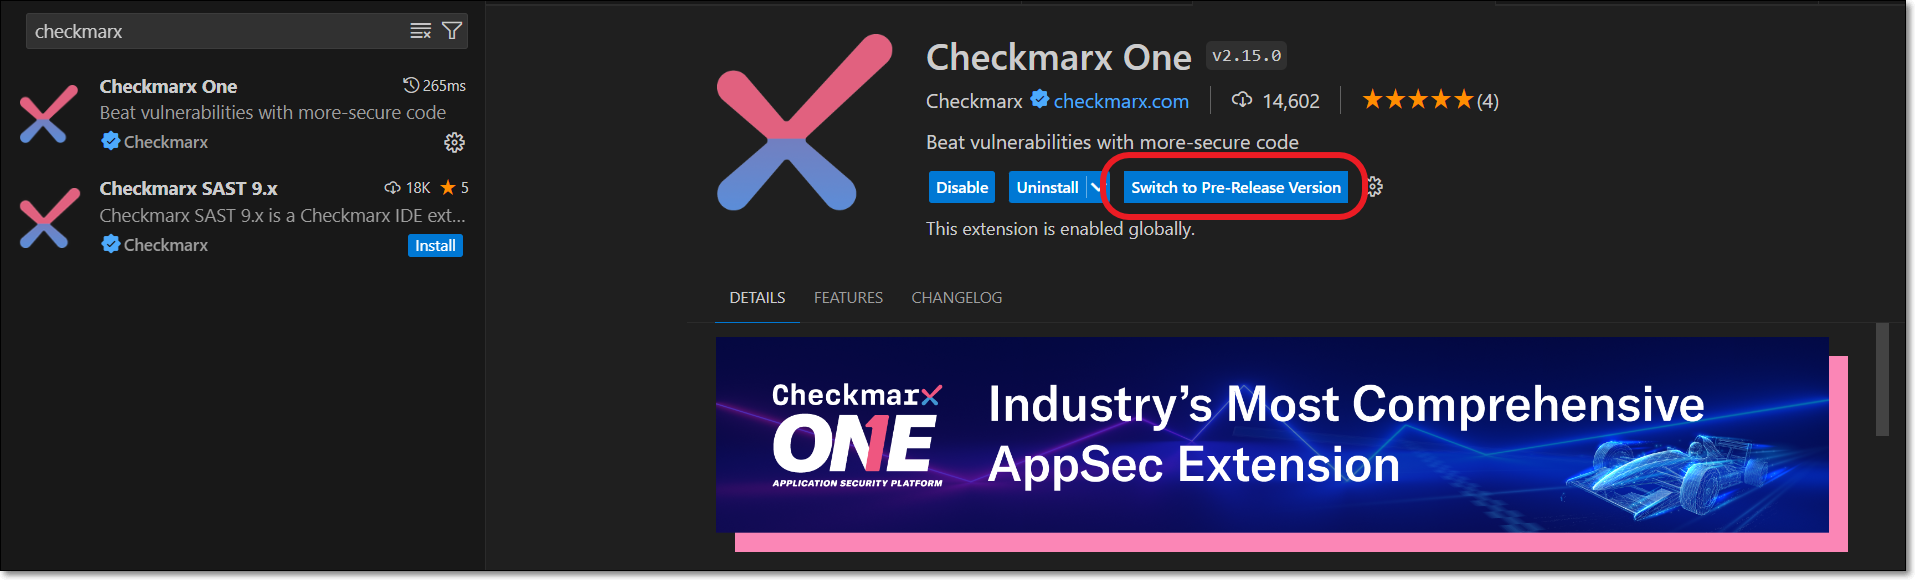
A restart is required to activate the changes.
Notice
You can revert at any time to only getting release versions by clicking on Switch to Release Version.
Setting up the Extension
After installing the plugin, in order to use the Checkmarx One Results tool you need to configure access to your Checkmarx One account, as described below.
Notice
If you are only using the free KICS Auto Scanning tool and/or the SCA Realtime Scanning tool, then this setup procedure is not relevant. However, for SCA Realtime Scanning tool, if your environment doesn't have access to the internet, then you will need to configure a proxy server in the Settings, under Checkmarx One: Additional Params.
In the VS Code console, click on View > Extensions.
On the Checkmarx One extension, click on the Manage icon and then click Settings.

The Checkmarx Settings tab opens.

Click on Authentication.
Notice
There is an alternative method to enter credentials by clicking on Edit in settings.json and adding the credentials to the file, but this is generally not recommended.
A new tab opens showing the Checkmarx One Authentication dialog.

Connect to Checkmarx One either using an API Key or your login credentials.
Login Credentials
Select the OAuth radio button (default).
Enter the Base URL of your Checkmarx One environment and the name of your tenant account, then click Sign in to Checkmarx.
Notice
Once you have submitted a base URL and tenant name, it is saved in cache and can be selected for future use (saves up to 10 accounts).
If you are logged in to your account, the system connects automatically. If you are not logged in, your account's login page opens in your browser. Enter your Username and Password, and then your One-Time Password (2FA) to log in.
API Key
Select the API Key radio button.
Enter your Checkmarx One API Key.
Notice
To create an API key, see Generating an API Key
The roles (permissions) assigned to the API Key are inherited from the user account that generates the key. Therefore, make sure that you are logged in to an account with the appropriate roles.
The following are the minimum required roles for accessing the full functionality of the IDE plugins:
CxOne composite role
ast-scannerIAM role
default-roles
Click Sign in to Checkmarx.
Go back to the Settings tab, and in the Additional Params field, you can submit additional CLI params. This can be used to manually submit the base url and tenant name if there is a problem extracting them from the API Key. It can also be used to add global params such as
--debugor--proxy. To learn more about CLI globalparams, see Global Flags.
Activating Checkmarx AI Secure Coding Assistant (ASCA)
If you would like to activate the ASCA scanner, select the Activate ASCA checkbox.
For more information about ASCA, see AI Secure Coding Assistant (ASCA) for VS Code.
Configuring AI Security Champion
AI Security Champion can be used with the Checkmarx One results tool as well as with the KICS Realtime Scanning tool. In order to use AI Security Champion you need to integrate the VS Code extension with your OpenAI account.
Notice
If the Global Settings for your account have been configured to use Azure AI instead of OpenAI, then the credentials are submitted on the account level and it is not possible to submit credentials in your IDE for an alternative AI model.
To set up the integration with your OpenAI account:
Go to the Checkmarx extension Settings and select Checkmarx AI Security Champion.
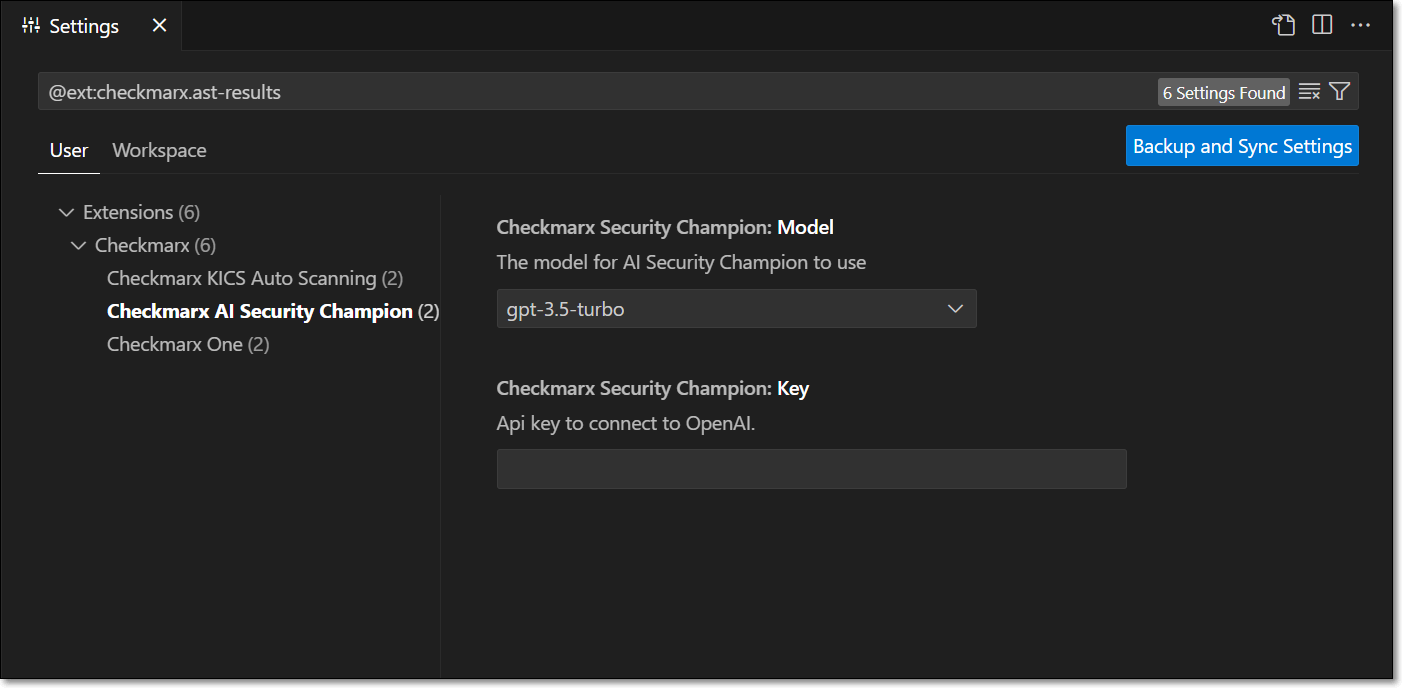
In the Model field, select from the drop-down list the model of the GPT account that you are using.
In the Key field, enter the API key for your OpenAI account.
Notice
Follow this link to generate an API key.
The configuration is saved automatically.
Configuring the KICS Realtime Scanning Tool (Optional)
This tool is activated automatically upon installation and no configuration is required.
Notice
It is not necessary to configure the Checkmarx One Authentication settings in order to use the KICS Realtime Scanning feature.
If you would like to customize the scan settings, you can use the following procedure:
In the VS Code console, go to Settings > Extensions > Checkmarx > Checkmarx KICS Auto Scanning.
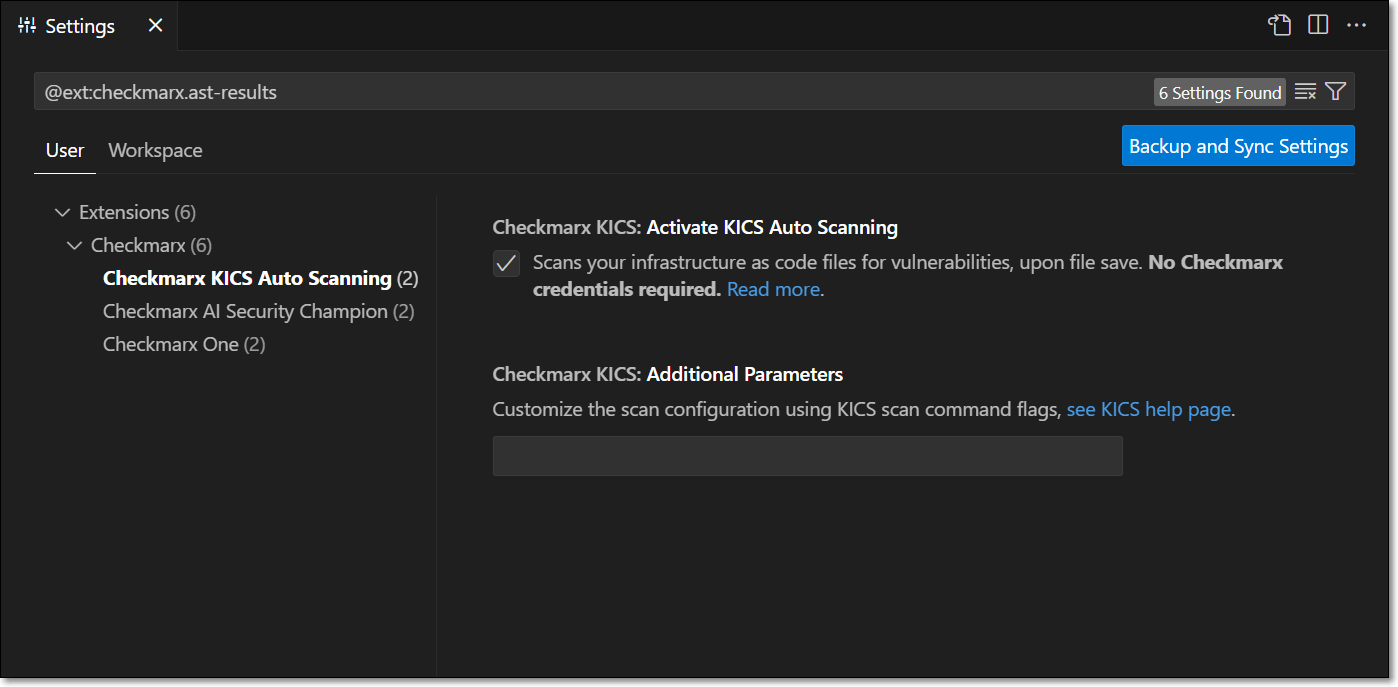
By default the extension is configured to run a KICS scan whenever an infrastructure file of a supported type is opened or saved. If you would like to disable automatic scanning, deselect the Activate KICS Auto Scanning checkbox.
Notice
In this case, you will still be able to trigger scans manually from the command palette.
If you would like to customize the scan parameters, enter the desired flags in the Additional Parameters field. For a list of available options, see Scan Command Options.