Triaging BYOR Results
You can triage vulnerabilities imported through the Bring Your Own Results (BYOR) feature to assess their risk and manage their remediation.
The BYOR Results Viewer enables you to update the state and severity of individual vulnerabilities, attach notes, and apply changes to multiple results. You can also review the Change Log to track previous triage decisions.
Alternatively, you can change the state of imported vulnerabilities through Application Risk Management.
For information about viewing and investigating imported vulnerabilities, see BYOR Results Viewer.
Triaging Results in the BYOR Results Viewer
The BYOR Results Viewer enables you to triage vulnerabilities associated with a project. You can edit individual findings or select multiple findings for bulk triage.
Editing an Individual Result
To triage an imported vulnerability:
Navigate to Workspace > External Imports.
Locate the relevant import and click View.
The BYOR Results Viewer opens.
Click the vulnerability you want to triage.
Click Edit to open the Edit Result panel.
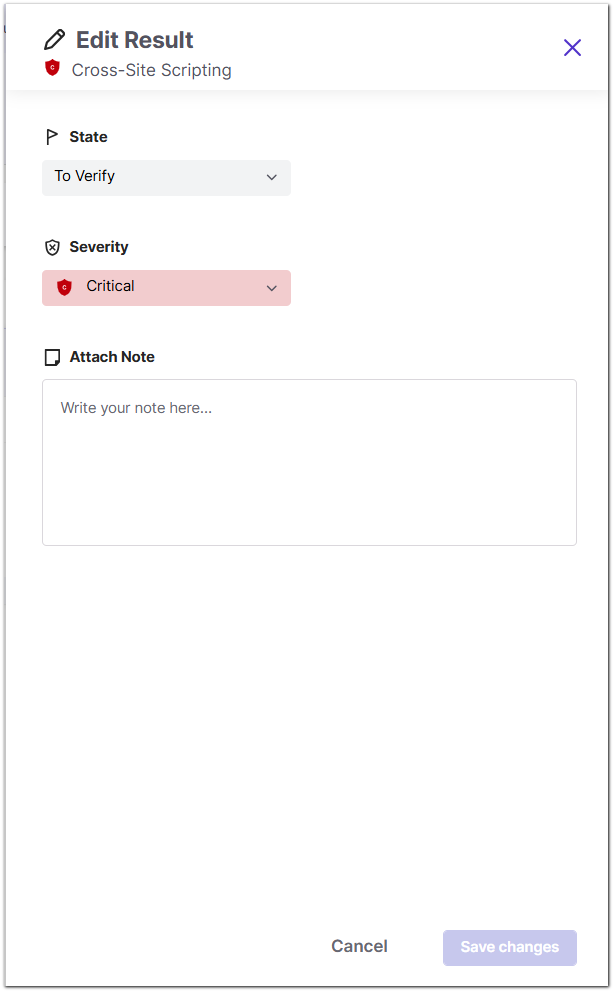
Update the relevant fields:
Field
Description
State
Select the appropriate triage state for the vulnerability. New results are assigned To Verify by default.
Severity
Change the severity assigned to the vulnerability based on your assessment.
Attach Note
Enter a note to document your assessment or explain the changes.
Click Save Changes.
The updated state and severity are reflected in the results.
Bulk Triaging Results
You can select multiple vulnerabilities in the BYOR Results Viewer and apply triage changes to them in a single operation.
To bulk triage vulnerabilities:
Open the relevant import in the BYOR Results Viewer.
Select the checkboxes beside the vulnerabilities you want to triage. You can use the checkbox in the table header to select multiple results.
Click Edit to open the bulk-edit action for the selected results.
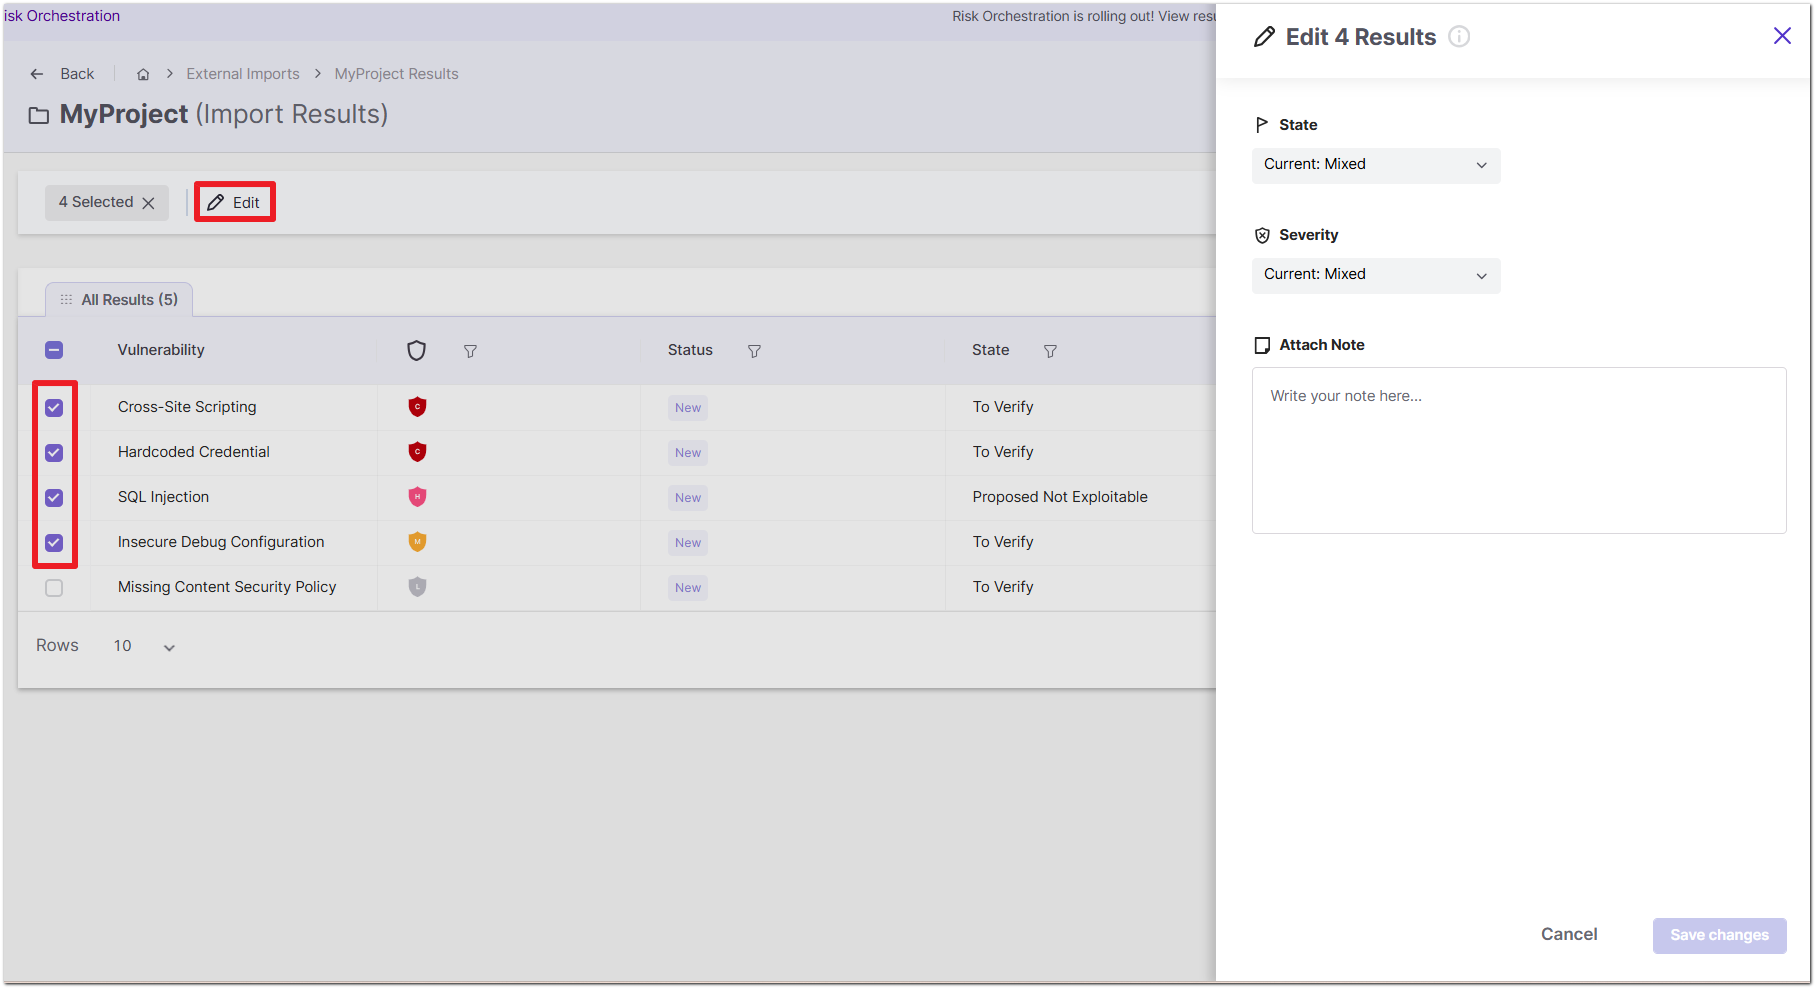
Specify the triage changes you want to apply.
Save the changes.
The selected vulnerabilities are updated according to the specified changes.
Viewing the Change Log
The Edit Result panel includes a Change Log that records previous changes to the vulnerability.
Each entry displays the user who made the change, the date and time, and the recorded state, severity, and any attached notes.
You can use the Change Log to review previous triage decisions and track changes made to a vulnerability over time.
Triaging BYOR Results in Application Risk Management
Imported vulnerabilities can also be triaged through Application Risk Management. In this interface, you can change a vulnerability's State, but not its Severity.
To triage an imported vulnerability:
Navigate to Workspace > Applications.
Open the relevant application and select the Risk Management tab.
Filter the Vulnerability Type column by Imported Results.
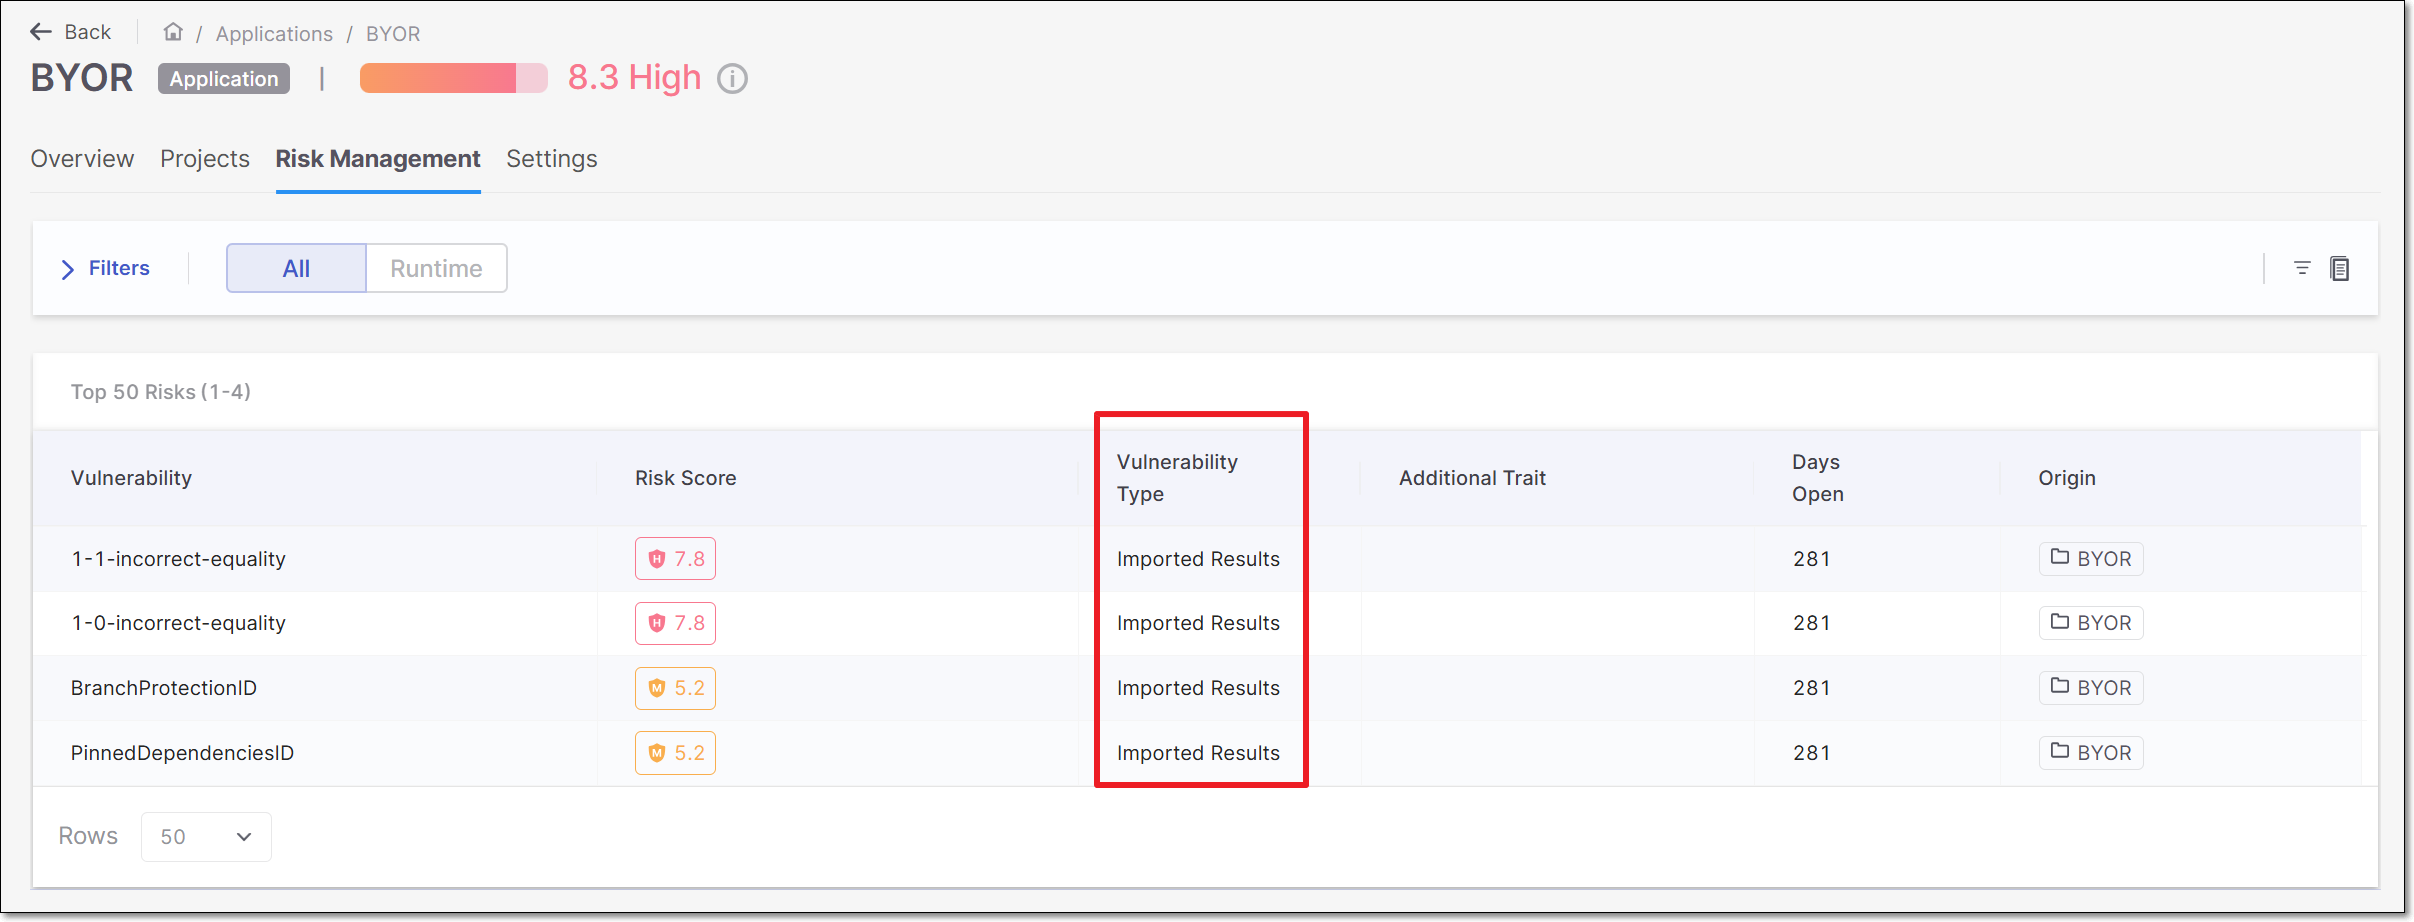
Locate the vulnerability and click View to open its details in a new tab.
Click the current State value in the upper-left corner.
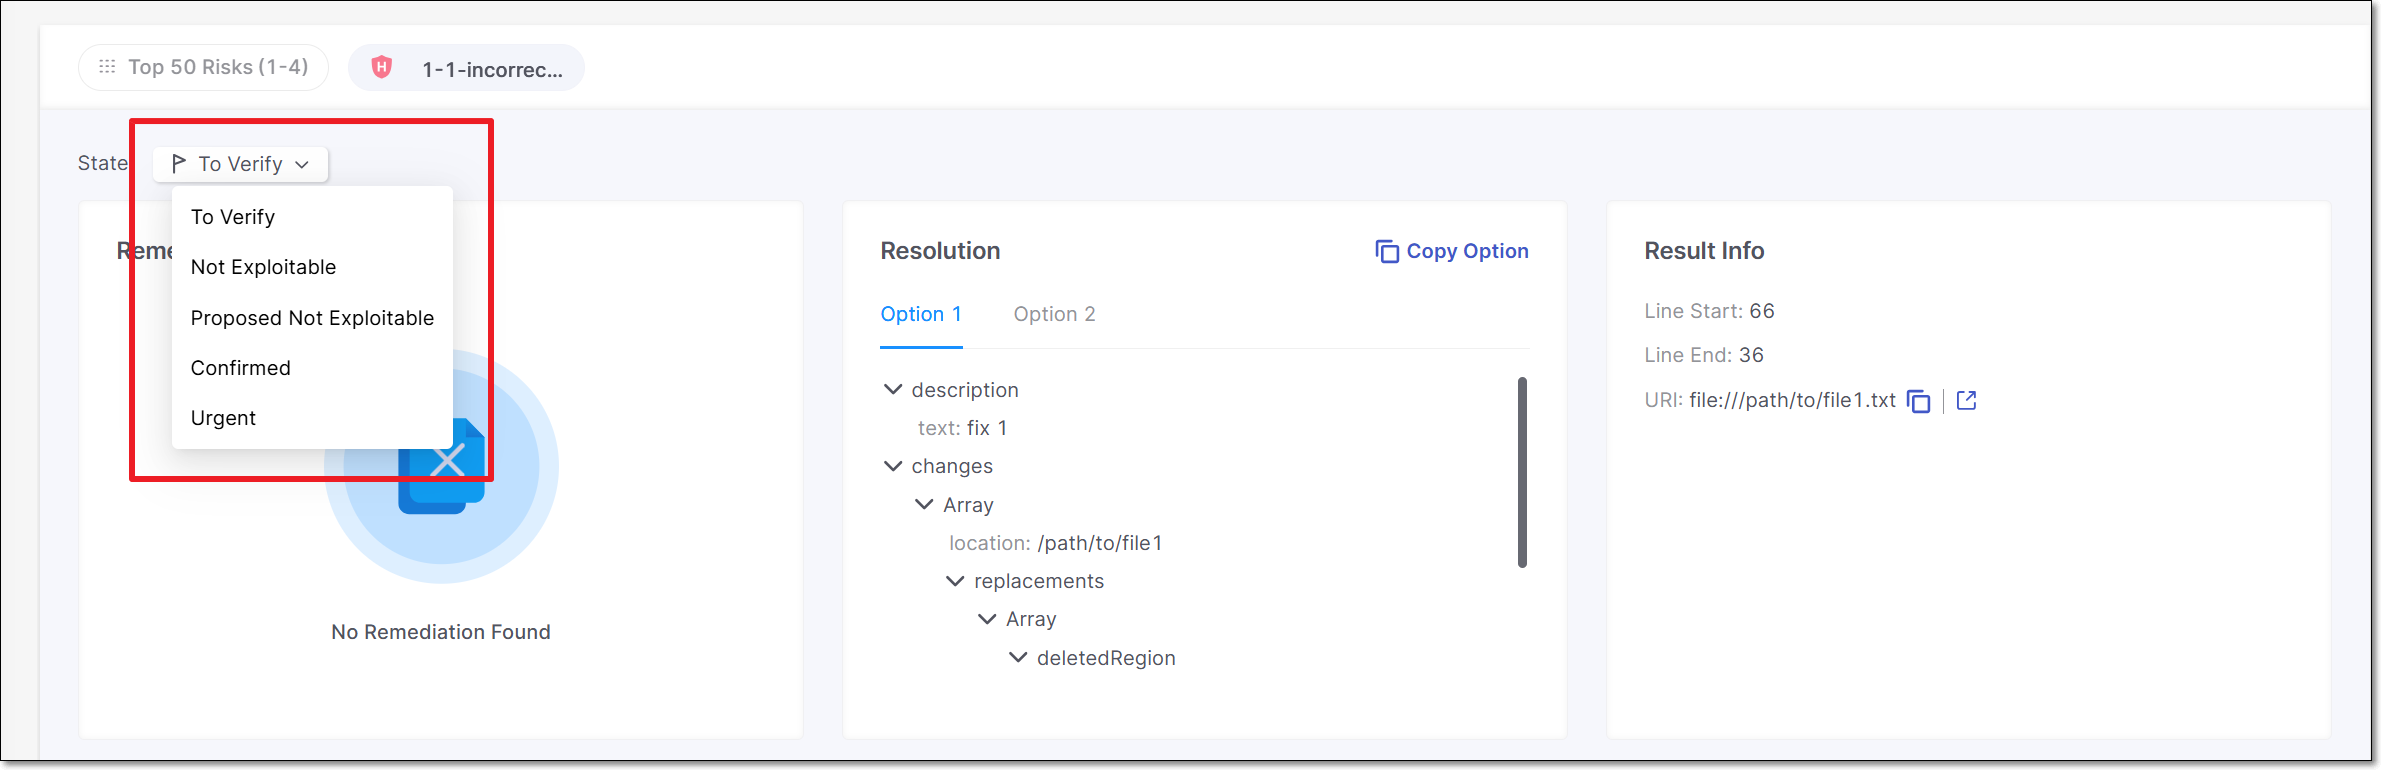
Select the appropriate state from the dropdown.
The available states are:
To Verify — The default state for new vulnerabilities.
Not Exploitable
Proposed Not Exploitable
Confirmed
Urgent
The selected state is applied to the vulnerability and is reflected in the BYOR Results Viewer.
Notice
The Application Risk Management tab displays up to 50 of the most severe risks in the application. To view and triage imported findings that are not included in this list, use the BYOR Results Viewer.
For more information, see Using Application Risk Management.
Identifying Unique Results for BYOR
When you change the state of an imported vulnerability, Checkmarx One associates the triage decision with the unique result. If the same vulnerability is identified in a subsequent import, its previously assigned state is retained.
Vulnerability matching and triage persistence are scoped to individual projects. When the same vulnerability is imported again into the same project, Checkmarx One retains its previously assigned triage state. If the vulnerability is imported into a different project, it is treated as a new finding and does not inherit triage decisions from the original project.
Checkmarx One identifies unique results across imported SARIF files using the following methods:
GUID: If the result in the SARIF file contains a
guidfield, its value is used as the unique result identifier (resultID).Calculated hash: If no GUID is provided, Checkmarx One calculates a hash by combining the following five fields:
Field
Description
toolNameThe name of the tool that generated the result.
ruleIDThe identifier of the rule that triggered the result.
snippetTextThe code snippet associated with the result.
locationURIThe URI of the file or resource where the result was found.
lineStartThe starting line number where the issue was detected.
To ensure that triage decisions are retained across imports, the identifying information must remain consistent for the same vulnerability.
For additional information about importing results, see Bring Your Own Results (BYOR).