Developer Assist for Cursor
Initial Setup and Configuration
Prerequisites
A Checkmarx One account with a Checkmarx One Assist license. Also, Dev Assist must be activated for your tenant account in the Checkmarx One UI under Global Settings > Plugins page. This must be done by an account admin.
Checkmarx One users will need to provide:
an API Key (see Generating an API Key), OR
login credentials (Base URL, Tenant name, Username and Password)
Installing the Extension
The Cursor Extension is available on the Open VSX Registry. You can initiate the installation directly from within Cursor.
Notice
Although there is no dedicated Checkmarx plugin for Cursor, the plugin for VS Code has been tested and is effective for use in Cursor.
Warning
The Checkmarx VS Code extension includes the Checkmarx One Assist feature as part of the Checkmarx One platform experience and should be used by Checkmarx One customers with a Checkmarx One Assist license. The Checkmarx and Checkmarx Developer Assist VS Code extensions are mutually exclusive. To use the Checkmarx extension, ensure that the Checkmarx Developer Assist extension is uninstalled before installation. If you are not a Checkmarx One customer and are trying to install the Checkmarx Developer Assist VS Code extension, see Initial Setup and Configuration.
To install the extension:
Open Cursor.
In the main menu, click on the Extensions icon.
Search for the Checkmarx extension, then click Install for that extension.
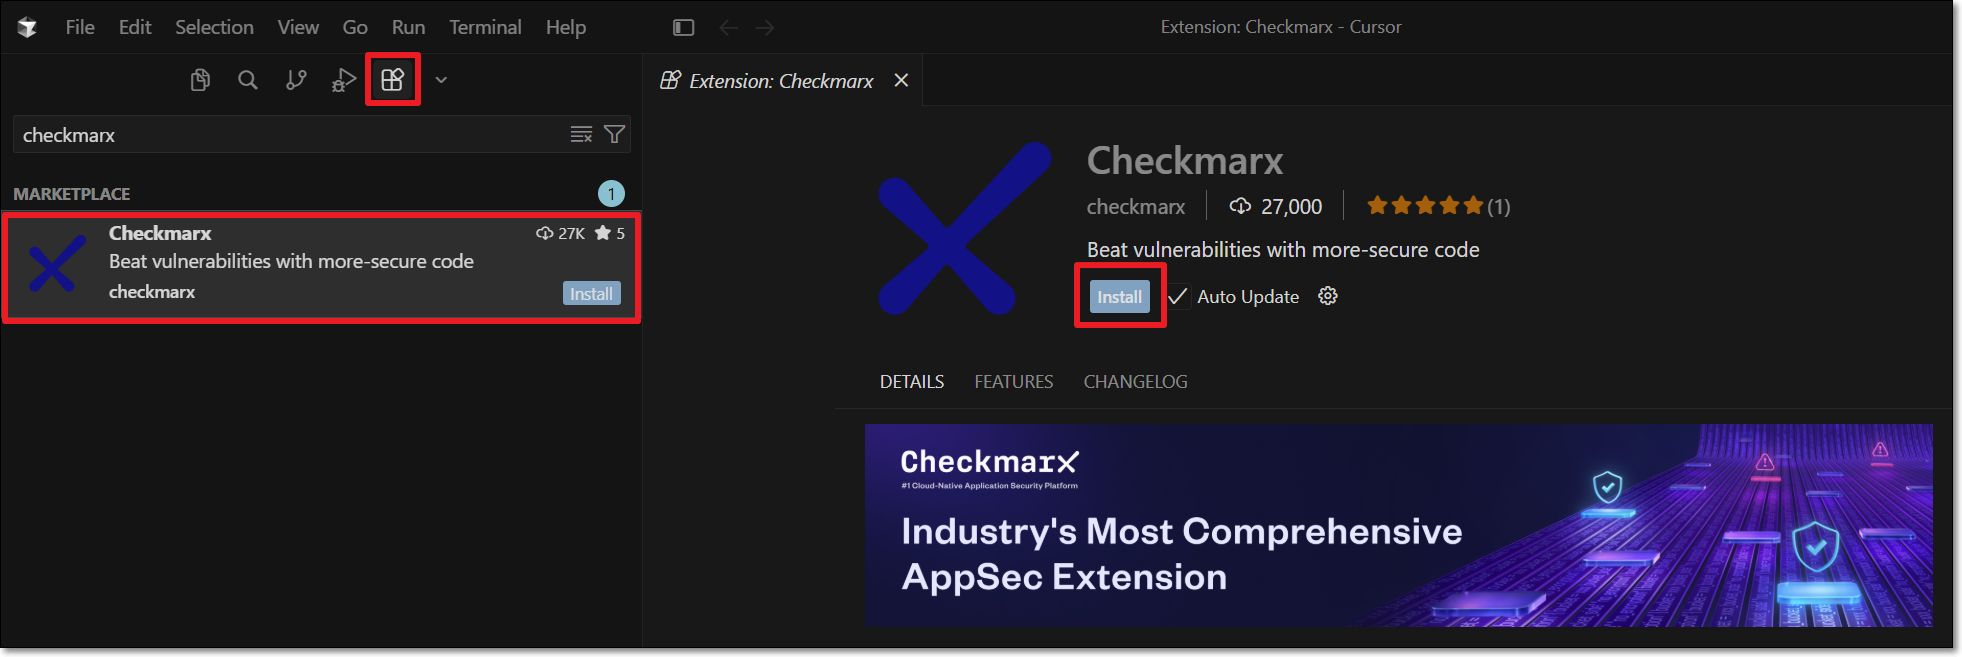
The Checkmarx extension is installed.
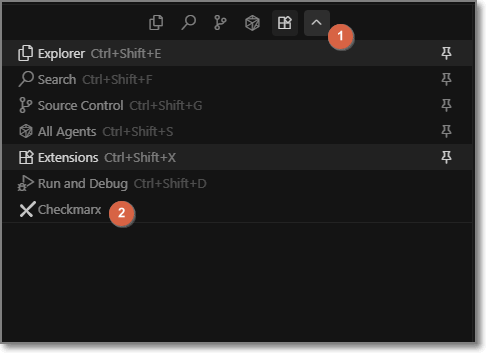
To open the Checkmarx extension, click the arrow box next to the extension icon, and select the Checkmarx icon.
Setting up the Extension
After installing the plugin, in order to use the Checkmarx One Assist tool you need to configure access to your Checkmarx One account, as described below.
Notice
This procedure provides a streamlined setup for users who primarily want to use Checkmarx One Assist. The Checkmarx extension includes additional tools and capabilities that may require further configuration. If you intend to use these additional features, see Installing and Setting up the Checkmarx Cursor Extension
In the Cursor console, click on the Checkmarx extension icon.
The Checkmarx One Authentication sidebar opens:
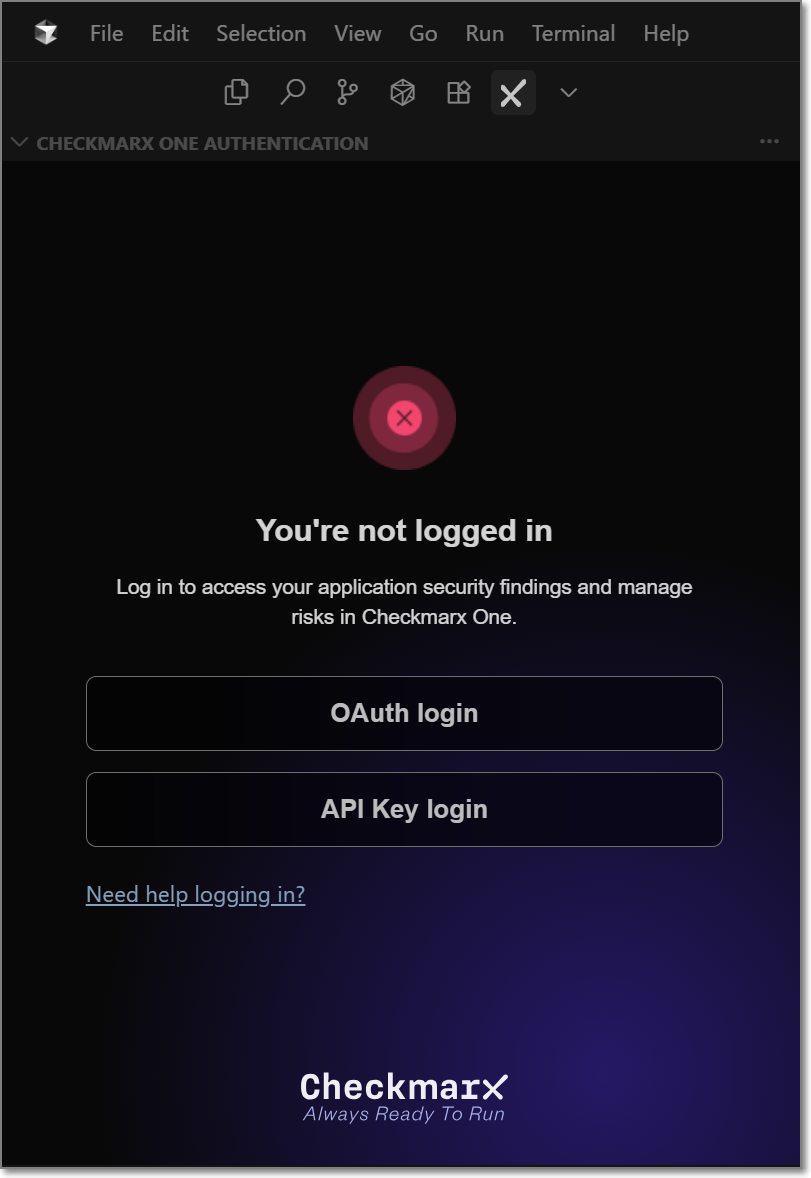
In the Checkmarx One Authentication sidebar, connect to Checkmarx One either using an API Key or login credentials.
Important
In order to use this integration for running an end-to-end flow of scanning a project and viewing results with the minimum required permissions, the API Key or user account should have the Checkmarx One
plugin-scannerrole and the IAMdefault-roles<tenant>role.The permissions included in
plugin-scannerare shown here. If you would like to create a custom role with more granular permissions, you should refer to this list of permissions in order to determine which permissions you will need to assign.Login Credentials
Select the OAuth login button.
The OAuth Log in window opens.
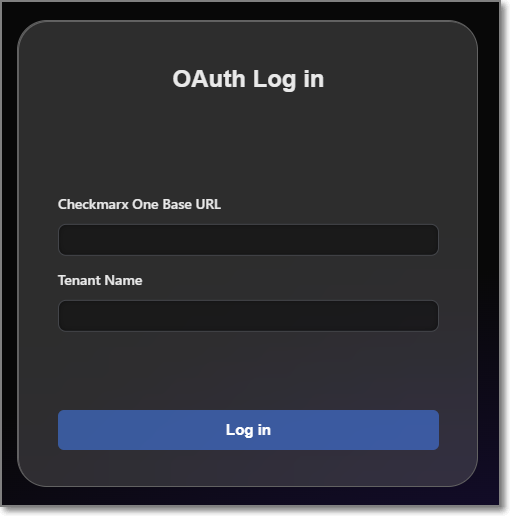
Enter the Base URL of your Checkmarx One environment and the name of your tenant account, then click Log in.
Notice
Once you have submitted a base URL and tenant name, it is saved in cache and can be selected for future use (saves up to 10 accounts).
A confirmation dialog asks for permission to open an external website.
Click on Open to proceed.
Notice
If you would like to prevent this dialog from opening in the future, click on Configure Trusted Domains and then in the Command Pallete click on Trust....
If you are logged in to your account, the system connects automatically. If you are not logged in, your account's login page opens in your browser. Enter your Username and Password and then your One-Time Password (2FA) to log in.
API Key (see Generating an API Key)
Select the API Key login button.
The API Key Log in window opens.
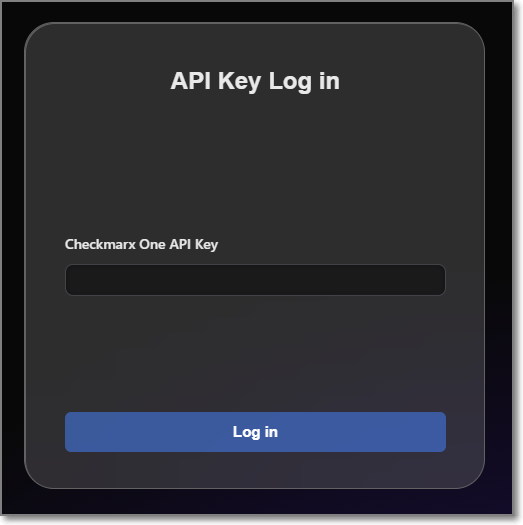
Enter your Checkmarx One API Key and click Log in.
The Checkmarx One Authentication sidebar will now show that you are logged in.
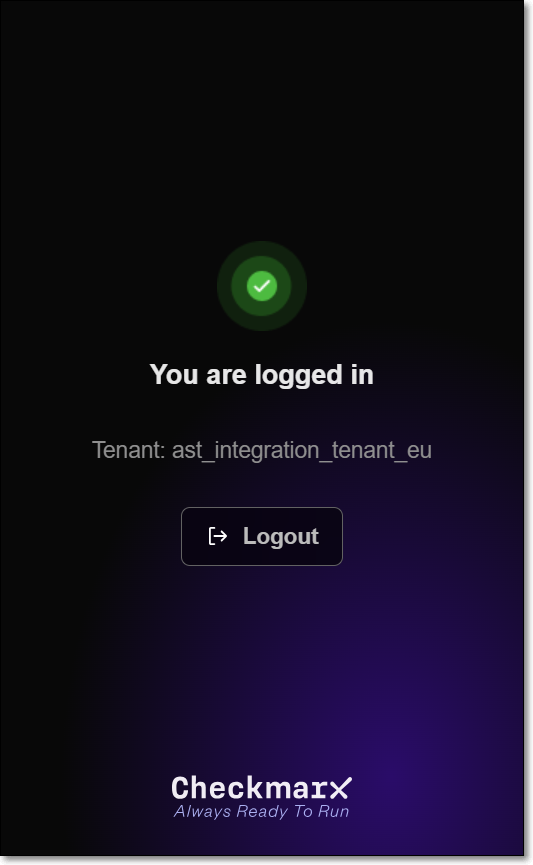
A Checkmarx welcome page is displayed immediately after a successful login.
At the top right of the Checkmarx One Authentication sidebar, select the more options icon and click Settings.
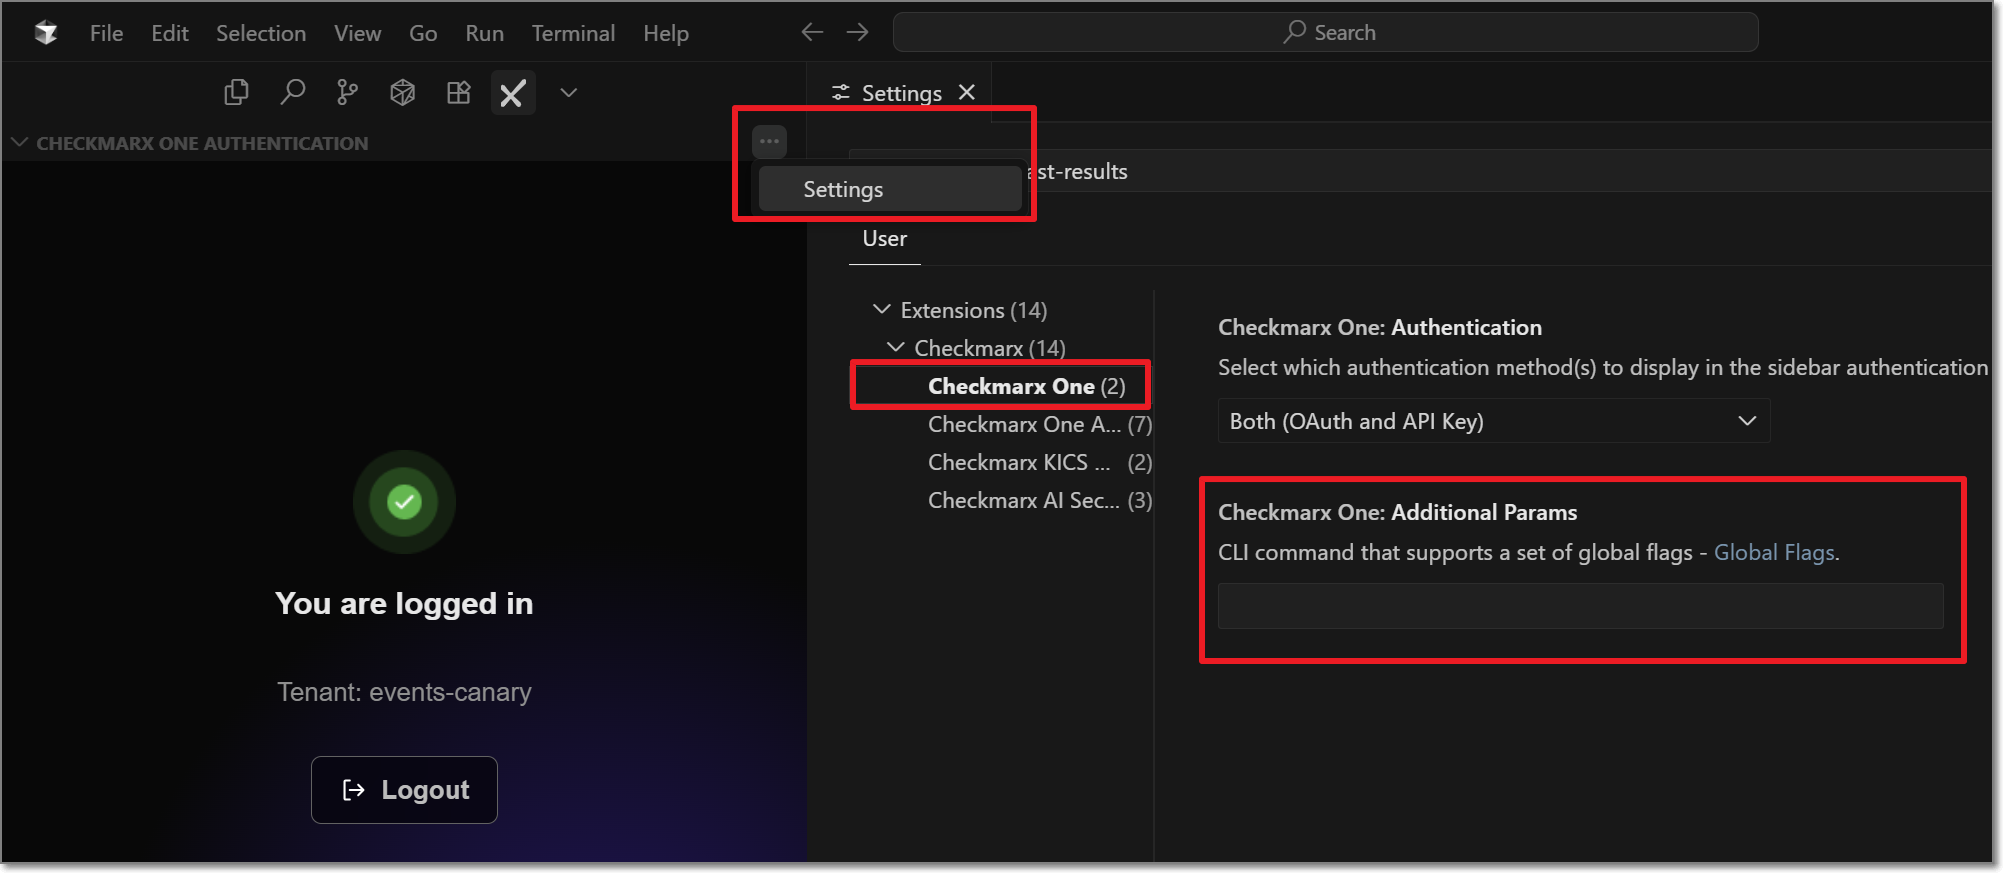
Navigate to the Checkmarx One settings tab, and in the Additional Params field, you can submit additional CLI params. This can be used to manually submit the base url and tenant name if there is a problem extracting them from the API Key. It can also be used to add global params such as
--debugor--proxy. To learn more about CLI globalparams, see Global Flags.
Configuring Checkmarx Developer Assist
Start the Checkmarx MCP server:
Open Cursor Settings and under Tools & MCP > Installed MCP Servers, click Authenticate in the Checkmarx row.
If prompted, allow Cursor to open the Checkmarx web application and complete the authentication process.
You can optionally adjust the Settings for Checkmarx One Assist, as follows:
Add Additional Params to set up custom configuraitions, such as proxy servers or to run in debug mode.
Enable/disable specific realtime scanners. By default, all scanners are enabled.

For IaC realtime scanner you can change the container platform used, Docker (default) or Podman.
The IDE’s built-in AI assistant is enabled by default, and the selected AI Assistant is ignored. To use a different AI Assistant:
Disable Prefer Native AI Assistant.
Select the AI Assistant to use for remediation. Options are Copilot (default) or Claude.
MCP Authentication – Select the authentication method used by the Checkmarx MCP server.
Notice
After changing the authentication method, click Install MCP to update the
mcp.jsonconfiguration.OAuth (default) when the MCP server starts, a browser-based login session is initiated to authenticate with your Checkmarx One account.
Token Based uses the API key associated with your current Checkmarx One login and avoids browser authentication when starting the MCP server.
Warning
When this method is used, the API key is stored in the
mcp.jsonfile.
Troubleshooting - Manually Configuring the Checkmarx MCP Server
The extension normally creates and configures the mcp.json file automatically. Manual configuration is only required if automatic configuration fails or if you prefer to create the MCP configuration yourself.
Open Cursor Settings and under Tools & MCP > Installed MCP Servers, click + New MCP Server. An
mcp.jsonfile is opened in the editor.Configure the
mcp.jsonfile for the authentication method that you want to use:OAuth (default) - Authenticates through your Checkmarx One account when the MCP server starts.
{
  "mcpServers": {
    "Checkmarx": {
      "url": "<Checkmarx_one_base_url>/api/security-mcp/mcp/<tenant-name>",
      "auth": {
        "CLIENT_ID": "cx-mcp-client"
      }
    }
  }
}
Token Based - Authenticates using a Checkmarx One API key stored in the mcp.json file. Browser authentication is not required when starting the MCP server.
{
   "mcpServers":{
      "checkmarx":{
         "url":"<Checkmarx_one_base_url>/api/security-mcp/mcp",
         "headers":{
            "cx-origin":"Cursor",
            "Authorization":"<Checkmarx_one_API_key>"
         }
      }
   }
}
Save the file.
For OAuth authentication method, you need to manually start the MCP server:
Open Cursor Settings and under Tools & MCP > Installed MCP Servers, click Connect in the Checkmarx row.
When prompted, allow Cursor to open the Checkmarx web application and complete the authentication process.
Using Developer Assist in Cursor
Realtime Scanning
Identify vulnerabilities in realtime during IDE development of both human-generated and AI-generated code. Our super-fast scanners run in the background whenever you edit a relevant file. Our scanners identify vulnerabilities and unmasked secrets in your code. We also identify vulnerable or malicious container images and open source packages used in your project. Results are marked as Problems which are highlighted in the code and annotated with identifying icons.
Learn more about Dev Assist realtime scanners here
AI Remediation
How to Remediate Risks Using AI
The following procedure explains how to remediate risks by clicking on the Fix button for a particular risk. Alternatively, you can request remediation via chat with your AI Agent, as decribed below.
When Checkmarx realtime scanners identify a risk, it is flagged as a Problem, which is marked in the code with a squiggly underline and annotated in the margin with an icon that indicates the type of risk.
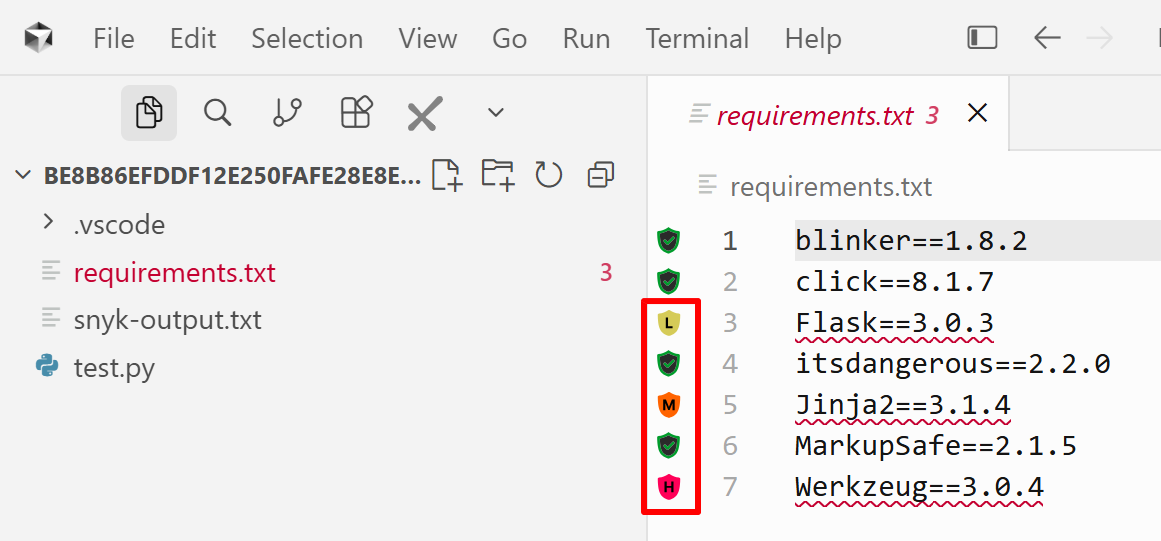
Hover over the vulnerable line of code.
The Checkmarx dialog opens.
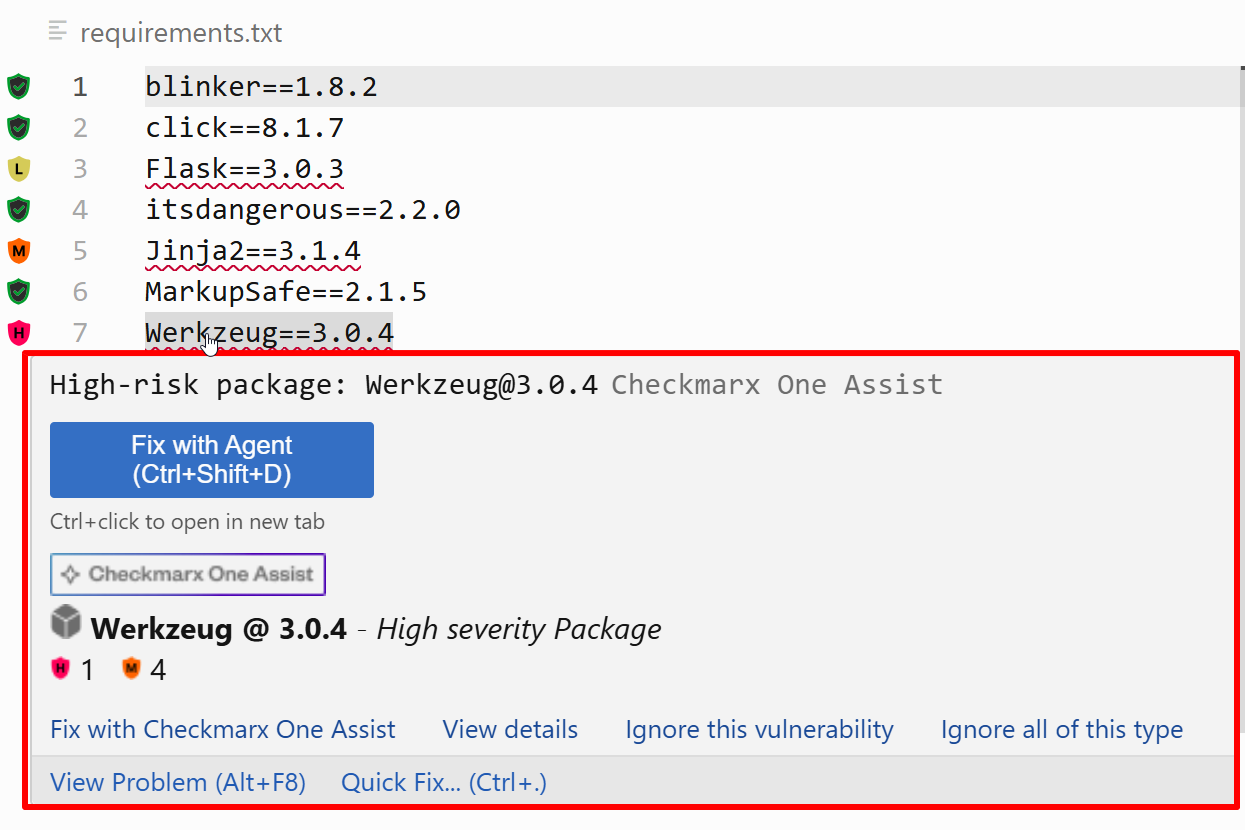
Click on Fix with CxOne Assist.
A Copilot session opens in the side panel and all relevant info is sent for analysis.
Notice
Depending on your IDE configuration, you may need to click Continue several times in order to complete the process.
Copilot automatically makes the necessary changes in the code in order to remediate the risk.
If you approve the change, click Accept.
The change is made and the code is rescanned to verify that the risk is no longer present.
If you want to improve on the suggestion, click Undo. You can then chat with Copilot to determine the best way of remediating the code.
Remediation via Chat
You can submit a request for CxOne Dev Assist remediation via natural language chat with your AI Agent. Just say that you want to fix a security risk and indicate which risk or risks you want to fix. Your AI will automatically route the request to the Checkmarx MCP and send all relevant data for analysis in order to generate the suggested remediation. The following are some examples of valid requests:
"Fix the vulnerability in line 26"
"Fix all critical vulnerabilities"
"Fix all SQL Injection risks"
"Remediate all vulnerable packages"
"Correct all critical issues in my JavaFile.java"
Things to Know About Dev Assist Chat
No need to mention "Checkmarx" explicitly; once Dev Assist is installed and running all remediation requests are handled via Checkmarx MCP
Support for multi-language prompts
Effective in single message context. Improved accuracy in context of an existing thread or finding.
By default, requests are interpreted in the context of the current open file (e.g., line 26 of the open file). You can specify a different file in your workspace.
Ignoring Risks
In order to help you to focus on actionable risks, Checkmarx Dev Assist enables marking risks as Ignore, so that the risks will no longer be shown in your IDE. You can Revive a risk at any time to resume showing that risk. This can be applied to a specific instance of a risk or it can be applied to all instances of that risk in your project. You can revive the risk at any time to resume showing risks for that package.
Notice
For risks identified in open source packages, a risk instance refers to the entire package that the vulnerability is associated with.
To Ignore a risk
When Checkmarx realtime scanners identify a risk, it is flagged as a Problem, which is marked in the code with a squiggly underline and annotated in the margin with an icon that indicates the type of risk.
Hover over the vulnerable line of code.
The Checkmarx dialog opens.
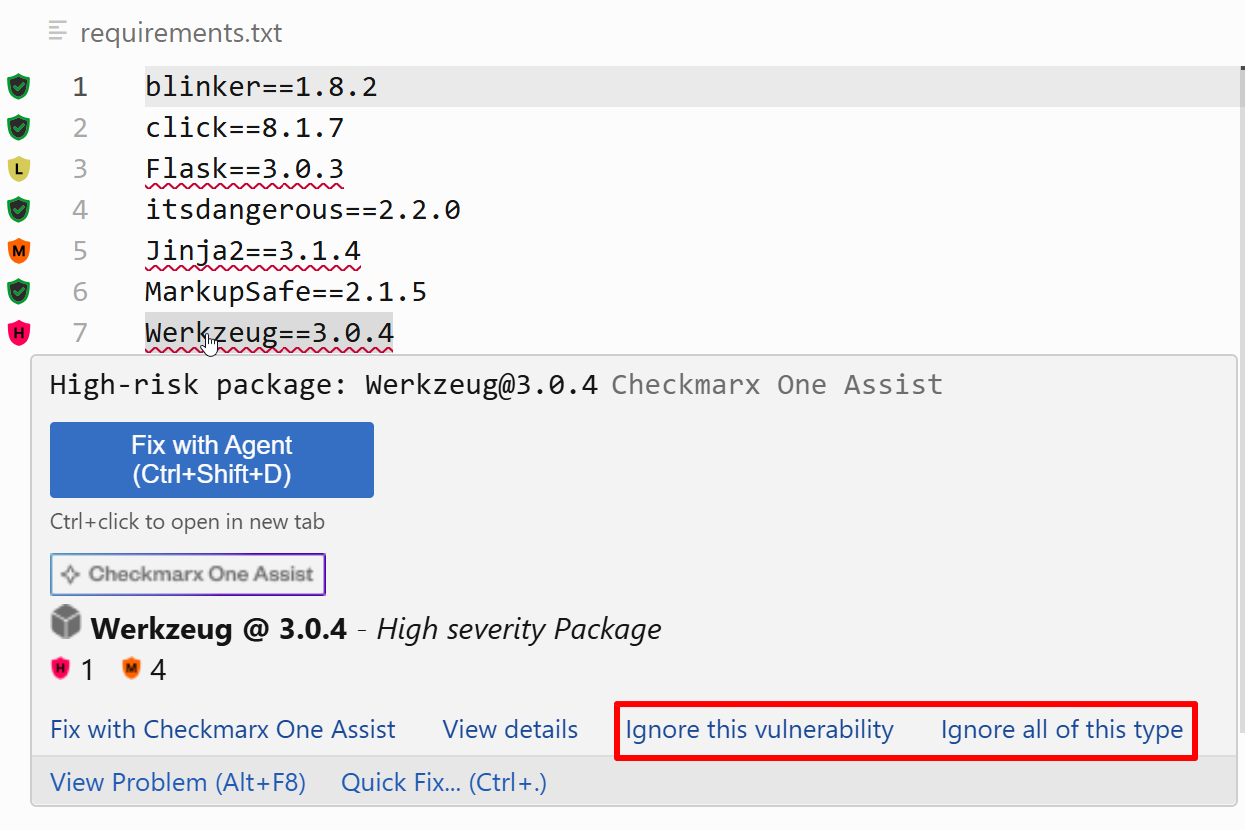
To ignore the risk in this particular instance, click on Ignore this vulnerability.
To ignore all instances of the risk, click on Ignore all of this type.
To revive a package:
Click on the Ignore icon in the bottom bar.

The Ignored Vulnerabilities tab opens.
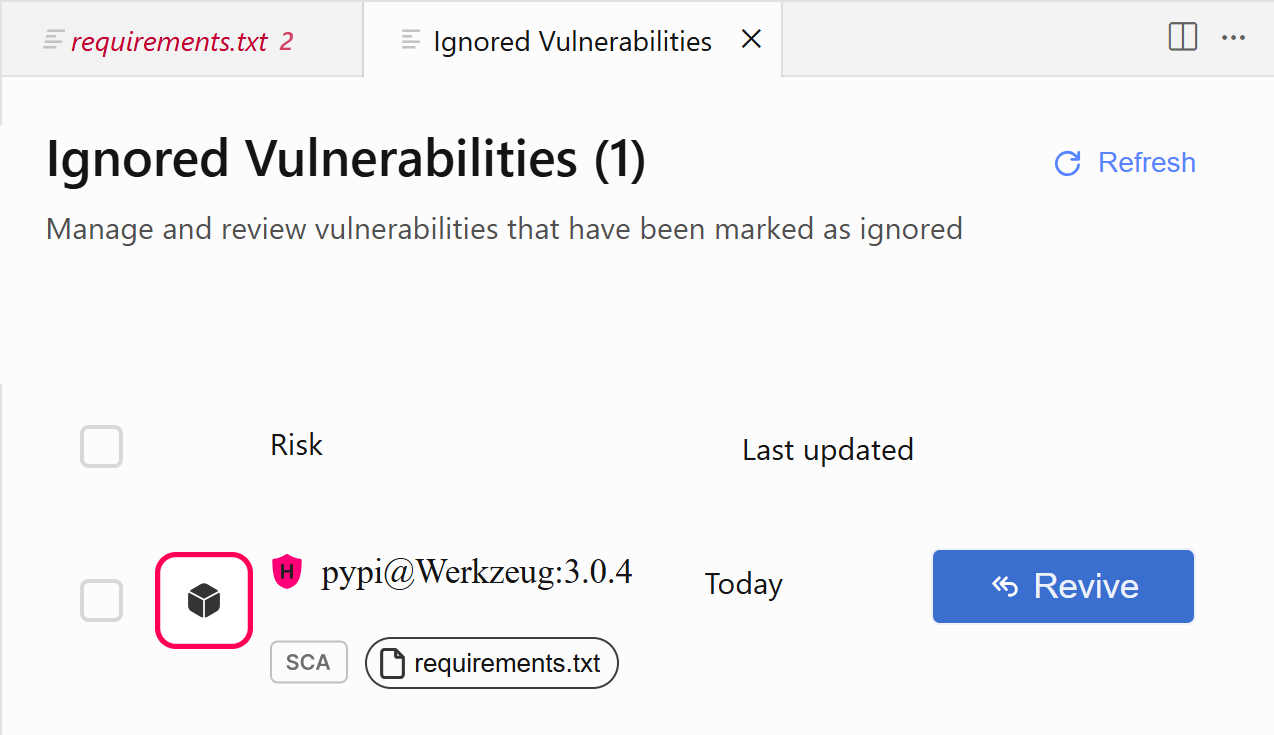
For the desired vulnerability click on the Revive button.
Notice
This can also be done as a bulk action for all selected items.