Installing and Setting up the Checkmarx One JetBrains Plugin
Installing the Plugin
The Checkmarx One JetBrains Plugin is available on the JetBrains marketplace, and can be installed directly from your JetBrains IDE console.
 |
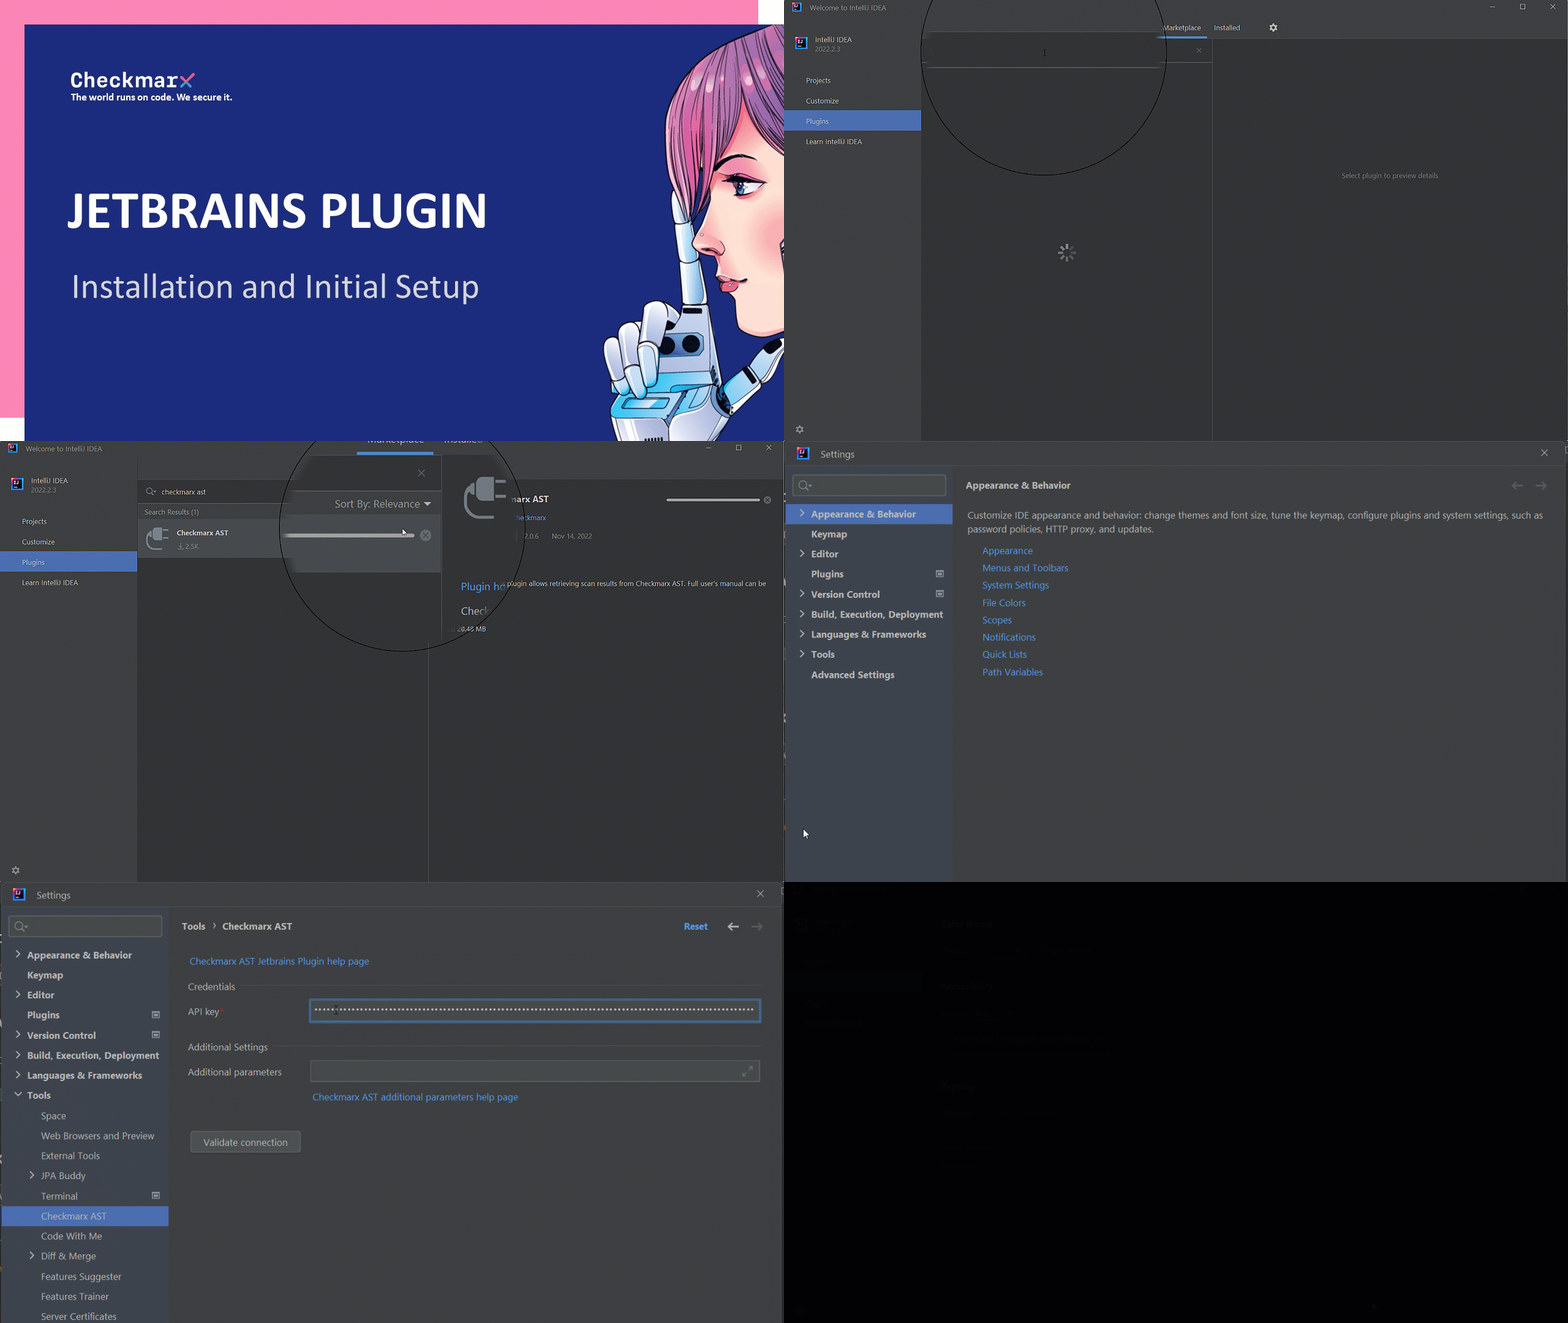
GIF - How to install and set up the plugin
To install the plugin from the marketplace:
Open your JetBrains IDE console (e.g., IntelliJ IDEA).
In the main menu click on Plugins.

Search for the Checkmarx AST plugin, then click Install for that plugin.

Follow the prompts to run the installation.
The plugin is installed.
Automatic Updates - Releases Versions and Pre-Release Versions
Once you have installed the Checkmarx plugin, it is automatically updated to the latest version whenever we create a new release.
Whenever new code is merged in between full releases, we create nightly pre-release versions. You can choose to install a pre-release version. Once you have installed a pre-release version, you will continue to get automatic updates whenever a new pre-release (or release) is created.
Warning
Pre-release versions haven't been tested and approved for distribution. Therefore, there is some degree of risk involved in using pre-release versions.
To start getting pre-release versions:
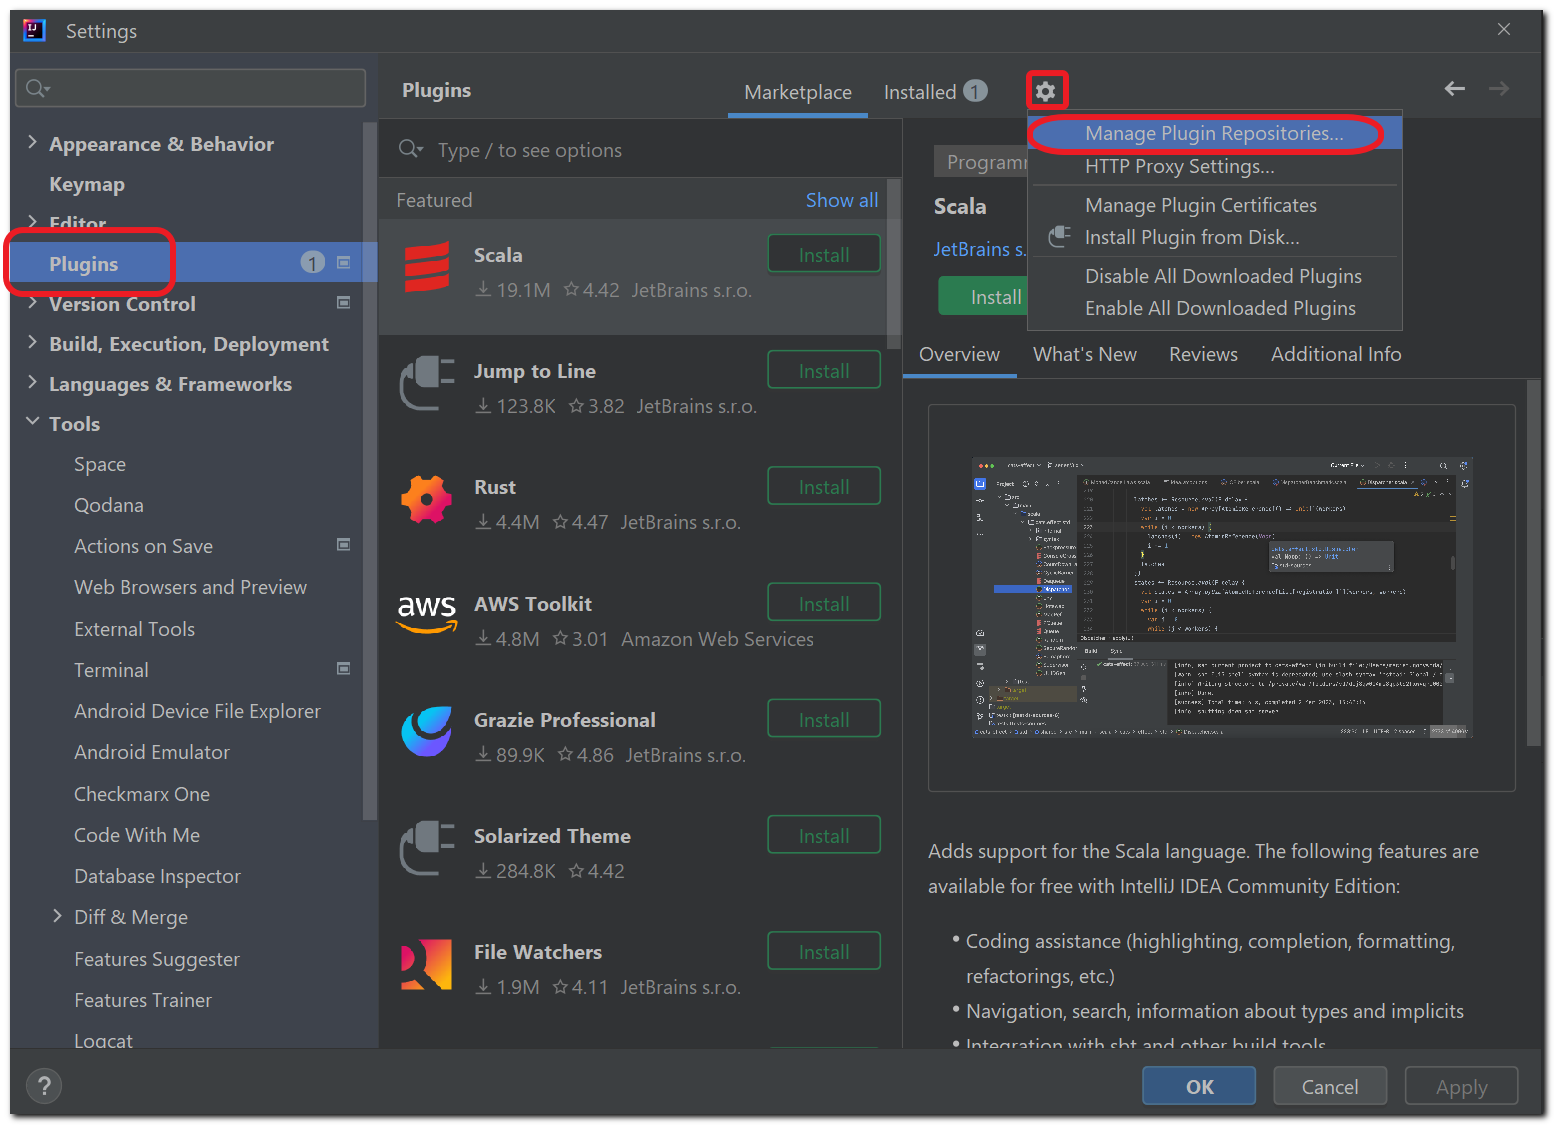
Go to File > Settings > Plugins and click on the
 icon in the header bar.
Select Manage Plugin Repositories.

In the Custom Plugin Repositories dialog click "+" and enter
https://plugins.jetbrains.com/plugins/nightly/17672/, then click OK.Search for the Checkmarx plugin.
The latest pre-release version is shown.
Click Update and then click OK.
Notice
You can revert at any time to only getting release versions by opening the Custom Plugin Repositories dialog and deleting the nightly channel.
Setting up the Plugin
If you would like to use a proxy server, you can set up a proxy variable in one of two ways. See below.
To set up the plugin:
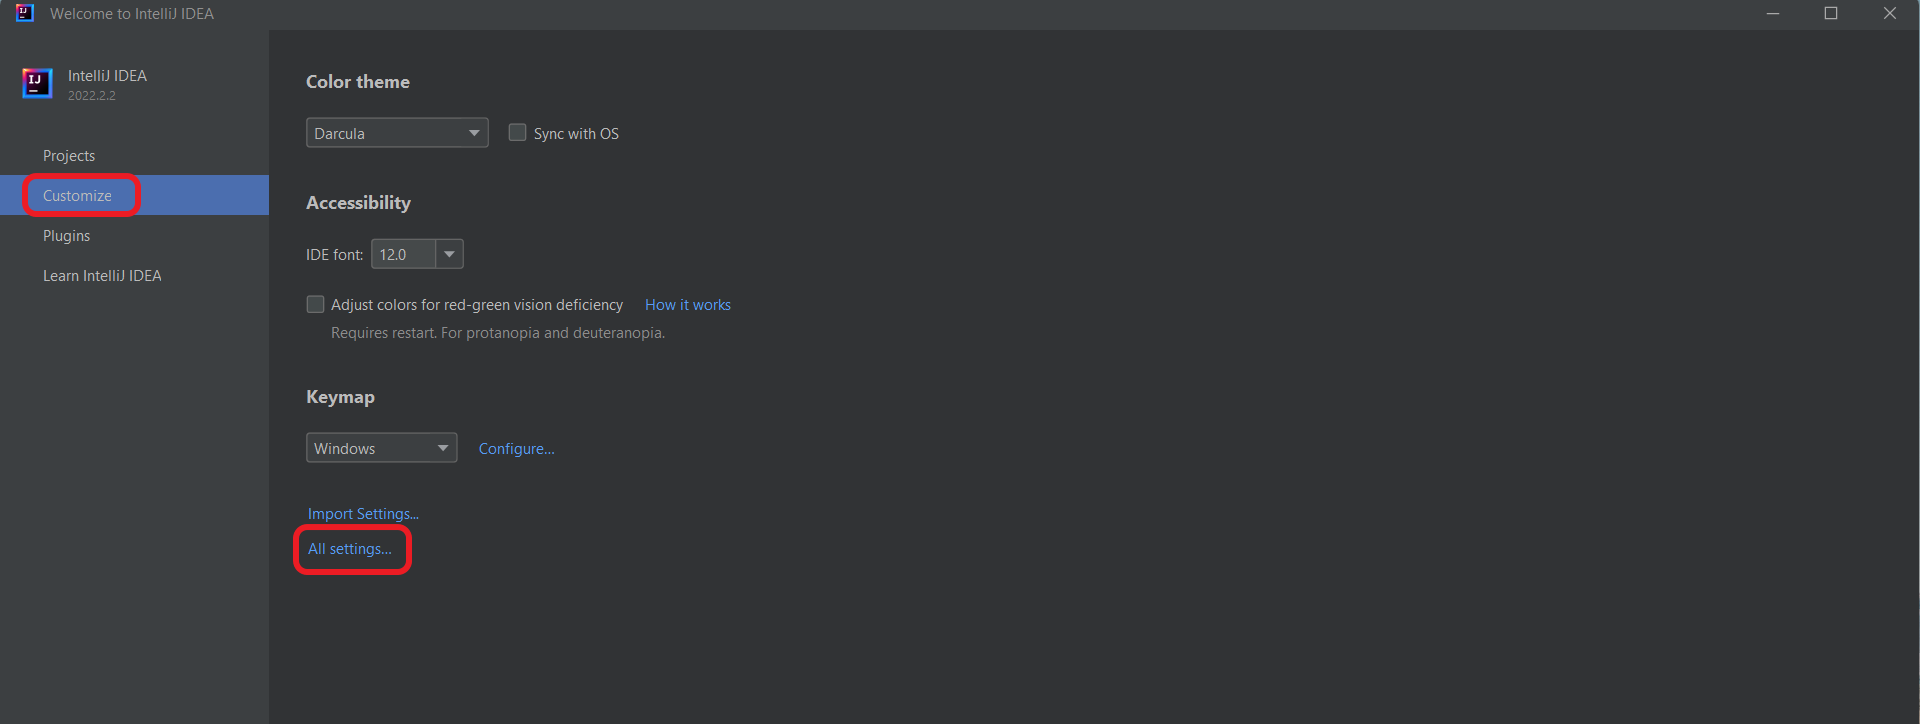
In the main navigation, click Customize > All settings.

The Settings window is shown.
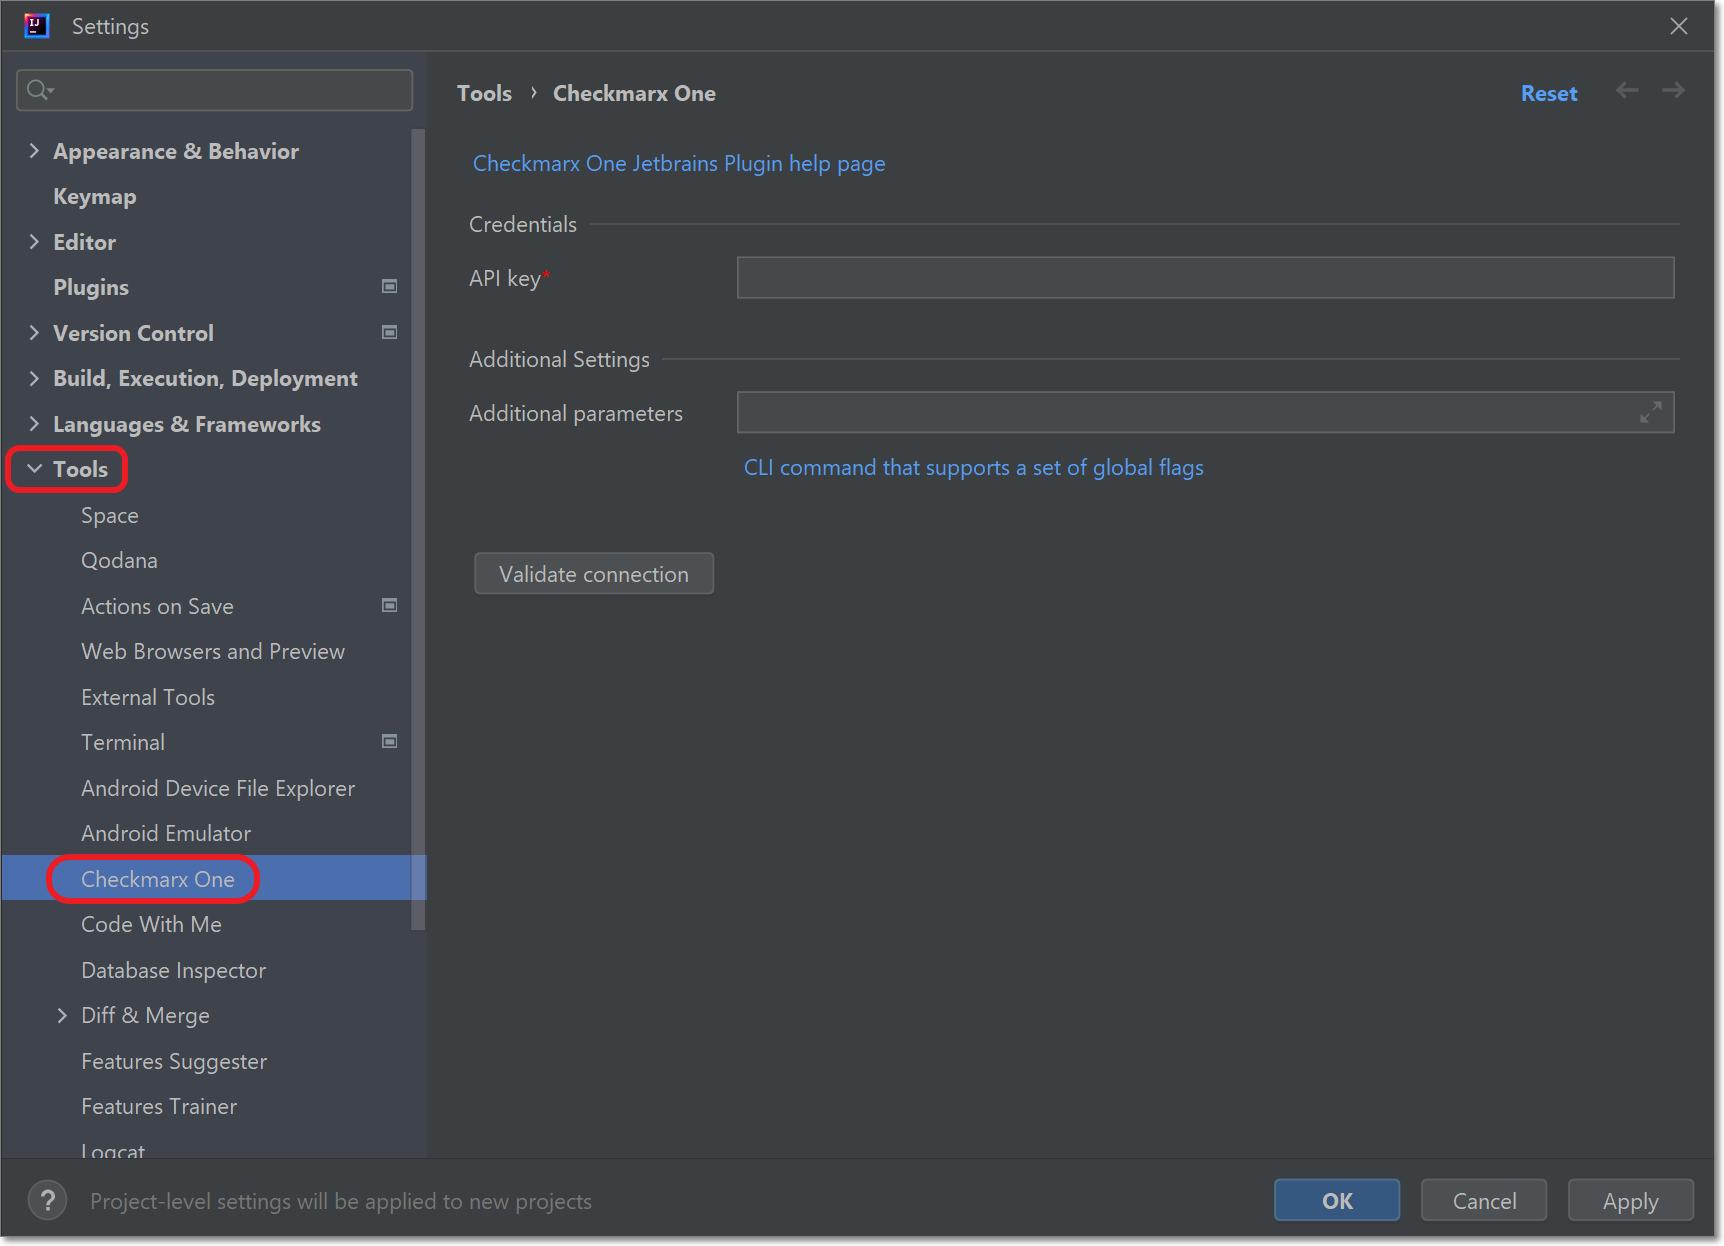
In the Settings window, click Tools > Checkmarx One (or search for Checkmarx One in the search box).

The Checkmarx One JetBrains plugin configuration settings are shown.
In the API key field, enter your Checkmarx One API key.
Notice
To create an API key, see Generating an API Key
The roles (permissions) assigned to the API Key are inherited from the user account that generates the key. Therefore, make sure that you are logged in to an account with the appropriate roles.
In order to use this integration for running an end-to-end flow of scanning a project and viewing results, the API Key must have at a minimum the out-of-the-box composite role
ast-scanneras well as the IAM roledefault-roles.In the Additional Parameters field, you can submit additional CLI params. This can be used to manually submit the base url and tenant name if there is a problem extracting them from the API Key. It can also be used to add global params such as
--debugor--proxy. To learn more about CLI global params, see Global Flags.Click on Validate connection, to test that the connection works.
Notice
If the connection fails, you can view detailed error logs by entering
--debugin the Additional parameters section and retrying the connection.Click OK at the bottom of the screen.
Setting up a Proxy Variable (Optional)
There are two ways to set up a proxy variable in JetBrains: using additional parameters in JetBrains or using your system’s environment variables.
Setting up a Proxy Variable using your OS System Environment Variables
In your operating system (e.g., Windows, iOS, Linux, etc.), set up a system environment variable with the following configuration:
In the Name field, enter HTTP_PROXY.
In the Value field, enter the value of your proxy address using the following format:
http://<username>:<password>@<proxy_ip>:<port_number>. If authentication is required, then the format should behttp://<proxy_ip>:<port_number>Notice
Make sure to include the
http://prefix.It is not recommended to pass the username and password in clear text.
Setting up a Proxy using Additional Parameters
In the main navigation, click Customize > All settings.
The Settings window is shown.
In the Settings window, click Tools > Checkmarx One (or search for Checkmarx One in the search box).
The Checkmarx One JetBrains plugin configuration settings are shown.
In the Additional parameters section, configure your proxy using the following format
http://<proxy_ip>:<port_number>. If authentication is required, then the format should behttp://<username>:<password>@<proxy_ip>:<port_number>.Notice
Make sure to include the
http://prefix.It is not recommended to pass the username and password in clear text.
Click OK at the bottom of the screen.