- Checkmarx Documentation
- IAST Documentation
- Setup Guide
- Installing and Configuring IAST
- Installing the IAST Management Server
- Installing the IAST Management Server under Windows
Installing the IAST Management Server under Windows
You have received a welcome an email with a link to download the IAST installation before installing for the first time.
Before installing the IAST Management server, check that you can connect to the SQL server using the ‘sa’ user. You may validate the connectivity to the SQL server by using SQL Server Management Studio (SSMS). Confirm that the SQL Server Services are running and restart the services, if you made any changes.
Note
Make sure to keep the installation file as some configuration changes that you may wish to perform in the future require re-installing IAST.
The domain user must be an administrator and must have Logon as a Service privileges.
It is recommended to verify that you can connect to the database over TCP. You can use the following to confirm that you are getting a list of some table names:
sqlcmd -S tcp:localhost\sqlexpress -U user -P pwd -Q "select name from sys.tables"
If you intend to connect to your database server using the IAST Windows Authentication Configuration (either Domain User or Network Service), make sure that the domain user with which you are starting the IAST Management Server installation has access permissions to the database server.
In your welcome email, follow the link to download the Checkmarx Installation file.
Navigate to the download location and right-click IAST Installer and select Run as Administrator to start the Checkmarx installer.
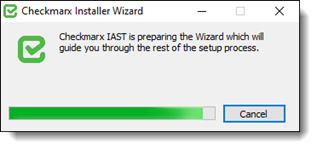
Once the IAST Welcome screen appears, click <Next> and accept the end user license agreement when asked.
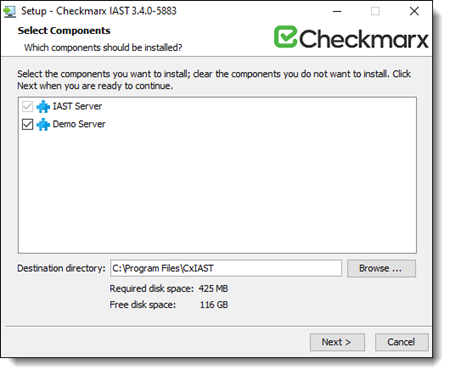
Select Demo Server, if you wish to install the demo applications environment.
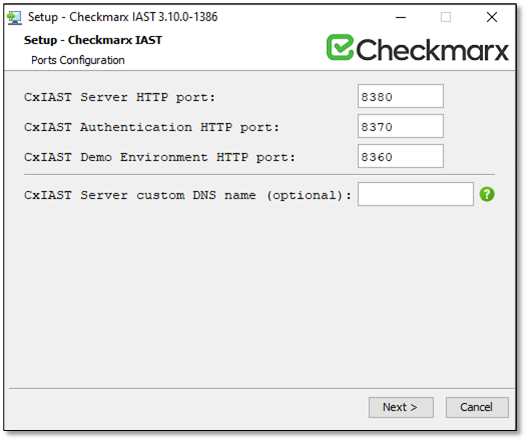
Verify the default ports chosen for the different components and click <Next>.
Note
If any of the chosen default ports are already in use, re-check availability or allocate another port.
Assign a DNS name for this host, if one of the following applies:
The host is deployed on an AWS.
The host resides behind a proxy.
The host name has been changed manually.
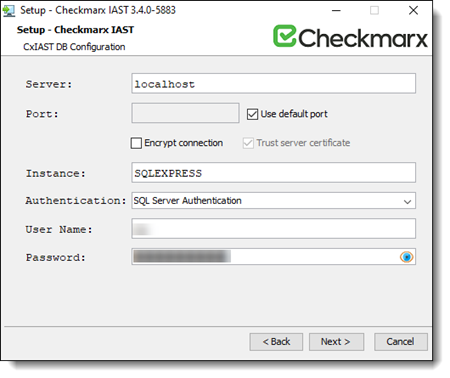
Complete the database configuration settings and click <Next>. You are asked to specify the server.
Field
Description
Server
Name of the server. This field is optional and if left empty will attempt to connect to the local database (local host).
Port
Set a specific port or use the default port by selecting Use Default Port.
Connection Properties
The following checkboxes can be selected to:
Encrypt Connection: Enable encrypted connections to the database
Trust Server Certficate: Trust the server certificate, in case it is self-signed
Instance
Database instance, as configured during MSSQL installation. This can be retrieved from the Microsoft SQL Server Manager Studio (SSMS), for example SQLEXPRESS.
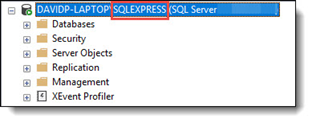
Authentication
SQL Server Authentication or Windows Authentication
Note
For Windows Authentication, user name and password are not required.
User Name
[Relevant only for SQL Server Authentication] – DB Administrator User name. This should be the same Admin User Name as was used when MSSQL was installed and configured.
Password
[Relevant only for SQL Server Authentication] – DB Administrator Password. This should be the same Admin Password as was used when MSSQL was installed and configured.
Select the account under which you run the IAST server.
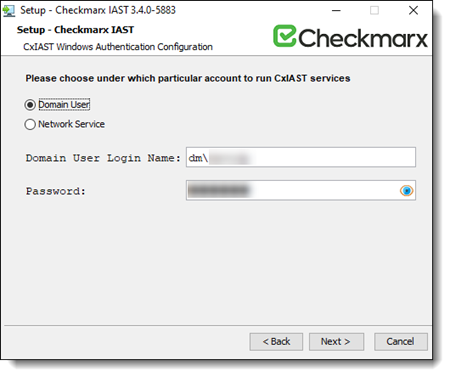
Note
This setting applies to installing under Windows only.
Field
Description
Domain User
Select Domain User, if you want the IAST server to run with specific user permissions.
Network Services
Select Network Service, if you want to use the predefined local account used by the Service Control Manager.
For Network Service, the user name and the password are not required.
Domain User Login Name
The username to be used as Domain User. This field only shows, if you select Domain User.
Password
The password used to validate the user credentials and provide access to the MSSQL DB. This field only shows, if you select Domain User.
To enable SSL, check :check: Configure SSL and enter the SSL settings as specified below.
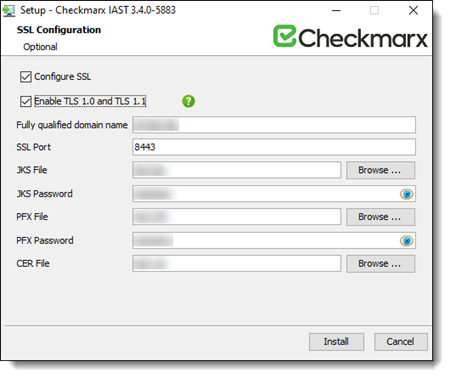
Note
If the SSL Certificate files required for the installation are located on the Desktop, there might be permission issues when the user attempts to load them. In such a case, it is recommended to move the SSL Certificate files to a location where the user has full access permissions before loading them. Such a location is for example the home user folder.
Field
Description
Configure SSL
Check to enable SSL configuration settings.
Enable TLS 1.0 and TLS 1.1
By default, only TLS 1.2 is enabled.
To enable TLS 1.0 and TLS 1.1 in addition, check Enable TLS 1.0 and TLS 1.1.
Fully qualified domain name
The domain name associated with the certificate file.
SSL Port
The SSL port to be used by the IAST server.
JKS File
The location of the JKS file.
JKS Password
The password associated with the uploaded JKS file.
PFX File
The location of the PFX file file.
PFX Password
The password associated with the uploaded PFX file.
CER File
The location of the certificate.
Click <Install>. IAST is installed.
Once the Setup Completed window appears, click <Finish> to complete the installation.
Verify that the IAST services have been started. For further information and instructions, refer to the next section.
Navigate to the Windows Services at Start > Control Panel > System Security > Administrative Tools > Services.
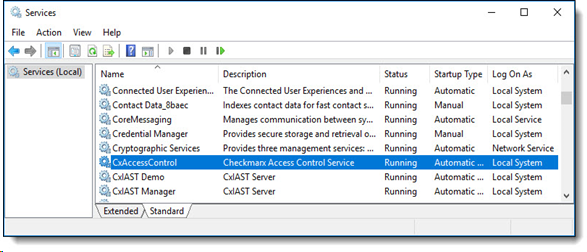
Confirm that the following IAST services have started:
CxAccessControl – Authentication Server
CxIAST Demo – Contains the preinstalled demo applications which are monitored by the CxAgent
CxIAST Demo – Contains the preinstalled demo applications which are monitored by the CxAgent
Close the Services dialog.